
Quick Summary: Replace your old sink affordably by learning simple DIY techniques. This guide breaks down choosing budget-friendly sinks, gathering essential tools, and performing the replacement step-by-step, making a kitchen or bathroom upgrade accessible and cost-effective for any homeowner.
Is your kitchen or bathroom sink looking a little sad? Maybe it’s chipped, stained, or just plain outdated. Replacing a sink might sound like a big, expensive job, but it doesn’t have to be! With a little know-how and the right approach, you can swap out that old sink for a fresh new one without breaking the bank. This guide is designed to walk you through the entire process, from picking out a deal on a new sink to installing it yourself. We’ll keep things simple, safe, and budget-friendly every step of the way.
Why Replace Your Sink?

Sinks are workhorses in our homes. They’re used multiple times a day for everything from washing hands and dishes to preparing food. Over time, even the most durable sinks can show signs of wear and tear. Here are a few common reasons people decide it’s time for a replacement:
- Damage: Cracks, chips, deep scratches, or rust spots can compromise the sink’s integrity and appearance.
- Stains and Discoloration: Some materials, especially older porcelain or laminate, can become permanently stained and impossible to clean effectively.
- Outdated Style: Trends change! An old-fashioned sink can make a whole room feel dated. A new sink is a relatively inexpensive way to modernize your kitchen or bathroom.
- Functionality Issues: A slow drain that can’t be fixed, or a sink that’s too small for your needs, might warrant an upgrade.
- Leaks: Persistent leaks around the drain or faucet base that can’t be sealed properly are a clear sign a replacement is needed.
Don’t let a worn-out sink drag down the look and feel of your home. Upgrading can be a satisfying DIY project that adds value and improves your daily life.
Choosing a Sink on a Budget
The “cheap” in replacing your sink doesn’t have to mean low quality. It’s about smart shopping and knowing what to look for. Here’s how to find a great sink without overspending:
Materials Matter (and Cost)
The material of your sink significantly impacts its price. For budget-friendly options, consider these:
- Stainless Steel: Often the most budget-friendly choice, especially in kitchens. It’s durable, easy to clean, and resistant to heat. Look for a decent gauge (lower numbers are thicker, e.g., 18-gauge is better than 20-gauge) for better sound deadening and durability.
- Composite/Resin: These sinks are made from a blend of materials, often acrylic or polyester resins with stone particles. They’re durable, available in various colors, and can mimic the look of natural stone at a fraction of the cost.
- Porcelain-Enameled Cast Iron: While cast iron itself can be pricey, some manufacturers offer porcelain-enameled versions that are more accessible. They are very durable and have a classic look but are heavy.
- Acrylic: Lightweight and inexpensive, acrylic sinks are a good option for bathrooms. They come in many shapes and colors but can be prone to scratching over time.
Where to Find Deals
Your wallet will thank you if you shop around:
- Discount Home Improvement Stores: Places like Home Depot or Lowe’s often have a “special buys” or clearance section where you can find sinks at reduced prices.
- Online Retailers: Websites such as Amazon, Wayfair, or Overstock can offer competitive pricing. Read reviews carefully and check return policies.
- Salvage Yards and Architectural Salvage Stores: If you’re looking for something unique or have a specific vintage style in mind, these places can be treasure troves for sinks at low prices.
- Manufacturer Outlets or Floor Models: Sometimes, you can find great deals on sinks that were floor models or have minor cosmetic imperfections.
Sink Types & Their Budget Implications
The way a sink is installed also affects its price and ease of installation:
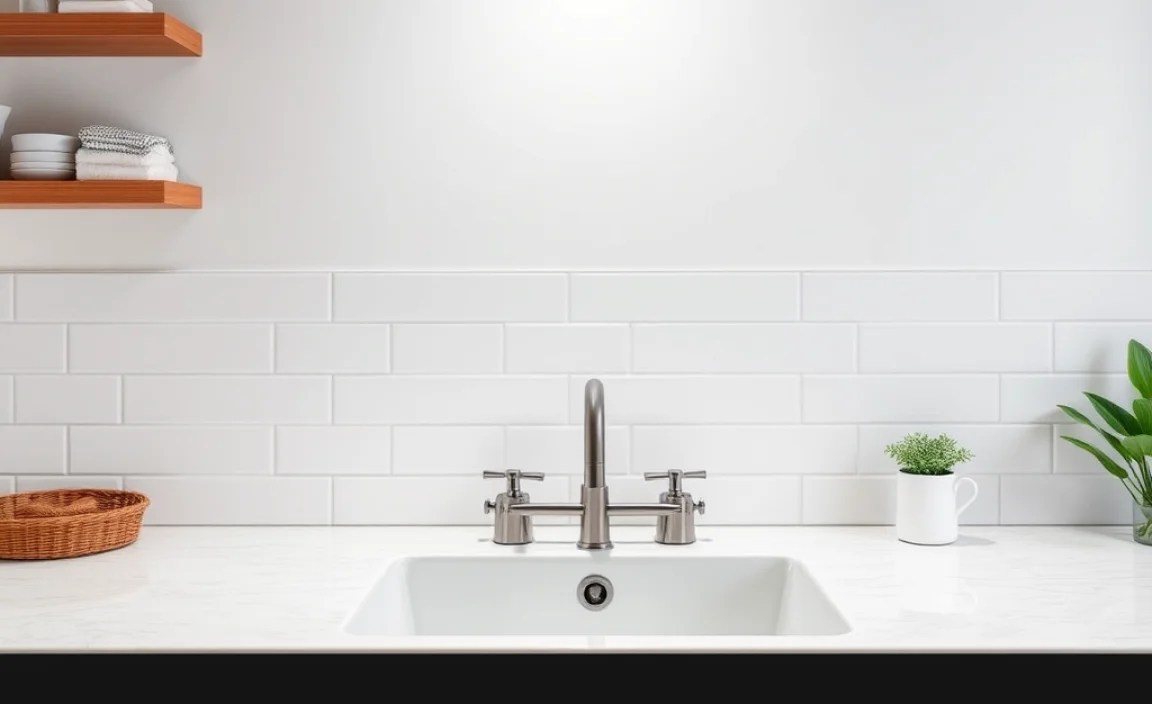
- Top-Mount (Drop-In): These are typically the most affordable and the easiest to install, making them a top choice for DIY replacements. The sink rim sits on top of the countertop.
- Undermount: Mounted from below the countertop, these offer a sleek look but are usually more expensive and require a solid countertop material (like granite or quartz) that can support the sink’s weight. Installation is more complex.
- Farmhouse (Apron-Front): These are usually the most expensive style due to their size and distinctive design, often requiring custom cabinetry modifications.
For a cheap and easy replacement, a top-mount sink made of stainless steel or composite is often your best bet.
Essential Tools and Materials

Before you start, gather everything you’ll need. Having your tools ready makes the job go smoothly and safely.
Tools You’ll Need
- Adjustable Wrench: For loosening and tightening nuts on the faucet and drain.
- Pipe Wrench: For gripping and turning pipes, especially the drain assembly.
- Basin Wrench: A specialized tool perfect for reaching those awkward nuts behind the sink bowl that hold the faucet in place.
- Screwdrivers: Both Phillips head and flathead, in various sizes.
- Pliers (Slip-joint and Channel-lock): For various gripping and turning tasks.
- Putty Knife or Scraper: To remove old caulk and putty.
- Caulking Gun: For applying new silicone caulk to seal the sink to the countertop.
- Bucket or Towels: To catch any residual water and protect your cabinets.
- Safety Glasses: Protect your eyes from debris and falling water.
- Work Gloves: To protect your hands.
- Utility Knife: For cutting old caulk and other sealants.
- Pliers: Useful for gripping and turning smaller parts.
- Drill with appropriate bits: May be needed if you need to adjust countertop holes or mount certain drain assemblies.
- Plumber’s Putty or Silicone Sealant: To create a watertight seal around the drain flange and faucet base.
Materials You’ll Need
- New Sink: Your chosen budget-friendly model.
- New Faucet (Optional): If your old faucet is worn or you want a matching new look.
- New Drain Assembly (Optional but Recommended): It’s often easier to replace the old drain when installing a new sink.
- Supply Lines: Flexible hoses that connect your faucet to the water shut-off valves. It’s a good idea to replace these if they look old or brittle.
- Silicone Caulk: Kitchen and bath grade for sealing the sink.
- Rags and Paper Towels: For cleaning up.
- Teflon Tape (Pipe Thread Tape): For sealing threaded pipe connections to prevent leaks.
Step-by-Step Guide to Replacing Your Sink

Let’s get down to business! This guide assumes you’re replacing a standard top-mount sink. Safety first – make sure you’re comfortable with basic plumbing before you begin.
Step 1: Turn Off the Water and Drain the Lines
This is the most crucial safety step. Find the shut-off valves for your sink. These are usually under the sink, one for hot water and one for cold. Turn them clockwise firmly to shut off the water supply.
Once the valves are off, turn on the faucet to drain any remaining water in the pipes and relieve pressure. Let it run until no more water comes out.
Pro Tip: If you can’t find or turn off the shut-off valves under the sink, you’ll need to turn off the main water supply to your house. This valve is typically located in the basement, garage, or outside near your water meter.
Step 2: Disconnect the Plumbing
Place a bucket or towels under the pipes to catch any drips. Use your adjustable wrench or pipe wrench to disconnect the water supply lines from the faucet. They’ll likely have nuts that you’ll turn counter-clockwise.
Next, disconnect the P-trap from the sink drain. This is the U-shaped pipe under your sink. It usually has slip nuts on either side that you can loosen by hand or with pliers. Remove the trap and empty any water into your bucket.
If you’re replacing the drain assembly, you’ll also need to disconnect it from the sink tailpiece (the pipe coming directly from the sink drain). This often involves a large nut and a rubber gasket. You might need a pipe wrench for this.
Step 3: Remove the Old Sink
Now it’s time to detach the sink from the countertop. Look around the rim where the sink meets the counter. You’ll likely see a bead of old caulk or sealant. Use your utility knife or putty knife to cut through this seal. Be careful not to scratch your countertop.
For top-mount sinks, there are often clips underneath that secure the sink to the countertop. You’ll need to look under the sink to find them. Use a screwdriver or wrench to loosen and remove these clips.
Once all clips are removed and the seal is broken, gently push up on the sink from the inside. It might be stuck, so you may need to wiggle it. Carefully lift the old sink out of the countertop opening. Dispose of it properly.
Step 4: Prepare the Countertop Opening
Clean the countertop surface where the old sink sat. Scrape away any remaining caulk, putty, or adhesive using your putty knife or scraper. Ensure the area is clean and dry. This is vital for a good seal with the new sink.
If you’re installing a new faucet, it’s usually much easier to do this before the sink is in place. Follow the manufacturer’s instructions for your new faucet, ensuring you use plumber’s putty or silicone sealant under the faucet base and any escutcheon plates (decorative plates).
External Link: For more on faucet installation tips, check out this guide from the This Old House website.
Step 5: Install the New Sink
Here’s where your new sink starts to take shape! Apply a continuous bead of silicone caulk around the underside edge of the new sink rim. This bead should create a watertight seal when the sink is pressed down onto the countertop. Alternatively, some manufacturers recommend applying the sealant to the countertop edge.
Carefully lower the new sink into the countertop opening. Ensure it’s centered and aligned correctly. Gently press down on the sink to spread the caulk evenly and create a good seal.
If your sink came with mounting clips, install them now according to the manufacturer’s instructions. Tighten them just enough to hold the sink securely in place. Overtightening can crack the sink or countertop.
Wipe away any excess caulk that squeezed out around the sink rim with a damp rag. For a clean line, you can use your finger or a caulk tool to smooth the bead before it cures.
Step 6: Reconnect the Plumbing
Now, let’s reconnect everything you disconnected in Step 2.
Drain Assembly: If you installed a new drain assembly, follow its specific instructions. Typically, you’ll apply plumber’s putty or silicone under the drain flange that sits inside the sink. Then, insert the flange through sink drain hole and secure it from underneath with any included gaskets and the locknut. Tighten it firmly with a pipe wrench.
P-trap: Reattach the P-trap to the sink tailpiece and the drain pipe coming from the wall. Hand-tighten the slip nuts, then give them a quarter-turn with pliers or a wrench. Don’t overtighten, as this can strip the plastic.
Supply Lines: Connect the water supply lines to the faucet shanks (the threaded pipes coming down from the faucet). Hand-tighten these nuts, then use an adjustable wrench to tighten them about another quarter to half turn. Avoid overtightening here as well.
Step 7: Test for Leaks
This is another critical step. Turn the water supply back on slowly at the shut-off valves (or at the main valve if you turned that off). Check for any immediate drips at the supply line connections and the faucet itself.
Once the water is on, run both hot and cold water into the sink. Fill the sink partway and then let the water drain. As the water drains, carefully inspect all the connections you made: the faucet supply lines, the drain assembly (flange, tailpiece, P-trap, connections), and the P-trap itself.
Look and feel for any signs of moisture. Gently wiggle pipes and connections to see if any are loose. If you find a leak, turn off the water and retighten the connection. Sometimes, a small leak might indicate a missing or improperly seated gasket, or that more Teflon tape is needed on threaded connections.
External Link: The U.S. Environmental Protection Agency (EPA) offers great resources on water conservation, including tips on fixing leaks.
Step 8: Final Touches
Once you’re confident there are no leaks and everything is working correctly, you can clean up the area. Replace any items you removed from under the sink. Dispose of your old sink and any waste materials responsibly.
If you notice any small gaps or imperfections in the caulk line around the sink, you can touch these up with a fresh bead of sealant after the initial caulking has cured (check the caulk packaging for cure times). For a perfectly smooth finish, you can use a caulk smoothing tool or even a damp finger.
Cost Breakdown: Replacing a Sink Cheaply

The cost of replacing a sink can vary wildly, but here’s a typical breakdown for a budget-friendly DIY replacement. Prices are approximate and can fluctuate based on location and sales.
| Item | Estimated Cost (Budget-Friendly) | Notes |
|---|---|---|
| Basic Top-Mount Sink (Stainless Steel or Composite) | $75 – $150 | Look for sales and consider store brands. |
| New Drain Assembly Kit | $15 – $30 | Recommended for a leak-free install. |
| Plumber’s Putty or Silicone Sealant | $5 – $10 | A small tube or container goes a long way. |
| Silicone Caulk (for Countertop Seal) | $5 – $10 | A standard caulk tube. |
| Faucet Supply Lines (if needed) | $10 – $25 (pair) | Crucial for preventing leaks. |
| Teflon Tape | $2 – $5 | Essential for threaded pipe connections. |
| Total Estimated Cost: | $112 – $230 | This excludes tools if you don’t already own them. |
Tool Costs: If you need to buy a whole new set of tools, the initial investment can be higher. However, most basic tools like wrenches, screwdrivers, and pliers are often already in a DIYer’s toolkit or can be borrowed. A specialized basin wrench might cost around $15-$30 if you don’t have one.
Savings by DIY: Hiring a plumber to replace a sink can cost anywhere from $150 to $400 or more, not including the cost of the sink itself. By doing it yourself, you save significantly on labor costs.
Tips for Long-Term Sink Maintenance
Once your new sink is installed, a little bit of care can keep it looking great and functioning perfectly for years to come.
- Clean Regularly: Wipe down your sink daily with a soft cloth and mild soap. This prevents grime and hard water spots from building up.
- Avoid Harsh Cleaners: For most sink materials, avoid abrasive cleaners, steel wool, or bleach-based products, as they can scratch or damage the finish. Check your sink manufacturer’s recommendations.
