
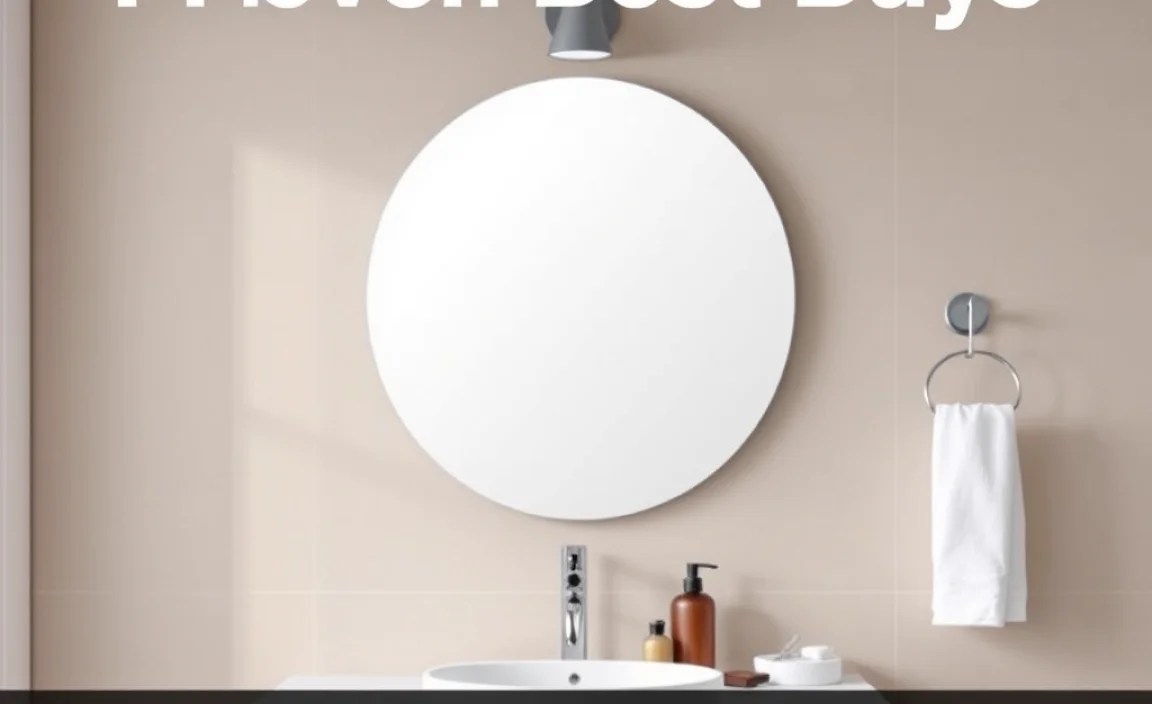
Discover the best bathroom mirror accessories to enhance your space, from practical storage solutions to stylish lighting, ensuring a functional and beautiful bathroom with easy-to-install, highly-rated options.
Your bathroom mirror is more than just a place to check your reflection; it’s a focal point. But let’s be honest, sometimes it feels a bit… bare. Adding the right accessories can transform it from plain to perfectly practical and stylish. Many homeowners find this a daunting task, wondering where to start and what actually works. Don’t worry! I’m here to guide you through selecting and installing some of the best bathroom mirror accessories that are not only functional but also look great. We’ll cover everything from super-useful shelving to smart lighting options that are surprisingly easy to implement. Get ready to upgrade your bathroom mirror experience!
Maximizing Your Bathroom Mirror Space: A Beginner’s Guide

As Bryan Lee, your go-to expert for all things home and DIY, I know that a well-accessorized bathroom mirror can make a world of difference. It’s about making your space work smarter, not harder. Think of these accessories as your bathroom’s new best friends, helping you keep things organized and adding a touch of personality without requiring a massive renovation.
The right accessories can declutter your countertops, improve your grooming routine, and even boost your bathroom’s overall aesthetic. Whether you’re dealing with a cramped powder room or looking to elevate your master bath, these simple additions are game-changers.
Why Accessorize Your Bathroom Mirror?
It’s simple: functionality and style. A bare mirror might look clean, but it doesn’t offer much beyond its primary purpose. Accessories fill in the gaps, providing much-needed storage, better lighting, and decorative flair.
Organization: Keep your essentials tidy and within easy reach. No more searching for that misplaced hair tie or razor!
Improved Functionality: Better lighting can make a huge difference for makeup application or shaving. Demisters mean no more waiting for steam to clear.
Enhanced Aesthetics: Accessories can add a modern touch, a bit of sparkle, or a unique design element that complements your bathroom’s style.
Space Saving: Especially crucial in smaller bathrooms, accessories that attach to or surround your mirror can utilize vertical space effectively.
Let’s dive into some of the best-rated bathroom mirror accessories that are perfect for beginners and seasoned DIYers alike.
Top Bathroom Mirror Accessories: Best-Rated Picks
When choosing accessories, it’s important to consider what you need most. Do you need more storage? Better lighting? A bit of both? The market is full of options, but here are some of the most popular and effective types.
1. Integrated LED Lighting
Modern bathrooms often feature mirrors with built-in LED lighting. These aren’t just fancy additions; they offer practical benefits that can significantly improve your bathroom experience.
Benefits:
Even Illumination: Provides consistent, glare-free light right where you need it.
Energy Efficient: LEDs use less electricity than traditional bulbs, saving you money.
Modern Look: Adds a sleek, contemporary feel to your bathroom.
Adjustable Brightness/Color Temperature: Many models allow you to dim the lights or change their warmth for different moods or tasks.
Considerations for Beginners:
Installation: While some are replacements for existing mirrors, others might require basic electrical work. If you’re not comfortable with wiring, opt for plug-in models or hire an electrician.
Power Source: Check if they’re hardwired, plug-in, or battery-operated.
Best Buys: Look for mirrors with integrated LED lighting that offer features like dimmability and anti-fog capabilities. Brands like Kichler and Conair offer well-reviewed options. For a comprehensive guide on lighting, you might find resources from the U.S. Department of Energy helpful for understanding energy efficiency.
Types of LED-Integrated Mirrors
Framed Mirrors with Lighting: These blend classic aesthetics with modern tech, often featuring light strips along the frame.
Fogless Mirrors with Defogger Pads: Many LED mirrors come with a built-in defogger, activated by a switch, ensuring your mirror stays clear even after a steamy shower.
Smart Mirrors: These are the high-tech marvels, often with touch screens, integrated speakers, and display capabilities. While pricier, they offer a futuristic bathroom experience.
Installation Tips for LED Mirrors
If you’re replacing an existing mirror, turn off the power at the breaker box for safety. Most plug-in models are straightforward. Hardwired units will require connecting wires to your bathroom’s electrical supply. Always follow the manufacturer’s instructions precisely and consider professional installation if you’re unsure.
2. Magnifying Mirrors
A magnifying mirror is an indispensable tool for detailed tasks like applying makeup, shaving, or tweezing. They come in various forms, designed to complement your main mirror.
Benefits:
Enhanced Detail: Allows for close-up viewing, making intricate tasks easier and more precise.
Variety of Magnification: Available in strengths from 3x to 10x or even higher.
Adjustable: Many can be extended, swiveled, and tilted for optimal positioning.
Considerations for Beginners:
Placement: Decide if you want a wall-mounted, countertop, or a smaller attachment for your main mirror.
Lighting: Some come with their own lights, which is a great bonus.
Installation (Wall-Mounted): These usually require drilling into the wall.
Best Buys: For quality and versatility, Floxite and Zadro are highly recommended brands. Look for models with good articulation and integrated LED lighting for the best user experience.
Mounting Options for Magnifying Mirrors
Wall-Mounted (Extendable/Swing Arm): These are excellent for saving counter space and offer great flexibility. They mount securely to the wall, often directly adjacent to your main mirror.
Countertop Magnifying Mirrors: Portable and easy to use, these sit on your vanity. Some are weighted for stability, while others are rechargeable through USB.
Clip-On or Suction Cup Mirrors: These are the most temporary and easiest to install, attaching directly to your existing bathroom mirror. They’re ideal for renters or those who prefer not to drill.
Choosing the Right Magnification
3x-5x: Good for general close-up tasks like shaving or applying foundation.
7x-10x: Ideal for detailed work like applying eyeliner, tweezing eyebrows, or inserting contact lenses.
Higher Magnification (15x+): Can be useful for very specific tasks but may be difficult to adjust and use effectively without practice.
3. Mirror Cabinets and Shelving Units
Maximizing storage is often the biggest challenge in bathrooms. Mirror cabinets and small shelving units that attach to or surround your mirror offer a stylish way to keep essentials organized.
Benefits:
Hidden Storage: Cabinets keep clutter out of sight.
Visible Storage: Shelves allow for quick access to frequently used items.
Space Efficiency: Utilizes the area around your mirror, often vertical space.
Variety of Styles: From minimalist floating shelves to traditional mirrored medicine cabinets.
Considerations for Beginners:
Mounting: Will you be drilling into tile, drywall, or a solid wall? Ensure you have the right tools and anchors.
Size and Fit: Measure your space carefully to ensure the cabinet or shelves will fit and not overwhelm the mirror.
Material: Look for moisture-resistant materials like treated wood, stainless steel, or aluminum.
Best Buys: For medicine cabinets, Interior Illusions and YAMAZAKI home offer stylish and functional options. For shelving, consider brands like Simplehuman for premium quality or IKEA’s range of affordable solutions.
Types of Mirror Cabinets & Shelving
Recessed Medicine Cabinets: These are installed between wall studs, creating a flush, built-in look. They offer significant storage but require more involved installation.
Surface-Mounted Medicine Cabinets: These attach to the wall surface above or beside the mirror. Easier to install than recessed units.
Floating Shelves: Minimalist and modern, these mount directly to the wall and can sit above, below, or to the side of your mirror, perfect for displaying decorative items or holding small essentials.
Corner Shelves: These are great for maximizing often-underutilized corner spaces near your mirror.
4. Anti-Fogging Solutions
Waking up to a steamy bathroom mirror after a shower is a common annoyance. While some mirrors have built-in defoggers, you can also use aftermarket solutions.
Benefits:
Clear Visibility: Ensures your mirror remains clear even in humid conditions.
Convenience: Saves you time and the hassle of wiping the mirror.
Easy Application: Most solutions are sprays or wipes that are simple to use.
Considerations for Beginners:
Longevity: How often does the treatment need to be reapplied?
Surface Compatibility: Ensure the product is safe for mirror coatings (e.g., anti-glare).
Best Buys: Look for sprays like Rain-X Anti-Fog Treatment or Cat Crap Anti-Fog Spray. These dedicated products are generally effective and easy to apply. Always test a small, inconspicuous area first.
How to Apply Anti-Fog Treatments
1. Clean the Mirror: Ensure the mirror surface is clean and dry.
2. Apply Solution: Spray a small amount of the anti-fog solution onto a clean, soft cloth.
3. Wipe: Gently wipe the cloth over the entire mirror surface.
4. Buff: Use a separate dry, clean cloth to buff the mirror until it’s clear and streak-free.
5. Reapply: Follow the product instructions for reapplication frequency, which often depends on humidity levels and usage.
5. Mirror Lighting Fixtures
Beyond integrated LEDs, you can add separate lighting fixtures to enhance your mirror’s functionality and ambiance.
Benefits:
Task Lighting: Positional lights can be perfect for focused tasks.
Ambiance: Sconces or vanity lights can add a decorative touch and softer light.
Customization: Allows you to choose a style that perfectly matches your bathroom decor.
Considerations for Beginners:
Electrical Wiring: Most fixture installations require wiring. If you’re not experienced, it’s best to hire an electrician.
Placement: Position lights at eye level for optimal illumination, avoiding shadows.
Best Buys: Brands like Quoizel, Progress Lighting, and Sea Gull Lighting offer a wide range of attractive vanity lights. For a modern look, consider sleek vanity bar lights. For traditional aesthetics, sconces flanking the mirror work well. Resources from organizations like the National Association of Home Builders can provide useful tips on lighting placement and types.
Types of Mirror Lighting
Vanity Bar Lights: These are horizontal fixtures mounted above the mirror, providing even light across the face.
Sconces: Mounted on either side of the mirror, these provide balanced lighting and add a decorative element.
Pendant Lights: A more decorative option, often used in pairs to frame a larger mirror.
DIY Installation Basics for Beginners

Taking on a DIY project can be incredibly rewarding! For most bathroom mirror accessories, the installation is indeed straightforward. Here’s a general guide to get you started, focusing on safety and simple steps.
Essential Tools You Might Need:
Before you begin, gather these common tools:
Drill and Drill Bits: For creating pilot holes or screwing in mounts.
Screwdriver Set: Phillips and flathead screwdrivers are essential.
Level: To ensure your accessory is perfectly straight.
Measuring Tape: For accurate placement.
Stud Finder: Crucial for mounting heavier items securely to wall studs.
Pencil: For marking measurements.
Safety Glasses: Always protect your eyes.
Gloves: For a better grip and to keep hands clean.
General Installation Steps for Accessories:
1. Read the Manual: This is step one for a reason! Every product is different.
2. Turn Off Power (If Applicable): For any electrical component, find the breaker that controls that bathroom circuit and switch it OFF. Use a voltage tester to confirm there’s no power before touching any wires.
3. Measure and Mark: Use your measuring tape and level to mark precisely where your accessory will be mounted. Double-check your measurements.
4. Locate Studs (If Necessary): For items like medicine cabinets or heavy shelving, use a stud finder to locate wall studs. Mounting directly into studs provides the strongest support.
5. Drill Pilot Holes: For screws, drilling small pilot holes can prevent wood from splitting and make screwing easier.
6. Mount the Accessory: Follow the manufacturer’s instructions for attaching brackets or the accessory itself. Use the correct screws and wall anchors if not mounting into studs.
7. Connect Electrics (If Applicable): If your accessory has a light or power component, carefully connect the wires according to the instructions. If you’re uneasy, this is the point to call a professional.
8. Test: Once mounted, gently test for stability. If it’s a light, turn the power back on at the breaker and test the fixture.
9. Clean Up: Wipe away any dust or smudges from the installation process.
Safety First!
Electricity: Always assume wires are live until you’ve confirmed otherwise with a tester. If you encounter unfamiliar wiring or feel unsure, stop and call a qualified electrician. The Occupational Safety and Health Administration (OSHA) provides excellent resources on electrical safety in the workplace, which are applicable to home DIY projects.
Drilling: Be aware of what’s behind your wall. Avoid drilling near water pipes, electrical conduits, or air vents.
Heavy Items: Ensure anything heavy is securely anchored, preferably to wall studs, to prevent it from falling.
Comparison of Popular Accessory Types

To help you make the best choice, here’s a quick comparison of some of the most popular bathroom mirror accessories. This table highlights key features and considerations for beginners.
| Accessory Type | Primary Function | Ease of Installation (Beginner) | Typical Cost Range | Key Considerations |
|---|---|---|---|---|
| Integrated LED Mirror | Lighting, Style, Defogging | Moderate (may require electrical) | $100 – $500+ | Hardwired vs. Plug-in, Defogger, Dimming |
| Magnifying Mirror (Wall-Mounted) | Close-up tasks, Shaving, Makeup | Moderate (requires drilling) | $30 – $150 | Magnification power, Extension arm, Built-in light |
| Medicine Cabinet (Surface-Mount) | Hidden Storage, Organization | Easy to Moderate (requires drilling) | $50 – $300 | Size, Depth, Material, Mirror type |
| Floating Shelves | Display, Accessible Storage | Easy (requires drilling) | $20 – $100 | Weight capacity, Material, Style |
| Anti-Fog Spray/Treatment | Maintain mirror clarity | Very Easy (no tools needed) | $10 – $25 | Reapplication frequency, Surface safety |
| Vanity Bar Light | Task Lighting, Ambiance | Difficult (requires electrical) | $50 – $250 | Style, Brightness (lumens), Color temperature |
Choosing the Right Accessories for Your Needs:
Small Bathroom? Focus on space-saving options like corner shelves, extendable magnifying mirrors, or slim medicine cabinets. Integrated LED mirrors can also make a small bathroom feel more open.
Need More Storage? A medicine cabinet is your best bet. If wall space is limited, consider vertical shelving units that flank your mirror.
Grooming Focused? Magnifying mirrors with good lighting are essential. Consider a dedicated vanity light for well-balanced illumination.
Modern Aesthetic? Integrated LED mirrors, minimalist floating shelves, and sleek vanity bar lights will fit right in.
Real-World Scenarios & Solutions
Let’s look at a few common bathroom scenarios and how the right accessories can provide the perfect fix.
Scenario 1: The Cramped Powder Room
You have limited counter space, and your current mirror is just… a mirror. The sink area feels cluttered with toothpaste, toothbrushes, and stray cosmetics.
Solution:
Install a slim, surface-mounted medicine cabinet above the mirror. Choose one with a mirrored door so it still functions as a mirror and doesn’t take up extra wall space. Pair this with a small, extendable magnifying mirror that can fold flat against the wall when not in use. This frees up your counter and keeps essentials organized and accessible.
Scenario 2: The Master Bath – Missing Task Lighting
Your large master bathroom mirror provides general room light, but it’s not sufficient for detailed tasks like makeup application or precise shaving. You get shadows and uneven lighting.
Solution:
Add vanity sconces on either side of the mirror at eye level. This provides balanced, shadow-free task lighting. If you prefer a more modern look, a LED vanity bar light mounted directly above the mirror can also work wonders. Consider one with adjustable brightness and color temperature for ultimate control.
Scenario 3: The Renter’s Dilemma
You want to upgrade your bathroom but can’t make permanent modifications like drilling holes or extensive wiring.
Solution:
Opt for stick-on LED vanity lights (battery-operated or plug-in if an outlet is available and permissible). Use a suction-cup magnifying mirror that attaches directly to your existing mirror. For storage, consider over-the-door organizers or tension rod shelves that fit in corners or between fixtures, rather than wall-mounted units.
Maintaining Your Bathroom Mirror Accessories
Just like any part of your home, your mirror accessories will last longer and look better with a little care.
Cleaning Tips:
Mirrors: Use a glass cleaner and a microfiber cloth. For LED mirrors with integrated lights, be careful not to spray liquid directly onto the light components. Wipe down the frame and backing as well.
Metal Fixtures (Magnifying mirrors, shelves): For chrome, stainless steel, or brushed nickel, a soft cloth with mild soap and water is usually sufficient. Avoid abrasive cleaners that can scratch the finish. For tougher water spots, a solution of equal parts white vinegar and water can be effective, followed by rinsing and drying.
Plastic or Acrylics: Use a soft cloth and mild soap. Avoid harsh chemicals or abrasive pads.
Electricity: For any electrical components, ensure they are unplugged or the power is off at the breaker before cleaning.
Regular Checks:
Mounting: Periodically check that wall-mounted items are still secure. Tighten screws if necessary.
Electrical Connections: If you have hardwired lights, ensure connections remain secure.
Magnifying Mirrors: Check the arm and joints for smooth operation. Clean any dust or hair that might impede movement.
Anti-Fog: Reapply defogging treatments as needed based on product instructions and your bathroom’s humidity.
Maintaining these accessories is straightforward and ensures they continue to serve their purpose effectively and look great for years to come.
Conclusion
Upgrading your bathroom mirror with the right accessories is one of the most impactful yet straightforward ways to enhance both its functionality and your daily routine. From the clean illumination of integrated LEDs to the clutter-busting power of medicine cabinets and the precision of magnifying mirrors, these additions are proven best buys for a reason. They offer practical solutions to common bathroom challenges and can significantly elevate your space’s style.
Remember to choose accessories that match your specific needs and bathroom size. Don’t shy away from DIY installation; with the right tools, a little patience, and by following safety guidelines, most of these upgrades are well within a beginner’s reach. By investing in these proven best-rated bathroom mirror accessories, you’re not just adding items to your bathroom; you’re creating a more organized, efficient, and enjoyable personal sanctuary. Happy accessorizing!
Frequently Asked Questions About Bathroom Mirror Accessories
Q1: What is the best type of lighting to add to a bathroom mirror?
For task lighting, integrated LED mirrors or vanity bar lights mounted above or sconces on the sides provide even, shadow-free illumination. LED lights are energy-efficient and long-lasting. For ambiance, softer sconces can be a great addition.
Q2: How do I choose the right magnification for a mirror?
For general close-up tasks like shaving or applying foundation, 3x to 5x magnification is usually sufficient. For more detailed work such as applying eyeliner or tweezing, 7x to 10x is ideal. Higher magnifications can be challenging to use.
Q3: Can I install bathroom mirror accessories if I have tile walls?
Yes, you can install accessories on tile walls, but you’ll need specific drill bits designed for tile (like carbide-tipped bits). You’ll usually drill a pilot hole and then use special anchors designed for tile or masonry to ensure a secure fit. Always go slow to avoid cracking the tile.
Q4: What is the easiest way to add storage around a bathroom mirror?
The easiest methods involve minimal or no drilling. Options include: stick-on shelves or organizers (ensure they’re rated for bathroom humidity), over-the-door racks, or a freestanding organizer unit placed beside the mirror. For a slightly more involved but still beginner-friendly option, consider a surface-mounted medicine cabinet.
Q5: Are defogging sprays effective?
Yes, dedicated anti-fog sprays and treatments can be very effective at preventing mirrors from steaming up after a shower. Their effectiveness and longevity vary by product and the humidity in your bathroom, but they are a simple and affordable solution compared to built-in defoggers.
Q6: How do I make sure my new accessory is securely attached?
For wall-mounted items, always try to screw them into wall studs using a stud finder. If studs aren’t available in the desired location, use appropriate heavy-duty wall anchors (like toggle bolts or molly bolts) designed for your wall type (drywall, plaster, etc.) and the weight of the accessory. Always test the stability after installation.
