
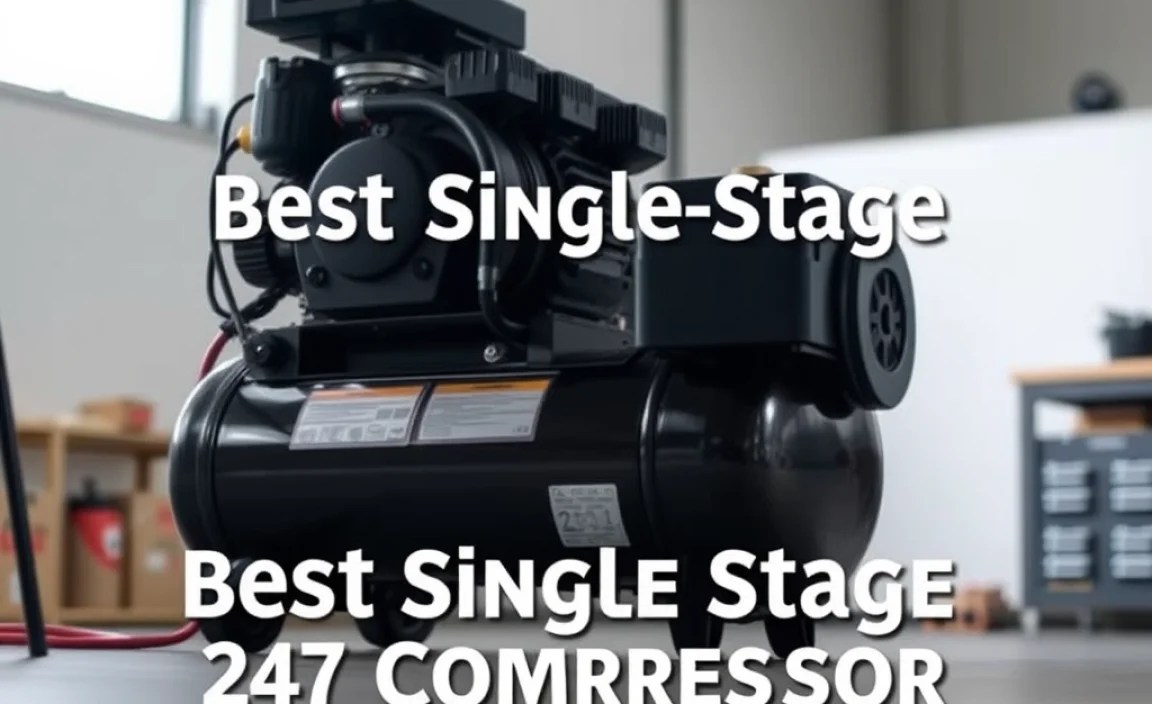
The best single-stage 24-gallon air compressor is a versatile workhorse for your garage or workshop, perfect for DIYers needing reliable air for inflating tires, powering nail guns, and operating various air tools. It offers a good balance of tank size and portability for most home projects.
Hey there, DIY champions! Are you looking to power up your projects with the convenience of compressed air? Maybe your old compressor is on its last breath, or perhaps you’re finally ready to dive into the world of air-powered tools. It can feel a bit overwhelming trying to pick the right air compressor, especially when you see all sorts of tanks and horsepower ratings. But don’t worry, we’re here to make it super simple.
Finding the right air compressor means matching its capabilities to your needs without breaking the bank or taking up too much space. A 24-gallon, single-stage air compressor is a fantastic sweet spot for many home workshops and DIY tasks. It’s big enough to handle a good range of jobs but not so massive that it’s impossible to move.
In this guide, we’ll break down exactly what makes a great 24-gallon, single-stage air compressor and help you choose the perfect one for your next project. Get ready to feel confident and in control!
Why a 24-Gallon Single-Stage Air Compressor is a DIYer’s Dream

Let’s talk about why this specific type of air compressor consistently comes up as a top choice for home use. It’s all about striking the right balance.
Understanding “Single-Stage”
First off, what does “single-stage” mean? In simple terms, a single-stage compressor takes air in, compresses it in one go, and sends it directly into the tank. This makes them generally simpler, more affordable, and often quieter than their two-stage counterparts. For most DIY tasks that don’t require continuous, ultra-high pressure, a single-stage compressor is more than capable.
The Magic of 24 Gallons
Now, the 24-gallon tank. This is a sweet spot for several reasons:
- Sufficient Air Reserve: It holds enough compressed air to allow for longer run times on tools like nail guns, staplers, or impact wrenches without the motor constantly cycling on and off.
- Portability: While not exactly lightweight, a 24-gallon compressor is usually designed with wheels and a handle, making it manageable to move around a garage or driveway. It’s a significant step up from smaller pancake or hot-dog compressors, but still less cumbersome than truly industrial units.
- Versatility: It’s powerful enough for a wide array of DIY projects, from powering air tools for woodworking and automotive repairs to inflating sports equipment and cleaning dusty areas.
Think of it like having a medium-sized gas tank on your car. It gives you a good range without being overly heavy or requiring constant refills. This size is often ideal for tasks involving:
- Nail guns (framing, finishing, brad nailers)
- Impact wrenches for lug nuts or general auto maintenance
- Air ratchets
- Tire inflation
- Blow guns for cleaning
- Light-duty sanders or grinders
Key Features to Look for in the Best Single-Stage 24 Gallon Air Compressor

When you’re browsing, you’ll notice a few technical terms and features. Don’t let them intimidate you! Here’s what really matters for a great 24-gallon single-stage compressor:
1. Horsepower (HP) and Amps
Horsepower (HP) gives you an idea of the motor’s power. For a 24-gallon compressor, look for something in the 2 to 3 HP range. High HP generally means it can compress air faster and maintain pressure better.
Amps (A) tell you how much electrical current the compressor draws. This is important for understanding if your home’s circuits can handle it. A 10-15 amp draw is typical for this size, which usually means it can run on a standard 120V household outlet. Always check the manufacturer’s recommendations for circuit requirements.
2. Cubic Feet per Minute (CFM)
This is arguably the most critical spec for air-powered tools. CFM measures the volume of air delivered at a specific pressure. Tools have CFM requirements, and your compressor needs to meet or exceed them to function correctly.
Look for CFM ratings at two common pressures: 90 PSI (pounds per square inch) and 40 PSI. For a 24-gallon compressor, you’ll want:
- At 90 PSI: Aim for at least 4 CFM. This is the standard for many air tools, especially impact wrenches and spray guns.
- At 40 PSI: A rating around 5-6 CFM here is good, indicating solid performance at lower demands.
Why is this important? If your compressor’s CFM is too low for a tool, the tool will perform poorly, or the compressor will run constantly, overheating and shortening its lifespan. For a great all-around 24-gallon compressor, a CFM rating of 4.0+ at 90 PSI is a solid benchmark.
Pro Tip: Always check the CFM requirement for the specific air tools you plan to use. The Engineering Toolbox has a great list of typical air tool CFM requirements.
3. Tank Size and Type
We’ve settled on 24 gallons, which is excellent. The tank material is usually steel. Some tanks are vertical (taking up less floor space) while others are horizontal. Vertical tanks are popular for their space-saving design in garages.
4. Pump Type
For single-stage 24-gallon compressors, you’ll most commonly find:
- Oil-Lubricated Pumps: These tend to be more durable and longer-lasting. They require regular oil checks and changes, but many DIYers find the added lifespan worth the minimal maintenance. They can also be slightly quieter.
- Oil-Free Pumps: These are virtually maintenance-free when it comes to oil. They are often lighter and can be a bit more portable. However, they can sometimes be louder and may not last as long under heavy use compared to oil-lubed counterparts.
Consider how much you’ll be using the compressor. If it’s for occasional tasks, oil-free might be fine. For more frequent or demanding use, oil-lubricated often makes more sense.
5. Horsepower Rating (Running vs. Peak)
Be aware of “peak” HP versus “running” HP. Peak HP is a marketing term often used to denote the motor’s maximum potential power for a very short burst. Running HP (or continuous HP) is a more accurate representation of sustained power output. Aim for compressors that clearly state their running HP or provide detailed information.
6. Noise Level (Decibels – dB)
Air compressors can be loud! If you’re working in a shared space, a housing development, or just value peace and quiet, look for models that advertise lower decibel (dB) ratings. Some are specially designed for quieter operation, often using specific pump designs or sound-dampening shrouds. A rating below 70 dB is considered relatively quiet for an air compressor.
7. Durability and Brand Reputation
Look for well-known brands that have a good track record for reliability and customer support. Reading reviews from other DIYers can be invaluable. Key indicators of durability include sturdy metal construction, robust pump designs, and good thermal overload protection for the motor.
Top Single-Stage 24 Gallon Air Compressors for DIYers
While the “best” can depend on your specific needs and budget, here are some popular and highly-rated options that consistently meet the criteria above. These models are known for their reliability, performance, and value for the home workshop.
It’s always a good idea to check the latest models and reviews, as manufacturers frequently update their product lines. However, these brands and types of compressors are excellent starting points:
| Brand/Model Example | Key Strengths | Potential Drawbacks | Ideal For |
|---|---|---|---|
| Craftsman 27 Gallon (Often considered comparable) | Excellent value, good CFM for its class, durable cast-iron pump. Often a vertical tank design. | Can be a bit louder than some premium models. | General workshop use, automotive, framing & finishing. |
| DeWalt 25 Gallon (Often considered comparable) | Robust build quality, powerful motor, good CFM, user-friendly controls. Often oil-lubricated for longevity. | Can be pricier than budget options. | Demanding DIY, automotive bays, woodworking. |
| Campbell Hausfeld 20-30 Gallon Range (Various Oil-Free & Oil-Lubed) | Wide range of options, some models focus on quieter operation, generally good performance for the price. | Varies greatly by model; some lower-end models might have lower CFM. | Beginner DIYers, light to moderate tasks, tire inflation. |
| California Air Tools 20-30 Gallon Series (Often focus on Ultra Quiet) | Extremely quiet operation (often below 70 dB), lightweight aluminum tank and motor, very low maintenance (oil-free). | May have slightly lower CFM output compared to louder gas-powered units in the same price range. Can be more expensive for the quiet technology. | Users prioritizing noise reduction, working in close proximity to living areas. |
| Industrial Air 20-30 Gallon Range | Good power and CFM for general purpose use, often a strong value proposition, robust construction for the price. | Noise levels can vary, some models may require more maintenance (oil-based). | Versatile home and garage use, automotive and woodworking applications. |
Note: Specific model availability and specifications change. Always verify the exact CFM, HP, and features of the unit you are considering purchasing.
Setting Up Your New 24 Gallon Air Compressor
Once you’ve chosen your compressor, setting it up is usually straightforward. Follow these steps to get it ready for action safely.
What You’ll Need:
- Your new 24-gallon air compressor
- Power cord (if not integrated)
- Air hose (appropriate length and type for your tools)
- Air tool(s)
- Safety glasses
- Ear protection (optional but recommended)
- Manufacturer’s manual
Step-by-Step Setup:
- Unboxing and Inspection: Carefully unpack your compressor. Check for any visible damage that may have occurred during shipping. Ensure all parts mentioned in the manual are present.
- Placement: Find a suitable location. It should be on a level, stable surface. Ensure there’s good ventilation around the compressor; they generate heat. Keep it away from flammable materials and humidity if possible. Many 24-gallon models have wheels, making them easy to position.
- Check and Add Oil (if applicable): If your compressor has an oil-lubricated pump, this is crucial. Consult your manual to identify the oil fill port. Use only the type and weight of oil recommended by the manufacturer. Fill to the indicated level. Do NOT overfill.
- Connect Power: Plug the compressor into a suitable electrical outlet. Ensure the circuit can handle the amperage draw. For most 120V, 24-gallon compressors, a dedicated 15 or 20-amp circuit is ideal. The U.S. Department of Energy has great resources on understanding home electrical load.
- Attach Air Hose and Tool: Connect your air hose to the compressor’s outlet port using a proper fitting. If your compressor has a regulator, adjust it to the pressure recommended for your air tool. Connect your air tool to the other end of the hose.
- Initial Start-Up: Turn on the compressor. It will begin to fill the tank. Listen for any unusual noises. The motor will shut off automatically when the tank reaches its maximum pressure.
- Test Your Tool: Once the tank is pressurized, carefully operate your air tool to ensure it functions correctly. If the tool sputters or the compressor cycles on too quickly, you may need more CFM or a higher pressure setting.
Operating and Maintaining Your 24 Gallon Air Compressor
Proper maintenance is key to a long-lasting and reliable air compressor. Here’s what you need to know.
Daily/Before Each Use Checks:
- Check Oil Level (Oil-Lubricated Models): Ensure the oil is between the minimum and maximum marks on the sight glass or dipstick. Add oil if necessary.
- Drain the Tank: This is probably the most important maintenance step. Water condenses inside the tank as air is compressed. This water can cause rust and damage the tank over time. Locate the drain valve (usually at the bottom of the tank) and open it slowly to release the air and moisture. Do this every time you finish using the compressor, and let it drain completely. OSHA also emphasizes proper draining for safety.
- Inspect Hoses and Fittings: Check for any leaks, cracks, or damage.
Weekly/Monthly Checks:
- Check Air Filter: The air intake filter keeps dust and debris from entering the pump. If it’s dirty, it restricts airflow, making the compressor work harder. Clean or replace it as per the manufacturer’s instructions. A dirty filter can significantly reduce performance.
- Check Oil (Oil-Lubricated Models): If you use the compressor frequently, you might need to change the oil more often than if it’s used sparingly. Consult your manual for the recommended oil change interval (often every 3-6 months or a certain number of operating hours).
Periodic Maintenance:
- Belt Tension (If Applicable): Some compressors have belts connecting the motor to the pump. Check the belt for proper tension – not too tight, not too loose.
- Drain Valve Check: Ensure the drain valve isn’t clogged.
- Regulator and Gauges: Periodically check that pressure gauges are reading accurately and the regulator is functioning correctly.
Troubleshooting Common Issues
Even with great maintenance, you might run into a few hiccups. Here’s how to tackle them:
- Compressor won’t start:
- Check power supply (plugged in, breaker not tripped).
- Ensure the reset button on the motor hasn’t popped.
- Check if thermal overload protection has engaged (wait for it to cool down).
- Compressor runs but won’t build pressure:
- Is the drain valve fully closed?
- Is the air filter clogged?
- Are there major leaks in hoses or fittings?
- Is the pump damaged (less common)?
- Compressor cycles on and off too frequently:
- Your tools might be demanding more CFM than the compressor can supply continuously.
- Check for air leaks. Even small leaks add up.
- Is the tank losing pressure because the drain valve isn’t fully sealed?
- Air leaks:
- Listen for hissing sounds.
- Use soapy water on connections to pinpoint small leaks.
- Tighten fittings or replace worn O-rings/gaskets.
- Excessive noise:
- Check belt tension.
- Ensure the compressor is on a level surface.
- If it’s an oil-lubricated model, is the oil level correct?
- If persistent, there might be an internal issue with the pump.
For more specific troubleshooting, always refer to your compressor’s owner’s manual.
Frequently Asked Questions (FAQ)
Q1: What kind of air tools can I run with a 24-gallon air compressor?
A 24-gallon compressor, especially one with at least 4 CFM at 90 PSI, can handle most common DIY air tools like brad nailers, finish nailers, framing nailers.
