
Your bidet’s plumbing structure involves connecting it to your existing water supply and toilet. It typically includes a T-valve, a supply hose, and either a nozzle or a seat with integrated features. Understanding these components ensures a smooth installation and reliable operation for a hygienic and comfortable bathroom experience.
Ever wondered how those sleek bidets get their water or how they actually work without a separate, bulky water tank? If you’re new to bidets, the plumbing part can seem a bit daunting. But don’t worry! It’s often much simpler than you think, and with a little guidance, you’ll understand exactly how a bidet integrates into your bathroom’s existing system. We’ll break down the bidet structure in plumbing so you can feel confident about how it functions and what to expect during installation.
Many people put off adding a bidet because they imagine complex pipes or major bathroom renovations. The good news is that for most common bidet types, the plumbing is straightforward and designed to be user-friendly. We’re here to demystify the process. By the end of this guide, you’ll have a clear picture of the essential plumbing components, how they connect, and what makes a bidet a hygienic and convenient addition to your home. Let’s dive in and explore the anatomy of your bidet’s plumbing!
Understanding Bidet Plumbing Basics
At its core, a bidet’s plumbing is about redirecting a clean water supply to where you need it in the bathroom. Unlike a traditional toilet that has its own internal water tank, a bidet typically uses your home’s existing pressurized water lines. This is what allows for a consistent stream of water without needing to wait for a tank to refill. The structure might seem complex at first glance, but it’s a clever system designed for efficiency and hygiene.
Think of it like adding a new fixture that shares the same water source as your sink or shower. The key is a smart valve system that diverts water and a hose that delivers it. We’ll explore the main types of bidets and their specific plumbing setups, so you can identify what’s relevant to you, whether you’re looking to install one or just understand how it works.
Types of Bidets and Their Plumbing Structures
The plumbing structure of a bidet can vary quite a bit depending on the type of bidet you have. Each type is designed with a different user experience and installation process in mind. Understanding these differences will help you identify the components you might encounter.
1. The Non-Electric Bidet Attachment/Sprayer
This is one of the simplest and most common types of bidets, especially for DIYers. It’s essentially a nozzle or a handheld sprayer that connects to your toilet’s existing water supply. There’s no need for electricity, making installation a breeze.
Plumbing Components:
- T-Valve: This is the heart of the connection. It’s a fitting that screws onto the water supply line connected to your toilet tank. It has three connections: one that goes to your toilet tank, one that allows water to flow into the bidet’s supply line, and one that typically connects to the existing flex line for the toilet tank. This ensures water can still fill the tank while also being sent to the bidet.
- Bidet Supply Hose: This is a flexible hose, usually made of braided stainless steel or a durable plastic, that runs from the T-valve to the bidet nozzle or attachment. It’s designed to handle the water pressure from your home’s supply.
- Nozzle/Sprayer Head: This is the part that delivers the water. It can be a fixed nozzle that extends from the side of the toilet seat, a handheld sprayer that you manually direct, or integrated into the toilet seat itself.
2. The Electric Bidet Seat
These are a step up in luxury and functionality, offering features like heated water, adjustable water pressure, and warm air dryers, all powered by electricity. Their plumbing is similar to non-electric types but with a few added considerations for water heating.
Plumbing Components:
- T-Valve: Similar to the non-electric bidet, a T-valve is used to tap into the toilet’s water supply line.
- Bidet Supply Hose: A flexible hose connects the T-valve to the bidet seat, carrying cold water until it’s heated internally.
- Integrated Water Heater/Pump: This is the key difference. Electric bidets have an internal heater that warms the water on demand. Some models also have a small pump to ensure consistent water pressure, especially if your home’s water pressure is low.
- Nozzle (Retractable): These systems usually feature a retractable nozzle that extends from underneath the seat when in use and retracts when not.
3. The Integrated Bidet Toilet
This is a toilet with a bidet function built directly into its design. It offers the most seamless look and feel, with all the plumbing and electrical components hidden within the toilet itself. These are typically high-end options.
Plumbing Components:
- Water Inlet: A single water inlet connects directly to your home’s water supply, similar to a standard toilet but designed to also serve the bidet functions.
- Internal Valving and Waterways: The toilet has sophisticated internal plumbing that diverts water to the flushing mechanism or the bidet nozzle as needed.
- Internal Water Heater and Pump: Like electric bidet seats, these units often include integrated heating and pumping systems.
- Concealed Nozzles and Features: All mechanical parts are hidden, providing a clean aesthetic.
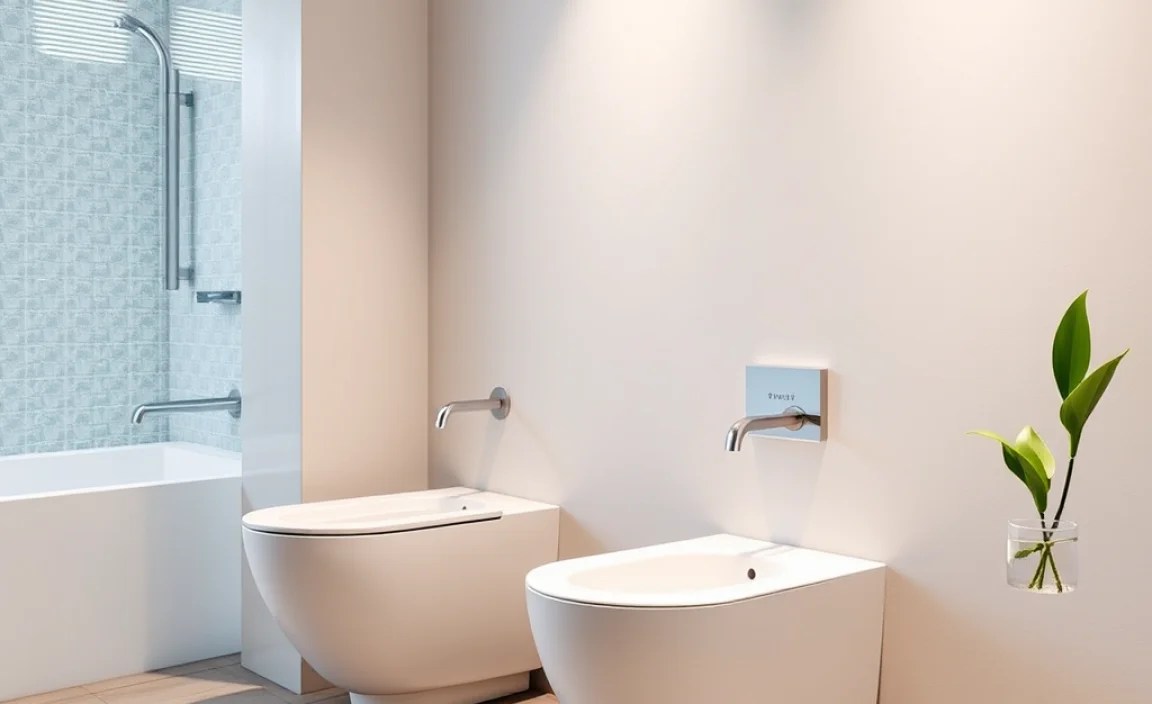
4. The Standalone Bidet Fixture
This is the most traditional type of bidet, resembling a low sink or a small toilet bowl and installed next to your toilet. It requires its own dedicated water supply and drain connections, similar to a sink or a toilet itself.
Plumbing Components:
- Hot and Cold Water Supply Lines: Separate lines connect to valves on the wall or floor, providing both hot and cold water to the bidet faucet.
- Bidet Faucet: Similar to a sink faucet, this controls the flow and temperature of the water.
- Drainage Pipe: A standard drainpipe connects to the bidet fixture and leads to your home’s main sewer line.
- Overflow Mechanism: Some fixtures may include an overflow to prevent flooding.
For the rest of this guide, we’ll focus on the most common DIY installations: the non-electric bidet attachment and the electric bidet seat, as these are what most homeowners will choose to install themselves. These types represent the majority of bidet structures encountered in residential plumbing upgrades.
Essential Bidet Plumbing Components Explained
Let’s break down the core components you’ll find in most bidet plumbing setups, focusing on the parts that connect the bidet to your existing water system. Understanding these pieces is key to a successful installation and troubleshooting if needed.
1. The T-Valve (or Diverter Valve)
This is arguably the most critical piece of hardware for any bidet attachment or seat. Its purpose is to split the single water line that feeds your toilet tank into two—one for the tank and one for the bidet. Without it, you couldn’t easily add a bidet to your current setup.
- Material: T-valves are usually made of sturdy brass or durable plastic. Brass is generally preferred for its longevity and resistance to corrosion, but high-quality ABS plastic is also common and effective.
- Connections: A typical T-valve has three threaded connections:
- Inlet (Toilet Tank Connection): This is usually a 7/8-inch standard connection that screws onto the fill valve outlet underneath your toilet tank.
- Outlet (Toilet Supply): This connection screws onto the existing flexible water supply hose that leads to your toilet tank.
- Bidet Outlet: This connection is typically 3/8-inch and connects to the supply hose that will run to your bidet. Many T-valves come with adapters to fit different hose sizes, so always check what’s included.
- Operation: The T-valve doesn’t have moving parts in most basic models; it simply redirects the water flow. Some advanced electronic bidets might use a more complex solenoid valve controlled electronically.
Professional Tip: Ensure the T-valve you purchase is compatible with your toilet’s fill valve thread size (most commonly 7/8-inch) and your bidet hose thread size (often 3/8-inch, but check!). Manufacturers usually specify these.
2. The Water Supply Hose
This flexible hose transports water from the T-valve to the bidet unit (the nozzle or the bidet seat). Its flexibility allows for easy routing behind the toilet and ensures it won’t kink or break under normal use.
- Materials:
- Braided Stainless Steel: The most common and recommended material for durability and resistance to leaks. The stainless steel braiding protects an inner rubber or PVC tubing.
- PVC or Rubber Hoses: Less common for direct bidet connections, often found in very basic kits. They are less durable and more prone to cracking over time.
- Fittings: The hose will have threaded fittings on both ends, usually with rubber washers or gaskets to create a watertight seal. The size of these fittings needs to match the T-valve outlet and the bidet inlet.
- Length: Hoses come in various lengths (e.g., 3ft, 6ft). Choose one that’s long enough to reach comfortably from the T-valve to the bidet without being excessively long and creating a mess behind the toilet.
3. The Bidet Nozzle or Sprayer
This is the component that actually delivers the water stream. Its specific design depends on the type of bidet, but its plumbing connection is straightforward.
- Non-Electric Attachments: The nozzle might be fixed to the side of the seat or extend from under it. It connects directly to the water supply hose.
- Handheld Sprayers: These have a hose that screws into the nozzle’s handle. The other end of the hose comes from the T-valve, and the nozzle is held manually to direct the spray.
- Electric Bidet Seats: The nozzle is usually a retractable unit stored beneath the seat. The water supply hose connects to an inlet port on the side or back of the bidet seat, which then directs the water to the internal heating element and then to the nozzle.
4. Water Shut-Off Valve
While the T-valve diverts water, your home’s main water shut-off valve for the toilet line is crucial. This is typically a small knob or lever located on the wall or floor behind the toilet, connecting to the flexible hose that feeds the toilet tank. You’ll need to turn this off before starting any installation or maintenance.
Importance: Always turn off the water supply at this valve before disconnecting any hoses or parts. This prevents a sudden flood in your bathroom. If this valve is faulty or leaky, it’s a good idea to replace it. You can find replacement shut-off valves and supply line hoses at most hardware stores.
5. Optional Components for Electric Bidets
Beyond the basic water connections, electric bidets have additional components that are part of their functional structure, even if they don’t impact the initial plumbing hookup:
- Internal Water Heater: Whether tankless (on-demand) or small tank-based, this heats the water.
- Water Pump: Some models include a small pump to boost water pressure for a stronger spray, especially in homes with low water pressure.
- Air Dryer: For the warm air drying function.
- Control Panel/Remote: For adjusting settings.
Step-by-Step Installation Guide for Common Bidet Plumbing
Installing a bidet, especially a non-electric attachment or an electric bidet seat, is a common DIY project. Here’s a general guide. Always refer to your specific bidet model’s instructions, as they may have unique steps.
Tools You’ll Likely Need:
- Adjustable wrench
- Pliers (slip-joint or channel-lock)
- Towel or bucket (to catch drips)
- Plumber’s tape (thread seal tape) – often optional, as most connections have rubber gaskets.
- Screwdriver (if your toilet seat needs removal)
Installation Steps (Non-Electric Bidet Attachment/Electric Bidet Seat):
Step 1: Turn Off Water Supply
Locate the water shut-off valve behind your toilet. Turn it clockwise until it stops. This completely cuts off the water supply to the toilet tank. Wikihow has a great visual guide on how to do this properly.
Step 2: Flush the Toilet
Flush the toilet and hold the handle down to drain as much water as possible from the tank. This minimizes water spillage when you disconnect the hoses.
Step 3: Disconnect Toilet Supply Hose
Place a towel or bucket under the connection point where the water supply hose meets the toilet tank’s fill valve. Use your adjustable wrench or pliers to gently unscrew the existing supply hose from the fill valve (it usually screws onto a threaded stem of the fill valve). Some water will likely drip out.
Step 4: Install the T-Valve
Ensure the T-valve has a rubber gasket in its toilet tank inlet connection. Screw the T-valve onto the fill valve stem where the toilet supply hose was previously attached. Tighten it gently by hand, then use your wrench to snug it up about a quarter to half turn. Do not overtighten, as this can crack the plastic fill valve or the T-valve.
Now, reattach the original toilet supply hose to the bottom outlet of the T-valve. Tighten it by hand, then snug with a wrench.
Step 5: Connect the Bidet Supply Hose
Connect one end of the new bidet supply hose to the side outlet of the T-valve (this is usually a 3/8-inch connection). Tighten by hand and then snug with a wrench.
Connect the other end of the bidet supply hose to the water inlet on your bidet seat or attachment. Ensure you use the provided rubber washer. Tighten by hand, then a quarter turn with a wrench.
Step 6: Mount the Bidet Seat (If Applicable)
If you’re installing an electric bidet seat, you’ll need to remove your old toilet seat first. Follow the manufacturer’s instructions for securing the new bidet seat. This usually involves inserting mounting posts and then sliding the seat onto them until it clicks, or screwing it down from underneath.
Step 7: Turn Water Supply Back On
Slowly turn the water shut-off valve counter-clockwise to restore water flow. Listen for any hissing sounds and visually inspect all connections (where the T-valve connects to anything, and both ends of the bidet hose) for leaks. Tighten slightly if you see drips.
Step 8: Test the Bidet
For non-electric bidets, activate the spray function according to the instructions. For electric bidets, plug it in and follow the startup procedures. Check the water stream. If you still see leaks, turn the water off at the shut-off valve again and re-tighten the connections 1/8-1/4 turn.
Step 9: Final Check and Cleanup
Once you are sure there are no leaks, clean up any spilled water and tidy the hoses.
Important Note on Water Pressure: Bidets, especially electric ones with heaters, rely on your home’s water pressure. The U.S. Environmental Protection Agency (EPA) recommends residential water pressure to be between 40 and 60 psi (pounds per square inch). If your pressure is too low or too high, it can affect performance. You can measure your home’s water pressure with a simple water pressure gauge, available at most hardware stores. If it’s consistently outside the optimal range, you might consider a pressure reducing valve (PRV) for your main water line, often installed by a plumber.
