
Quick Summary: Understanding the components of a plumbing trap is key to preventing sewer gases from entering your home. These essential parts include the trap arm, trap seal, and vent pipe, all working together to maintain a water barrier and ensure proper drainage. This guide breaks down each component for clear understanding and DIY confidence.
Plumbing traps are often overlooked heroes in our homes. They’re the unsung guardians that keep not just our sinks and toilets draining smoothly, but also prevent unpleasant odors from filling our living spaces. If you’ve ever wondered why your drain doesn’t smell like the sewer, you can thank the humble plumbing trap! Dealing with drain issues can feel daunting, but knowing what makes a trap work is the first step to tackling them. This guide will demystify the different parts of a plumbing trap, making it simple and straightforward. Let’s dive in and get you comfortable with the components that keep your home fresh and functional!
Why Do Plumbing Traps Matter?
Plumbing traps are a fundamental part of any drainage system. Their primary job is to create a water seal. This seal acts as a barrier, preventing harmful and foul-smelling sewer gases from backing up into your home through the drains. Without this simple yet ingenious design, your bathrooms and kitchen could smell like a sewer, which is not only unpleasant but can also be unhealthy. Understanding these traps helps you maintain your plumbing and troubleshoot minor issues with confidence.
The system relies on gravity and water to function. When water flows down a drain, it fills the curved section of the trap. A small amount of this water remains in the curve, forming the critical water seal. As more water flows through, it pushes the wastewater out and refills the trap, maintaining the barrier against sewer gases. The vent pipe, which is connected to the trap system, is equally vital. It allows air into the drain system, preventing a vacuum from forming that could siphon the water out of the trap, breaking the seal.
This delicate balance ensures that water flows away efficiently while keeping potentially hazardous gases at bay. Knowing the individual components helps you appreciate the system’s effectiveness and identify when something might be going wrong. Let’s explore each of these essential components.
The Main Components Of A Plumbing Trap

A plumbing trap, often called a P-trap due to its usual shape, is comprised of a few key parts. Each part plays a specific role in ensuring proper drainage and maintaining the crucial water seal. While the exact configuration might vary slightly depending on the fixture (sink, shower, toilet, etc.), the fundamental components remain the same. We’ll break down each one so you can easily identify them.
1. The Trap Bend (or Trap Bowl)
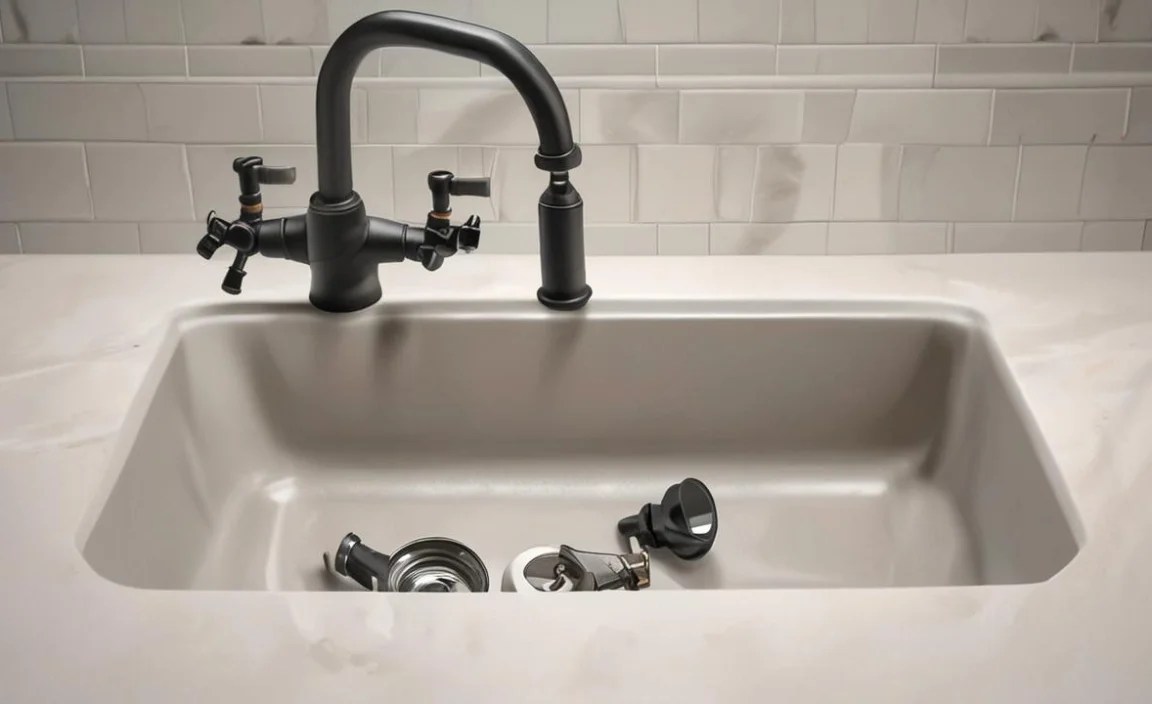
This is the most recognizable part of a plumbing trap. Visually, it’s the U-shaped or S-shaped section of pipe located directly beneath the drain opening of your fixture. Its curved design is intentional. As wastewater flows down from the sink, shower, or tub, it fills this bend. The water that remains in the lowest point of the curve after drainage is known as the “trap seal.”
The depth of the trap seal is critical for effective gas prevention. Building codes typically specify a minimum trap seal depth, often around 2 inches (5 cm). This ensures a robust barrier against sewer gases. If the trap seal is too shallow, it’s more susceptible to being siphoned out, especially during large water flows elsewhere in the system or during reduced atmospheric pressure. Conversely, a trap seal that is too deep might impede drainage flow.
This component is usually made of PVC (polyvinyl chloride), ABS (acrylonitrile butadiene styrene), or metal (like brass or stainless steel), depending on the plumbing system and local codes. PVC and ABS traps are inexpensive, easy to install, and corrosion-resistant, making them popular for DIY projects. Metal traps, while more durable and aesthetically pleasing, can be more expensive and harder to work with.
2. The Trap Arm
The trap arm is the horizontal or slightly sloped section of pipe that extends from the outlet of the trap bend to the main drainage system, specifically to a fitting that connects to the vent line. It’s essentially the pathway for the wastewater to leave the trap and enter the larger drain pipes.
The slope of the trap arm is critical. It needs to be sloped downwards away from the fixture, typically at a rate of ¼ inch per foot (about 2 cm per meter). This proper slope ensures that wastewater flows away freely and rapidly, preventing it from pooling in the trap arm and potentially causing clogs or odors. If the trap arm is installed with insufficient slope or is uneven, it can lead to the trap seal being siphoned out because the water sits stagnant and is easily pulled out by airflow in the drain.
The trap arm is directly connected to the trap bend and then to the building’s drainage and venting system. Its length is also regulated by plumbing codes. If the trap arm is too long, it can increase the risk of a siphon effect, as there is more water to be pulled from the trap seal. Codes often limit the maximum length of a trap arm to prevent such issues. For example, the Uniform Plumbing Code (UPC) outlines specific requirements for trap arm lengths and slopes to ensure proper function and safety.
3. The Vent Pipe
While not directly part of the U-bend itself, the vent pipe is an indispensable component of a functional plumbing trap system. Its role is to equalize pressure within the drainage system. Think of it as an air intake. When water rushes down a drain, it creates suction or negative pressure behind it. If there were no vent, this suction could pull the water right out of the trap seal, leaving the sewer gas barrier broken.
The vent pipe connects to the drain line between the fixture and the sewer or septic system, usually at a point after the trap arm. It then runs vertically, usually up and through the roof, or connects to a larger vent stack. This allows air to enter the drain pipes, releasing the vacuum and allowing water to flow smoothly. It also allows sewer gases to escape harmlessly through the roof, rather than pushing their way back into your home.
A properly vented system ensures that water flows efficiently and that the trap seal is maintained. Without adequate venting, you might notice gurgling sounds from drains, slow drainage, or recurring sewer odors—all signs that the vent might be blocked or improperly installed. Maintaining clear vent pipes is as important as keeping the traps themselves clean.
Types of Plumbing Traps
The P-Trap
The most common type, used under sinks, tubs, and showers. Its essential U-shape is designed to hold water, creating the necessary seal against sewer gases. It’s simple, effective, and usually made of plastic or metal.
The S-Trap
An older design that looks like a P-trap but with an extra curve that directs wastewater horizontally into a wall drain. S-traps are generally discouraged and often not permitted by modern plumbing codes because the single trap seal is highly susceptible to siphoning. If you have an S-trap, especially in an older home, it’s a good idea to consider having it replaced with a P-trap and proper venting.
The Drum Trap
Less common now, drum traps are cylindrical and often located beneath the floor. They have a removable cover that allows access to the trap contents. Vents are still crucial with drum traps. They are more prone to clogging and can be difficult to clean compared to P-traps.
The Bottle Trap
Often seen in modern bathrooms, especially wall-mounted sinks, bottle traps are more compact than P-traps. They consist of a body that holds water and a mechanism that prevents gases from entering. They can be more visually appealing but may require specific tools for cleaning.
How a Plumbing Trap Works in Stages

Understanding the process helps solidify the function of each component. Let’s trace the journey of water and air through a typical P-trap system:
- Drainage Starts: When you turn on a faucet or flush a toilet, water begins to flow down the drainpipe.
- Filling the Trap Bend: The water first enters the trap bend, filling its curved lower section.
- Wastewater Exits: As more water flows, it pushes the wastewater out of the trap bend and into the trap arm.
- Maintaining the Seal: Crucially, the trap bend retains a small amount of water at its lowest point. This creates the water seal.
- Air Enters via Vent: Simultaneously, air enters the drain system through the vent pipe. This prevents a vacuum from forming.
- Pressure Equalization: The air flowing in through the vent prevents this vacuum from siphoning the water out of the trap bend, thus preserving the water seal.
- Wastewater Enters Main Drain: The wastewater, now free of its connection to sewer gases, flows through the trap arm and then into the building’s main drain lines, heading towards the sewer or septic system.
- Gas Barrier Maintained: The remaining water in the trap bend acts as a barrier, preventing any sewer gases from traveling back up the drain and into your home.
Table: Component Functions and Importance
| Component | Primary Function | Importance | Common Materials |
|---|---|---|---|
| Trap Bend (Trap Bowl) | Holds a water seal | Prevents sewer gas from entering the building; creates the barrier. | PVC, ABS, Brass, Stainless Steel |
| Trap Arm | Carries wastewater away from the trap bend | Ensures efficient drainage; its slope prevents pooling and siphoning. | PVC, ABS, Cast Iron, Copper |
| Vent Pipe | Allows air into the drainage system | Prevents siphoning of the trap seal; equalizes pressure, allowing smooth flow and escape of gases. | PVC, ABS, Cast Iron, Copper |
Troubleshooting Common Plumbing Trap Issues
Even with a well-designed system, problems can arise. Knowing the components helps you diagnose the issue more effectively. Here are some common scenarios:
1. Foul Odors from Drains

Cause: The most frequent culprit is a broken trap seal. This can happen if the fixture hasn’t been used in a while (water evaporates), or if siphoning has occurred due to improper venting or negative pressure. Other causes include blockages within the trap itself or the trap arm.
Solution: Run water for a minute or two to refill the trap seal. If the smell persists, check your vent system for blockages. If you suspect a clog within the trap arm, you might need to disassemble the trap (with a bucket underneath!) to clean it out.
2. Slow Draining
Cause: Often due to partial clogs within the trap bend or trap arm. Hair, grease, and debris can accumulate over time. A blocked vent pipe can also cause slow drainage because air can’t escape properly as water tries to drain.
Solution: Try using a plunger or a drain snake to dislodge minor clogs. If that doesn’t work, you may need to disassemble the trap for a thorough cleaning. Ensure your vent pipe is clear by checking for obstructions like leaves or nests, especially near the roof exit.
3. Gurgling Sounds
Cause: This is a classic sign of a venting problem. As water drains, it tries to pull air behind it. If the vent is blocked or insufficient, the water can’t flow smoothly, and air is forced through the water in the trap, creating gurgling. This can also indicate that the trap seal is in danger of being siphoned.
Solution: Focus on clearing the vent pipe. If you can safely access the areas where vent pipes exit your roof, check for any obvious blockages. For internal clogs, a plumber may be needed.
4. Leaks at Trap Connections
Cause: Loose slip nuts, damaged washers, or cracks in the plastic trap components. Over-tightening can also crack plastic fittings.
Solution: For minor leaks at slip nut connections, try gently tightening them. If the leak persists, ensure the washer is seated correctly or replace it. If the trap itself is cracked, the damaged section will need to be replaced. Always have a bucket and towels ready when working on traps that may contain water.
Important Note on DIY Repairs: While many trap issues are fixable with basic tools, if you’re unsure or uncomfortable, don’t hesitate to call a licensed plumber. Improperly installed or repaired plumbing can lead to bigger, more costly problems and potential water damage.
DIY Maintenance Tips for Plumbing Traps
Maintaining your plumbing traps doesn’t require complex tools or extensive knowledge. A little regular attention can go a long way in preventing issues and ensuring your system runs smoothly. Here are some simple, practical tips:
- Regularly Flush with Hot Water: Once a month, pour a kettle of boiling water down each drain. This helps to melt and flush away grease and soap scum that can build up in the trap and trap arm. Be cautious with plastic pipes; don’t pour boiling water directly into them for extended periods, as it could cause damage. Luke-warm water is often sufficient and safer for plastic.
- Use a Drain Strainer: Install mesh strainers in sink and shower drains. These catch food scraps, hair, and other debris before they can enter the trap, significantly reducing the risk of clogs. Cleaning these strainers regularly is easy and effective.
- Avoid Pouring Grease Down the Drain: Never pour cooking grease, fats, or oils down any drain. They solidify at room temperature and are a primary cause of major clogs in the plumbing system, including the trap arm. Collect grease in a container and dispose of it in the trash.
- Address Slow Drains Promptly: Don’t ignore slow-draining sinks or tubs. The sooner you address them, the easier they are to fix. A plunger or a simple trap cleaning might solve the issue before it becomes a significant problem.
- Test Faucets and Showers Regularly: If a fixture is used infrequently, the water in its trap can evaporate. Make it a habit to run water in all sinks, tubs, and showers for about 30-60 seconds each month to ensure the trap seal is always fresh and functional. This is especially important for guest bathrooms or basements that aren’t used daily.
- Be Mindful of Chemicals: While drain cleaners can sometimes help with minor clogs, overuse or using harsh chemicals can damage older pipes or damage the seals within plastic traps over time. Opt for natural drain cleaners (like baking soda and vinegar) or mechanical methods like plungers and snakes when possible.
Understanding Plumbing Codes and Traps
Plumbing codes are essential for ensuring the safety and functionality of your home’s water and drainage systems. They are developed and updated by organizations dedicated to public health and safety. For instance, the International Association of Plumbing and Mechanical Officials (IAPMO) develops the Uniform Plumbing Code (UPC), which is widely adopted in many jurisdictions.
These codes specify requirements for many aspects of plumbing, including:
- Trap Seal Depth: Mandating a minimum depth (typically 2 inches) to ensure an adequate water barrier against sewer gases.
- Trap Arm Length: Limiting the maximum length of the trap arm to prevent siphoning of the water seal.
- Slope: Dictating the required downward slope of the trap arm (e.g., ¼ inch per foot) for efficient drainage.
- Venting Requirements: Specifying the size and location of vents, how they connect to the drainage system, and how they terminate (usually through the roof).
- Materials: Outlining approved materials for pipes and traps based on their durability and compatibility with various conditions.
Adhering to these codes is crucial. When you’re undertaking DIY plumbing projects or even just understanding why a certain setup exists, referencing local building codes or established standards like the UPC can provide valuable guidance. For example, the maximum trap arm length is typically tied to the diameter of the pipe: a 1 ½ inch trap arm can generally be up to 3 ½ feet long before the risk of siphoning becomes too great, according to UPC standards. These details ensure the trap design functions as intended, protecting your home from sewer gases and ensuring smooth drainage.
Frequently Asked Questions (FAQ)
Q1: What is a plumbing trap?
A plumbing trap is a specially shaped section of drainpipe (usually U-shaped) that holds a small amount of water. This water seal prevents foul-smelling sewer gases from entering your home through drains while allowing wastewater to pass through.
Q2: What are the main parts of a plumbing trap?

The main components are the trap bend (the curved part that holds water), the trap arm (the pipe extending from the trap bend to the main drain), and the vent pipe, which is connected to the drain system to allow air in and maintain pressure.
Q3: Why do my drains smell sometimes?
This is usually because the water seal in the trap has evaporated (if the drain isn’t used often
