
Quick Summary: Understanding the core “components of vanity in plumbing” – including the sink, faucet, drain assembly, water supply lines, and P-trap – empowers you to maintain your bathroom with confidence. Knowing these parts helps with simple fixes and informed upgrades, ensuring a functional and leak-free space.
Your bathroom vanity is more than just a pretty face; it’s a hardworking hub of your home’s plumbing. When something goes awry, like a slow drain or a dripping faucet, knowing the basic parts involved can make all the difference between a stressful DIY attempt and a quick, successful fix. This guide breaks down the essential components of vanity plumbing, making them easy to understand and manage. We’ll walk you through each part, explaining what it does and why it’s important, so you can tackle minor issues with confidence and keep your bathroom running smoothly.
Your Bathroom Vanity Plumbing: A Beginner’s Guide

As Bryan Lee, I believe that understanding your home’s systems shouldn’t feel like rocket science. Your bathroom vanity, a central fixture in any home, plays a vital role, and its plumbing is no exception. For many homeowners, the thought of plumbing can be a bit intimidating. You might hear terms like “drain assembly” or “P-trap” and picture complicated pipe networks.
But the truth is, the plumbing within your vanity is quite straightforward once you break it down. We’re going to demystify these components, looking at each piece and its function. By the end, you’ll have a clear picture of what’s going on beneath your sink, ready to handle common issues and appreciate the engineering that keeps your water flowing correctly.
The Visible Stars: Sink and Faucet

Let’s start with the parts you see and use every day: the sink and the faucet. These are the most prominent “components of vanity in plumbing,” and thankfully, the ones that are easiest to understand.
The Sink: More Than Just a Basin
The sink is where most of the action happens – brushing teeth, washing hands, rinsing out cups. While you might just see it as a basin, it’s designed to channel water efficiently towards the drain.
- Material: Sinks come in various materials like porcelain, ceramic, stainless steel, glass, and even stone. Each has its own look and durability.
- Style: You’ll find different installation types, such as:
- Undermount: Installed beneath the countertop for a seamless look.
- Drop-in (Self-rimming): Sits on top of the countertop with a visible lip.
- Wall-mount: Attached directly to the wall, often seen in powder rooms or modern designs.
- Pedestal: A sink with a supporting column, common in older homes.
- Drain Opening: This is the hole at the bottom of the sink where water exits. It’s sized to fit standard drain assemblies.
The Faucet: Controlling the Flow
The faucet is your command center for water. It controls both the flow and temperature of the water coming into your sink. Different types exist, each with its unique mechanism.
- Types of Faucets:
- Centerset: All three holes (hot, cold, and spout) are located on a single unit.
- Widespread: The handles and the spout are separate pieces, offering a more luxurious look and greater flexibility in placement.
- Single-handle: A single lever controls both water flow and temperature.
- Components of a Faucet:
- Spout: Delivers the water into the sink.
- Handles/Lever: Used to turn water on/off and adjust temperature.
- Cartridge/Valve: The internal mechanism that controls water flow. Single-handle faucets usually have a cartridge, while two-handle faucets often use compression or ceramic disc valves.
- Aerator: A small screen at the tip of the spout that mixes air with water, creating a smoother, splash-free stream and using less water.
Understanding your faucet type is key for repairs. For instance, replacing a worn-out cartridge in a single-handle faucet is a common DIY task that can stop annoying drips.
The Hidden Heroes: Drain and Water Supply
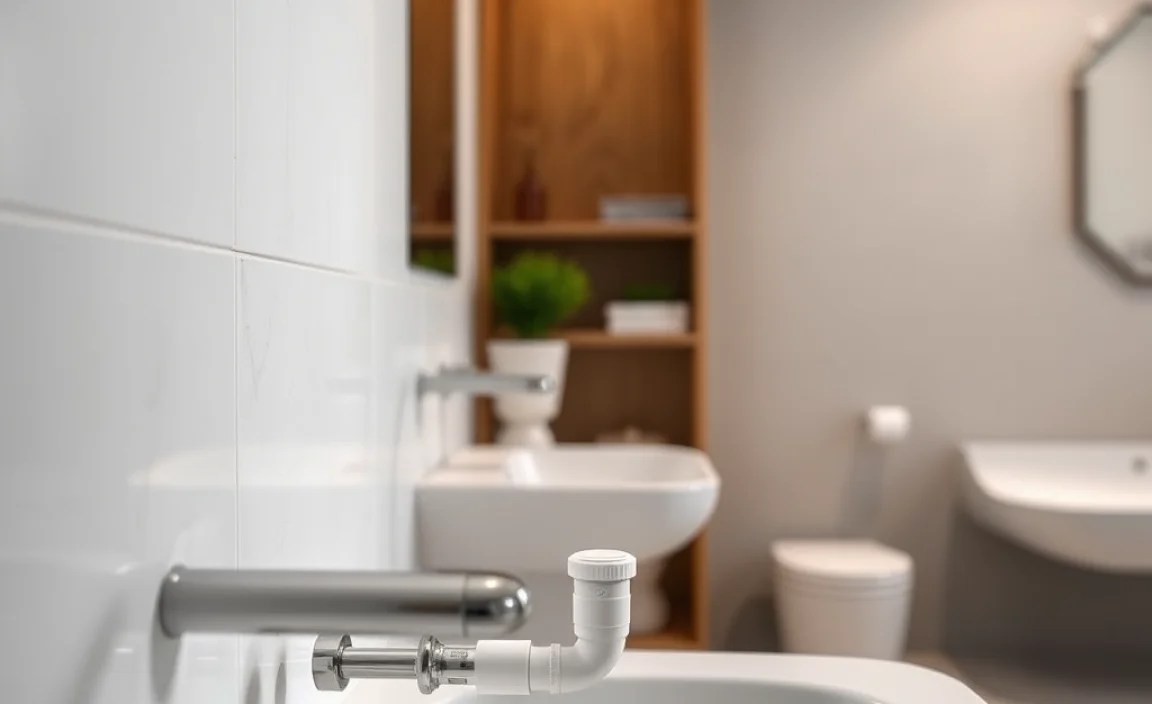
Beneath the sink, a network of pipes and connections works silently to get water to your faucet and to carry wastewater away. These are crucial “components of vanity in plumbing” that ensure your sink functions properly.
The Drain Assembly: Guiding Wastewater Away
This component connects directly to your sink’s drain opening and leads to the main drainpipe. Its primary job is to let water out while preventing larger debris from clogging the system and keeping sewer gases from entering your home.
A typical drain assembly includes:
- Strainer: Often a basket or a set of crosshairs that sits in the drain opening to catch hair and other debris.
- Tailpiece: A vertical pipe segment that extends down from the sink’s drain flange.
- Flange: The metal ring that seals the top of the drain assembly to the sink basin.
- Washer and Nut: These components secure the drain body to the sink from underneath.
- Pop-up Stopper (for most bathroom sinks): This is the mechanism you usually operate with a lever behind the faucet to seal and open the drain. If your sink doesn’t have this, it likely has a simple strainer.
A leaky drain assembly can cause significant water damage under your vanity. Inspecting the seals and connections here regularly is a wise maintenance step.
The P-Trap: Your Invisible Guardian
Perhaps one of the most misunderstood yet vital “components of vanity in plumbing” is the P-trap. You’ll recognize it by its distinctive U-shape that sits beneath your sink.
What it does: The P-trap is designed to hold a small amount of water after each use. This water creates a seal that prevents unpleasant and potentially harmful sewer gases from rising up through the drain and into your bathroom. It’s a simple but incredibly effective invention.
Why it’s important:
- Odor Control: The water seal is the primary defense against sewer smells.
- Debris Catcher: The trap can also catch heavier debris that might otherwise flow further into your plumbing system, making it easier to retrieve if a clog occurs deeper within the trap itself.
Maintenance: Because it can catch debris, the P-trap is also a common spot for clogs. If water is draining very slowly, or if you notice a gurgling sound, the P-trap might be the culprit. Most P-traps are designed to be easily removed for cleaning. Just be sure to place a bucket underneath when you disassemble it, as it will be full of water!
For those interested in plumbing codes and standards, understanding the role of traps is fundamental. The International Code Council (ICC) provides comprehensive guidelines on plumbing requirements, including the proper installation and venting of traps to ensure safety and functionality.
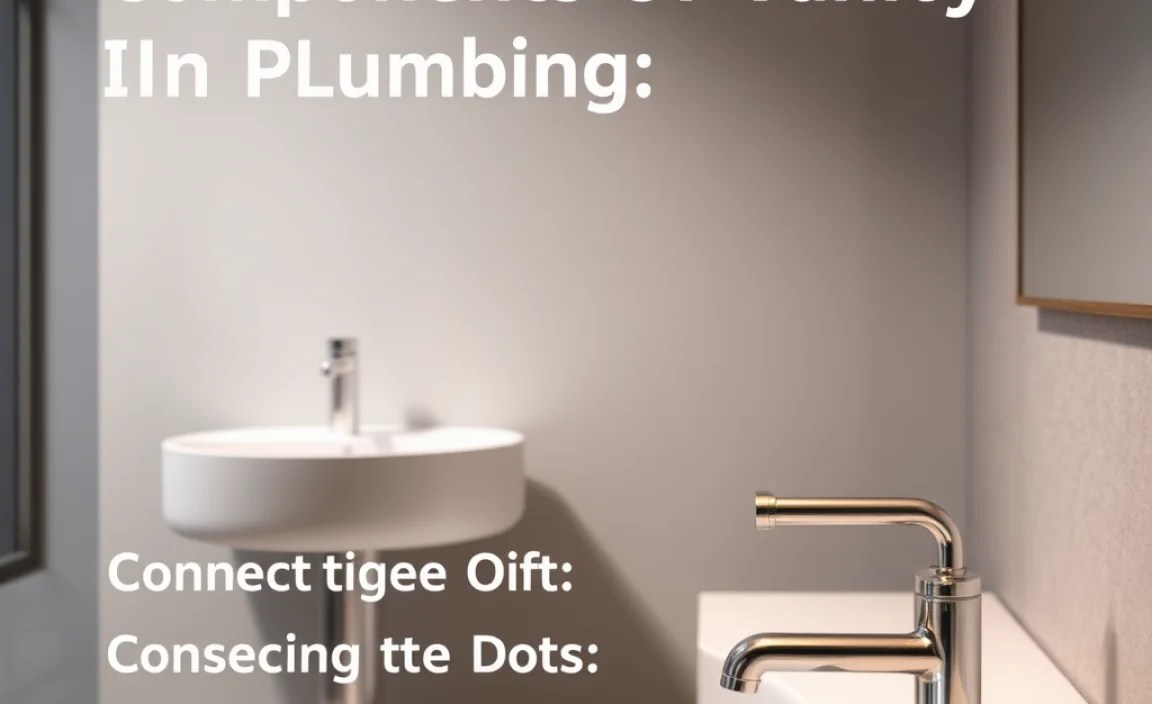
Connecting the Dots: Water Supply Lines
These flexible or rigid pipes are responsible for delivering hot and cold water from your home’s main water pipes to your faucet. They are critical “components of vanity in plumbing” that allow your faucet to function.
- Materials: Modern supply lines are often made of braided stainless steel, which is durable and resistant to kinks. Older systems might use copper or plastic tubing.
- Connections: One end connects to the shut-off valve (usually located behind the vanity or on the wall), and the other connects to the faucet’s inlets.
- Shut-off Valves: These are crucial! They are usually found on the hot and cold water lines leading to the faucet. Being able to shut off the water supply to your faucet quickly is essential for any repairs or maintenance.
A common issue with water supply lines is leakage, often caused by worn-out seals or cracks. Regularly inspecting these lines and their connections can prevent water damage. If you’re ever unsure about your water system, a certified plumber can provide professional guidance.
Beyond the Basics: Other Vanity Plumbing Components
While the sink, faucet, drain, P-trap, and supply lines are the main players, a few other “components of vanity in plumbing” contribute to the overall system’s function and aesthetics.
Water Shut-Off Valves
As mentioned, these are vital. Located on the hot and cold water lines behind the vanity, they allow you to isolate your sink from the main water supply. This is essential for any repair work on the faucet or drain lines without shutting off water to your entire house.
- Types: The most common for sinks are angle stops (which turn downwards) or straight stops (which turn sideways). They can be operated by a handle or a screwdriver slot.
- Maintenance: If a valve is difficult to turn or shows signs of corrosion, it’s a good idea to have it replaced by a plumber before it fails completely.
Overflow System (if applicable)
Many bathroom sinks have an overflow drain, usually a small hole or series of holes near the top of the basin. This is a safety feature designed to prevent water from overflowing the sink if the main drain is blocked or if the water is left running. The overflow channel connects to the main drain assembly behind the sink, usually above the P-trap.
Vent Pipe Connection
Though not directly in the vanity itself, your vanity’s plumbing is connected to your home’s venting system. Plumbing vents allow air to enter the drainage system, balancing pressure and enabling water to flow smoothly down the drain. Without proper venting, water can gurgle back up, and sewer gases can enter your home. You can often see a vent pipe protruding from your roof, but the connection point for your vanity’s drain typically ties into this larger system within your walls.
Understanding the importance of venting is key to diagnosing slow drains or gurgling sounds. You can learn more about plumbing ventilation at reputable resources like those offered by plumbing industry associations or government building code bodies.
Putting It All Together: How Vanity Plumbing Works
Let’s visualize the entire process:
- Water In: Cold water from the main supply travels through the cold water pipe, through the cold shut-off valve, and up through the flexible cold water supply line into the faucet. The process is identical for hot water.
- Faucet Action: When you open the faucet handle(s), the internal valves (cartridge or discs) allow water to mix (if desired) and flow out through the spout.
- Filling the Sink: Water fills the sink basin.
- Drain Activation: When you turn on the faucet, the drain stopper (if present) is usually in the open position, or it’s simply a clear drain hole.
- Through the Drain Assembly: Water flows through the sink’s drain opening, past the strainer/crosshairs, and into the tailpiece of the drain assembly.
- The P-Trap Seal: The tailpiece connects to the P-trap. Crucially, the P-trap retains a small amount of water, forming a barrier against sewer gases.
- To the Main Drain: After passing through the P-trap, the wastewater flows into the main drainpipe.
- Venting: As water flows down the drain, the venting system allows air to enter, preventing a vacuum and ensuring smooth drainage.
- Wastewater Out: The wastewater travels through your home’s drain system to your sewer or septic tank.
This orchestrated sequence ensures your sink is functional, hygienic, and odor-free. Even the simplest upgrades to any of these “components of vanity in plumbing” can enhance your bathroom’s look and efficiency.
Troubleshooting Common Vanity Plumbing Issues
Knowing the parts helps immensely when something goes wrong. Here are a few common issues and how understanding the components can help you address them:
Dripping Faucet
Likely Culprit: Worn-out faucet washer, O-ring, or cartridge within the faucet mechanism.
DIY Potential: Often yes! Identifying your faucet type (single-handle, two-handle, cartridge, ceramic disc) is the first step. Replacement parts can usually be found at hardware stores. For advanced mechanisms, consulting manufacturer instructions or seeking professional help is recommended.
Slow or Clogged Drain
Likely Culprit: Hair, soap scum, toothpaste buildup, or foreign objects in the drain assembly, tailpiece, or P-trap.
DIY Potential: High. Start by cleaning the sink strainer. If that doesn’t work, a bucket placed underneath, you can unscrew the P-trap, clean it out, and reassemble. Plunger use or a drain snake can also be effective.
Leaky Sink Drain Assembly
Likely Culprit: Loose connections, worn-out washers or seals around the drain flange or tailpiece.
DIY Potential: Moderate. You’ll need to access the drain from underneath. Tightening the mounting nut or replacing the seals can often fix the leak. Be sure to get the correct size and type of replacement parts.
Water Leaking from Supply Lines or Shut-Off Valves
Likely Culprit: Damaged supply line (crack, corrosion), loose connection nut, or a faulty shut-off valve.
DIY Potential: Moderate to High for supply lines, High for valves if you’re comfortable turning off water. Always shut off the water at the valve before attempting to tighten or replace a supply line. If the shut-off valve itself is leaking, it’s often best to call a plumber to replace it, as this involves shutting off water to a larger portion of your home.
Gurgling Drains or Bad Odors
Likely Culprit: Improper venting, or a dry P-trap (water seal has evaporated).
DIY Potential: Low to Moderate. If the trap is dry, simply running water for a minute should fix it. If it’s a recurring issue, it might indicate a problem with your home’s wider venting system, which usually requires professional diagnosis and repair.
Choosing and Understanding Vanity Plumbing Fixtures
When it comes to selecting “components of vanity in plumbing,” functionality meets style. Whether you’re renovating or simply replacing a worn-out fixture, here’s a quick guide.
Faucet Selection Considerations
- Style: Modern, traditional, transitional – choose what complements your bathroom’s decor.
- Finish: Chrome, brushed nickel, matte black, polished brass. Consider durability and ease of cleaning.
- Reach and Height: Ensure the spout offers enough clearance over your sink for comfortable use.
- Water Efficiency: Look for faucets with the WaterSense label, indicating they use at least 20% less water than standard models without sacrificing performance. You can find more information on WaterSense certified products from the U.S. Environmental Protection Agency (EPA).
Sink Materials and Styles Explained
Here’s a table to help compare common sink materials:
| Material | Pros | Cons |
|---|---|---|
| Porcelain/Ceramic | Durable, non-porous, easy to clean, classic look. | Can chip or crack if heavy objects are dropped. |
| Stainless Steel | Durable, resistant to stains and scratches, modern look, affordable. | Can be noisy, prone to water spots if not dried. |
| Vitreous China | Very durable, highly resistant to stains and chemicals, glossy finish. |
