
Summary: Sealant in construction is a flexible material used to fill gaps and joints, preventing leaks, drafts, and moisture intrusion. It protects buildings from weather, improves energy efficiency, and maintains structural integrity. Understanding its types and uses is key for DIYers and homeowners to ensure durable, protective seals.
Ever notice those little gaps around windows, doors, or where walls meet floors? That’s where building magic happens, and a star player in that magic is called sealant. If you’ve ever wondered why your home feels drafty or how water seems to sneak in during a storm, understanding sealants will demystify a lot. Don’t worry if the term sounds technical; we’re going to break it down into simple terms. Think of sealant as the trusty gap-filler that keeps your home cozy, dry, and sound. This guide will show you exactly what sealant is, why it’s so important, and how it works its wonders in construction.
What Exactly is Sealant in Construction?
At its core, sealant in construction is a pliable material designed to seal joints, cracks, and openings. Its primary job is to create a barrier. This barrier prevents the passage of fluids, air, and even noise. Imagine it like a flexible, waterproof glue that can expand and contract with your building. This is crucial because buildings aren’t static; they move slightly with temperature changes, wind, and settling. Sealants are engineered to move with them, maintaining their seal over time.
The purpose of a good seal is multifaceted:
- Waterproofing: Prevents rain, snowmelt, and leaks from entering the building envelope.
- Air Sealing: Stops unwanted drafts, which makes your home more comfortable and your heating/cooling systems more efficient.
- Energy Efficiency: By blocking air leaks, sealants reduce energy loss, saving you money on utility bills.
- Dust and Pest Control: Seals off entry points for dust, allergens, and unwanted critters.
- Aesthetics: Provides a clean, finished look to gaps and joints.
- Noise Reduction: Helps dampen sound transmission between different areas.
Why is Sealant So Important in Building?
You might be tempted to overlook those small gaps, but they can lead to big problems. Unsealed joints are like open invitations for water, air, and pests. This can cause:
- Mold and Mildew Growth: Moisture trapped within wall cavities can lead to unhealthy mold issues.
- Structural Damage: Water infiltration can rot wood framing and damage insulation.
- Increased Energy Bills: Drafts force your HVAC system to work harder, consuming more energy.
- Discomfort: Cold drafts in winter and hot air in summer make your home less pleasant.
- Pest Infestations: Small openings are enough for insects and even small rodents to find their way in.
Using the right sealant in the right places is a proactive measure that protects your investment and ensures a healthy living environment. It’s a small step that offers significant long-term benefits.
Common Types of Sealants Used in Construction

The world of sealants is quite diverse, with different types suited for various applications, temperatures, and materials. Here’s a look at some of the most common ones:
1. Silicone Sealants

Silicone sealants are known for their excellent flexibility and resistance to extreme temperatures and UV radiation. They are waterproof and great for areas exposed to moisture, like bathrooms and kitchens, and they can also be used on exterior applications.
- Pros: Highly flexible, waterproof, UV resistant, temperature resistant (hot and cold).
- Cons: Can be tricky to paint over, can sometimes shrink slightly over time, may be more expensive.
- Best For: Bathrooms, kitchens, around tubs and sinks, exterior window and door frames, areas with significant temperature fluctuations.
2. Acrylic Latex (Caulk) Sealants

Often referred to as “latex caulk,” these are very common for general-purpose sealing. They are easy to use, clean up with water, and can be painted over once dry, making them a favorite for interior projects. They are less flexible than silicones and not as durable in harsh outdoor conditions.
- Pros: Easy to apply, water cleanup, paintable, affordable.
- Cons: Less flexible than silicone, can shrink more, not as durable for exterior use or in extreme weather.
- Best For: Interior trim, baseboards, around windows and doors (interior), drywall cracks, nail holes.
3. Polyurethane Sealants
Polyurethane sealants offer a great balance of flexibility, strength, and adhesion. They are very durable, resistant to abrasion, and can often be painted. They are a good choice for both interior and exterior applications where a strong, long-lasting seal is needed.
- Pros: Very durable, excellent adhesion, good flexibility, paintable, resistant to abrasion and weathering.
- Cons: Can be more expensive, may have a strong odor during application, requires mineral spirits for cleanup if not fully cured.
- Best For: Exterior joints, expansion joints, concrete joints, wood-to-masonry applications, heavy-duty sealing.
4. Hybrid (MS Polymer) Sealants
These modern sealants combine the best properties of silicone and polyurethane. They offer excellent flexibility, durability, UV resistance, and adhesion to a wide range of surfaces, often without the drawbacks of either pure silicone or polyurethane. They are also typically paintable and have low VOCs (Volatile Organic Compounds).
- Pros: Excellent adhesion to many surfaces, good UV and weather resistance, highly flexible, paintable, low odor, environmentally friendly.
- Cons: Can be more expensive than basic acrylics.
- Best For: A wide range of interior and exterior applications, including windows, doors, siding, roofing, and bathrooms.
5. Butyl Sealants

Butyl sealants are known for their exceptional waterproofing capabilities and adhesive properties, especially on metal and rigid surfaces. They remain somewhat pliable and are excellent for sealing around flashing, gutters, and RVs.
- Pros: Excellent waterproofing, strong adhesion to metals and many plastics.
- Cons: Can be sticky and messy to work with, not very flexible, often not paintable, can degrade with UV exposure over long periods.
- Best For: Gutters, downspouts, RVs, metal roofing, flashing.
6. Silicone vs. Acrylic Latex: A Key Distinction

For DIYers, understanding the difference between silicone and acrylic latex is fundamental. Acrylic latex is generally easier for beginners—it’s forgiving, cleans up with water, and you can paint over it to match your walls. Silicone, while highly effective and durable, can be trickier to apply neatly, and painting over cured silicone is often problematic. For most routine interior sealing tasks like trim and baseboards, acrylic latex is usually the go-to. For areas needing superior water resistance and flexibility, like in a bathroom or exterior joints, silicone or a hybrid might be a better choice.
Understanding Sealant Properties and Performance
When choosing a sealant, you’ll encounter various terms and specifications that indicate its performance. Knowing these will help you pick the right product for the job.
Adhesion

This refers to how well the sealant sticks to the surfaces it’s applied to. Good adhesion is crucial for a long-lasting seal. Different sealants are formulated to adhere to specific materials like wood, metal, glass, concrete, or plastic. Always check the product label to ensure it’s compatible with your project materials.
Flexibility (Movement Capability)
Buildings move! Sealants need to be able to stretch and compress without tearing or losing their seal. This is often measured as a percentage of movement capability. For example, a sealant with 25% movement capability can accommodate a joint that expands or contracts by up to 25% of its original width. Joints that experience significant temperature changes or structural movement require sealants with higher movement capabilities.
Durability and Weather Resistance

How long will the sealant last? This depends on its resistance to UV radiation (sunlight), extreme temperatures, and moisture. Outdoor applications, especially those exposed to direct sunlight, need sealants with excellent UV and weather resistance to prevent cracking and degradation.
Paintability
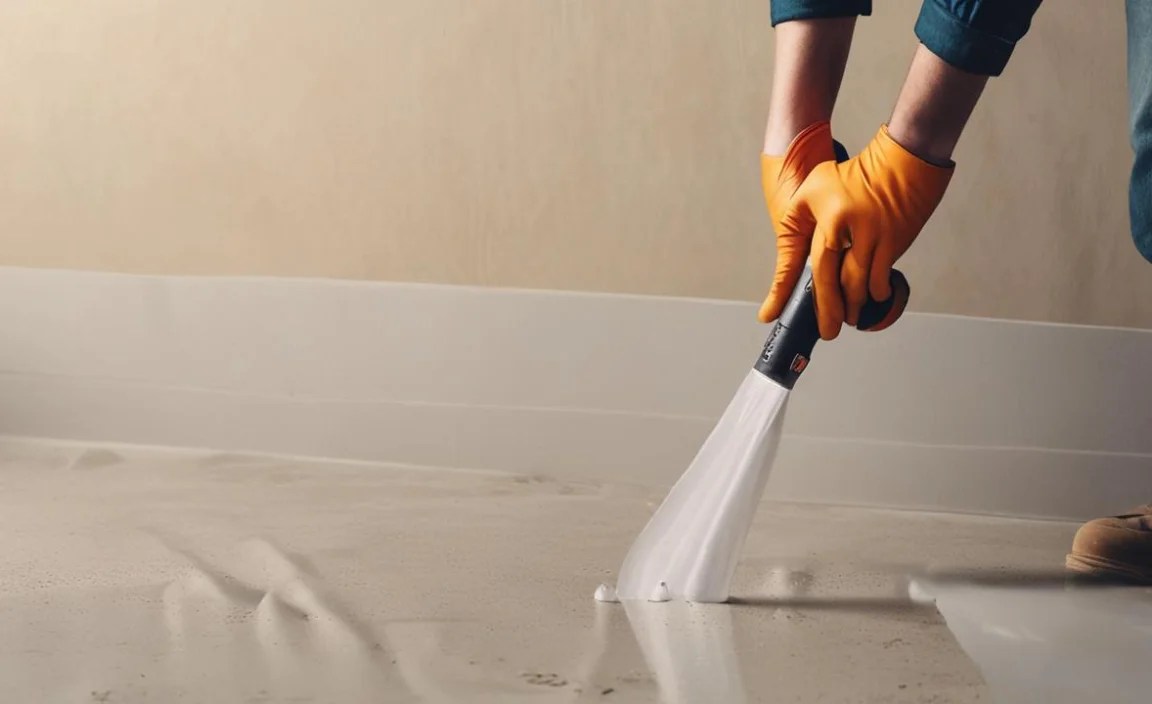
If you want a seamless look, you’ll need a sealant that can be painted over. Most acrylic latex and many polyurethane and hybrid sealants are paintable. Typically, you should wait for the sealant to fully cure before painting. Silicone sealants are notoriously difficult to paint over effectively.
VOC Content
Volatile Organic Compounds (VOCs) are chemicals that can be released into the air. Some older or less advanced sealants have high VOC content, which can cause strong odors and may be less environmentally friendly. Newer formulations, particularly hybrid and some acrylics, boast low VOC content, making them safer for indoor use and better for the environment.
Where Sealant is Used in Construction

Understanding where sealants are applied will give you a comprehensive picture of their importance. They are used in a multitude of places, both inside and outside your home.
Exterior Applications
The exterior of your home is the first line of defense against the elements, and sealants play a vital role in maintaining its integrity.
- Window and Door Frames: Sealing the perimeter where frames meet the wall prevents water and air from entering the building. This is a critical step for energy efficiency and preventing water damage.
- Siding Joints: Sealants are used to fill gaps between different pieces of siding and at corners to prevent water ingress.
- Roofing: Around vents, chimneys, and flashing, sealants are used to create watertight seals. For roofing, specialized roofing sealants are often used that can withstand extreme weather.
- Foundation and Exterior Walls: Cracks in the foundation or where wall materials meet can be sealed to prevent moisture and pest entry.
- Expansion Joints: Larger joints in concrete (driveways, patios) or between different building materials are designed to allow movement and are filled with flexible sealants to prevent cracking.
For exterior applications, it is crucial to use sealants rated for outdoor use, offering UV and weather resistance. Learn more about weatherproofing your home from resources like the U.S. Department of Energy.
Interior Applications
Inside your home, sealants contribute to comfort, cleanliness, and preventing minor issues from becoming major ones.
- Around Bathtubs, Showers, and Sinks: Bathroom and kitchen sealants (often silicone or silicone-enhanced acrylics) are used to create a watertight barrier around fixtures, preventing water from seeping into walls and floors.
- Baseboards and Trim: Filling the small gaps between baseboards, trim, and walls creates a cleaner look and prevents dust from accumulating in those crevices.
- Window and Door Trim: Similar to exterior frames, sealing interior trim prevents drafts and dust.
- Corner Joints: Sealing the internal corners where walls meet can provide a cleaner finish and prevent cracks from appearing over time.
- Around Pipes and Electrical Penetrations: Sealing openings where pipes or wires enter walls or floors helps maintain air sealing and prevents moisture and pest entry.
How to Choose the Right Sealant for Your Project

Selecting the correct sealant can seem daunting, but focusing on a few key factors will simplify the process.
1. Identify the Surface Material
Is it wood, metal, glass, plastic, concrete, or painted? Many sealants are versatile, but some perform best on specific materials. For example, butyl sealants are great for metal, while acrylics are good all-rounders for wood and drywall.
2. Determine the Location (Interior/Exterior)
Exterior applications require sealants that can withstand UV rays, rain, and temperature fluctuations. Look for labels that clearly state “exterior grade” or mention UV resistance and weatherproofing.
3. Consider the Joint Movement

If the joint needs to expand and contract significantly (like large expansion joints), you’ll need a sealant with high movement capability (e.g., 25% or more). For small gaps that don’t move much, a lower movement rating may suffice.
4. Think About Paintability

Do you need to paint over the sealant? If so, choose an acrylic latex, polyurethane, or hybrid sealant. Check the product description for “paintable” or “paintable after cure.”
5. Assess Water Resistance Needs
For wet areas like bathrooms and kitchens, or for any exterior sealing against rain, high water resistance is crucial. Silicone and hybrid sealants excel here.
6. Check for Special Requirements
Are you working in an area with extreme temperatures? Do you need a low-VOC product for better air quality? Consider these specific needs.
Key takeaway: Always read the product label carefully. It will specify the intended use, surface compatibility, performance characteristics, and application instructions.
A Simple Guide to Applying Sealant
Applying sealant might seem intimidating, but with a little practice, you can achieve professional-looking results. The most common way to apply sealant to small gaps is using a caulk gun and a tube of semi-liquid sealant.
Tools You’ll Need:

- Caulk gun
- Tube of sealant
- Utility knife or sealant removal tool
- Stiff brush or putty knife (for preparation)
- Painter’s tape (optional, for clean lines)
- Damp cloth or paper towels
- Gloves
- Safety glasses
Step-by-Step Application Process:
- Prepare the Area:
- Remove old, peeling sealant using a utility knife or a specialized sealant removal tool.
- Clean the area thoroughly. Remove any dirt, dust, grease, or moisture. The surface must be clean and dry for the sealant to adhere properly. A stiff brush or putty knife can help remove loose debris.
- Using a utility knife, cut the tip of the sealant tube at a 45-degree angle. Start with a small opening; you can always cut it larger if needed. The size of the opening determines the bead of sealant dispensed.
- Pull back the plunger on the caulk gun, insert the sealant tube (cut tip first), and push the plunger forward until it engages the tube.
- For perfectly straight lines, especially around trim or windows, apply painter’s tape parallel to the joint, about 1/8 to 1/4 inch away from the edge. This creates a guide for your sealant bead.
- Place the nozzle at the beginning of the gap. Gently squeeze the trigger of the caulk gun and move it steadily along the joint, maintaining even pressure. Aim for a consistent bead size. It’s often easier to pull the gun towards you than to push it away. Release the trigger when you reach the end of the joint.
- This is where you smooth the bead for a good seal and a finished look. Immediately after applying the bead, dip your fingertip (wear a glove!) or a specialized tooling tool into a cup of water (for latex caulk) or a damp cloth. Gently run your finger or tool along the bead, pushing the sealant slightly into the gap and smoothing the surface. If using tape, do this before removing the tape.
- Carefully pull the painter’s tape away at an angle while the sealant is still wet. This will leave a very clean line.
- Wipe away any excess sealant with a damp cloth. For dried sealant, you may need a solvent, depending on the type of sealant used.
- Let the sealant cure completely before exposing it to water or paint. Check the product packaging for specific drying and curing times.
Common Sealant Mistakes to Avoid

Even with careful application, beginners can make a few common errors. Being aware of these can help you avoid them:
- Using the Wrong Type of Sealant: Applying an interior-only caulk outside, or using a non-paintable silicone where a painted finish is desired. Always match the sealant to the job.
- Not Preparing the Surface Properly: Applying sealant over dirt, dust, or moisture will result in poor adhesion and premature failure.
- Cutting the Nozzle Too Large: This dispenses too much sealant, leading to a messy bead that’s hard to control and tool.
- Applying Too Much Sealant: Over
