
Do you hear a drip, drip, drip coming from your bathroom sink? It’s annoying, right? A leaking bathroom sink isn’t just a bother; it can waste water and mess up your home. What if I told you that fixing it might be easier than you think? With just a few simple steps, you can stop that leak and save money on water bills.
Many people face this problem at some point. You might feel nervous about tackling it yourself. But don’t worry! You can fix that leak with basic tools and a bit of patience. Imagine how satisfying it will be to turn off the tap without the annoying drip echoing back at you. Curious how to start?
In this article, we will walk you through quick and easy ways to fix your leaking bathroom sink. Let’s get started and turn that leak into a success story!
How To Fix A Leaking Bathroom Sink: Easy Steps To Follow
When Dealing With A Leaking Bathroom Sink, It Can Be Both Frustrating And Damaging. A Small Leak Can Lead To Bigger Problems Such As Water Damage Or Mold Growth. Thankfully, Fixing A Leaking Bathroom Sink Is A Task That Many Homeowners Can Tackle On Their Own With The Right Tools And A Bit Of Know-How. Here’S A Step-By-Step Guide To Help You Resolve The Issue Efficiently. Identify The Source Of The Leak The First Step In Fixing A Leaking Bathroom Sink Is To Identify Exactly Where The Leak Is Coming From. Common Sources Include: 1. **Sink Drain**: Check The Area Where The Sink Drain Meets The Basin. 2. **Faucet**: Inspect The Faucet For Leaks Around The Handle Or Spout. 3. **Water Supply Lines**: Look For Leaks At The Connection Points Of The Water Supply Lines. Gather Your Tools And Materials Before You Start The Repair, Gather The Necessary Tools And Materials, Including: – Adjustable Wrench – Plumber’S Tape – Silicone Sealant – Replacement Washers Or O-Rings – Bucket Or Towels To Catch Any Residual Water Turn Off The Water Supply Before You Begin Fixing The Leak, Ensure That You Turn Off The Water Supply To Avoid Any Flooding. This Is Typically Done By Turning The Valves Under The Sink Clockwise. Fixing The Drain Leak If You’Ve Determined That The Leak Is Coming From The Sink Drain: 1. **Remove The Drain Assembly**: Using Your Wrench, Loosen The Nut That Holds The Drain In Place. 2. **Inspect And Replace Washers**: Look For Worn-Out Washers Or O-Rings. Replace Them With New Ones To Create A Tight Seal. 3. **Reassemble**: Apply Plumber’S Tape To The Threads And Reassemble The Drain, Making Sure It’S Securely Tightened. Repairing The Faucet Leak If The Leak Is From The Faucet: 1. **Disassemble The Faucet**: Remove The Handle And Lift Out The Cartridge. 2. **Check O-Rings And Washers**: Inspect These Components For Wear And Replace Them If Necessary. 3. **Reassemble The Faucet**: Reassemble Everything Back Carefully To Ensure There Are No Loose Parts. Fixing Supply Line Leaks For Leaks In The Supply Lines: 1. **Tighten The Connections**: Use Your Adjustable Wrench To Tighten Any Loose Connections. 2. **Replace Supply Lines If Necessary**: If The Line Itself Is Damaged, You Will Need To Replace It Entirely. Disconnect The Old Line And Install A New One Using Plumber’S Tape For A Watertight Seal. Test Your Repairs Once You’Ve Made Your Fixes, Turn The Water Supply Back On Slowly. Check For Leaks By Running The Faucet And Observing All Areas You’Ve Worked On. If Everything Appears To Be Dry, Congratulations! Conclusion Fixing A Leaking Bathroom Sink May Seem Daunting, But With These Easy Steps, You Can Tackle It Yourself And Save On Plumbing Costs. Regular Maintenance Checks Can Help Prevent Future Leaks, Ensuring That Your Bathroom Remains In Good Condition. Always Remember, If You Are Uncomfortable With Any Steps, It May Be Best To Consult With A Professional Plumber.
Fixing a Leaking Bathroom Sink
Dealing with a leaking bathroom sink can be frustrating. Discover how to easily identify the cause of the leak. Common culprits include worn washers or loose connections. By tightening joints or replacing parts, you can often stop the drip. Did you know a single drip can waste over 3,000 gallons of water a year? Fixing it not only saves water but also money on bills. Keeping your sink in good shape is easier than you think!
Understanding the Causes of a Leaking Bathroom Sink
Common reasons for leaks: wornout washers, loose connections, and corroded pipes. Importance of identifying the source of the leak for effective repair. Why is your bathroom sink leaking? It could be a sneaky washer that’s all worn out or some connections that got too loose. Even corroded pipes can cause trouble! Finding out where the leak is coming from is key. If you don’t know the source, fixing it is like trying to find the last fry at the bottom of a big bag. Not easy! Check out these causes:

| Cause | Description |
|---|---|
| Worn-out Washers | These little guys can wear down over time and start to leak. |
| Loose Connections | Sometimes things just need a good tighten-up to stop that drip. |
| Corroded Pipes | Pipes can rust and develop holes, leading to leaks. |
Understanding these reasons helps you fix the problem and keep your sink dry. Remember: a dry sink is a happy sink!
Tools and Materials Needed for the Repair
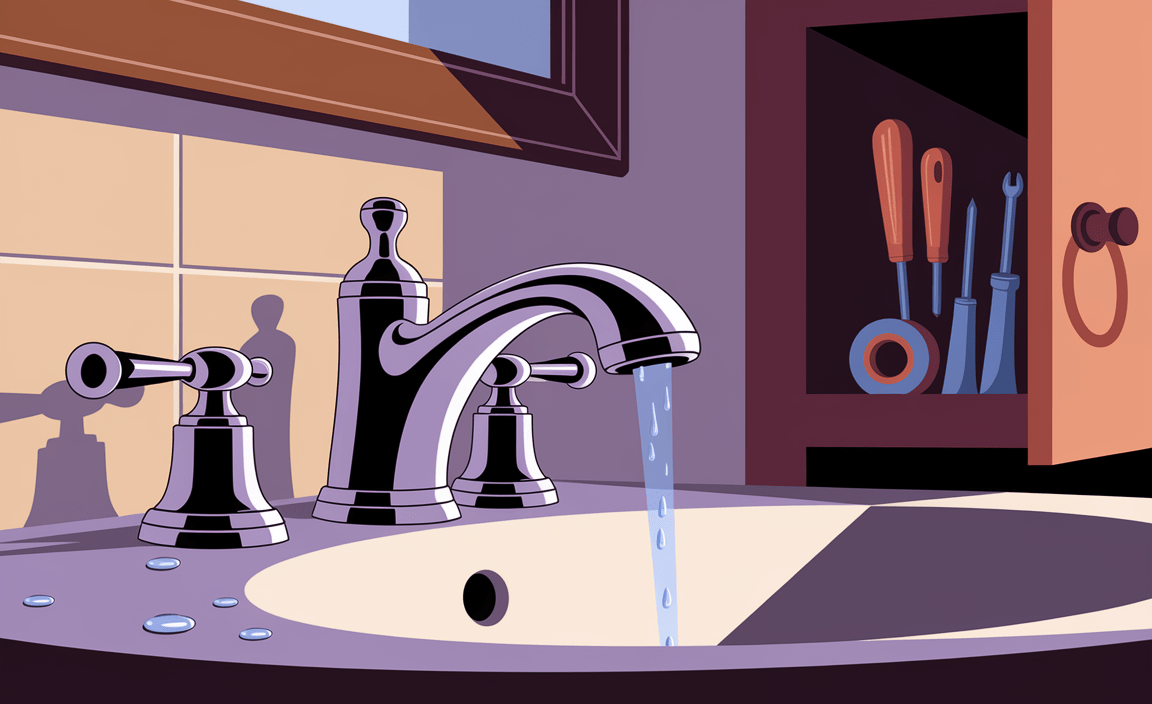
List of essential tools: adjustable wrench, screwdrivers, bucket, plumber’s tape. Recommended materials: new washers, seals, or gaskets depending on the issue. Repairing a leaking bathroom sink is easier with the right tools and materials. Here’s what you’ll need:
- Adjustable Wrench: Helps loosen or tighten plumbing parts.
- Screwdrivers: Needed for removing screws.
- Bucket: Catches any water during repairs.
- Plumber’s Tape: Seals connections to stop leaks.
You’ll also need some replacement parts:
- New Washers: Fits inside taps to stop leaks.
- Seals: Used to prevent gaps.
- Gaskets: Helps join two flat surfaces together.
Step-by-Step Guide to Fixing a Leaking Bathroom Sink

Detailed instructions for shutting off the water supply. Procedures for securing or replacing components, such as Ptraps and faucets. First, you need to shut off the water supply. Look for the valve under the sink and turn it clockwise until it stops.
Then, place a bucket under the sink to catch any water. Next, check the parts like the P-trap and faucet. If the P-trap is loose, tighten it. If any parts are damaged, you’ll need to replace them. Use a wrench for pipes and follow the instructions that come with your new parts.
How do I shut off the water supply to my sink?
To shut off the water supply, find the valve under the sink and turn it clockwise. This stops the water flow while you fix the leak.
Steps to Secure or Replace Parts:
- Unscrew the P-trap if it’s loose.
- Tighten any loose nuts with a wrench.
- Replace broken parts carefully, following the new part’s instructions.
Common Mistakes to Avoid When Fixing a Sink Leak
Pitfalls like neglecting to check for additional leaks postrepair. Importance of not overtightening connections to prevent damage. Fixing a bathroom sink leak can be tricky. One mistake is forgetting to check for more leaks after your repairs. Imagine fixing one issue, only to discover another surprise leak later—it’s like finding an extra sock in the laundry. Also, be careful not to overtighten connections. It’s like trying to squeeze toothpaste from the bottom of the tube—too much pressure can cause damage. Keep your tools handy and your humor ready!
| Mistake | Why Avoid It? |
|---|---|
| Neglecting to check for additional leaks | Can lead to more costly repairs. |
| Overtightening connections | Might damage parts and create new leaks. |
When to Call a Professional Plumber
Signs that indicate a need for professional assistance, such as persistent leaks and major plumbing issues. Benefits of hiring an expert for complex repairs. Some bathroom sink problems need a skilled plumber. Look for these signs:
- Water pooling under the sink.
- Constant dripping even after tightening the faucet.
- Strange noises from pipes.
- Water damage on walls or cabinets.
Calling a pro can save you time and stress. Experts know how to handle complex repairs. They ensure everything is fixed the right way. This helps avoid future issues and saves money in the long run.
When should you hire a plumber?
If simple fixes don’t work, hire a plumber. They can help with big problems like broken pipes. Hiring a pro helps prevent damage and keeps your home safe.
Maintaining Your Bathroom Sink to Prevent Future Leaks
Tips for regular maintenance checks and cleaning. Recommendations for periodic replacement of seals and washers to preserve sink integrity. Regular maintenance keeps your bathroom sink happy! Make sure to check it often. Look for drips or stains. Clean it regularly with soap to keep dirt away. If you notice problems, fix them right away.
Replace seals and washers every couple of years. This helps prevent leaks. Always use good quality parts. It saves time and money in the long run. Here are some quick tips:

- Check for leaks once a month.
- Clean around pipes weekly.
- Change seals every 2-3 years.
Taking these steps will keep your sink strong. A little care makes a big difference!
How can I maintain my bathroom sink to prevent leaks?
Check regularly for leaks and clean often. Replace seals and washers at least every two years to ensure everything stays intact and leak-free.
Conclusion
In conclusion, fixing a leaking bathroom sink is easy with a few simple steps. You can locate the leak, replace worn parts, and tighten fittings. Remember to turn off the water first! If you need help, consider asking an adult or checking online resources. Let’s keep our sinks working well and save water together!
FAQs
What Are The Common Causes Of A Leaking Bathroom Sink?
Common causes of a leaking bathroom sink include loose connections, worn-out seals, and cracks. If the pipes are not tight, water can escape. Old rubber washers can break and cause leaks, too. Sometimes, the sink itself might have a crack. We should check these things to fix the leak.
How Can I Identify Where The Leak Is Originating From In My Bathroom Sink?
To find the leak in your bathroom sink, first, dry the area around the sink with a towel. Then, turn on the faucet and watch closely for water. Check the pipes under the sink for any drips or wet spots. Also, look at the sink itself for cracks or broken seals where water might escape. If you notice any wet places, that’s where the leak is coming from!
What Tools And Materials Do I Need To Fix A Leaking Bathroom Sink?
To fix a leaking bathroom sink, you need some basic tools. Grab a wrench to loosen the pipes and a screwdriver for screws. You might also want plumber’s tape to seal the pipes. Keep a towel handy to clean up any water. If needed, you can get a new washer or seal to stop the leak.
When Should I Consider Calling A Plumber Instead Of Attempting A Diy Fix For A Leaking Sink?
You should call a plumber if the leak is very bad and you can’t stop it. If you see lots of water or if it keeps getting worse, it’s time for help. Also, if you tried fixing it and it didn’t work, call a plumber. They have special tools and know how to fix tricky problems.
How Can I Prevent Future Leaks In My Bathroom Sink After Making Repairs?
To stop leaks in your bathroom sink, make sure all parts are tight and secure. You can check the connections often and look for signs of water. Use plumber’s tape on threaded pipes to create a better seal. Remember to replace old or worn-out parts quickly. Keeping everything clean and dry will help, too!
Resource:
-
Water-saving tips for your home: https://www.epa.gov/watersense/start-saving
-
Beginner’s guide to using a wrench: https://www.popularmechanics.com/home/tools/how-to/a150/how-to-use-a-wrench/
-
Signs of hidden plumbing leaks: https://www.angi.com/articles/how-detect-plumbing-leak.htm
-
Guide to common plumbing tools: https://www.familyhandyman.com/project/plumbing-tools-every-homeowner-should-have/
