
Installing caulk is a straightforward DIY task that seals gaps, prevents leaks, and gives your home a polished look. This guide breaks down the process into simple steps, making it easy for anyone to achieve professional-looking results and boost their home’s comfort and efficiency.
If you’ve ever noticed drafts around windows, water stains under sinks, or peeling paint along trim, poor caulking might be the culprit. Don’t worry! This guide is designed specifically for beginners, walking you through every step with clear instructions and helpful tips. We’ll cover everything from choosing the right caulk to achieving smooth, seamless finishes. Get ready to tackle this common home maintenance task with confidence!
Why Caulking Matters for Your Home

Caulking is a flexible, sealant material used to fill cracks and gaps in your home’s surfaces. It’s a small detail that makes a big difference in many ways. Properly installed caulk acts as a barrier, keeping unwanted elements out and helpful elements in.
Think of it as a tiny guardian for your home. It stops air leaks, which can make your heating and cooling systems work harder, costing you more on energy bills. It also keeps moisture out, preventing mold, mildew, and water damage in areas like bathrooms and kitchens. Plus, a neat caulk line makes everything look tidier and more finished.
Common Areas Where Caulking is Essential
- Around bathtubs, showers, and sinks to prevent water from seeping behind tiles.
- Where walls meet ceilings and floors (baseboards and crown molding) to seal against drafts.
- Around window frames and door frames to stop air leaks and water intrusion.
- Where countertops meet backsplashes.
- Outdoor uses like sealing around outdoor pipes, vents, and where siding meets trim.
Choosing the Right Caulk: A Beginner’s Guide
Walking down the caulk aisle can be confusing! There are many types, each suited for different jobs. For beginners, understanding the basics will help you pick the right product without getting overwhelmed.
The most common types you’ll encounter are water-based (latex/acrylic) and silicone. Each has its own strengths and weaknesses.
Water-Based Caulks (Latex/Acrylic)
These are your go-to for most interior jobs. They are easy to work with, clean up with water, and come in a wide variety of colors, including paintable options.
- Pros: Easy to apply, easy cleanup with water, paintable, less odor.
- Cons: Less flexible than silicone, not ideal for areas with constant moisture or extreme temperature changes.
- Best For: Interior trim, baseboards, windows, doors, walls. Look for “paintable” if you plan to paint over it.
Silicone Caulks
Silicone caulk is highly flexible, waterproof, and resistant to mold and mildew. This makes it perfect for bathrooms and kitchens.
- Pros: Excellent flexibility, waterproof, durable, mold and mildew resistant.
- Cons: Can be harder to clean up (requires mineral spirits or denatured alcohol), cannot be painted over, can have a stronger odor.
- Best For: Bathrooms (around tubs, showers, sinks), kitchens, areas prone to moisture.
Important Note: Always check the caulk label! It will tell you what the caulk is best used for, whether it’s paintable, and cleanup instructions.
| Caulk Type | Best Use | Cleanup | Paintable? | Flexibility |
|---|---|---|---|---|
| Latex/Acrylic (Water-Based) | Interior trim, windows, doors, walls | Water | Yes | Good |
| Silicone | Bathrooms, kitchens, high moisture areas | Mineral spirits/Alcohol | No | Excellent |
For general-purpose home repairs and a smooth learning curve, a good quality paintable latex or acrylic caulk is often the best choice for beginners. If your primary need is waterproofing in a bathroom, opt for silicone.
Tools and Materials You’ll Need

Having the right tools makes any DIY project smoother and more successful. For caulking, you don’t need a lot, and most items are readily available at your local hardware store.
Essential Tools:
- Caulk Gun: This is the applicator. There are basic models and those with features like a drip-stop or cutter. For beginners, a basic, sturdy model is perfectly fine.
- Utility Knife or Caulk Removal Tool: To cut away old caulk.
- Putty Knife or Scraper: For removing stubborn old caulk.
- Cleaning Rags or Paper Towels: For wiping up excess caulk and cleaning tools.
- Rubbing Alcohol or Mineral Spirits: For cleaning up silicone caulk or for final smoothing if recommended.
- Bucket of Water (Optional, for latex caulk): For cleaning up when using water-based caulk.
- Painter’s Tape: Very helpful for creating crisp, straight lines, especially for beginners.
- Caulk Finishing Tool (or a damp finger!): To smooth the bead of caulk.
Materials:
- Caulk: Choose the right type based on your project (as discussed above).
- Gloves (Optional): For keeping your hands clean.
Step-by-Step Installation of Caulking
Let’s get started! Follow these steps to install caulk like a pro, even if it’s your first time.
Step 1: Prepare the Area and Remove Old Caulk
This is a crucial step for a good finish. If there’s old caulk, it needs to go. Old, cracked, or moldy caulk won’t allow new caulk to adhere properly and will ruin the final look.
- Clean the Surface: Wipe down the area where you’ll be caulking to remove dust, grease, or debris.
- Cut Away Old Caulk: Use your utility knife or caulk removal tool to carefully cut along the edges of the old caulk. Then, use a putty knife or scraper to peel or pry away the old material. For stubborn bits, a gentle sawing motion with the utility knife can help.
- Deep Cleaning: If there’s mold or mildew, use a mold and mildew cleaner. For general residue, a damp cloth is usually enough. For silicone caulk, you might need mineral spirits or denatured alcohol and a rag. You want a clean, dry surface for the new caulk.
You can find more detailed information on removing old caulk from reputable sources like This Old House.
Step 2: Prepare the Caulk Tube and Gun
Getting the caulk tube ready is simple but important. This is where the caulk gun comes into play.
- Cut the Tip: Using your utility knife, carefully cut the tip of the caulk tube at a 45-degree angle. Start with a small opening; you can always make it bigger if you need a wider bead of caulk. A smaller opening gives you more control.
- Puncture the Seal: Most caulk tubes have an inner seal. Your caulk gun likely has a long metal rod (often called a “stabber”) that you can use to puncture this seal. If not, use a thin piece of wire or a coat hanger.
- Load the Caulk Gun: Pull back the plunger on the caulk gun. Insert the caulk tube, cut tip first. Push the plunger rod back into the gun until it meets the end of the tube.
- Release Pressure: Most caulk guns have a small lever or tab. Press this to release pressure on the plunger when you’re not actively squeezing the trigger. This prevents caulk from continuing to ooze out.
Step 3: Apply Painter’s Tape (Optional but Recommended for Beginners)
Painter’s tape is your secret weapon for creating perfectly straight caulk lines, especially around trim, windows, and showers. It acts like a stencil.
- Apply Tape: Carefully place strips of painter’s tape along the edges of the gap you want to fill. Ensure the tape is parallel and creates a clean edge for your un-caulked area. The width of your tape lines will define the width of your caulk bead.
- Press Down Firmly: Make sure the tape is fully adhered to the surface to prevent caulk from seeping underneath.
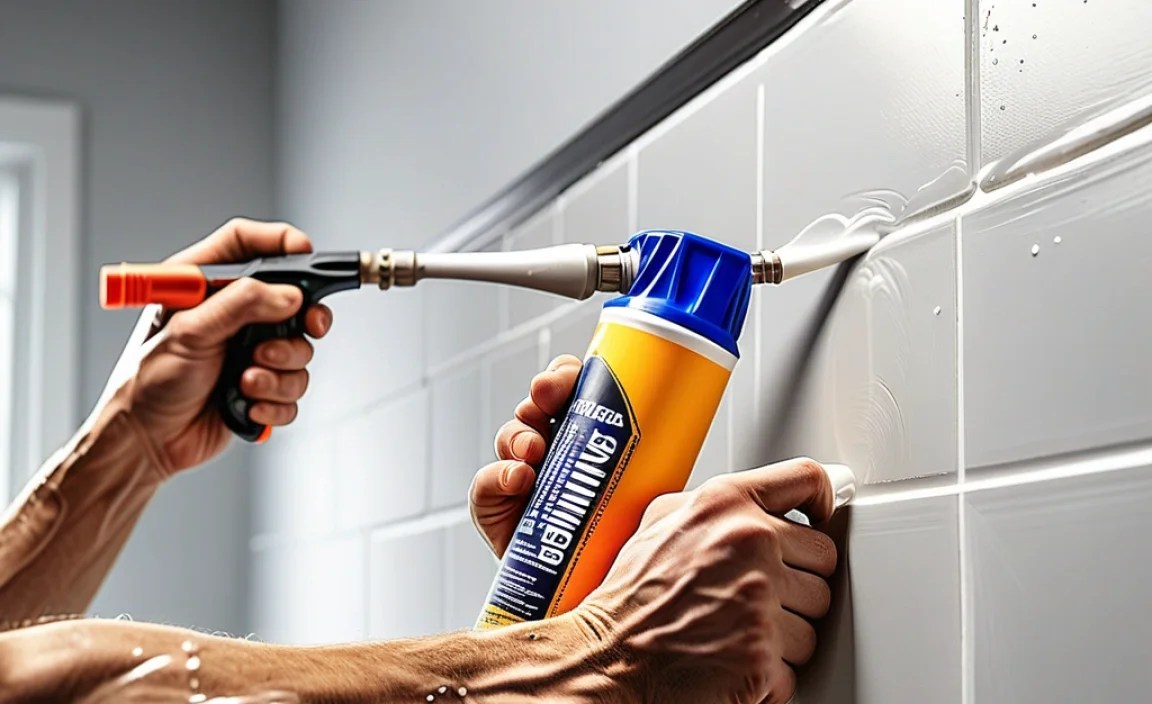
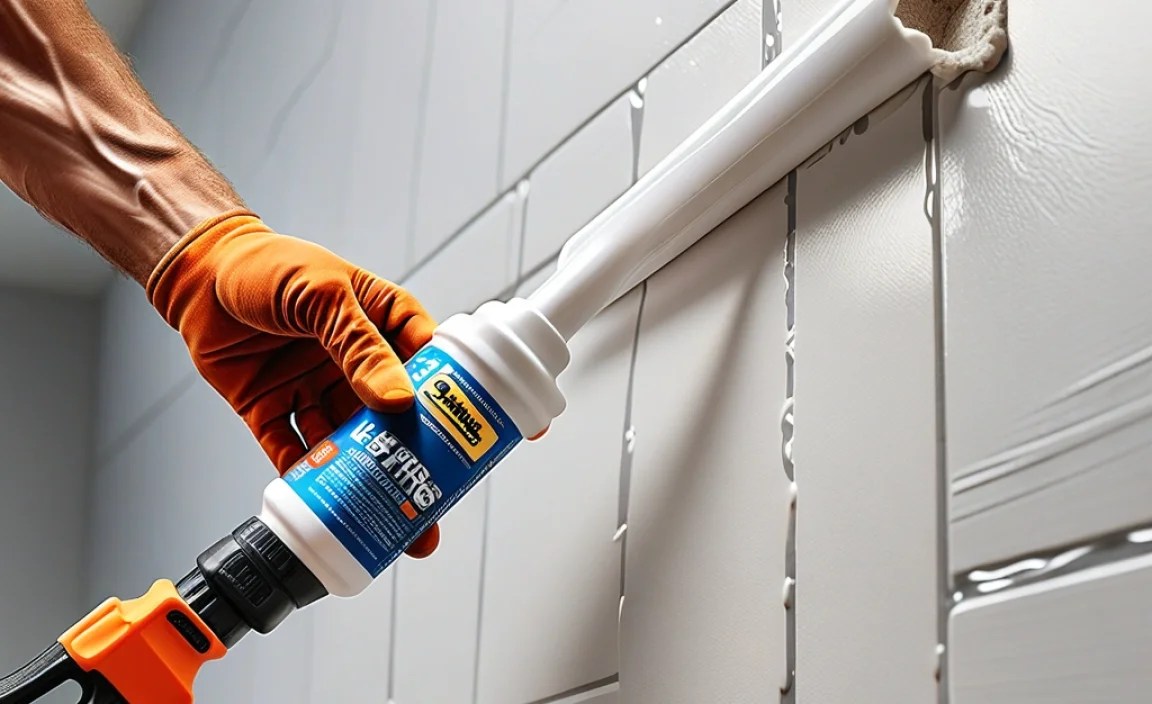
Step 4: Apply the Caulk
This is the main event! Take your time, and don’t worry if it’s not perfect the first time – that’s what the smoothing step is for.
- Squeeze the Trigger: Place the tip of the caulk tube at a 45-degree angle into the gap. Apply steady, even pressure to the caulk gun’s trigger.
- Move Steadily: Move the caulk gun smoothly and consistently along the gap. Aim for a continuous bead of caulk. Try to fill the gap without leaving excess on the surface. Work in manageable sections, especially if you’re new to this.
- Release Trigger to Stop: When you reach the end of a section or need to stop, release the pressure on the trigger. Remember to engage the pressure release on the gun immediately to stop the flow.
- Backtrack and Fill: Sometimes, you might miss a spot or not fill the gap completely. You can go back over it, applying more caulk. It’s better to have a little too much than too little.
Step 5: Smooth the Caulk Bead
This step transforms a messy line of caulk into a clean, professional-looking seam.
- Remove Painter’s Tape (If Used): IMPORTANT: If you used painter’s tape, remove it while the caulk is still wet. Pull the tape away slowly and at a 45-degree angle away from the caulk bead. This prevents the caulk from pulling up with the tape.
- Smoothing Tool or Finger:
- Caulk Tool: These plastic tools have different-sized curves. Place the chosen curve against the bead and pull it along the caulk line.
- Damp Finger: If using latex/acrylic caulk, slightly dampen your finger with water (or a water/soap mix) and gently run it along the caulk bead to smooth it. For silicone caulk, dampen your finger with rubbing alcohol or mineral spirits, or use a plastic caulk tool.
- Wipe Excess: As you smooth, caulk will build up on your tool or finger. Wipe it off frequently onto a damp rag or paper towel. If you’re using a tool, it’s helpful to have a bucket of water or a designated spot to wipe it clean.
- Be Gentle: The goal is to slightly press the caulk into the gap and create a smooth, concave surface, not to remove all the caulk.
Don’t overwork the caulk. A single, smooth pass is usually best. If you make a mistake, wipe it off immediately with a damp rag (for latex) or alcohol/spirits (for silicone) and reapply.
Step 6: Clean Up
Good cleanup makes a big difference and maintains your tools.
- Wipe Down: Wipe away any stray caulk marks from the surrounding surfaces with a damp rag (for latex caulk) or a rag with mineral spirits or rubbing alcohol (for silicone caulk).
- Clean Tools: Clean your caulk gun nozzle, smoothing tool, and any other tools you used. For caulk gun nozzles, you can often use a damp paper towel while the caulk is still soft.
- Allow to Cure: Let the caulk cure according to the manufacturer’s instructions. This usually takes a few hours to 24 hours. Avoid disturbing the area during this time. Refer to the caulk packaging for specific cure times. For example, the Loctite PL 500 product page often has cure time information in the Q&A or specifications.
Tips for a Professional Finish
Even with the best instructions, a little extra know-how can elevate your caulking job from good to great.
- Practice Makes Perfect: If you’re nervous, grab a scrap piece of wood or cardboard and practice applying and smoothing caulk first. This helps you get a feel for the caulk gun pressure and movement.
- Work in Small Sections: Don’t try to caulk an entire wall or a long countertop run at once. Breaking it down into smaller, manageable sections (e.g., one side of a window, a foot or two of a seam) prevents the caulk from drying out before you can smooth it.
- Maintain Caulk Gun Angle: Keeping the 45-degree angle consistent as you apply caulk helps create a uniform bead size.
- Don’t Overfill: It’s tempting to pack the gap full, but too much caulk is harder to smooth and can create a messy blob. Aim to fill the gap cleanly.
- Smooth Immediately: Once you’ve applied a section of caulk, smooth it right away while it’s still wet. Waiting even a few minutes can make smoothing much harder.
- Keep Rags Handy: Have plenty of clean rags or paper towels ready. You’ll use them more than you think for wiping excess caulk from your smoothing tool or fingers.
- For Gaps Larger Than ¼ Inch: If you have a very large gap, caulk might not be the best solution on its own, or you might need to use caulk backing rod (a foam rope) first to fill some of the void before applying caulk. For most typical home gaps, standard caulking is sufficient. For expert advice on larger gaps, consider resources like the BuildingGreen website, which discusses material applications.
Common Caulking Mistakes to Avoid
Even with careful planning, beginners can sometimes run into issues. Here are some common pitfalls and how to sidestep them.
Mistake 1: Not Removing Old Caulk Completely
Why it’s bad: New caulk won’t adhere well to old caulk, leading to peeling and poor sealing. It also looks messy.
How to avoid: Be thorough! Use a caulk removal tool or utility knife and scrape until you’re down to the bare surface. If in doubt, remove a little more.
Mistake 2: Cutting the Caulk Tube Tip Too Large
Why it’s bad: A large opening dispenses too much caulk, making it hard to control, difficult to smooth, and wasting product.
How to avoid: Start small! Cut a 45-degree angle with a very small opening. You can always cut it larger if needed. A smaller bead is easier to manage and looks neater.
Mistake 3: Not Releasing the Caulk Gun Pressure
Why it’s bad: Caulk continues to ooze out after you release the trigger, creating blobs and messes.
How to avoid: Get in the habit of pressing the release lever on your caulk gun every time you stop squeezing the trigger. It takes practice but saves a lot of cleanup.
Mistake 4: Waiting Too Long to Smooth
Why it’s bad: Once caulk starts to skin over, it’s very difficult to smooth properly, often resulting in a rough, uneven finish. It can also pull away from the tape.
How to avoid: Smooth within a few minutes of application. Work in small sections so you can apply and smooth before the caulk dries.
Mistake 5: Using the Wrong Type of Caulk
Why it’s bad: Using a non-waterproof caulk in a shower will lead to mold and failure. Using a non-paintable caulk where you want to paint will cause peeling.
How to
