
Maintaining tiles easily is achievable with a simple routine using common household items. Regular dusting, spot cleaning spills immediately, and a gentle weekly wash with a mild cleaner will keep your tiles looking new, prevent buildup, and protect grout. This effortless method saves time and effort while ensuring a beautiful, long-lasting finish.
Tired of your beautiful tiles losing their sparkle? Mopping up spills only to see a dull film remain can be frustrating. You might think keeping tiles pristine is a time-consuming chore, but it doesn’t have to be! With a few simple techniques and regular care, maintaining your tiles effortlessly is not just possible, it’s easy. We’ll show you a proven method that works for most tile types, from your kitchen backsplash to your bathroom floor. Get ready to spend less time scrubbing and more time enjoying your gleaming surfaces.
Why Tile Maintenance Matters More Than You Think
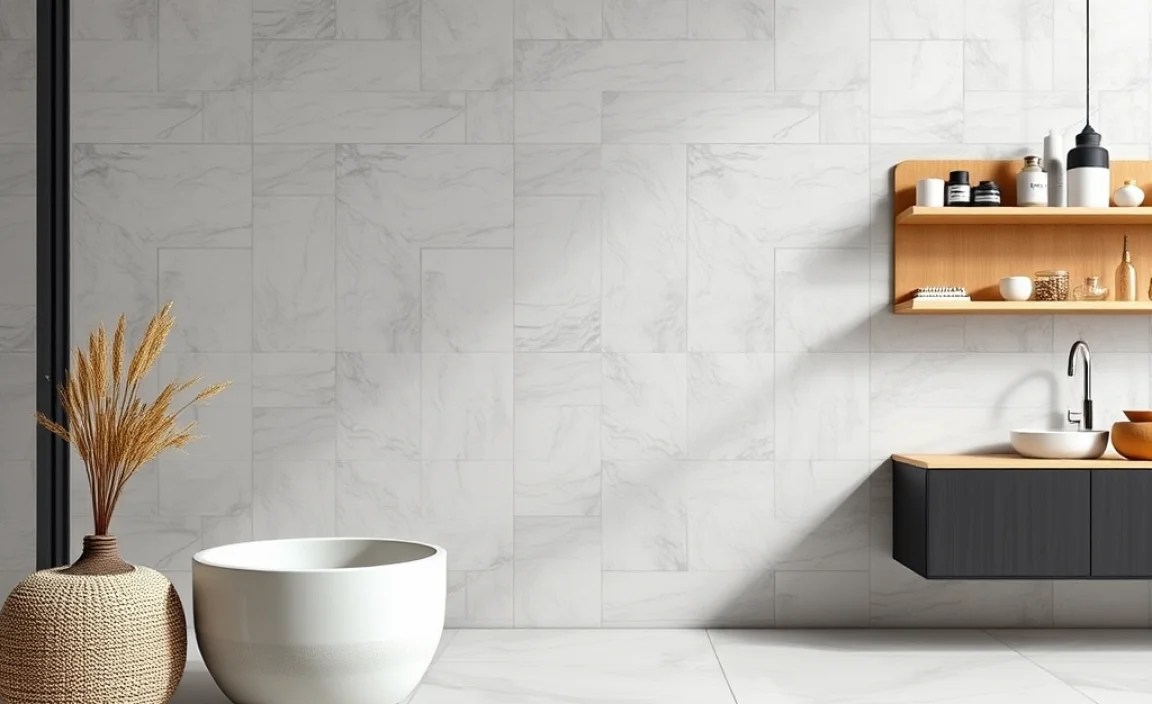
Tiles are a fantastic choice for many areas of your home. They’re durable, water-resistant, and come in countless styles to match any decor. However, without a little attention, they can quickly lose their charm. Dirt, grime, soap scum, and everyday spills can build up, making them look dull and dirty. This isn’t just about appearance; unchecked buildup can actually damage the tile and grout over time, leading to discoloration or even weakening the seal. Regular, easy maintenance is the key to preventing these issues and keeping your tiles looking their best for years. It’s about protecting your investment and ensuring your home consistently looks and feels clean and inviting.
The Effortless Tile Maintenance Method: Your Step-by-Step Guide

This method focuses on consistency and using the right tools and cleaners. It’s designed to be straightforward, even if you’ve never tackled tile cleaning before. Remember, the goal is to prevent tough grime from forming in the first place, which makes cleaning much easier in the long run.
Step 1: The Daily Tidy-Up – Quick Wipes & Dry Sweeps
This is your first line of defense. Think of it as preemptive cleaning. It takes mere minutes but makes a huge difference.
- For Hard Floors: After cooking or heavy foot traffic, a quick sweep or a pass with a dry microfiber dust mop is ideal. This picks up crumbs, pet hair, and loose dust before they get ground into the grout or stick with a spill.
- For Walls & Backsplashes: If you’ve been cooking, a quick wipe-down of the backsplash with a damp cloth can remove splatters before they harden. Pay attention to areas around the stove and sink.
- Kitchen/Bathroom Sinks: Wipe down the sink area after use. This prevents water spots and residue from dried toothpaste or soap.
A good quality microfiber dust mop or broom is your best friend here. Microfiber traps dust effectively, unlike traditional brooms that can scatter it. For walls and backsplashes, a soft, clean cloth is all you need.
Step 2: Tackle Spills Immediately – The Wipe-It-Now Rule
This step is crucial and incredibly simple: if something spills, wipe it up right away. This is especially important in kitchens where food and drinks can stain, and in bathrooms where soaps and lotions can leave residue.
- Liquids: Blot up any liquid spills with a clean cloth or paper towel. Don’t just wipe, as this can spread the spill.
- Sticky Foods: For substances like jam, honey, or sticky sauces, use a damp cloth after blotting to lift any remaining residue.
- Grease: Kitchen grease can be sneaky. A slightly soapy cloth is best for cutting through grease immediately after a spill.
Why is this so effective? Many common household substances are acidic or sugary. If left to sit, they can etch into grout or even dull certain types of tile glaze. Prompt attention prevents this damage and makes future deeper cleaning far less of a chore.
Step 3: The Weekly Refresh – Gentle Washing
Once a week, or as needed for high-traffic areas, give your tiles a gentle, thorough wash. This removes the light film of dirt and grime that daily tidying might miss.
What You’ll Need:
- Two buckets
- Warm water
- A mild, pH-neutral cleaner (see recommendations below)
- A soft-bristle brush or an old toothbrush for grout
- A clean mop (sponge mop, microfiber mop, or string mop)
- A clean, dry cloth or microfiber towel
Recommended Mild Cleaners for Tiles:
When choosing a cleaner, always opt for something mild. Harsh chemicals can damage grout and even the tile glaze itself. Here are some great options:
- pH-Neutral Floor Cleaner: Many brands offer specific pH-neutral cleaners designed for tile and stone. These are excellent as they won’t etch or dull the surface. You can find these at most home improvement stores or supermarkets.
- Dawn Dish Soap: A small squirt (really, just a teaspoon or two) in a bucket of warm water is surprisingly effective at cutting through everyday grime without being too harsh. It’s great for kitchen tiles, especially.
- Vinegar (Diluted): For a more natural approach, a solution of 1 part white vinegar to 10 parts warm water can be used. Caution: While effective, vinegar is acidic. Do not use it on natural stone tiles like marble or granite, as it can etch them. It’s generally safe for ceramic and porcelain tiles, but always rinse thoroughly. For a comprehensive guide on cleaning different tile types, check out resources from reputable sources like The Ceramic Tile and Stone Consultative Committee.
- Baking Soda Paste: For stubborn grout or small stained areas, a paste of baking soda and water is a gentle abrasive that works wonders.
Weekly Washing Steps:
- Prepare your buckets: Fill one bucket with warm water and add your chosen mild cleaner according to label instructions. Fill the second bucket with plain, clean, warm water for rinsing.
- Mop in sections: Dip your mop into the cleaning solution, wring it out well so it’s damp, not soaking wet. Mop your tiles in small sections, working from the farthest corner of the room towards the exit. This prevents you from walking on wet, just-cleaned tiles.
- Address grout lines: As you mop, pay attention to the grout lines. If you see any discoloration, use a soft-bristle brush or an old toothbrush dipped in your cleaning solution to gently scrub the grout. For tougher spots, the baking soda paste mentioned earlier can be applied directly, allowed to sit for a few minutes, then scrubbed.
- Rinse thoroughly: After cleaning a section, immediately rinse it by dipping your clean mop into the second bucket of plain water, wringing it out well, and going over the cleaned area again. This is crucial to remove any cleaning solution residue, which can attract dirt and leave a dull film.
- Change water as needed: If your cleaning water becomes visibly dirty, empty the bucket and refill it with fresh water and cleaner. Likewise, if your rinse water gets murky, change it out. Dirty water just spreads grime.
- Dry the tiles: For a streak-free shine, especially on glossy tiles or in areas prone to water spots like bathrooms, use a clean, dry cloth or a dedicated microfiber drying towel to buff the tiles dry. You can also let them air dry, but drying ensures a perfect finish.
Step 4: Dealing with Tougher Stains & Grime
Even with consistent effort, tough stains can happen. Here’s how to address them without resorting to harsh chemicals.
- Soap Scum (Bathrooms): For shower tiles and tub surrounds, soap scum is a common enemy. A paste of baking soda applied to the scum, left for 15-20 minutes, then scrubbed gently with a non-abrasive sponge or cloth, can work wonders. For persistent scum, a dedicated bathroom tile cleaner that is safe for your tile type can be used sparingly. Always follow product instructions and ensure good ventilation.
- Oil or Grease Stains: For fresh oil stains on porous tiles or grout, sprinkle the area generously with cornstarch or baking soda immediately. Let it sit for a few hours or overnight to absorb the oil, then sweep or vacuum it up. For older stains, you might need to repeat this process or use a specialized degreaser designed for tiles.
- Hard Water Stains: These often appear on shower doors or around faucets. A dilute vinegar solution (as mentioned before, use cautiously on natural stone) can help break down the mineral deposits. Spray it on, let it sit for 5-10 minutes, then scrub gently and rinse. A squeegee can also help prevent these by removing water after showers. A good resource for understanding material compatibility is Architectural Digest’s guide to cleaning grout, which often touches on stain removal.
- Mold or Mildew: Small spots of mold or mildew, often found in grout in humid bathrooms, can be tackled with a dilute bleach solution (1 part bleach to 10 parts water) or a commercial mold and mildew remover safe for grout. Apply with a toothbrush, let it sit for a few minutes, scrub gently, and rinse thoroughly. Wear gloves and ensure good ventilation. For severe mold issues, consult a professional.
Remember to always test any cleaning solution on an inconspicuous area first to ensure it doesn’t damage your tiles or grout.
Tools & Accessories for Effortless Maintenance

Having the right tools makes all the difference in making tile maintenance easy and efficient. You don’t need a lot, just the smart choices.
Essential Tools:
- Microfiber Mops: These are superior to traditional string mops for several reasons. They have a larger surface area, trap dirt more effectively, and are lighter and easier to maneuver. Look for one with a washable head.
- Microfiber Cloths: You’ll want several of these. They are perfect for daily quick wipes, drying buffing, and tackling grout lines. They are lint-free and excellent at trapping dust and grime.
- Soft-Bristle Scrub Brush: A dedicated grout brush or even an old toothbrush is perfect for getting into grout lines without scratching the tile.
- Buckets: Having two buckets is key for the two-bucket washing method – one for cleaning solution, one for rinsing.
- Spray Bottle: Useful for applying diluted cleaning solutions or water for spot cleaning.
- Squeegee: Especially helpful for shower glass and tiles to prevent water spots and soap scum buildup in bathrooms.
Helpful Accessories:
- Grout Pen or Sealant Pen: For older grout that’s stained beyond repair, a grout pen can rejuvenate its appearance. For preventative maintenance and stain resistance, consider resealing your grout periodically. A quality grout sealant can be found at most hardware stores.
- Tile & Grout Cleaner (pH-Neutral): As mentioned, having a good, mild cleaner on hand simplifies your weekly refreshes.
- Absorbent Mats: Placing absorbent mats at entryways and in front of the sink or shower can catch a lot of moisture and dirt before it even reaches your main tile areas.
Choosing the Right Cleaning Products: A Quick Guide
The type of tile you have matters when selecting cleaning products. While the pH-neutral method is generally safe, some materials are more sensitive.
| Tile Type | Recommended Cleaners | Cleaners to Avoid | Special Considerations |
|---|---|---|---|
| Ceramic & Porcelain | pH-neutral cleaners, mild dish soap, diluted vinegar (rinse well), baking soda paste. | Abrasive cleaners (scouring powders), harsh acids (unless specifically for tile and rinsed immediately), ammonia. | Very durable, generally forgiving. |
| Natural Stone (Granite, Marble, Slate) | Specialized natural stone cleaners, pH-neutral cleaners, water. | Vinegar, lemon juice, ammonia, abrasive cleaners, acidic or alkaline cleaners. | Porous and sensitive to acids and harsh chemicals. Always seal regularly. |
| Travertine & Limestone | Specialized natural stone cleaners, water. | Vinegar, lemon juice, acidic cleaners, abrasive scrubbers. | Softer natural stones, prone to etching. |
| Glass Tiles | Glass cleaner, diluted dish soap, water. | Abrasive cleaners, scouring pads, rough brushes. | Can scratch easily, prone to streaks. Dry thoroughly. |
When in doubt, always consult the tile manufacturer’s cleaning and maintenance recommendations. Reputable tile retailers and associations like the Tile Council of North America (TCNA) offer extensive resources on tile care for various materials.
Maintaining Grout: The Key to a Unified Look
Grout is often the unsung hero of tile installations, but it can also be the first place to show wear and tear. Clean grout makes tiles look fresh; dirty grout can make even the most beautiful tiles look dingy.
- Sealing: This is your most important proactive step. New grout should be sealed, and existing grout should be resealed every 6-12 months, depending on traffic and moisture exposure. A good quality grout sealer creates a barrier that repels stains and moisture. Applying it is relatively simple with a small brush or applicator.
- Regular Cleaning: As detailed in the weekly refresh, consistently cleaning grout with a soft brush and mild cleaner prevents dirt from embedding deep within its pores.
- Spot Treatment: For minor discoloration, a baking soda paste or a specialized grout cleaner can be applied directly to the affected area, scrubbed, and then rinsed.
- Repair: If grout becomes cracked or crumbles, it needs to be repaired to prevent water damage behind the tiles. Small repairs can be done DIY with grout repair kits.
Ignoring grout means you’re essentially leaving the back door open for dirt and moisture. A well-maintained grout line dramatically enhances the overall appearance of your tiled surfaces. For further insights into grout upkeep, resources from building material experts like Homebuilding & Renovating offer practical advice.
When to Call in the Professionals
While this effortless method covers most of your tile maintenance needs, there are times when professional help is the best course of action. Don’t hesitate to call a pro if you encounter any of the following:
- Extensive Mold or Mildew: If you see widespread mold that appears to be growing behind tiles or in large areas of grout, it could indicate a deeper moisture issue that requires professional assessment and remediation.
- Cracked or Damaged Tiles: Replacing broken tiles, especially if they are unique or discontinued, is often best left to experienced installers who can ensure a perfect match and seamless repair.
- Deep Grout Re-coloring or Replacement: For severely stained or damaged grout that won’t come clean or is crumbling extensively, professionals can re-color or completely remove and replace the old grout, restoring a like-new look.
- Persistent Stains: If you’ve tried multiple methods for stubborn stains (like oil or rust) with no success, a professional cleaning service may have access to stronger, specialized solutions and equipment.
- Water Intrusion Issues: If you suspect water is getting behind your tiles (e.g., in a shower or around a tub), this is a serious problem that requires professional inspection to diagnose and fix the underlying cause, which could be faulty sealing, grout issues, or damage to the substrate.
Knowing when to handle a task yourself and when to seek expert help is a sign of smart home maintenance. For most daily and weekly upkeep, our proven methods will keep your tiles looking magnificent.
Frequently Asked Questions About Tile Maintenance
Q1: How often should I clean my tiles?
For best results, sweep or dry mop high-traffic tile floors daily. Wipe down kitchen backsplashes and bathroom surfaces after use. Perform a full mopping wash once a week, or more often in very busy areas.
Q2: What’s the best way to clean grout without damaging it?
Use a soft-bristle brush or an old toothbrush with a mild, pH-neutral cleaner like diluted dish soap or a specialized grout cleaner. Avoid abrasive brushes or harsh chemicals that can wear down grout over time. Always rinse thoroughly.
Q3: Can I use regular household cleaners on my tiles?
It’s best to stick to mild, pH-neutral cleaners. Harsh chemicals like bleach (unless heavily diluted for specific issues like mold), ammonia, or abrasive scouring powders can damage certain tile finishes and grout. Always check your tile manufacturer’s recommendations.
