
Grout in construction is a special, cement-like material used to fill gaps and spaces, like those between tiles or in concrete cracks. Its main job is to make things strong, waterproof, and stable, preventing water damage and structural issues. Understanding grout is key for any DIYer or homeowner!
Meaning of Grout in Construction: Your Essential Beginner’s Guide

Ever noticed those lines between your bathroom tiles or the sturdy filler in pre-cast concrete sections and wondered what it is? That’s grout! Often overlooked, grout plays a massive role in the durability and appearance of many construction projects. If you’ve ever felt a bit unsure about what grout does or why it’s important, you’re in the right place. This guide breaks down everything a beginner needs to know about grout, making it super simple to understand. We’ll cover what it is, why we use it, and how it keeps our homes and buildings strong and looking good.
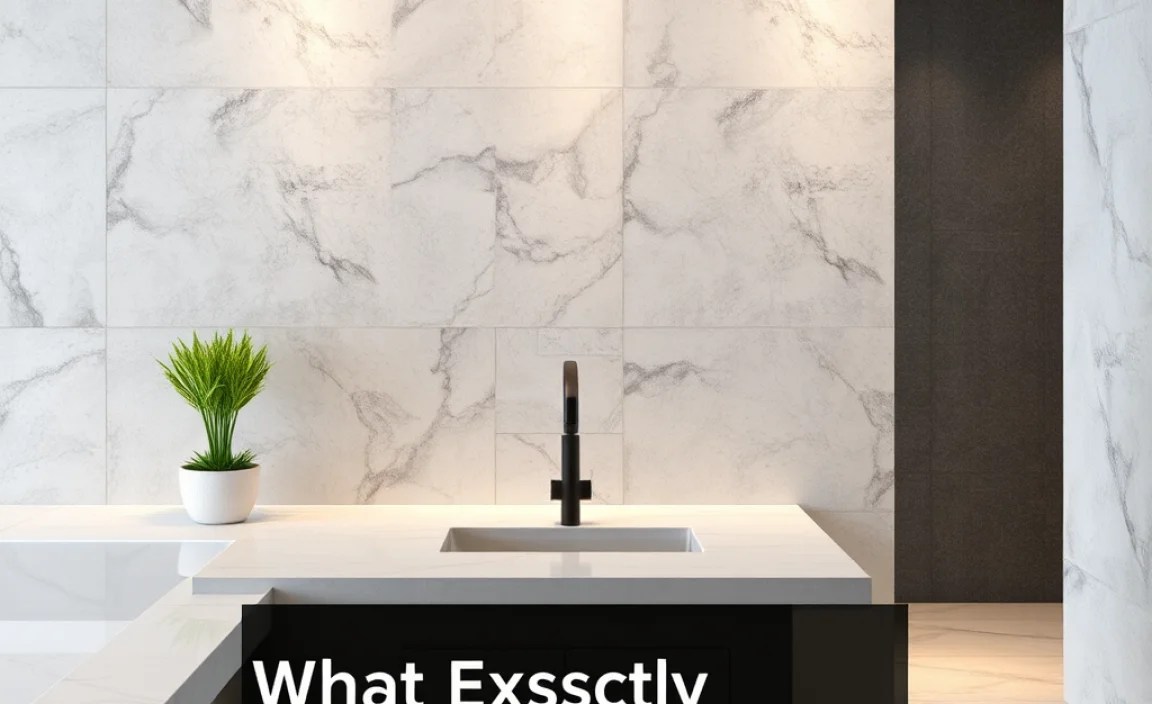
What Exactly is Grout in Construction?
At its core, grout is a fluid or semi-fluid material often made from a mixture of cement, water, and sand. Sometimes, other additives are included to give it specific properties. Think of it as a highly specialized ‘filler’ material. Unlike paint or sealant which might cover a surface, grout goes into gaps and voids, creating a solid, seamless connection. It’s designed to be poured or injected into spaces where it can flow easily-meaning its consistency is much wetter than regular concrete.
This fluidity allows it to fill tight spaces completely, ensuring there are no air bubbles or voids. Once it hardens, grout becomes a rigid mass, providing support, sealing, and aesthetic finishing. It’s a foundational element in many building processes, from tiling your kitchen backsplash to securing structural components in large-scale infrastructure projects.
The Purpose of Grout: Why is it So Important?

Grout isn’t just there to make things look neat; it serves crucial functional purposes in construction. Without it, many structures would fail prematurely or suffer significant damage.
Key Functions of Grout:
Structural Integrity: In many applications, grout reinforces and stabilizes assemblies. For example, when setting pre-cast concrete elements or filling the space around rebar in a concrete wall, grout acts as a binder, transferring load and preventing movement, which is vital for a structure’s overall strength.
Waterproofing and Sealing: Grout creates a barrier against moisture. This is especially critical in areas like bathrooms, kitchens, swimming pools, and basements. By filling the gaps, it prevents water from seeping behind tiles or into structural cracks, which can lead to mold, mildew, rot, and even structural damage.
Load Transfer: In post-tensioned concrete construction, grout fills the duct around the steel tendons. This bond is essential for transferring the tension forces uniformly to the concrete, allowing for lighter and longer spans in bridges and buildings. The Concrete Society provides excellent insights into the critical role of grouting in concrete structures.
Aesthetic Finishing: While function is primary, grout also contributes significantly to the finished look of tiled surfaces. The color and width of grout lines can dramatically change the overall appearance of a tiled area, either blending in or creating a bold contrast.
Crack Repair: In existing structures, cracks can form due to settling, stress, or damage. Grouting can be used to fill these cracks, restoring the structural integrity and preventing further deterioration.
Types of Grout: Not All Grouts Are Created Equal

The world of grout can seem a bit overwhelming at first, as there are several types, each suited for different jobs. The main distinction often comes down to composition and application.
Common Grout Types You’ll Encounter:
1. Cementitious Grout: This is the most common type, especially for tile applications. It’s made primarily from Portland cement, often mixed with sand and polymers.
Sanded Grout: Contains fine sand mixed with cement. The sand particles fill the gaps between larger aggregate in the cement, making it stronger and reducing shrinkage. It’s ideal for grout lines that are 1/8 inch wide or larger, as it prevents cracking.
Unsanded Grout (or Non-Sanded Grout): This type is made from cement and polymers but without sand. It’s finer and smoother. Unsanded grout is best for narrow grout lines (less than 1/8 inch wide) and for delicate materials like glass or metal tiles, as the sand particles could scratch them.
Epoxy Grout: This is a much more durable and stain-resistant option. It’s made from epoxy resins and a hardener. Epoxy grout is non-porous, making it excellent for areas that get heavy use or are prone to stains, like kitchen countertops or high-traffic floors. It’s also waterproof and chemical-resistant but can be more challenging to work with than cementitious grout.
Furan Grout: This is a highly specialized, extremely durable grout made from furan resins. It’s resistant to very harsh chemicals and high temperatures, making it suitable for industrial applications, such as factory floors or laboratories. It’s not typically used in residential settings.
2. Non-Cementitious Grout:
Calcium Aluminate Cement Grout: These grouts develop strength very quickly and are often used in situations where rapid setting is crucial, or in high-sulfate environments where Portland cement might not perform as well.
Gypsum Grout: Less common in typical construction, but sometimes used for specific applications in finished interiors or as a component in other materials.
Grout vs. Mortar: What’s the Difference?
It’s common to confuse grout with mortar, as both are cement-based bonding agents. However, they have distinct roles:
Mortar: Is a coarser mixture, typically containing cement, sand, lime, and water. It’s used as an adhesive to bond masonry units together (like bricks or stones) and to fill the larger joints between them. Mortar is designed to provide structural bonding and is less fluid than grout.
Grout: Is a finer, more fluid mixture used to fill smaller voids and gaps after the main structural or tiling elements are in place. Its primary roles are sealing, strengthening voids, and providing a smooth finish.
Imagine building a brick wall: you use mortar to stick the bricks together. Once the wall is built, if there are any small air pockets or if you’re tiling a surface, you’d use grout to fill those specific spaces.
Where is Grout Used in Construction?
Grout is a versatile material found in a wide array of construction contexts. You might be surprised by how many places it’s working behind the scenes!
Common Applications of Grout:
Tile Installation: This is perhaps the most familiar use. Grout fills the spaces between ceramic, porcelain, natural stone, and glass tiles on floors, walls, backsplashes, and in showers and tubs.
Structural Concrete: In pre-cast concrete construction, grout is used to fill the joints between pre-manufactured elements, ensuring a continuous and strong structure. It’s also used to fill the voids around anchor bolts and reinforcing bars (rebar) in some concrete applications.
Anchoring and Foundation Repair: Grout is injected into drilled holes to anchor bolts, dowels, or other structural elements into existing concrete or rock. It’s also used to stabilize foundations and fill voids beneath machinery.
Post-Tensioned Concrete: As mentioned earlier, grout is absolutely critical in post-tensioned concrete structures, where it fills the ducts surrounding high-strength steel tendons. This bond is vital for the structural integrity of bridges, parking garages, and high-rise buildings. The Federal Highway Administration has extensive resources on concrete technology, including post-tensioning.
Waterproofing and Sealing: In addition to tile jobs, grout is used to seal gaps in concrete structures, tunnel linings, and even around pipes passing through walls to prevent water ingress.
Countertops and Vanity Tops: While often associated with tiles, grout is also used to fill the very fine joints between slabs of stone or solid surface materials when creating countertops.
How to Choose the Right Grout for Your Project
Selecting the correct grout type is crucial for both the longevity and the appearance of your project. Here’s a breakdown to help you make the best choice:
Factors to Consider When Choosing Grout:
Grout Line Width:
1/8 inch or wider: Sanded or polymer-modified sanded grout is usually best.
Less than 1/8 inch: Unsanded or polymer-modified unsanded grout is recommended to avoid scratching delicate tiles.
Location and Exposure:
High-Traffic Areas (floors, walkways): Epoxy grout or a high-performance cementitious grout with polymers will offer superior durability and stain resistance.
Wet Areas (showers, tubs, pools): Look for waterproof and stain-resistant options like epoxy grout or specifically formulated cementitious grouts. Unsanded grout can be porous if not sealed properly.
Kitchens (especially backsplashes and countertops): Stain resistance is key. Epoxy or a good quality polymer-modified cementitious grout is ideal.
Areas with Chemical Exposure (garages, industrial settings): Furan grout or epoxy grout are the most robust choices.
Tile Type:
Delicate materials (glass, metal, polished marble): Use unsanded grout to prevent scratching.
Most common tiles (ceramic, porcelain): Sanded or unsanded can work, depending on joint width.
Textured or uneven tiles: Sanded grout might fill the larger contours better.
Color and Aesthetics: Grout color significantly impacts the final look. White grout makes tiles pop, while grey or darker colors can be more forgiving with stains and create a more understated look. Consider the style you want to achieve.
Ease of Installation: Cementitious grouts are generally easier for beginners to apply than epoxy grouts, which require precise mixing and have a short working time.
Table: Grout Type Comparison for Beginners
| Grout Type | Best For Grout Line Width | Key Benefits | Considerations for Beginners |
| Sanded Cementitious | 1/8″ and wider | Strong, durable, cost-effective | Can scratch delicate tiles, may shrink slightly |
| Unsanded Cementitious | < 1/8″ | Smooth finish, good for delicate tiles | Less durable than sanded, prone to cracking if too wide |
| Epoxy | Any width | Highly stain & waterproof, very durable | Challenging to mix & apply, can be more expensive |
| Polymer-Modified | Any width | Enhanced strength, flexibility, stain resistance | Generally adds cost to cementitious grout |
The Grouting Process: A Beginner’s Overview
While applying grout can be a hands-on DIY task, understanding the steps involved is key. It’s important to note that for structural grouting (like in concrete structures), specialized equipment and expertise are always required. This overview focuses on the more common tile grouting process.
Basic Steps for Grouting Tiles:
1. Preparation is Key:
Ensure the tiles are firmly set and the adhesive is completely dry.
Remove any excess adhesive or debris from the grout lines. Spacers should be removed.
If the tile is porous, you might need to lightly dampen it with a sponge (not wet, just damp) to prevent it from wicking water out of the grout too quickly.
2. Mix the Grout:
Follow the manufacturer’s instructions precisely. Cementitious grout usually involves mixing a powder with water to achieve a peanut-butter-like consistency.
Mix only what you can use within the pot life (the time before it starts to set).
3. Apply the Grout:
Using a grout float (a rubber-faced trowel), spread the grout over the tiles, pressing it firmly into the gaps.
Work in small sections. Hold the float at a 45-degree angle and sweep it diagonally across the tiles to ensure full coverage of the grout lines.
4. Clean Off Excess Grout:
Once a section is grouted, let it set for about 15-30 minutes (check manufacturer’s recommendation). The grout should be firm but not hard.
Use a damp (not wet!) sponge to wipe away the excess grout from the tile surface. Rinse the sponge frequently in clean water. Be careful not to dig grout out of the lines.
5. Final Haze Removal:
After a few hours, a chalky haze may appear on the tiles. Buff this off with a soft, dry cloth.
6. Curing and Sealing:
Allow the grout to cure fully according to the manufacturer’s instructions (this can take several days).
Once cured, apply a grout sealer. This is crucial for cementitious grouts, especially in wet areas, to protect against stains and moisture.
Always wear appropriate safety gear, including gloves and eye protection, when mixing and applying grout.
Tools You Might Need for Grouting (Tile Projects):
Grout float
Large sponges
Buckets (at least two for clean and rinse water)
Utility knife or grout saw (for cleaning out old grout if necessary)
Mixing paddle and drill (for larger batches)
Soft cloths or microfiber towels
Grout sealant and applicator
Common Grouting Mistakes to Avoid
Even with the best intentions, beginners can sometimes stumble. Here are a few common mistakes to watch out for:
Using too much water: This weakens grout and can lead to cracking. Mix to the recommended consistency.
Not cleaning thoroughly: Leaving too much excess grout on the tiles will result in a stubborn haze and an unprofessional look.
Cleaning too soon or too late: Cleaning while the grout is too wet will pull it out of the joints. Cleaning when it’s too hard makes removal extremely difficult.
Not sealing porous grout: Cementitious grouts are porous and need sealing to prevent stains and water damage.
Using the wrong type of grout for the job: This can lead to premature failure, cracking, or staining.
Grout Maintenance: Keeping it Looking Great
Proper maintenance will extend the life and beauty of your grouted surfaces.
Regular Cleaning: Clean tiled surfaces with pH-neutral cleaners. Avoid harsh or acidic cleaners, as they can break down grout over time.
Wipe Up Spills Quickly: Especially in kitchens and bathrooms, blot up spills immediately to prevent staining, particularly if your grout isn’t sealed or if you have lighter grout.
Reapply Sealer: Grout sealers wear down over time. Reapply a quality sealer every 1-2 years, especially in wet areas, to maintain protection. You can test the seal by dripping a little water on the grout line; if it darkens immediately, it’s time to reseal.
* Address Cracks Promptly: If you notice cracked or missing grout, repair it as soon as possible to prevent water from getting underneath the tiles.
Conclusion
Understanding the meaning of grout in construction is more than just knowing a word; it’s about appreciating a fundamental material that ensures the strength, longevity, and appearance of countless surfaces. From the sturdy foundations of our buildings to the beautiful tiled walls and floors in our homes, grout quietly does essential work.
FAQ: Your Grout Questions Answered
Here are some common questions beginners have about grout:
- What is grout primarily made of?
- Grout is typically made from a blend of cement, water, and sand. Depending on the type, it can also include polymers, colorants, or epoxy resins for added durability, flexibility, or stain resistance.
- Can I use grout to repair small holes in a wall?
- While grout is a filler, it’s usually too fluid and not strong enough for general wall hole repair. For most wall repairs, you’d use joint compound (spackle) or a concrete patching compound, depending on the wall material and hole size.
- Is epoxy grout difficult to install for a beginner?
- Epoxy grout can be more challenging for beginners due to its fast setting time and precise mixing requirements. Cementitious grout is generally considered more forgiving for DIY tile projects.
- Do I really need to seal my grout?
- If you used a standard cementitious grout, especially in wet areas like bathrooms or kitchens, sealing is highly recommended. It significantly improves stain resistance and helps prevent water penetration. Epoxy grout is generally non-porous and doesn’t require sealing.
- What color grout should I choose?
- The choice of grout color depends on your aesthetic goals. Lighter grout makes tiles stand out, while darker grout can create a more modern look and hide dirt better. Always consider a sample board to see how it looks next to your tiles.
- How long does it take for grout to cure?
- Grout “sets” within hours, allowing for initial haze cleaning. However, it fully cures over several days. Check the manufacturer’s instructions, but typically, it takes 3-7 days for full cure before heavy use or sealing. Some structural grouts can cure much faster.
