
Need to remove pipes affordably? This guide shows you how to safely and cheaply remove old pipes yourself, saving you money and giving you a sense of accomplishment. We’ll cover essential tools, step-by-step instructions, and smart tips to make the job easier and get professional results without the high cost.
Dealing with old pipes can be a real pain. Whether they’re rusty, leaky, or just in the way of your renovation plans, replacing them often seems like a big, expensive job. You might think you need a plumber for everything, but the truth is, with the right information and approach, removing old pipes yourself can be surprisingly manageable and, yes, very affordable.
This guide is designed to help you tackle this task confidently, even if you’ve never done anything like it before. We’ll break down everything you need to know, from what tools to gather to the exact steps to follow. Get ready to learn a proven, budget-friendly method that will have those old pipes out of your way in no time.
Why Removing Old Pipes is a DIY-Friendly Task
Many homeowners shy away from pipe removal, assuming it’s a complex plumbing job requiring specialized equipment. However, much of the process is about careful disconnection, safe removal, and minor demolition – tasks that are completely within reach for the average DIYer. The primary goal is to isolate sections of pipe and then physically detach them.
Understanding the basic systems involved, like water supply and drainage, is key. Over time, old pipes, especially those made of galvanized steel or lead, can degrade, leading to leaks, reduced water pressure, and potential health concerns. Removing them not only resolves these issues but also preempts future problems. By learning to do it yourself, you bypass the significant labor costs that plumbers charge, making it a genuinely cheap way to get the job done. We’ll guide you through each step, ensuring safety and efficiency.
Understanding Your Pipes: What You’re Dealing With

Before you grab a wrench, it’s helpful to know what kind of pipes you have. This information affects how you’ll remove them and what safety precautions you’ll need.
Common Pipe Materials and Their Characteristics
Different pipe materials have different properties that influence their removal.
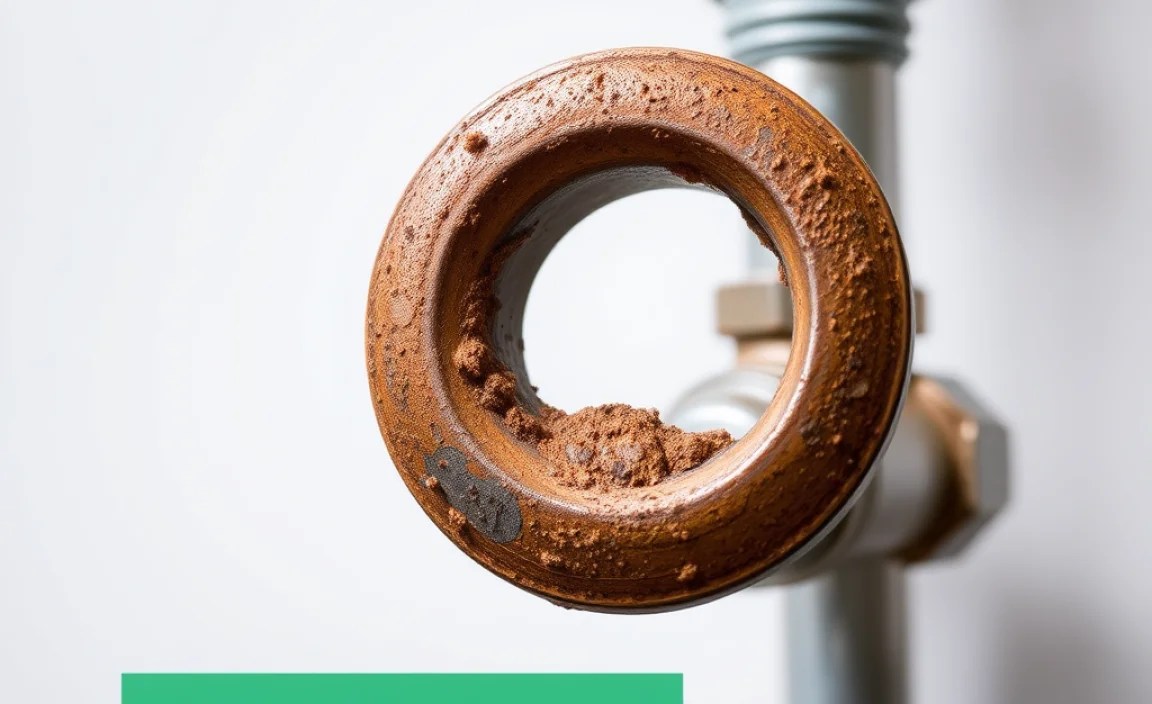
- Galvanized Steel: These are silver-gray and often appear heavily corroded or rusted after many years of service. They can be brittle and sometimes difficult to unscrew due to mineral buildup.
- Copper: Easily identifiable by its reddish-brown color. Copper pipes are common for water supply lines. They can be cut with a pipe cutter or unscrewed. Older copper can be brittle, while newer installations might be soldered, requiring a different removal approach if connecting to fittings.
- PVC/CPVC: These are modern plastic pipes, usually white (PVC) or off-white/gray (CPVC). They are glued together with solvent cement. To remove them, you’ll need to cut them.
- PEX: Flexible plastic tubing, commonly red (hot) or blue (cold), often used for water supply. PEX is typically connected with crimp rings or expansion fittings, meaning you’ll need to cut it.
- Cast Iron: Heavy, dark gray pipes, usually found in older drainage systems. These are very sturdy and require demolition tools to cut or break.
- Lead: Found in very old plumbing systems (pre-1970s). Lead pipes are dull gray and soft. They are pliable and can be cut with a hacksaw. Due to health concerns, handling lead pipes requires extra caution and proper disposal.
Identifying Water Lines, Drain Lines, and Vents
Knowing which pipe is which is crucial for safety and functionality.
- Water Supply Lines: These carry clean water into your home from the municipal supply or your well. They are usually pressurized. You’ll typically find two main lines: one for hot water (often insulated or colored red) and one for cold water (colored blue or left uninsulated). Shutting off the main water supply is your first and most important step for these.
- Drainage Lines (Wastewater Pipes): These carry used water and waste away from fixtures like sinks, toilets, and showers to the sewer or septic system. They operate via gravity and are typically larger in diameter than supply lines. They are usually made of PVC, ABS (black plastic), or cast iron.
- Vent Pipes: These are smaller pipes that connect to your drainage system and run up through your roof. They allow air into the drainage system, preventing vacuum locks and helping wastewater flow smoothly. They are usually part of the overall drainage system.
Essential Tools for Cheap Pipe Removal
Gathering the right tools before you start can save you a lot of frustration and potential trips to the hardware store. For a cheap pipe removal job, you’ll want to leverage tools you might already have or can borrow.
Must-Have Tools
These are the basics you’ll need almost regardless of pipe type.
- Safety Gear: This is non-negotiable. Always wear safety glasses or goggles to protect your eyes from debris, dust, and splashes. Gloves will protect your hands from rough edges and dirt. A dust mask is recommended, especially when dealing with old, dusty pipes or demolition.
- Adjustable Wrenches: You’ll need at least two. Having two allows you to hold a pipe or fitting in place with one while turning another part with the second. Different sizes are helpful.
- Pipe Wrench: Essential for gripping round pipes. Again, having two in different sizes can be very useful for leverage and for holding fittings.
- Pliers: Various types like slip-joint pliers and channel-lock pliers can be handy for gripping and maneuvering smaller parts or stubborn connections.
- Bucket and Rags: To catch any residual water that might still be in the pipes. This is especially important for drain lines.
- Utility Knife or Heavy-Duty Scissors: For cutting away sealant or insulation.
Tools for Specific Pipe Types
Depending on your pipes, you might need a few specialized (but still affordable) tools.
- Pipe Cutter: If you have copper, PEX, or thin-walled plastic pipes (like PVC/CPVC), a pipe cutter is the cleanest and easiest way to go. They are relatively inexpensive and make precise cuts.
- Hacksaw: A basic hacksaw is a versatile tool that can cut through galvanized steel, old copper, and even cast iron if you have the patience and the right blade.
- Rotary Tool (e.g., Dremel) with Cutting Wheels: For very tight spaces or specific cuts, a rotary tool can be a lifesaver. It’s less labor-intensive than a hacksaw for multiple cuts but requires more caution.
- Reciprocating Saw (Recip Saw): If you need to cut through thicker materials like cast iron or large PVC, a recip saw with the appropriate blade is highly effective. This is a more powerful tool and requires careful handling.
- Hammer and Chisel: For breaking up stubborn fittings or, in extreme cases, to help cut through brittle cast iron pipes.
Optional but Helpful Tools
These can make the job smoother.
- Screwdriver Set: For removing any attached brackets or supports.
- Pry Bar: To help dislodge stubborn pipe sections.
- Work Light: If you’re working in a dim basement or crawl space.
- Shop Vacuum: For cleaning up debris as you go.
Step-by-Step Guide: Removing Your Pipes Cheaply and Safely

This section covers the core process. Always adapt these steps to your specific situation.
Phase 1: Preparation and Safety First
This is the most critical phase for a smooth and safe removal.
- Turn Off the Main Water Supply: Locate your home’s main water shut-off valve. This is typically found where the water line enters your house, often in the basement, crawl space, or a utility closet. Turn the valve clockwise until it’s completely closed.
- Drain the System: Open the lowest faucet in your house (like an outdoor spigot or a basement sink) and the highest faucet (like an upstairs bathroom sink). This helps release pressure and drain most of the water from the pipes. Let them run for a few minutes.
- Identify the Pipes to Remove: Clearly mark or identify the specific pipes you intend to remove. Understand how they connect to the rest of your plumbing system. If you’re unsure, it’s wise to consult a diagram or even take photos to show a more experienced friend or a professional for a quick opinion before proceeding.
- Protect Your Work Area: Lay down tarps or old sheets to protect floors and surrounding areas from dust, debris, and any remaining water.
- Gather and Inspect Your Tools: Ensure all your chosen tools are in good working order and you have everything you need readily accessible.
Phase 2: Disconnecting Water Supply Lines
Water supply lines are pressurized, so this needs extra care.
- Disconnect at Fixtures First: Start by disconnecting the pipes at the points where they connect to fixtures (faucets, toilets, appliances). Use two wrenches: one to hold the fixture’s supply line connector steady and another to loosen the nut connecting it to the pipe you’re removing. Be prepared for a small amount of residual water.
- Loosen Pipe Fittings: For pipes running through walls or floors, you’ll eventually need to disconnect them from larger plumbing assemblies or fittings. Apply penetrating oil to stubborn threads if they won’t budge. Use your two adjustable or pipe wrenches. Turn the fitting that attaches to the pipe you’re removing counter-clockwise (lefty-loosey).
- Cutting as a Last Resort: If a section of pipe is severely corroded or fused into a fitting and cannot be unscrewed, you may need to cut it. Use a pipe cutter for copper/PEX/thin PVC, or a hacksaw for galvanized steel. Always cut cleanly and make sure you’re not cutting into a pipe you intend to keep.
Phase 3: Removing Drain and Vent Pipes
These are not under pressure, making them generally easier to handle, but they can be bulky and heavy.
- Prepare for Residual Water: Drain pipes contain stagnant water and debris. Have buckets positioned directly below any joint you plan to break or cut.
- Disconnect at Fixtures: Start at the fixture (sink, tub, toilet). If it’s a plastic pipe (PVC/ABS), you’ll likely need to cut it a few inches away from the fixture’s trap or outlet pipe. For simpler connections, you might find threaded fittings that can be unscrewed.
- Cut or Unscrew Larger Sections: For most drain and vent pipes (PVC, ABS, cast iron), cutting is the most common method for removal.
- PVC/ABS: Use a pipe cutter or a hacksaw/recip saw to cut the pipe into manageable lengths. Make cuts at convenient points, avoiding cutting too close to structural elements or other pipes.
- Cast Iron: This is tougher. You can use a hacksaw blade (you might need several) and a hacksaw frame, or a recip saw with a metal-cutting blade. For very thick pipe, a “pipe snapper” tool or even a sledgehammer (used with caution and protective barriers) can be employed, though this is a more destructive method.
- Break Apart Fittings: Sometimes, solvent-welded PVC/ABS fittings are best removed by cutting the pipe just before the fitting. For older metal drain pipes, you might be able to unscrew unions or use a pipe wrench to carefully break apart couplings.
Phase 4: Final Removal and Disposal
Once pipes are disconnected, it’s time to get them out and clean up.
- Carefully Remove Sections: Gently maneuver the disconnected pipe sections out of their location. If a section is still attached to something, re-assess and make another cut or use a pry bar gently to loosen it. Be mindful of what’s around them – wires, other pipes, drywall.
- Clean Up Debris: Use your shop vacuum and rags to clean up any dust, water, or debris that has accumulated in the area where the pipes were.
- Proper Disposal: This is a key part of the “cheap” removal.
- Recycling: Copper, aluminum, and clean steel are often accepted by scrap metal recyclers. You might even get a small amount of money for them.
- General Waste: Small amounts of PVC, PEX, or other plastics can sometimes be disposed of in your regular household trash, depending on local regulations. Check with your local waste management service.
- Hazardous Waste: If you discover lead pipes, or asbestos insulation on old pipes, these require special handling and disposal procedures. Contact your local environmental agency or waste management authority for guidance. Do not mix these materials with regular trash.
- Special Drop-offs: Some municipalities have specific drop-off locations for construction debris or scrap metal.
Cost-Saving Tips for Pipe Removal

Doing it yourself is the biggest cost-saver, but here are more ways to keep your expenses low.
Leverage What You Have
Borrow Tools: Ask friends, family, or neighbors if they have any specialized tools you might need, such as a pipe cutter or a recip saw.
Rent for Big Jobs: If you need a tool for a single, large task (like a specific demolition tool for cast iron), renting it for a day or two is much cheaper than buying.
DIY Tool Kits: Invest in basic DIY toolkits that include common items like adjustable wrenches, pliers, and screwdrivers. These are useful for many home projects, making the initial investment worthwhile over time.
Smart Material Handling
Scrap Metal Value: If you’re removing a good amount of copper or galvanized steel, take it to a local scrap metal yard. While prices fluctuate, you might get a decent return, effectively making that part of your removal “free.”
Used Parts: For smaller, non-critical components of the piping system you’re removing, evaluate if any salvageable fittings or adapters can be repurposed or sold.
Avoiding Costly Mistakes
Educate Yourself: Thoroughly understand the system before you start. Accidentally cutting a live water line or a critical electrical conduit can lead to very expensive repairs. Websites like EPA WaterSense offer insights into water usage and pipe systems, helping build foundational knowledge.
Take Your Time: Rushing can lead to mistakes, damaging surrounding structures or creating a bigger mess to clean. This often results in more expensive repairs.
Document Everything: Take pictures before, during, and after. This helps you remember how things were connected, aids in planning the removal, and serves as a record if any issues arise during demolition.
Pros and Cons of DIY Pipe Removal
Understanding the trade-offs can help you decide if this approach is right for your project.
Advantages
Significant Cost Savings: The most obvious benefit is avoiding expensive plumber labor costs.
Sense of Accomplishment: Successfully completing a DIY project builds confidence and skills.
Flexibility: You can work on your own schedule, fitting it around other commitments.
Learning Opportunity: You gain valuable knowledge about your home’s plumbing system.
Environmental Disposal: You can choose to recycle metal pipes, turning waste into a small revenue stream.
Disadvantages
Time Investment: DIY projects usually take longer than professional jobs.
Risk of Mistakes: Improper handling can lead to leaks, water damage, or personal injury.
Physical Effort: Some pipe removal can be physically demanding, especially with heavy materials like cast iron.
Tool Acquisition Costs: If you don’t have the necessary tools, there’s an upfront cost, though often less than professional labor.
Disposal Challenges: Dealing with potentially hazardous materials like lead or asbestos requires special handling and knowledge.
Dealing with Stubborn Fittings and Pipes
Sometimes, pipes just don’t want to come apart easily. Here’s how to tackle those challenging situations without causing more damage.
Penetrating Oil is Your Friend
For threaded metal pipes (like galvanized steel), mineral buildup and rust can seize fittings.
- Apply Generously: Spray a good quality penetrating oil (like WD-40 or a rust penetrant) directly onto the threads where the pipe meets the fitting.
- Wait and Repeat: Let the oil soak in for at least 15-30 minutes. For really stubborn threads, you might need to reapply the oil several times and wait longer, even overnight.
- Gentle Persuasion: After soaking, try to loosen the fitting again with your pipe wrenches.
Heat Can Help (Use with Extreme Caution)
For metal pipes, expanding them slightly with heat can sometimes break the bond.
- Safety First: Ensure there are no flammable materials nearby. Have a fire extinguisher ready. This is best done in an open or well-ventilated area.
- Apply Heat: Use a propane torch to gently heat the fitting (not the pipe itself, if possible). Heat it evenly for a minute or two.
- Attempt Removal: Immediately after heating, try to unscrew the fitting with your pipe wrenches. The expansion.
