
Quick Summary:
Experiencing drain issues? You can often tackle common drain problems yourself with simple tools and techniques. This guide covers essential DIY fixes for slow drains, clogs, and minor leaks, helping you save money and restore your plumbing. Learn when to call a professional for more complex “repair drain near me” situations.
Ugh, a clogged or slow-moving drain. It’s a common household headache that nobody really wants to deal with. It can disrupt your morning routine, lead to messy backups, and just generally be a nuisance. But don’t worry! Many drain problems aren’t as complicated as they seem. With a few basic tools and a little know-how, you can often fix them yourself. This guide is all about empowering you to tackle those essential drain repairs. We’ll walk through simple, step-by-step solutions that are safe and effective for beginners. You’ll be surprised at what you can accomplish!
DIY Drain Repair: When to Roll Up Your Sleeves

Before we dive into the fixes, it’s good to know when a DIY approach is your best bet. For everyday clogs caused by hair, soap scum, or food particles, you’re often in luck. Simple tools and techniques can work wonders. These are the kinds of issues that pop up in kitchens and bathrooms regularly. Think of a slow shower drain after a long day or a sink that takes forever to empty after you wash dishes.
However, it’s crucial to recognize your limits. If you’re dealing with multiple drains backing up at once, persistent gurgling sounds, sewage smells, or a complete blockage that doesn’t budge, it’s time to call in the experts. These could signal a larger issue with your main sewer line or a more complex plumbing problem that requires professional tools and expertise. For those scenarios, searching “repair drain near me” for a qualified plumber is the safest and most effective route. But for the common problems we’ll cover, let’s get our hands dirty (metaphorically, of course!).
Common Drain Problems and Their Solutions
Let’s break down the most frequent drain dilemmas and the straightforward ways to solve them. Understanding the cause is half the battle!
1. The Slow Drain
A drain that’s draining slower than usual is often the first sign of trouble brewing. It means something is starting to accumulate and obstruct the smooth flow of water. This is most commonly caused by a buildup of grease, soap scum, hair, and other debris in the pipe.
Causes of Slow Drains:

- Hair: Especially common in bathroom sinks and shower drains.
- Soap Scum: Reacts with minerals in water to form a sticky film.
- Grease and Food Scraps: In kitchen sinks, these solidify and clog pipes.
- Small Objects: Accidental drops can partially block pipes.
DIY Fixes for Slow Drains:
Here are a few methods to get that water flowing freely again:
-
Boiling Water: This is the simplest and often most effective first step, especially for kitchen sinks clogged with grease.
- Boil a kettle or pot of water.
- Carefully pour the boiling water directly down the drain in two or three stages, allowing it to work for 20-30 seconds between pours.
- Run hot tap water to see if the drain flows better. Repeat if necessary.
-
Baking Soda and Vinegar: A classic eco-friendly cleaning combination that can help break down mild clogs.
- Pour about 1/2 cup of baking soda down the drain.
- Follow with 1/2 cup of white vinegar. It will fizz!
- Let it sit for 15-30 minutes.
- Flush with hot water.
-
Manual Removal (Plunger): A plunger is your best friend for many drain issues.
- Ensure there’s enough water in the sink or tub to cover the plunger’s cup.
- Create a tight seal around the drain opening with the plunger.
- Pump the plunger up and down vigorously for about 20 seconds.
- Lift the plunger quickly to break the seal. Repeat several times.
- Run water to check the flow.
-
Manual Removal (Drain Snake/Auger): For clogs that are a bit deeper, a drain snake is excellent.
A drain snake, also known as a plumber’s snake or auger, is a flexible metal cable that you can feed into the drain to break up or pull out obstructions. You can find these at most hardware stores. For simple clogs just beyond the P-trap, a small hand-crank auger is usually sufficient.- Feed the snake end into the drain opening.
- Push it in until you feel resistance – that’s likely the clog.
- Crank the handle to either break up the clog or hook onto it.
- Slowly pull the snake back out.
- Flush the drain with hot water.
For more details on using a drain snake, check out resources from This Old House.
2. The Complete Clog
This is when the drain is completely blocked, and no water is going down. It’s more severe than a slow drain and requires a bit more effort.
Causes of Complete Clogs:
- Large food particles (in kitchen sinks).
- A significant hairball (in bathroom drains).
- Foreign objects accidentally flushed or dropped.
- Buildup of materials over time.
DIY Fixes for Complete Clogs:
You’ll likely need to employ more direct methods here.
- Plunger Power: Start with your trusty plunger. Ensure a good seal and vigorous plunging. For sinks, you might need to cover the overflow drain with a wet cloth to create better suction.
- Drain Snake (Auger): This is often the most effective tool for a complete clog. Feed the snake in, crank, and retrieve. You might need to repeat this process a few times.
-
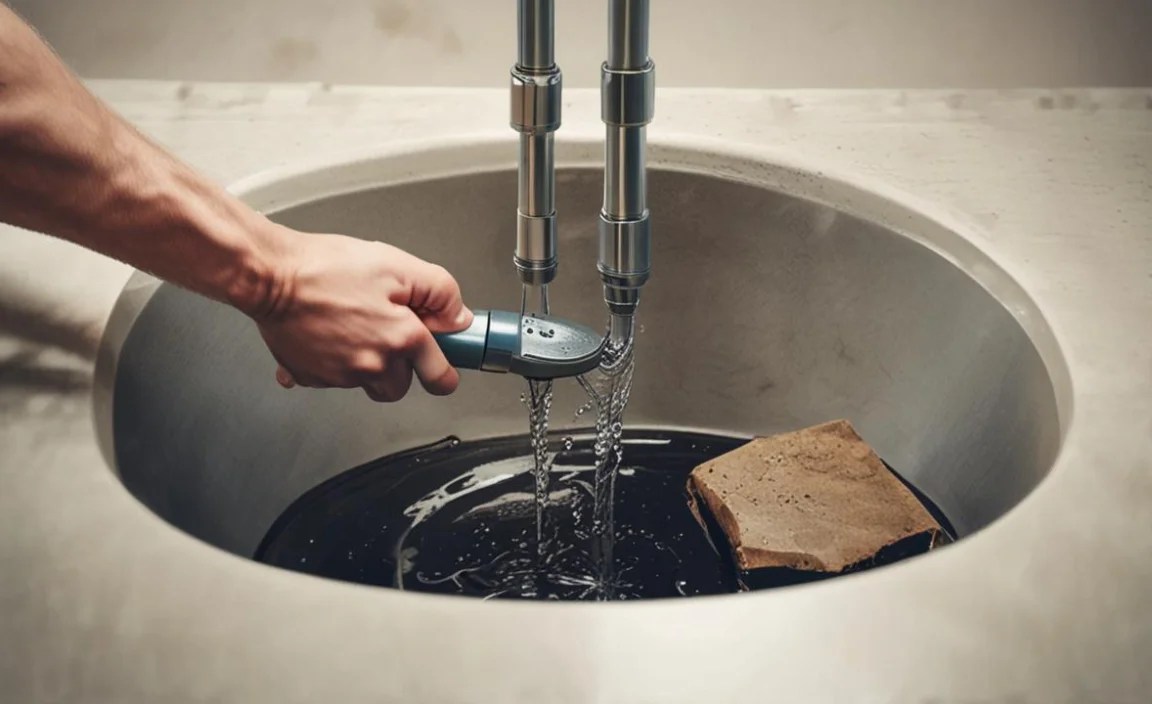
Cleaning the P-Trap: The P-trap is the U-shaped pipe under your sink. It’s designed to hold water, which prevents sewer gases from coming up into your home. It’s also a common spot for clogs.
- Safety First: Place a bucket underneath the P-trap to catch water and debris.
- Loosen Fittings: Use channel-lock pliers or a pipe wrench to loosen the slip nuts connecting the P-trap to the drainpipe and the tailpiece from the sink. Turn counter-clockwise.
- Remove the Trap: Carefully remove the P-trap. Empty its contents into the bucket.
- Clean the Trap: Scrub out any buildup inside the P-trap with a brush. You can also use hot water and soap.
- Check the Pipes: Before reassembling, check the connecting pipes for clogs and clear them if found.
- Reassemble: Put the P-trap back in place, ensuring the seals are correctly seated. Hand-tighten the slip nuts, then give them a quarter-turn with the pliers or wrench. Don’t overtighten, as this can crack the plastic.
- Test: Run water down the drain to check for leaks and ensure proper drainage.
For a visual guide on how to tackle P-trap issues, resources like Family Handyman offer excellent walkthroughs.
3. Leaky Drain Connections
A minor leak under a sink is usually not an emergency but needs attention to prevent water damage and mold growth.
Common Causes of Leaks:
- Loose slip nuts on the P-trap.
- Worn-out washers or seals.
- Cracked P-trap or pipes.
DIY Fixes for Leaky Drain Connections:
These are typically straightforward fixes.
- Tighten Connections: Often, the simplest fix is to slightly tighten the slip nuts connecting the P-trap or other drain pipe sections. Use channel-lock pliers for a gentle turn (about an eighth to a quarter turn) clockwise. Be careful not to strip the threads or crack plastic pipes.
-
Replace Washers/Seals: If tightening doesn’t work, the rubber washer or seal inside the connection might be worn or damaged.
- Turn off the water supply if attached to or near fixtures that use water.
- Loosen the slip nut and remove the P-trap or pipe section.
- Inspect the rubber washer. If it looks flattened, cracked, or misshapen, it needs replacing.
- Take the old washer to a hardware store to find an exact match.
- Install the new washer, reassemble the pipe, and tighten the slip nut.
- Test for leaks.
- Inspect for Cracks: If you find a crack in a pipe or the P-trap, that section will need to be replaced. This is generally a simple DIY task for plastic pipes, involving removing the old piece and installing a new one with new slip nuts and washers. For metal pipes or if you’re unsure, consider consulting a professional.
Essential Tools for DIY Drain Repair
Having the right tools makes all the difference. You don’t need a professional plumber’s arsenal, but a few key items will cover most common “repair drain near me” needs.
| Tool | Use | Beginner-Friendly? |
|---|---|---|
| Plunger (Cup plunger for sinks, flange plunger for toilets) | Creating suction to dislodge clogs. | Yes, very easy. |
| Baking Soda & White Vinegar | Natural cleaner for breaking down grime and mild clogs. | Yes, extremely easy. |
| Boiling Water | Melting grease and flushing out debris. | Yes, requires caution. |
| Bucket | Catching water and debris when disassembling pipes. | Yes, very easy. |
| Channel-Lock Pliers (or Adjustable Wrench) | Tightening or loosening slip nuts on pipe connections. | Yes, with gentle pressure. |
| Drain Snake (Hand Auger) | Reaching deeper clogs to break them up or pull them out. | Moderately easy; requires a little practice. |
| Wire Brush | Cleaning out the P-trap or pipes. | Yes, very easy. |
When to Call a Professional Plumber (“Repair Drain Near Me”)

As much as we love a good DIY fix, there are times when calling a professional is essential. Recognizing these situations can save you time, money, and prevent bigger problems down the line. If you find yourself repeatedly searching “repair drain near me” for the same issue, it might be a sign that you need expert help.
Signs You Need a Professional:
- Multiple Drains Clogged: If drains in different parts of your house are backing up simultaneously, it points to a main sewer line obstruction. This is a serious issue requiring professional equipment to locate and clear.
- Recurring Clogs: If you’re constantly plunging or snaking the same drain, there might be an underlying problem like pipe damage, improper venting, or a more significant buildup.
- Sewage Smells: Persistent foul odors might indicate a sewer line issue or a problem with your plumbing vents.
- No Water Flow at All: If water won’t go down any drain in your home, it’s a strong indicator of a sewer line blockage.
- Visible Pipe Damage: Cracks, leaks, or corrosion on main pipes are best handled by a licensed plumber.
- Lack of Confidence: If you’re uncomfortable with any repair task, especially those involving significant disassembly or potentially hazardous conditions, it’s always better to call a professional.
When you need a professional, look for licensed and insured plumbers in your area. Online reviews, recommendations from friends, or local plumbing associations can help you find a reliable service. For a list of common plumbing issues professionals handle, the U.S. Environmental Protection Agency (EPA) offers guidance on DIY versus professional plumbing work.
Preventative Maintenance: Keep Your Drains Flowing
The best way to deal with “repair drain near me” situations is to prevent them from happening in the first place! Regular maintenance can significantly reduce the frequency of clogs and extend the life of your plumbing system.
Tips for Prevention:
- Use Drain Strainers: Place mesh strainers in all your sinks and shower drains to catch hair, food particles, and other debris before they enter the pipes.
- Kitchen Sink Care: Never pour grease, oil, or coffee grounds down the kitchen sink. Scrape food scraps into the trash or compost bin. Run hot water for a minute after using the sink to help flush away any residue.
- Bathroom Care: Use a P-trap hair catcher, especially in showers. Avoid flushing cotton balls, feminine hygiene products, or excessive amounts of toilet paper.
- Regular Flushing: Once a month, pour a kettle of boiling water down your kitchen and bathroom drains to help melt away any accumulated grease or soap scum.
- Natural Cleaners: Periodically use the baking soda and vinegar method as a preventative measure to keep pipes clean and free of mild buildup.
- Address Slow Drains Promptly: Don’t wait until a slow drain becomes a complete clog. Tackle it with the simple methods described earlier as soon as you notice it.
- Proper Toilet Flushed: Only flush toilet paper and human waste. Avoid flushing paper towels, wipes (even “flushable” ones), cotton swabs, or feminine products.
Frequently Asked Questions (FAQ)
Q1: How often should I use baking soda and vinegar to clean my drains?

For preventative maintenance, using the baking soda and vinegar method once a month is generally a good practice. If you have slow drains, you might use it more frequently, perhaps once a week, until the issue is resolved.
Q2: Can I use commercial drain cleaners?

While commercial drain cleaners can be effective, they are often harsh chemicals that can damage pipes, especially older ones, and are harmful to the environment. It’s best to try gentler DIY methods like boiling water, baking soda and vinegar, or using a plunger or drain snake first. If you choose to use them, always follow the manufacturer’s instructions carefully and ensure good ventilation.
Q3: My toilet is clogged, can I use the same methods as a sink?

A toilet clog is different. For toilets, you’ll want to use a flange plunger (which has a cup that extends into the bowl) for better suction. Avoid using boiling water directly into the toilet bowl as it can crack the porcelain. For stubborn toilet clogs, a toilet auger (a specialized drain snake for toilets) is the best tool. If these methods don’t work, it’s definitely time to call a plumber.
Q4: What is the P-trap, and why does it clog?

The P-trap is the U-shaped pipe under your sink. It holds a small amount of water to create a seal that prevents sewer gases from entering your home. It often clogs because its shape can trap heavier debris like hair, food particles, or soap scum that settles in the curve.
Q5: How do I know if I have a main sewer line clog?

Signs of a main sewer line clog include multiple drains backing up (especially lower-level drains like basement toilets or floor drains), gurgling sounds in drains when water is used elsewhere, and water backing up into showers or tubs. If you suspect this, contact a professional plumber immediately.
Q6: Are there any DIY drain repairs that are too risky?

Yes, attempting to repair major pipe damage, especially in a main sewer
