
Repair grout easily with these simple steps to restore tile beauty and prevent further damage. This guide provides clear instructions for beginners, ensuring a stunning and essential fix for your home.
Cracked or missing grout can really bring down the look of tiled surfaces. It’s not just about appearances, though. Damaged grout can lead to bigger problems, allowing water to seep behind your tiles, causing mold and even structural issues. But don’t let that worry you! Fixing grout is a surprisingly simple DIY task that anyone can master. With the right tools and a bit of patience, you can achieve professional-looking results and protect your home. We’ll walk you through each step, making ‘repair grout easy’ a reality for your next weekend project.
Why Repairing Grout is an Essential Home Maintenance Task

Keeping your grout in good condition is more than just an aesthetic choice; it’s a crucial aspect of home maintenance. Grout acts as a protective barrier between tiles, sealing out moisture and preventing dirt and grime from accumulating. When grout begins to crumble, crack, or disappear, its protective function is compromised. This opens the door for water damage, which can lead to expensive repairs down the line. Think of it like the sealant around your bathtub or shower; once it’s broken, water gets underneath, causing rot and mold. Addressing grout issues promptly ensures your tiles remain beautiful and your home’s structure stays sound. It’s an easy fix that offers significant long-term benefits.
Understanding Your Grout: Types and Common Issues
Before we dive into the repair process, it’s helpful to know a little about grout itself. Grout essentially fills the gaps between tiles, much like mortar in a brick wall. Most homeowners will encounter one of two main types:
- Cementitious Grout: This is the most common type, made from cement, sand, and water. It’s porous and can be sealed to improve resistance to stains and moisture. Over time, cementitious grout can crack, erode, or become discolored.
- Epoxy Grout: A more durable and stain-resistant option, epoxy grout is made from epoxy resins and a hardener. It’s less common in older homes but is often used in areas prone to moisture or heavy traffic. Epoxy grout is much harder to repair, often requiring professional intervention or full tile replacement if damaged.
The most common issues you’ll face with grout are:
- Cracking: Caused by settling of the house, impact, or improper installation.
- Crumbling: Often a sign of age or water damage that has weakened the grout.
- Missing Sections: Pieces can fall out due to wear and tear or being hit by heavy objects.
- Discoloration/Staining: Grout can absorb spills and become permanently stained, especially if not sealed properly.
For the purpose of this beginner-friendly guide, we’ll focus on repairing cementitious grout, as it’s the most common and easiest to fix for DIYers.
Gathering Your Tools and Materials: What You’ll Need
Having the right tools makes any DIY project smoother and much more successful. For an easy grout repair, you won’t need a lot of specialized equipment. Here’s a list of essentials:
Essential Tools for Grout Repair
- Safety Glasses: Protect your eyes from dust and debris.
- Gloves: Keep your hands clean and protected from grout material and tools. A pair of sturdy work gloves or disposable nitrile gloves will do.
- Dust Mask: Essential for protecting your lungs from grout dust.
- Utility Knife or Grout Saw/Rake: For removing old grout. A grout saw is specifically designed for this and makes the job easier.
- Small Vacuum Cleaner or Brush and Dustpan: To clean up the dust and debris after removing old grout.
- Small Bucket: For mixing the new grout.
- Grout Float or Spreader: A flexible rubber tool used to force new grout into the joints.
- Sponge: A dense, non-abrasive sponge is crucial for cleaning up excess grout.
- Clean Cloths: For final wiping and polishing.
- New Grout: Choose a color that matches your existing grout as closely as possible. You can often find it at hardware stores.
- Optional: Grout Sealer: Once the new grout cures, applying a sealer will help protect it.
When selecting your new grout, try to get a color match. Take a small piece of the old grout (if you can safely remove one) to the store, or take a clear photo in good lighting to compare. If a perfect match isn’t available, consider a slightly lighter shade rather than darker, as darker grout can sometimes “bleed” if not applied perfectly. For more information on grout types and colors, resources like The Tile Council of North America (TCNA) offer excellent technical insights.
Step-by-Step: How to Repair Grout Easy
Now for the main event! Follow these steps carefully to achieve a professional-looking grout repair. Remember, patience is key, especially for your first time.
Step 1: Prepare the Area
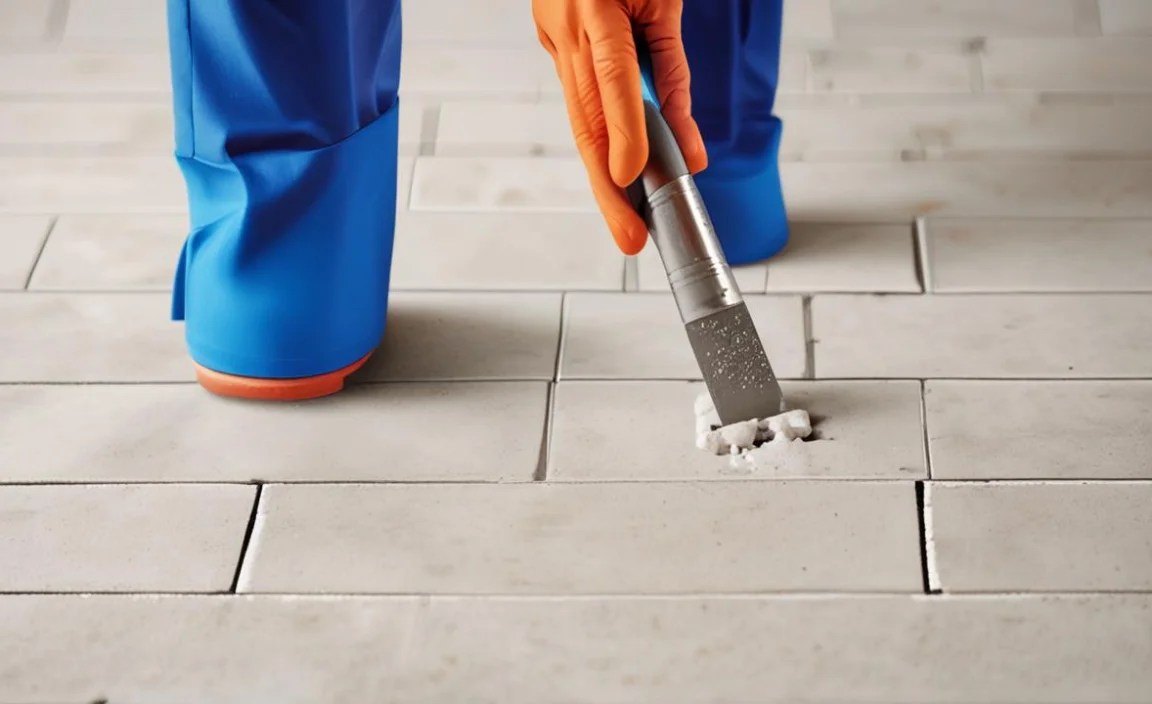
Start by clearing the area around the tiles you’ll be working on. Remove any items that might get in the way. Put on your safety glasses, gloves, and dust mask. Good preparation ensures safety and makes the work more efficient.
Step 2: Remove Old, Damaged Grout
This is often the most time-consuming part, but it’s essential for a good bond with the new grout. Use your utility knife or grout saw to carefully cut along the edges of the old grout lines. You want to remove the loose, crumbly bits. The goal is to create a clean, even channel for the new grout. Be careful not to damage the edges of your tiles. If using a grout saw, a back-and-forth motion works well. Aim to remove about 1/8 inch to 1/4 inch of depth. Scrape out as much of the old grout as possible. This ensures the new grout has a solid surface to adhere to and creates a consistent depth for the new fill.
Pro Tip: For stubborn grout, gently tapping the grout saw with a hammer can help break it up. However, be very careful not to strike the tiles.
Step 3: Clean the Grout Lines
Once you’ve removed the old grout, thoroughly clean the channels. Use your vacuum cleaner to suck up all the dust and debris. If there’s any residual dust clinging to the sides, use a damp cloth or a small brush to remove it. The grout lines need to be clean and free of any particles for the new grout to adhere properly and create a strong bond. Any remaining dust can prevent a good connection, potentially leading to premature failure of the repair.
Step 4: Mix the New Grout
Follow the manufacturer’s instructions on the grout packaging for mixing. Typically, you’ll add the grout mix to a small bucket and then gradually add water, mixing until you achieve a consistency similar to peanut butter or thick toothpaste. You want it smooth and creamy, not watery. Mix only what you think you can use within about 15–30 minutes, as grout begins to harden (cure) relatively quickly. If it starts to stiffen too much, you can sometimes add a tiny bit more water, but avoid overwatering, which weakens the grout.
You can find grout mixing guidelines and learn about different grout formulations on resources like the DIY.com Grout Guide.
Important Note: Never mix grout directly on your tile surface. Always use a separate mixing bucket.
Step 5: Apply the New Grout
Using your grout float or spreader, scoop a generous amount of the mixed grout onto the tool. Hold the float at an angle (about 45 degrees) and press the grout firmly into the cleaned grout lines. Work in small sections, moving the float diagonally across the tiles. This motion forces the grout deep into the Joints, ensuring there are no air pockets. As you go, scrape off excess grout from the tile surfaces with the edge of the float, again working diagonally to avoid pulling the grout out of the joints.
Step 6: Initial Cleaning (Sponging)
After you’ve filled a section of grout lines, it’s time for the first clean-up. Dampen your sponge (wring it out very well; it should be damp, not soaking wet) and gently wipe away the excess grout from the tile surface. Again, use a diagonal motion across the grout lines to avoid dislodging the newly applied grout. Rinse your sponge frequently in a separate bucket of clean water, wringing it out thoroughly each time. You’ll need to change the rinse water several times to keep it clean. This step isn’t about making the tiles spotless; it’s about removing the bulk of the excess grout and starting to shape the grout lines.
Step 7: Final Cleaning and Curing
Let the grout sit for about 15–30 minutes (check manufacturer instructions, as curing times vary). You’ll notice a haze forming on the tiles as the grout dries. Use a clean, dry, soft cloth to buff this haze away. You can also use a slightly damp cloth if needed, but avoid getting the grout lines too wet. Be gentle. The grout needs time to cure properly. You may need to repeat the buffing process a few times as the grout continues to dry. For the next 24–72 hours (or as recommended by the manufacturer), avoid getting the grout excessively wet or exposing it to heavy cleaning.
Curing Time: The grout will harden over these first few days, but it takes longer to reach its full strength. Check the product packaging, but typically, you can walk on tiles after 24 hours and shower after 48–72 hours. Full cure can take up to a week or more.
Step 8: Apply Grout Sealer (Optional but Recommended)
Once the grout has fully cured (usually after 3 days, but check your product), consider applying a grout sealer. This is an essential step for protecting your new grout from stains and moisture, especially in kitchens and bathrooms. Apply the sealer according to the manufacturer’s instructions, usually with a small brush or applicator. Wipe away any excess sealer from the tile surface immediately. A sealer helps maintain the beauty and longevity of your grout repair.
Comparing Grout Repair Methods: What’s Best for You?
While this guide focuses on the most common and beginner-friendly method of applying new grout, it’s good to be aware of other options. Understanding these can help you decide on the best approach for your specific situation.
| Method | Pros | Cons | Best For |
|---|---|---|---|
| Patching with New Grout (As described above) |
Easy to learn, inexpensive, good for small repairs, wide color selection available. | Can be difficult to match color exactly, patch lines may be visible if not done perfectly, requires removal of old grout. | Small cracks, crumbling sections, missing pieces in cementitious grout. Perfect for beginners. |
| Grout Pens/Markers | Very quick and easy to use, good for covering minor stains or discoloration, instant visual improvement. | Doesn’t fill cracks or gaps, only a cosmetic fix, can wear off over time, limited color choices. | Covering minor discoloration, freshening up looks on slightly worn grout. Not for structural repairs. |
| Grout Colorant/Stain | Can dramatically change the look of all your grout, excellent for covering widespread stains, can seal and color simultaneously. | More involved than pens, requires careful application to avoid staining tiles, can be more expensive for large areas, requires full cure time. | Transforming the look of an entire tiled area, covering deep or persistent stains if patching isn’t an option. |
| Replacing Entire Grout Lines | Provides a completely new, uniform look, addresses widespread damage or outdated grout. | Time-consuming, labor-intensive, requires more skill and tools, higher cost. | Severely damaged or very old grout needing a complete overhaul. Best for experienced DIYers or professionals. |
For an “easy grout repair,” patching with new grout is almost always the recommended method for beginners. Grout pens are fantastic for a quick cosmetic touch-up, but they don’t strengthen the tile or prevent moisture intrusion. Grout colorants are a good option for a complete makeover but involve more meticulous work. Full replacement is a significant undertaking best left for more experienced DIYers or professionals.
Troubleshooting Common Grout Repair Issues

Even with the best intentions, you might run into a few snags. Here are some common issues and how to fix them:
- Discoloration Issue: If your new grout dries a different shade than expected, it could be due to varying water amounts during mixing, temperature fluctuations during curing, or even mineral deposits in your water. Unfortunately, once dried, it’s hard to correct. For minor differences, a grout colorant can help. For significant differences, you may need to remove it and re-grout.
- Cracking After Repair: If new grout cracks shortly after repair, it usually means the original grout wasn’t fully removed, or the new grout was mixed too dry or too wet. It could also be due to settling or extreme temperature changes if the tiles are in an unconditioned space. You’ll likely need to remove the cracked grout and reapply.
- Grout Won’t Stick: This typically happens if the grout lines weren’t cleaned properly, leaving dust or debris. Ensure all loose material is removed before applying new grout.
- Too Much Grout Left on Tiles: If you left too much grout on the tiles and it’s hardened, you might need to gently use a razor blade scraper (held at a very low angle) to lift it off the tile surface, or try a grout haze remover product designed for tiles. Be extremely careful not to scratch the tiles.
Remember, practice makes perfect. Your first attempt might not be flawless, but each repair will improve your skill and confidence for tackling future DIY projects.
Frequently Asked Questions About Repairing Grout
Q1: How often should I seal my grout?
A1: After initial proper curing, it’s recommended to seal grout annually, especially in high-moisture areas like bathrooms and kitchens, or any area prone to heavy foot traffic and spills. Check the sealer manufacturer’s recommendations.
Q2: Can I repair epoxy grout the same way as cement grout?
A2: No, epoxy grout is much more durable and difficult to repair. Patching epoxy grout is challenging and often doesn’t blend well. If epoxy grout is damaged, it often requires removal and re-application, which is best left to professionals.
Q3: What is the best way to remove old grout?
A3: The most effective methods for beginners are using a utility knife or a dedicated grout saw/rake. For larger areas, a powered grout removal tool can speed up the process, but these require more caution to avoid damaging tiles.
Q4: Can I just paint over old grout?
A4: You can use grout paint or colorants, but it’s important to clean the grout thoroughly first. It’s a cosmetic fix that doesn’t fill gaps or protect the underlying tile as well as fresh grout. It won’t work for badly damaged areas.
Q5: How long do I need to wait before using the tiled area?
A5: Generally, you can walk on tiles after about 24 hours and expose them to water (like in a shower) after 48–72 hours. Always refer to the specific grout product’s instructions for curing times, as they can vary.
Q6: My new grout looks different from the old grout. What went wrong?
A6: It’s common for grout colors not to match perfectly, especially if the old grout has faded or stained over time. Factors like mixing water ratios, curing temperature, and lighting conditions can also affect the final color. For significant differences, you might consider using a grout colorant over the entire area for a uniform look.
Conclusion: Enjoying Your Beautifully Repaired Grout
You’ve done it! By following these straightforward steps, you’ve successfully repaired your grout, restoring the stunning look and essential protective function of your tiled surfaces. It might have seemed daunting at first, but you’ve proven that with a little guidance and the right approach, ‘repair grout easy’ is more than just a phrase – it’s an achievable reality. Not only have you saved money by tackling this task yourself, but you’ve also
