
Quick Summary:
This guide provides easy-to-follow, proven fixes for common shower problems like leaks or low pressure. Learn to identify issues, gather tools, and perform repairs yourself, saving time and money. Master your shower maintenance with these practical, beginner-friendly steps.
A leaky shower can be more than just annoying; it can lead to water damage and higher utility bills. Don’t let dripping faucets or weak water flow get you down. Many common shower issues are surprisingly simple to fix with the right guidance. This guide will walk you through common problems and their solutions, empowering you to tackle your shower repairs confidently. We’ll break down each step, explain what tools you’ll need, and offer tips to ensure you get the job done right, safely and effectively. Get ready to transform your bathroom experience!
Common Shower Problems and How to Solve Them
Showers are essential for our daily routines, so when they act up, it’s a real nuisance. From the dreaded drip, drip, drip to a showerhead that spits water more than it sprays, these issues can disrupt your peace and potentially damage your home. The good news? Many of these problems aren’t super complicated. With a bit of basic knowledge and some common household tools, you can often fix them yourself. Let’s dive into the most frequent culprits and how you can become the hero of your own bathroom!
1. The Leaky Showerhead: A Persistent Drip
A showerhead that won’t stop dripping is one of the most common shower complaints. This persistent drip can waste a surprising amount of water over time and create a constant, distracting noise. The usual suspects are a worn-out washer or a problem with the valve seat inside the faucet handle.
Why it Happens:
- Worn-out Washers: Rubber washers are used to create a watertight seal. Over time, they can become brittle, cracked, or compressed, losing their sealing ability.
- Corroded Valve Seat: The valve seat is where the water flow is controlled. Mineral deposits (limescale) can build up on it, preventing a complete shut-off.
- Loose Connections: Sometimes, the showerhead itself might not be screwed on tightly enough, allowing water to seep out.
What You’ll Need:
- Adjustable wrench
- Plumber’s tape (PTFE tape)
- Replacement washers (or a shower repair kit)
- Screwdriver (if your showerhead has a decorative cover)
- Vinegar and an old toothbrush (for cleaning mineral deposits)
Step-by-Step Fix:
- Turn Off the Water: Before you start, locate the main water shut-off valve for your house or the specific valve for your bathroom (if you have one) and turn it off. This is crucial for safety.
- Remove the Showerhead: Use an adjustable wrench to carefully unscrew the showerhead from the shower arm. You might need to hold the shower arm steady with another wrench or pliers to prevent it from turning. If there’s a decorative cover, gently pry it off with a flathead screwdriver.
- Inspect and Replace Washer: Look where the showerhead attaches to the shower arm. You’ll likely see a rubber washer. Carefully remove it. If it looks worn, cracked, or flattened, replace it with a new one of the same size.
- Clean the Valve Seat: Inside the shower arm, you might see a metal or brass valve seat. If it looks clogged with mineral buildup, you can try cleaning it with vinegar. Soak a rag in vinegar and wrap it around the valve seat for a few hours, or use an old toothbrush dipped in vinegar to scrub it.
- Reinstall the Showerhead: Apply a few wraps of plumber’s tape around the threads of the shower arm. Screw the showerhead back on by hand until snug, then use the wrench to tighten it an additional quarter to half turn. Don’t overtighten, as you could strip the threads.
- Test the Repair: Turn the water supply back on slowly and check for leaks. If the drip persists, you might need to replace the entire faucet cartridge, which is a more involved repair. We’ll cover that next!
2. The Dripping Faucet Handle: A Constant Annoyance

This issue usually points to problems within the faucet handle itself, specifically the cartridge or stem assembly that controls the water flow. Replacing these parts is a common DIY fix.
Why it Happens:
- Worn Cartridge/Stem: Like washers, these internal components can wear out over time, especially in older faucets.
- Loose Packing Nut: A nut behind the handle might be loose, allowing water to seep around it.
- Mineral Buildup: Scale deposits can interfere with the proper functioning of the cartridge.
What You’ll Need:
- Adjustable wrench
- Screwdriver set (Phillips and flathead)
- Pliers (needle-nose and standard)
- Replacement faucet cartridge or stem (make sure it’s compatible with your faucet brand)
- Plumber’s grease (optional, but recommended for lubrication)
Step-by-Step Fix:
- Shut Off Water Supply: Again, turn off the water to the shower.
- Remove Handle Trim: Look for a small screw, usually hidden under a decorative cap or plug on the handle. Pry off the cap with a small flathead screwdriver or a utility knife, then remove the screw.
- Remove Handle: Gently pull the handle straight off. If it’s stuck, you might need a handle puller tool or can try wiggling it carefully.
- Access the Cartridge/Stem: Once the handle is off, you’ll see a decorative escutcheon plate. Unscrew this, exposing the faucet body. You might encounter a bonnet nut or packing nut that needs to be unscrewed with a wrench.
- Remove Old Cartridge: The cartridge is typically a plastic or brass cylinder. Depending on the brand, it might pull straight out, or you may need to unscrew a retaining clip or nut. Consult your faucet’s manual or a quick online search for your specific model if unsure. For older faucets, you might be dealing with a valve stem and washers instead of a cartridge.
- Install New Cartridge: Lightly coat the O-rings of the new cartridge with plumber’s grease. Insert it into the faucet body, ensuring it’s oriented correctly (there’s usually a specific way it fits). Reinstall any retaining clips or nuts.
- Reassemble Faucet: Screw the escutcheon plate back on, then reattach the handle and its screw. Replace the decorative cap.
- Test for Leaks: Turn the water supply back on and check if the dripping has stopped and if the handle operates smoothly.
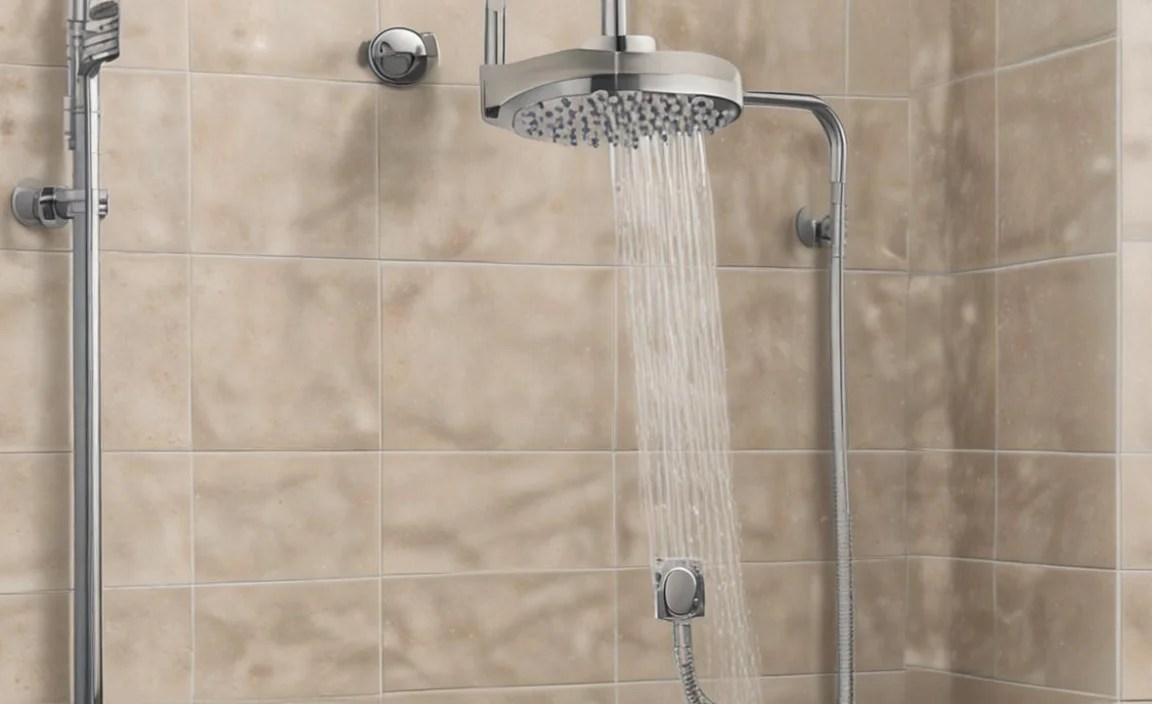
3. Low Water Pressure: A Sad Shower Experience
Is your shower more of a trickle than a powerful spray? Low water pressure can be frustrating, but it’s often a simple fix. The most common cause is a clogged showerhead, but it can also stem from issues with the valve or pipes.
Why it Happens:
- Clogged Showerhead: Mineral deposits, especially calcium and lime, can build up inside the showerhead spray nozzles, restricting water flow.
- Faulty Pressure-Balancing Valve: This valve is designed to prevent scalding by adjusting hot and cold water based on demand. If it malfunctions, it can reduce pressure.
- Partially Closed Shut-off Valve: Sometimes, the valve controlling water flow to the shower might not be fully open.
- Leaks in Plumbing: Less common for a gradual drop, but significant leaks can reduce overall pressure.
What You’ll Need:

- Adjustable wrench
- Old toothbrush or a small wire
- Vinegar
- Plastic bag and rubber band (for showerhead cleaning)
- Screwdriver
Step-by-Step Fix (Focusing on Showerhead):
- Check the Showerhead: This is the easiest fix. Unscrew the showerhead as described in the “Leaky Showerhead” section.
- Clean the Showerhead: If you see mineral buildup, soak the showerhead in a bowl of white vinegar for several hours or overnight. For stubborn clogs, scrub the nozzles with an old toothbrush or carefully poke out blockages with a small wire or toothpick. Rinse thoroughly.
- Alternative Showerhead Cleaning (On Fixture): If you don’t want to remove the showerhead, fill a plastic bag with vinegar, secure it around the showerhead with a rubber band, and let it soak for a few hours. Then remove the bag and run hot water through to flush out debris.
- Reinstall and Test: Apply plumber’s tape to the threads and screw the clean showerhead back onto the shower arm. Turn on the water and check the pressure.
If cleaning the showerhead doesn’t help, you might need to investigate the faucet cartridge or the pressure-balancing valve. These are more complex and might require calling a plumber if you’re not comfortable. For a deeper understanding of plumbing pressure, you can read about residential water pressure standards from sources like the HomeTips Water Pressure Guide which offers insights into maintaining optimal levels.
4. Stubborn Shower Doors: Squeaky and Hard to Slide

Shower doors, especially sliding ones, can become difficult to open and close over time. Dirt, grime, soap scum, and mineral buildup on the tracks are the usual culprits.
Why it Happens:
- Dirt and Debris: Small particles can accumulate in the tracks, causing friction.
- Soap Scum and Mineral Deposits: These create a sticky, abrasive layer that impedes smooth movement.
- Bent or Damaged Tracks: Physical damage to the metal or plastic tracks can cause sticking.
- Worn Rollers: The small wheels that allow the door to slide can become worn or damaged, leading to sticking and squeaking.
What You’ll Need:
- Clean cloths or sponges
- Mild all-purpose cleaner or a mixture of equal parts white vinegar and water
- Old toothbrush or small scrub brush
- Silicone lubricant spray (for plastic/metal tracks)
- Replacement rollers (if needed, ensure they match your door model)
- Screwdriver
Step-by-Step Fix:
- Clean the Tracks: This is usually the most effective step. Spray your cleaning solution generously into the shower door tracks. Let it sit for a few minutes to break down grime and soap scum.
- Scrub and Wipe: Use an old toothbrush or scrub brush to dislodge any stubborn buildup in the tracks. Once scrubbed, wipe everything down thoroughly with clean cloths or sponges. Rinse the tracks with clean water afterwards.
- Lubricate the Tracks: Once the tracks are clean and dry, spray a silicone-based lubricant along them. This helps the door glide smoothly. Avoid using oil-based lubricants, as they can attract more dirt. This Old House often recommends silicone spray for such applications.
- Check Rollers: If cleaning and lubrication don’t solve the problem, inspect the rollers on the bottom and top of the door. Some rollers can be adjusted with screws. If they are damaged, cracked, or missing, they will need to be replaced. This usually involves unscrewing them from the door panel.
- Replace Rollers (If Necessary): If you need to replace rollers, ensure you have the correct replacement parts. Follow the instructions for your specific shower door model to remove the old rollers and install new ones.
- Test the Door: Gently open and close the shower door to ensure it slides smoothly and quietly.
5. Mold and Mildew: The Unwelcome Guests

Mold and mildew love damp, dark, and humid environments like bathrooms. While not strictly a “repair,” managing them is crucial for shower health and appearance.
Why it Happens:
- Excess Moisture: Inadequate ventilation allows water vapor to linger, creating the perfect breeding ground.
- Poor Cleaning Habits: Soap scum and body oils feed mold and mildew.
- Leaks: Hidden leaks can create persistent damp areas where mold can thrive undetected.
What You’ll Need:

- Gloves and eye protection
- All-purpose bathroom cleaner
- Bleach solution (1 part bleach to 10 parts water) or a commercial mold and mildew remover
- Sponges, cloths, or a scrub brush
- Optional: Fan, dehumidifier, or exhaust fan
Step-by-Step Fix:
- Ventilate the Area: Open windows and turn on the exhaust fan, if you have one. Wear gloves and eye protection.
- Apply Cleaner: Spray your chosen cleaner directly onto the affected areas. For tougher spots, you might need a commercial mold remover or a diluted bleach solution. Let it sit for the time recommended on the product label or for about 10-15 minutes.
- Scrub Away: Use a scrub brush or sponge to vigorously scrub away the mold and mildew.
- Rinse and Dry: Rinse the treated areas thoroughly with clean water and dry them completely with a clean cloth.
- Prevent Future Growth:
- Always run your exhaust fan during and after showers for at least 20-30 minutes.
- Wipe down shower walls and doors after each use to remove excess moisture.
- Clean your shower regularly with a bathroom cleaner.
- Ensure there are no leaks in your shower enclosure or plumbing.
Troubleshooting Chart: Quick Reference
When you’re facing a shower issue, a quick glance at this chart might help you pinpoint the problem and the likely solution.
| Symptom | Possible Cause | Likely Fix |
|---|---|---|
| Leaky showerhead | Worn washer, loose connection, corroded valve seat | Replace washer, tighten connection, clean valve seat, or replace cartridge |
| Dripping faucet handle | Worn cartridge/stem, loose packing nut | Replace cartridge/stem, tighten packing nut |
| Low water pressure | Clogged showerhead, faulty pressure-balancing valve, partially closed shut-off valve | Clean showerhead, check valve, ensure shut-off is fully open |
| Sticking/squeaking shower door | Dirty tracks, soap scum, bent tracks, worn rollers | Clean tracks thoroughly, lubricate, check/replace rollers |
| Mold/Mildew on tiles/grout | Excess moisture, poor ventilation, soap scum buildup | Clean with mold remover, improve ventilation, regular cleaning |
| Water pooling in shower base | Clogged drain, improper slope of base | Clear drain, check for structural issues with base (may need professional) |
Essential Tools for Shower Repair
Having the right tools at your disposal can make any DIY repair project smoother and more successful. For most common shower fixes, you won’t need an overly extensive toolkit. Here are the essentials:
- Adjustable Wrench: This is your go-to tool for loosening and tightening various nuts and fittings. It’s versatile and can be adjusted to fit different sizes.
- Screwdriver Set: A set with various sizes and types of screwdriver heads (Phillips and flathead) is indispensable for removing handles, trim plates, and other fasteners.
- Pliers: Needle-nose pliers are great for gripping small parts or wires, while standard pliers can help with holding or turning.
- Plumber’s Tape (PTFE Tape): This essential material creates a watertight seal on threaded pipe connections, preventing leaks where components are joined. You can find it at any hardware store.
- Utility Knife or Small Flathead Screwdriver: Useful for prying off small decorative caps or covers on faucet handles.
- Bucket: Always have a bucket handy to catch any residual water when you disconnect pipes or fixtures.
- Old Toothbrush/Scrub Brush: Perfect for cleaning detailed areas, grout lines, and removing stubborn mineral deposits.
- Gloves and Eye Protection: Safety first! Always wear gloves and eye protection, especially when using cleaning chemicals or dealing with plumbing.
For more complex repairs, you might need specialized tools like a cartridge puller or a tubing cutter. However, for the common issues we’ve discussed, this basic set should be sufficient. If you
