
Replacing a faucet near you is a manageable DIY project! This guide provides step-by-step instructions, lists the tools you’ll need, and offers helpful tips to ensure a successful faucet replacement, saving you time and money.
Frustrated with a leaky, outdated, or hard-to-use faucet? You’re not alone! A malfunctioning faucet can be a real nuisance, wasting water and adding stress to your daily routine. The good news is that replacing a faucet is a common home repair that many beginners can tackle with the right guidance. You don’t need to be a master plumber to get the job done right. This essential guide will walk you through every step, from choosing a new faucet to the final tightening of connections. We’ll break down the process into simple, easy-to-follow instructions, ensuring you feel confident and prepared.
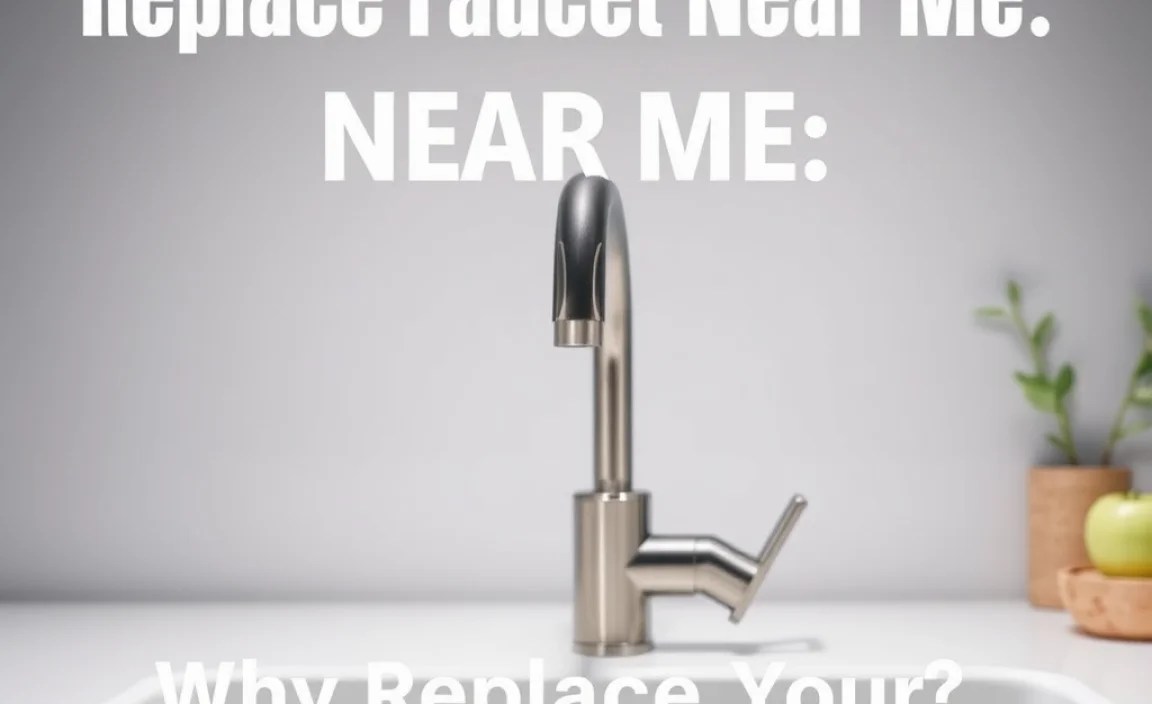
Why Replace Your Faucet?
There are several compelling reasons to consider replacing your faucet. Beyond aesthetics, a new faucet can significantly improve functionality and efficiency in your kitchen or bathroom. Let’s look at some common motivators:
- Leaks and Drips: Persistent leaks aren’t just annoying; they can significantly increase your water bill and lead to water damage over time. Replacing a worn-out faucet with leaky seals is often the most cost-effective solution.
- Outdated Style: Faucets are a prominent feature in kitchens and bathrooms. An old, clunky faucet can detract from your home’s overall aesthetic. A modern faucet can instantly refresh the look and feel of the space.
- Poor Performance: Sometimes, faucets simply don’t work as well as they used to. They might have low water pressure, difficulty controlling temperature, or sticky handles. A new faucet will restore smooth operation and optimal performance.
- Water Efficiency: Newer faucet models often incorporate water-saving technologies, such as low-flow aerators. Upgrading can help reduce your household’s water consumption, benefiting both the environment and your utility bills. For more on water conservation, explore the EPA’s WaterSense program.
- Hygiene and Health: Older faucets can sometimes harbor bacteria or minerals, especially if they are difficult to clean. A new faucet, particularly one with advanced features or easier-to-clean surfaces, can contribute to a more hygienic environment.
Choosing Your New Faucet

Shopping for a new faucet can seem overwhelming with so many options. Here’s a breakdown of what to consider to make an informed decision:
Types of Faucets
Faucets come in various styles, each suited for different needs and sink configurations:
- Widespread Faucets: These have separate handles for hot and cold water and a spout, all mounted independently on the countertop or sink. They require three holes and offer a classic, elegant look.
- Centerset Faucets: All components (hot handle, cold handle, and spout) are mounted on a single base, usually with a 4-inch spread. These are common in bathrooms and are typically easy to install.
- Single-Hole Faucets: A streamlined option where the spout and handle are combined into one unit, requiring only one hole. Many modern designs fall into this category.
- Wall-Mounted Faucets: Installed directly on the wall behind the sink, these are ideal for vessel sinks or to create a minimalist look. They require specific plumbing behind the wall.
- Pull-Down/Pull-Out Faucets: Popular in kitchens, these feature a sprayer head that pulls down or out from the faucet body, offering flexibility for washing dishes and cleaning the sink.
Faucet Materials and Finishes
The material and finish not only affect the look but also the durability and maintenance:
- Materials:
- Brass: Durable and corrosion-resistant, often considered the gold standard.
- Stainless Steel: Modern and resistant to rust and corrosion.
- Zinc Alloy: A more budget-friendly option, but can be less durable than brass.
- Plastic: Typically found in very low-cost options; less durable and aesthetically pleasing.
- Finishes:
- Chrome: Shiny, durable, and easy to clean. A very popular choice for its classic look.
- Brushed Nickel: Offers a matte, softer look that hides water spots and fingerprints well.
- Polished Nickel: Similar to brushed nickel but with a shinier, more reflective surface.
- Matte Black: A modern, bold choice that can make a statement in any kitchen or bathroom.
- Bronze: Comes in various shades, offering a warm, traditional feel.
- Gold/Brass: Can range from antique to polished finishes, adding a touch of luxury.
Other Considerations
- Valve Type: Ceramic disc valves are the most durable and reliable, offering smooth operation and preventing drips.
- Handle Type: Lever handles are easier to operate than knobs, especially for those with limited mobility.
- Sink Holes: Crucially, count the number of holes in your existing sink or countertop and measure the distance between them to ensure compatibility.
Tools and Materials You’ll Need

Gathering all your tools and materials before you start will make the process much smoother. Here’s what you’ll likely need:
Essential Tools:
- Adjustable Wrenches (two are helpful)
- Basin Wrench (essential for reaching tight spaces under the sink)
- Plumber’s Putty or Silicone Caulk
- Screwdrivers (Phillips and flathead)
- Bucket or Towels (to catch water)
- Safety Glasses
- Work Gloves
- Flashlight or Headlamp
- Wire Brush or Steel Wool (for cleaning threads)
- Rags
New Faucet Components:
- New Faucet Assembly
- Supply Lines (if not included with the faucet, it’s often a good idea to replace old ones)
Step-by-Step Guide: Replacing Your Faucet

Let’s get started! This guide assumes you are replacing an existing faucet with a similar type (e.g., replacing a centerset with another centerset).
Step 1: Turn Off the Water Supply
This is the most critical first step for safety and to prevent flooding. Look for the shut-off valves under the sink. There should be one for hot water and one for cold. Turn them clockwise until they stop. If you don’t have individual shut-off valves under the sink, you’ll need to turn off the main water supply to your home. You can usually find the main shut-off valve in your basement, garage, or near your water meter.
To test that the water is off, turn on the old faucet. If no water comes out, you’re good to go!
Step 2: Relieve Water Pressure and Disconnect Supply Lines
Open the old faucet to drain any remaining water in the lines. Place a bucket or some old towels beneath the pipes to catch any drips. Now, use an adjustable wrench to loosen the nuts connecting the flexible water supply lines to the shut-off valves. Be prepared for a little residual water to spill out.
Step 3: Remove the Old Faucet
This is where a basin wrench becomes your best friend. It’s designed specifically for reaching those awkward nuts and screws that hold the faucet in place from underneath the sink. Most faucets are secured by mounting nuts. You’ll need to reach up under the sink and locate these nuts. Use your basin wrench or an adjustable wrench to loosen and remove them. There might also be a mounting bracket or screws you need to remove.
Once the nuts and any other securing hardware are removed, carefully lift the old faucet assembly out from the top of the sink.
Step 4: Clean the Sink Surface
Before installing the new faucet, take some time to clean the area around the faucet holes on your sink or countertop. Remove any old plumber’s putty, caulk, or grime. A putty knife, scraper, or even some steel wool can help here. A clean surface ensures a good seal for your new faucet. You can find more cleaning tips from the Wirecutter’s guide to cleaning sinks.
Step 5: Install the New Faucet
Follow the manufacturer’s instructions for your specific faucet model. Generally, you’ll:
- Apply plumber’s putty or silicone caulk to the underside of the new faucet base or gasket to create a watertight seal.
- Insert the new faucet assembly through the holes in the sink or countertop from above.
- From underneath, secure the faucet with the provided mounting nuts and washers. Hand-tighten first, then use your basin wrench or adjustable wrench to snug them up. Be careful not to overtighten, as this can damage the sink or faucet.
Step 6: Connect the Water Supply Lines
Attach new flexible water supply lines to the faucet shanks. Then, connect the other ends of the supply lines to the corresponding hot and cold shut-off valves. Hand-tighten the connections, then use an adjustable wrench to tighten them about a quarter to half a turn more. Again, avoid overtightening.
Here’s a quick table to help you identify common faucet parts:
| Part | Description | Function |
|---|---|---|
| Spout | The part where water comes out. | Directs water flow into the sink. |
| Handle(s) | Levers or knobs used to control water flow and temperature. | Turns water on/off and adjusts hot/cold mix. |
| Aerator | A small screen at the tip of the spout. | Mixes air with water, reducing splash and conserving water. |
| Escutcheon Plate | A decorative flange or plate, usually under the faucet base. | Covers mounting holes on the sink or countertop. |
| Supply Lines | Flexible hoses connecting faucet to shut-off valves. | Carry hot and cold water to the faucet. |
| Mounting Nuts | Hardware securing the faucet from beneath. | Hold the faucet firmly to the sink/countertop. |
Step 7: Turn the Water Back On
Slowly turn the hot and cold shut-off valves back on (counter-clockwise). If you turned off the main water supply, turn that back on slowly as well.
Step 8: Check for Leaks
Turn the new faucet on slowly. Check all connections under the sink for any drips or leaks. Pay close attention to where the supply lines connect to the shut-off valves and the faucet. Also, check around the base of the faucet on top of the sink. If you see any leaks, gently tighten the connecting nuts a little more. If a leak persists, you may need to turn the water off again, disconnect the line, and re-seal the connection (perhaps with plumber’s tape, though not usually needed with modern compression fittings).
Step 9: Test Faucet Operation
Once you’re confident there are no leaks, fully test the faucet. Operate both handles, check the full range of hot and cold water, and ensure the water pressure is as expected. If you have a pull-down or pull-out sprayer, test its function and ensure it retracts properly.
Troubleshooting Common Issues
Even with careful work, you might encounter minor hiccups:
- Low Water Pressure: This could be due to a partially closed shut-off valve, debris in the aerator, or an issue with the supply lines. Check that valves are fully open. Unscrew the aerator from the spout tip (you might need pliers wrapped in a cloth to avoid scratching) and rinse it clean. Check supply lines for kinks.
- Leaking at Base: If water seeps from under the faucet base, the plumber’s putty or caulk seal might not be sufficient, or the mounting nuts may not be tight enough. You might need to remove the faucet, reapply sealant, and re-secure it.
- Dripping from Spout: This usually indicates a faulty cartridge or valve within the faucet. If your faucet is new, this points to a manufacturing defect, and you should contact the manufacturer or retailer. For older faucets, this often means the internal mechanism needs replacement.
When to Call a Professional
While replacing a faucet is a common DIY task, there are times when it’s best to call a qualified plumber:
- Unfamiliar with Plumbing: If the water shut-off valves are corroded, stuck, or you’re unsure about turning off the main water supply, it’s safer to call a pro.
- Complex Plumbing: If you have specialty plumbing, wall-mounted faucets that require in-wall work, or a very old house with potentially brittle pipes, professional help is recommended.
- Persistent Leaks: After attempting to fix leaks, if they continue to be an issue, a plumber has specialized tools and experience to diagnose and resolve the problem.
- Lack of Time or Confidence: If time is short, or you simply don’t feel confident undertaking the project, hiring a professional ensures the job is done correctly and efficiently. Searching “replace faucet near me” can help you find local licensed plumbers.
Maintaining Your New Faucet
Once your new faucet is installed, a little regular maintenance will keep it looking and working great for years to come:
- Regular Cleaning: Wipe down your faucet with a soft, damp cloth after use to prevent water spots and mineral build-up. Use mild soap and water for tougher grime. Avoid abrasive cleaners or scouring pads that can scratch the finish.
- Check Connections Periodically: Every six months or so, give the supply line connections under the sink a quick visual check to ensure there are no signs of leaks.
- Clean the Aerator: If you notice a decrease in water pressure, unscrew the aerator from the spout tip and clean out any debris or sediment.
- Address Minor Issues Promptly: Don’t let small drips or sticky handles fester. Addressing them early can prevent bigger problems down the line.
Conclusion
Replacing a faucet might seem like a daunting task at first, but with this comprehensive guide, you’re well-equipped to tackle it. By taking your time, gathering the right tools, and following these step-by-step instructions, you can successfully swap out your old, tired faucet for a new one that enhances your kitchen or bathroom’s look and functionality. Remember to prioritize safety by always shutting off the water supply and to double-check all your connections for leaks. If you encounter anything beyond basic troubleshooting, don’t hesitate to call a professional plumber. Enjoy your updated fixture, and the satisfaction of!
Frequently Asked Questions (FAQ)
Q1: How long does it typically take to replace a kitchen faucet?
For a DIYer with basic tools and some experience, replacing a kitchen faucet usually takes about 1 to 2 hours. If you’re a complete beginner, it might take a bit longer, so allow yourself ample time.
Q2: Do I need plumber’s putty or silicone caulk?
It depends on the faucet and sink. Most manufacturers recommend plumber’s putty for kitchen sink installations and silicone caulk for bathroom sink installations. Always check your faucet’s installation manual for the specific recommendation.
Q3: Can I replace my faucet without turning off the water?
No, this is highly discouraged and unsafe. Always turn off the water supply at the shut-off valves or the main water line before starting any faucet replacement work to avoid flooding and potential injury.
Q4: What’s a “centerset” faucet?
A centerset faucet is a single unit with all three holes (hot, cold, and spout) integrated into one piece, typically with a 4-inch spread. This makes them easy to install on sinks with corresponding hole configurations.
Q5: My new faucet is leaking at the supply line connection. What should I do?
First, ensure the connection is snug by tightening the nut slightly with an adjustable wrench (about a quarter turn). If it still leaks, turn off the water, disconnect the supply line, check the rubber washer inside the fitting, and reconnect. Sometimes, a faulty supply line needs replacement.
Q6: How do I know if my faucet cartridge needs replacing?
A common sign is a persistent drip from the spout even after tightening, or if a handle is very stiff or loose. Cartridges are the internal mechanisms that control water flow and temperature, and they wear out over time.
