
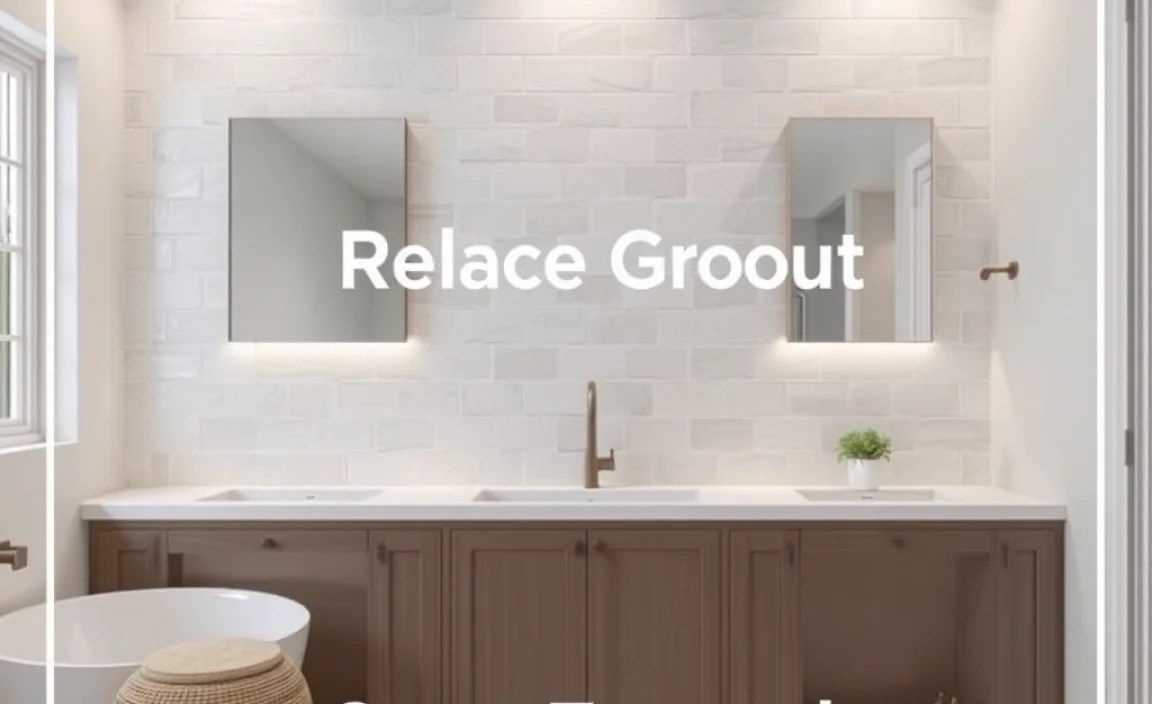
Replace grout cheap and easily with this guide! Learn how to refresh your tiles for a stunning, like-new look without breaking the bank. We’ll cover everything from tools to techniques for a DIY success.
Tired of dingy, cracked grout lines making your beautiful tiles look dull and old? You’re not alone! Grout is essential for protecting your tiles, but it can quickly become stained, crumbly, and unsightly. The good news is that you don’t need a huge budget or advanced skills to fix it. Replacing grout can make a dramatic difference in the aparência of your kitchen or bathroom, and doing it yourself is surprisingly achievable, even for beginners. Get ready to see your tiles shine again with this simple, step-by-step approach.
—
Why Replacing Grout is a Smart DIY Move
Grout is the unsung hero of your tiled surfaces. It fills the gaps between tiles, acts as a protective barrier against moisture and stains, and provides structural support. Over time, however, grout can wear down, absorb liquids, and harbor mold or mildew. This not only looks bad but can also lead to bigger problems like tile loosening or water damage behind your walls.
But don’t worry! “Replacing grout cheap” is more than just saving money; it’s about restoring the integrity and beauty of your space efficiently. When grout gets stained or damaged, it’s like a stain on your home’s appearance. Fixing it yourself is incredibly rewarding. It’s a project that offers a stunning visual upgrade and essential protection for your tiles. Ready to dive in? Let’s get those grout lines looking fresh and new!
Essential Tools & Materials for Budget Grout Replacement
Getting the right tools makes all the difference, and you can often find great deals on these items. Focusing on a budget doesn’t mean sacrificing quality; it means being smart about your purchases. Here’s what you’ll need to tackle this project without overspending:
Safety Gear (Non-Negotiable!)
- Safety Glasses: To protect your eyes from dust and debris.
- Dust Mask: Grout dust can be harmful if inhaled.
- Gloves: To protect your hands from cleaning solutions and grout.
Grout Removal Tools
- Grout Saw or Grout Rake: These are specifically designed for removing old grout. A grout saw has a small, tough blade, while a grout rake has multiple blades to speed up the process. Look for one with replaceable blades, as they can wear down.
- Oscillating Multi-Tool (Optional, but speeds things up): If you have access to one, the grout removal blade can make this job much faster and easier, though it might increase the initial tool cost. You can often rent these if you don’t own one.
- Utility Knife: For tight corners or touch-ups where a saw won’t fit.
- Hammer and Chisel (Carefully!): For stubborn bits, use a small chisel and a light tap from a hammer. Be very cautious not to chip or crack your tiles.
Cleaning Supplies
- Stiff-Bristled Brush: For general scrubbing.
- Vacuum Cleaner with Hose Attachment: To suck up all the dust and debris after removal.
- Sponge: For wiping and smoothing.
- Clean Rags or Microfiber Cloths: For final cleaning and polishing.
- Bucket: For water.
- Mild Soap or Tile Cleaner: For a final clean of the tile surfaces.
New Grout Materials
- New Grout: Choose between sanded or unsanded grout. For joints 1/8 inch or wider, use sanded grout. For narrower joints, unsanded is better. The color is crucial for the final look – consider a contrasting or complementing shade from your tiles. You can buy grout in powder form (cheapest) or pre-mixed (more expensive but convenient). For budget, powder is the way to go. A standard 10lb bag of grout powder can cover a significant area and typically costs between $10-$25, depending on the brand and type.
- Tinting Additive (Optional): If you want a specific color that isn’t pre-made, you can use grout tinting additives.
- Bucket (for mixing grout): A separate clean bucket is best for mixing.
- Mixing Stick or Margin Trowel: For mixing the grout powder with water.
- Grout Float: A rubber-faced tool for pressing grout into the joints.
- Sponge: A large, dense grout sponge is ideal for cleaning excess grout.
Shopping the sales at your local hardware store or home improvement center is a great way to keep costs down. You might also find great deals on tools and materials at discount stores or online marketplaces.
How to Replace Grout Cheaply: A Step-by-Step Guide
Let’s walk through the process of replacing your grout, focusing on making it as budget-friendly and straightforward as possible. Remember to take your time and work methodically.
Step 1: Prepare the Area and Protect Surfaces
Before you start, clear the area of any items. Cover countertops, sinks, or floors with drop cloths or old towels to catch dust and debris. Ensure good ventilation in the room.
Step 2: Remove the Old Grout
This is the most labor-intensive part, but crucial for a good result. Use your grout saw or rake to carefully scrape out the old grout. Work slowly and deliberately, following the lines between your tiles. You want to remove about 1/8 to 1/4 inch of the old grout. Be careful not to damage the edge of the tiles. If you encounter very stubborn grout, a light tap with a hammer and chisel can help, but proceed with extreme caution to avoid chipping the tile.
Pro Tip: If you’re very worried about damaging tiles, consider an oscillating multi-tool with a diamond grit blade. While an upfront cost, rentals are also an option. For a truly “cheap” approach, the manual grout saw is king, just be patient!
Step 3: Clean the Grout Lines Thoroughly
Once the old grout is removed, vacuum up all the dust and debris. Then, use a damp sponge or cloth to wipe down the empty grout lines and the tiles to remove any remaining dust. The lines need to be clean and dry for the new grout to adhere properly. Let them air dry completely.
Step 4: Mix the New Grout
If you bought powdered grout, carefully read the manufacturer’s instructions on the package. You’ll typically mix the powder with water in a clean bucket to achieve a peanut-butter-like consistency. Add water gradually to avoid making it too soupy. Mix thoroughly until there are no lumps. Let the mixed grout “slake” (rest) for about 5-10 minutes as per the instructions, then give it another quick mix.
Budget Tip: Buying grout powder is significantly cheaper than pre-mixed grout. You can mix only what you need for the job, reducing waste.
Step 5: Apply the New Grout
Using your grout float, scoop a generous amount of grout. Hold the float at a 45-degree angle to the tile surface. Press the grout into the empty lines with firm, steady strokes, working in a diagonal direction to the grout lines. Cover a small section of tiles at a time. The goal is to pack the grout tightly into the joints, ensuring there are no air pockets.
Step 6: Remove Excess Grout
As you fill the joints, hold the grout float at a steeper angle (around 90 degrees) and scrape diagonally across the tiles to remove the bulk of the excess grout. Work it off the tiles and back into your bucket if possible. Try to get the tile surfaces as clean as you can with the float.
Step 7: Initial Cleaning and Haze Removal
Wait about 15-30 minutes (or as instructed by the grout manufacturer) for the grout to set slightly. You’ll notice it starts to firm up. Then, using a damp (not wet!) grout sponge, start cleaning the tiles. Use light, circular motions and rinse the sponge frequently in your bucket of clean water. Change the rinse water often to avoid spreading dirty grout all over. As the grout dries, a light haze might appear on the tiles. This is normal and will be removed in the final cleaning.
Step 8: Final Cleaning and Curing
Once the grout has set enough that it doesn’t pull out of the joints (usually after a few hours, or as the manufacturer recommends), use a clean, damp cloth to wipe away any remaining haze. For a final polish, buff the tiles with a dry, soft cloth. Allow the grout to cure fully, typically 24-72 hours, before exposing it to water or heavy use. Check the grout packaging for specific curing times.
Budget-Friendly Colors: White, black, or grey grouts are usually the most cost-effective options. They also offer a classic, timeless look.
Grout Types and Cost Comparison
Choosing the right grout impacts both your project’s look and its cost. Understanding the differences helps you make the best budget-friendly choice.
| Grout Type | Typical Cost Per Pound (Powder) | Pros | Cons | Best For |
|---|---|---|---|---|
| Sanded Grout | $1.00 – $3.00 | Durable, less prone to shrinking/cracking, good for wider joints. | Can scratch delicate tiles, not ideal for very narrow joints. | Tile joints 1/8″ to 1/2″ wide. Common for floor tiles. |
| Unsanded Grout | $1.50 – $4.00 | Smooth finish, won’t scratch delicate surfaces, ideal for thin joints. | More prone to shrinking/cracking in wider joints, can be more expensive. | Tile joints less than 1/8″ wide. Common for wall tiles, glass tiles. |
| Epoxy Grout | $5.00 – $15.00+ | Extremely durable, stain-proof, water-resistant, no sealing needed. | Much more expensive, difficult to work with, requires faster application, can stain surrounding tiles if not cleaned quickly. | High-traffic areas, kitchens, bathrooms where durability is paramount and budget allows. |
| Pre-Mixed Grout | $5.00 – $10.00+ per smaller container | Convenient, no mixing required, good color consistency. | Significantly more expensive than powder, can dry out if not sealed properly, harder to touch up. | Small DIY projects where convenience outweighs cost. |
For the absolute cheapest DIY grout replacement, powdered sanded or unsanded grout is your best bet. It offers the most material for your money and allows you to mix only what you need.
Cost-Saving Tips for Grout Replacement

Replacing grout can be intimidating, but there are plenty of ways to keep costs down and still achieve stunning results. Here are some tried-and-true methods for a budget-friendly makeover:
- Buy in Bulk (Powder): If you have a larger area to cover, buying larger bags of powdered grout is almost always cheaper per pound than smaller bags.
- Choose Basic Colors: While trendy grout colors can be appealing, they often come with a higher price tag. Classic white, grey, or black grout powders are usually the most affordable.
- DIY the Mixing: Pre-mixed grout is convenient, but it costs more. Mixing your own grout from powder is significantly cheaper.
- Borrow or Rent Tools: If you don’t own specialized tile tools like an oscillating multi-tool with a grout blade, see if you can borrow one from a friend or rent one for a day. This can save you money compared to purchasing tools you might only use once.
- Focus on Grout Saw/Rake: The essential tool for this job is a good quality grout saw or rake. Invest in one with carbide-tipped or replaceable blades that can handle the job efficiently. This is one tool that’s worth having.
- Watch for Sales: Home improvement stores often have sales on tiling supplies. Plan your project around these discount periods.
- Clean Existing Tools: Make sure any buckets, sponges, or trowels you already own are thoroughly cleaned and in good condition before using them for this project.
- Accurate Measurement: Calculate the amount of grout you’ll need carefully. Buying too much means wasted money, while buying too little means a second trip to the store, potentially at a higher price if the sale ends.
- Consider Grout Pens (for minor touch-ups): If the damage is very localized and your grout is just discolored rather than degraded, a grout pen might be a cheaper alternative for minor touch-ups rather than a full replacement. However, for structural integrity, a full replacement is best.
By being strategic with your purchases and methods, you can give your tiled surfaces a beautiful facelift without straining your budget. The key is planning and utilizing the most cost-effective materials and tools.
The Essential Step: Sealing Your New Grout
You’ve worked hard to replace your grout cheaply and beautifully. Don’t let that effort go to waste! Sealing your new grout is a crucial step for its longevity and appearance.
Why Seal?
- Stain Protection: Unsealed grout is porous and can absorb spills (like wine, coffee, or grease) like a sponge, leading to permanent stains.
- Moisture Barrier: Sealing helps prevent water from seeping into the grout and potentially causing mold, mildew, or structural damage behind your tiles, especially in bathrooms and kitchens.
- Easier Cleaning: Sealed grout is smoother and less absorbent, making it much easier to wipe clean.
- Maintains Appearance: It helps keep your grout color looking fresh and new for longer.
When to Seal:
Wait for the grout to fully cure. This is typically 24-72 hours after application, but always check the grout manufacturer’s instructions. Sealing too early can trap moisture and compromise the grout.
How to Seal (Budget-Friendly Method):
- Clean the Area: Ensure tiles and grout are completely clean and dry.
- Apply Sealer: You can use a liquid grout sealer that comes in a small bottle with an applicator tip, or a spray-on sealer. For a budget approach, the applicator bottle is often more precise and you use less product. Apply a thin, even coat directly to the grout lines, wiping away any excess from the tile surface immediately with a clean cloth.
- Follow Product Instructions: Different sealers have different application methods and drying times. Read and follow the product’s instructions carefully.
- Reapply Periodically: Grout sealer doesn’t last forever. Depending on the product and traffic levels, you may need to reapply it every 6-12 months. A good test is to sprinkle a little water on the grout; if it beads up, the sealer is working. If it soaks in, it’s time to reseal.
A good quality liquid grout sealer can be purchased for around $10-$20 and will cover a substantial area, making this a very inexpensive but essential part of protecting your investment.
Frequently Asked Questions About Cheap Grout Replacement
Q1: How long does it take to replace grout cheaply?
A1: For a beginner working on a medium-sized
