
Replace Mirror Cheap: Genius Value
Breaking a mirror? Don’t stress! You can easily and affordably replace mirror cheap with simple tools and a bit of know-how. This guide will walk you through finding affordable replacement mirrors and safely installing them, saving you money and hassle. Get ready to restore your reflection without breaking the bank!
Mirrors are fantastic for making spaces feel bigger and brighter. They add a touch of elegance and functionality to almost any room. But what happens when that essential piece cracks, fogs up, or simply doesn’t fit your style anymore? The thought of replacing a mirror can bring up images of expensive custom orders or complicated installations. Many people worry about the cost, the effort, and whether they can even do it themselves. The good news is that replacing a mirror doesn’t have to be a budget-busting project. In fact, it can be a surprisingly simple and rewarding DIY task. We’re here to show you exactly how to tackle it, step-by-step, making sure you get great value and excellent results. Let’s dive into how you can replace that mirror for cheap and get that genius value!
Why Replace Your Mirror? Understanding Common Issues
Mirrors are a staple in many homes, serving both practical and decorative purposes. However, like any home fixture, they can develop issues over time. Understanding these common problems will help you determine when it’s time for a replacement and the best way to go about it:
- Cracks and Chips: Accidental impacts are the most common cause of mirror damage. Even a small chip can spread, compromising the mirror’s integrity and appearance.
- Silvering Degradation: Over time, the reflective coating on the back of a mirror can break down. This often appears as dark spots, streaks, or a hazy effect, particularly around the edges. This is more common in older mirrors or those exposed to moisture.
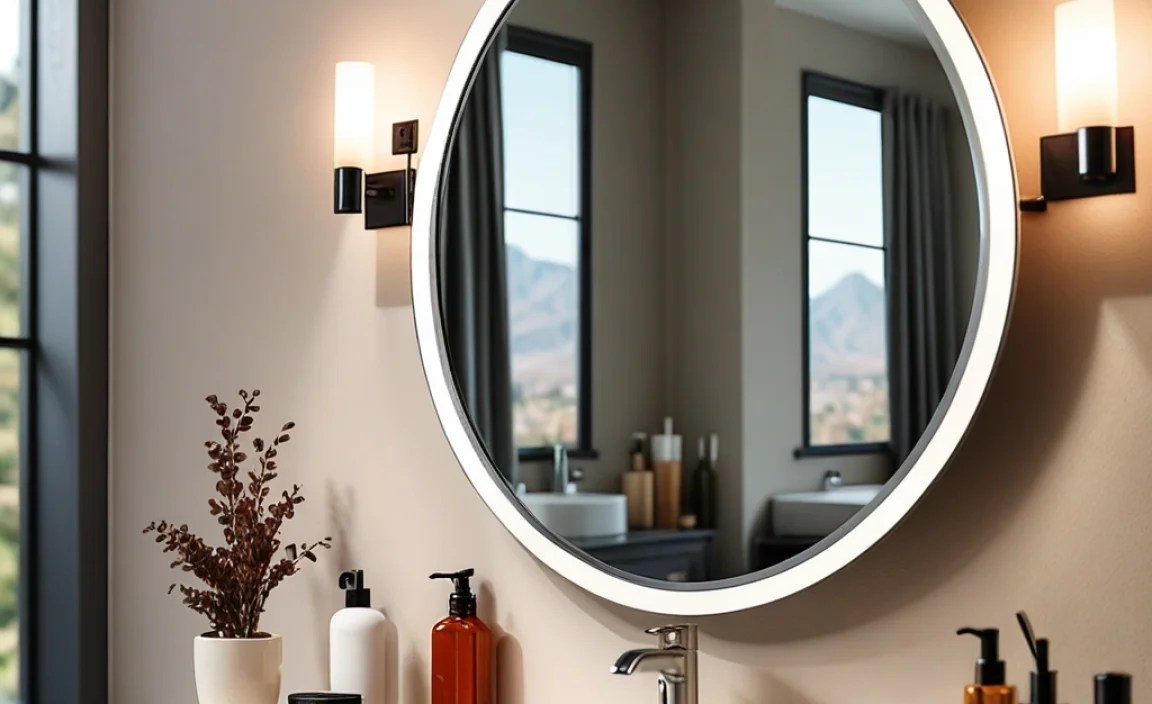
- Fogging and Delamination: In bathrooms, constant exposure to steam can lead to the silvering and backing layers separating from the glass. This results in an unsightly opaque or peeling appearance.
- Outdated Style or Size: Sometimes, a mirror is perfectly functional but no longer suits your decor. You might want a larger mirror for better light reflection or a different frame style to update a room.
- Safety Concerns: A mirror with significant cracks or weakened silvering can pose a safety hazard, especially if it’s large or in a high-traffic area.
Finding Your “Replace Mirror Cheap” Gem: Where to Look

The key to replacing a mirror on a budget lies in smart shopping and exploring alternative sources. Forget about going straight to custom framers for a standard replacement. Here are some excellent places to find affordable mirror glass:
1. Big Box Home Improvement Stores
Stores like Home Depot, Lowe’s, and other hardware giants often have a decent selection of pre-cut mirrors in standard sizes like 18×24, 24×30, or vanity sizes. They might also have larger sheets of mirror glass that can be cut to size for a fee.
- Pros: Readily available, often with options for different thicknesses and edge finishes. You can usually get them cut to specific dimensions.
- Cons: May not be the absolute cheapest option, especially for custom cuts. Quality can vary.
2. Glass and Mirror Shops
Local glass shops are a fantastic resource. They specialize in all things glass and can cut mirror sheets to virtually any size and shape you need. They often have competitive pricing, especially if you’re just looking for the glass itself.
- Pros: Highly customizable, wide variety of glass types and tints, professional cutting. Often a good balance of price and quality.
- Cons: Might require you to frame it yourself or use the old frame.
3. Online Retailers and Marketplaces
Websites such as Amazon, Wayfair, and specialty online glass suppliers offer a vast array of mirrors. You can often find great deals on pre-cut mirrors and sometimes even full mirror units.
- Pros: Huge selection, competitive pricing, convenience of home delivery.
- Cons: You can’t inspect the quality before buying, shipping fragile items can be risky, and returns can be a hassle.
4. Salvage Yards and Architectural Antique Stores
For a truly unique and budget-friendly find, explore architectural salvage yards or antique shops. You might uncover beautiful vintage mirrors or large mirror panels that can be repurposed. These often come with character and history.
- Pros: Unique character, often very inexpensive, environmentally friendly.
- Cons: Selection is hit-or-miss, mirrors may require cleaning or minor repairs, sizes might be unusual.
5. Thrift Stores and Flea Markets
Don’t overlook your local thrift stores or weekend flea markets. You can often find entire framed mirrors for very little cost. Even if the frame isn’t to your taste, you can often remove the glass and reuse the frame or just take the mirror itself.
- Pros: Extremely affordable, potential for unique finds.
- Cons: Mirror quality can be poor, sizes are rarely standard, requires patience and luck.
DIY Mirror Replacement: Tools and Materials You’ll Need

Before you start, gather everything you need. Having all your tools and materials ready will make the process smoother and safer. For a basic mirror replacement (assuming you’re reusing an existing frame or installing a frameless mirror), here’s a list:
Essential Tools:
- Safety Glasses: Absolutely crucial to protect your eyes from glass shards.
- Work Gloves: Thick, sturdy gloves to protect your hands from sharp edges. Heavy-duty leather or cut-resistant gloves are best.
- Tape Measure: For precise measurements of your opening or old mirror.
- Glass Cutter (Optional): If you’re cutting a sheet of mirror yourself. For beginners, it’s often easier to buy a pre-cut piece.
- Putty Knife or Scraper: To remove old adhesive or putty.
- Scredrivers: Both Phillips and flathead, depending on how the mirror is secured.
- Adhesive Remover (e.g., Goo Gone): For sticky residue.
- Pliers (Optional): For removing stubborn clips or nails.
- Level: To ensure your new mirror is hung straight.
- Drill with appropriate bits: If you need to create new mounting holes.
- Stud Finder: To locate wall studs for secure mounting.
Materials:
- New Mirror Glass: Measured precisely to fit your frame or space. Consider thickness (standard is usually 1/8 inch or 3mm for smaller mirrors, 3/16 inch or 5mm for larger ones) and type (e.g., clear, tinted, antiqued).
- Mirror Adhesive or Mounting Tape: Look for products specifically designed for mirrors. These are strong but also formulated to prevent damage to the mirror backing.
- Mirror Clips or Fasteners (if applicable): Small metal or plastic brackets that hold the mirror in place, often used in bathrooms or for larger mirrors.
- Silicone Sealant (Optional): For framing or a clean edge finish.
- Cleaning Supplies: Glass cleaner and soft cloths (microfiber is ideal).
- Painter’s Tape: To mask off areas or hold things in place temporarily.
Step-by-Step: How to Replace a Mirror Cheaply and Safely

This guide focuses on replacing a mirror in a frame or a frameless application where you’re mounting the glass directly. Always prioritize safety and take your time. If you’re uncomfortable at any point, it’s best to seek professional help.
Step 1: Measure Twice, Buy Once
Accuracy is critical. If you’re replacing a mirror in an existing frame, carefully measure the opening. Measure the height, width, and depth of where the glass will sit. If it’s a frameless mirror installation, measure the designated space on the wall. Remember to account for the thickness of the mirror if it needs to fit snugly within a recess.
Pro Tip: If the old mirror is still in place, use its dimensions as a starting point, but always double-check with your measuring tape for the actual opening.
Step 2: Remove the Old Mirror (Safely!)
This is where carefulness is paramount. Wear your safety glasses and gloves.
- For Framed Mirrors:
- Carefully lay the framed mirror face down on a clean, padded surface (like a blanket or cardboard).
- Look at the back of the frame. The mirror is usually held by small nails, brads, clips, or glazing points.
- Gently pry out any clips or nails with a flathead screwdriver or pliers. Work slowly to avoid damaging the frame.
- Once loosened, carefully lift the old mirror out of the frame. It might be stuck with old putty or adhesive – a putty knife can help here.
- Clean the frame thoroughly, removing any old adhesive, dust, or debris.
- For Frameless Mirrors (Wall Mounted):
- Check how the mirror is attached. It could be with mirror clips, strong adhesive, or double-sided tape.
- Mirror Clips: Loosen or remove screws holding the clips. The mirror should then be able to slide out or be carefully pulled away.
- Adhesive/Tape: This is trickier. Sometimes heating the adhesive gently with a hairdryer or heat gun (on a low setting, held at a distance) can soften it. Work a putty knife or scraper under an edge very carefully. Apply even pressure and avoid forcing it, as this can crack the glass. You might need to spray a little adhesive remover. Work in small sections. Having a helper can be very useful here to support the mirror as it releases.
Step 3: Prepare the Frame or Wall Space
Once the old mirror is out:
- Frame: Ensure the inside edges of the frame are clean and smooth. Any rough spots could scratch the new mirror. If the frame has a lip for the glass to sit against, clean it thoroughly.
- Wall: If you’re mounting a frameless mirror directly, ensure the wall surface is clean, dry, and smooth where the mirror will be placed. Repair any imperfections. If using mirror clips, mark the exact positions of the clips on the wall, ensuring they are level and evenly spaced. Use a stud finder to locate wall studs for maximum support if the clips aren’t directly over studs.
Step 4: Install the New Mirror
Handle your new mirror with extreme care! Always use gloves.
- Framed Mirrors:
- Carefully place the new mirror into the cleaned frame. Ensure it sits flush and correctly.
- Secure the mirror using new brads, glazing points, or clips. If using new nails, use a hammer very gently. Don’t over-nail.
- Add a thin bead of clear silicone sealant around the inner edge of the frame where it meets the glass for a neat finish and to help hold it securely, and to prevent moisture ingress (especially for bathroom mirrors).
- Frameless Mirrors (Wall Mounted):
- With Mirror Clips: Position the mirror against the wall, then attach and tighten the mirror clips over the edges to hold it securely.
- With Adhesive/Tape: Apply mirror-specific adhesive or double-sided mounting tape to the back of the mirror or directly to the wall, following the manufacturer’s instructions. Ensure the application is even to distribute weight. Carefully position and press the mirror firmly into place.
Step 5: Hang Your New Mirror
This step requires extra caution, especially for larger or heavier mirrors. Ensure your hanging hardware is rated for the mirror’s weight and is securely installed into wall studs or using appropriate heavy-duty drywall anchors. Use a level to ensure it hangs straight.
- For Framed Mirrors: Attach appropriate hanging hardware (like D-rings and wire, or heavy-duty picture hooks) to the back of the frame. Measure and mark the corresponding position on the wall, ensuring it’s level. Hang the mirror.
- For Frameless Mirrors Mounted Directly: If you followed Step 4 correctly with adhesive or tape, the mirror is already in place. If using clips, ensure they are all securely attached.
An important note from the experts: For safety, especially with larger mirrors, consider using a professional mounting system or having a second person assist you during the hanging process. Some adhesives are designed for direct wall mounting without clips, but always check the product specifications and weight limits. Resources like This Old House offer excellent advice on securely hanging heavy items.
Step 6: Clean Up and Admire
Once your new mirror is securely in place:
- Clean any fingerprints or smudges off the new mirror with a good quality glass cleaner and a soft, lint-free cloth.
- Dispose of the old mirror glass carefully. Wrap pieces in thick cardboard and heavy-duty trash bags, clearly marking them as “Broken Glass” to protect sanitation workers.
- Step back and admire your work and your beautiful, affordable new mirror!
Cost Comparison: DIY vs. Professional Replacement

Replacing a mirror yourself is almost always significantly cheaper than hiring a professional. The main costs for DIY are the mirror glass itself and any necessary adhesives or hardware.
Let’s break down some estimated costs. These are approximate and can vary widely based on your location, the size and type of mirror, and where you shop.
| Service/Item | Average Cost Range (USD) | Notes |
|---|---|---|
| Small Pre-Cut Mirror (approx. 18″x24″) | $20 – $50 | DIY purchase. |
| Medium Pre-Cut Mirror (approx. 24″x30″) | $40 – $80 | DIY purchase. |
| Large Custom Cut Mirror (e.g., 30″x40″) | $75 – $200+ | DIY purchase from glass shop. Varies by thickness/type. |
| Mirror Adhesive/Tape | $5 – $20 | DIY material. |
| Mirror Clips (set of 4) | $10 – $30 | DIY material. |
| DIY Tools (if you don’t have them) | $20 – $100+ | One-time investment for basic tools (gloves, scraper, etc.). |
| Estimated DIY Cost (Medium Mirror) | $50 – $100 | For mirror glass + adhesive/clips. |
| Professional Mirror Replacement (Small/Medium) | $150 – $400 | Includes labor, materials, and sometimes installation. |
| Professional Custom Mirror Installation (Large) | $300 – $800+ | Can be significantly higher for specialized mirrors or complex installations. |
As you can see, the savings with a DIY approach are substantial. For a standard-sized mirror, you can typically expect to save anywhere from 50% to 80% by doing it yourself. Even factoring in the cost of basic tools you might need to buy, the “replace mirror cheap” value is undeniable for the DIY-savvy homeowner.
Types of Mirror Glass and What to Consider
Not all mirrors are created equal. Your choice of glass can affect the look, function, and cost of your replacement.
Standard Mirror Glass
This is what you’ll find most commonly. It’s made by applying a reflective coating (usually silver or aluminum) to the back of a piece of glass. Ideal for most general applications like bathrooms, hallways, and dressing areas.
Safety Mirrors
These mirrors have a protective backing applied (often plastic film or a heavier coating) so that if the glass breaks, the pieces are held together, reducing the risk of injury.
