
Quick Summary: Sealing your bathtub’s edges prevents water damage and mold. This guide shows you how to find local help or DIY seal your bathtub easily and effectively. You’ll learn what materials you need and the simple steps to get a watertight, professional finish.
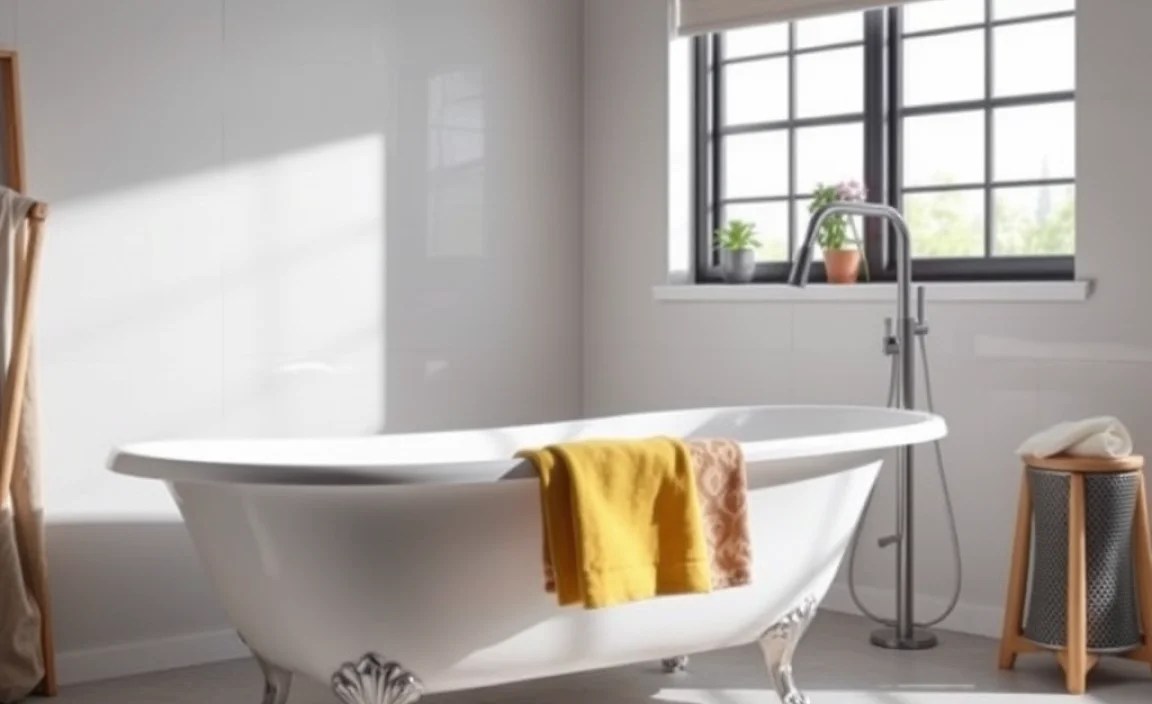
If you’ve noticed small leaks around your bathtub or seen that tell-tale black mold creeping into the cracks, it’s time to seal your bathtub. This might sound like a job for a professional, but it’s something most DIYers can tackle with confidence. A good seal keeps water where it belongs – in the tub! It protects your walls and floors from costly damage and makes your bathroom look much cleaner and more inviting. Don’t worry if you’re new to this; we’ll walk through every step to help you achieve a watertight, professional-looking finish.
Why Sealing Your Bathtub is Crucial

A sealed bathtub is more than just a cosmetic fix; it’s a vital part of your bathroom’s integrity. Without a proper seal, water can seep into the tiny gaps where the tub meets the wall or floor. Even a small amount of persistent moisture can lead to bigger problems.
Think of it like this: your bathtub is a giant basin for water. When you use it, water splashes and runs. If the sealant (often called caulk) around the edges is cracked, worn, or missing, that water has an easy path to travel behind your tiles or under your flooring. This can cause:
- Mold and Mildew Growth: Dark, damp cavities are perfect breeding grounds for mold, which can be harmful to your health and difficult to remove once established.
- Structural Damage: Persistent moisture can rot wooden studs in your walls, weaken subflooring, and even damage drywall, leading to expensive repairs.
- Pest Infestations: Water-damaged wood and dark, hidden spaces can also attract pests.
- Gaps and Cracks: Over time, the existing sealant can shrink, crack, or pull away from the surface, creating visible gaps that are unsightly and ineffective.
Addressing these issues early by sealing your bathtub can save you a lot of money and hassle down the line. It’s a relatively inexpensive maintenance task that offers significant protection.
Understanding Bathtub Sealants (Caulk)

Before you start, it’s helpful to know what you’re working with. The material you’ll use to seal your bathtub is commonly called “caulk.” Caulk is a pliable, waterproof material that fills gaps and prevents leaks. For bathrooms, you’ll want a caulk specifically designed for wet areas.
Here’s a quick look at the common types of caulk suitable for bathtubs:
| Caulk Type | Pros | Cons | Best For Beginner Use |
|---|---|---|---|
| 100% Silicone Caulk | Excellent water resistance, very durable, flexible, adheres well to non-porous surfaces like porcelain and acrylic. | Can be difficult to clean up (requires mineral spirits), harder to paint over, can be tricky to apply smoothly for beginners. | Good, but requires patience and care. |
| Acrylic Latex Caulk with Silicone | Easier to apply and tool (smooth out), cleans up with water, paintable. Good balance of flexibility and durability. | Not as waterproof as 100% silicone, may require more frequent replacement in very wet areas. | Excellent for beginners! |
| Kitchen & Bathroom Caulk (Mildew Resistant) | Specifically formulated with mildewcides to prevent mold and mildew. Often acrylic latex with silicone. Water-resistant. | Durability varies by brand; check labels. | Very good choice for beginners. |
For most DIYers, especially beginners, an “Acrylic Latex Caulk with Silicone” or a dedicated “Kitchen & Bathroom” caulk is the best bet. They offer a good mix of performance, ease of use, and cleanup.
Tools and Materials You’ll Need
Gathering your supplies before you begin makes the process much smoother. You don’t want to be halfway through and realize you’re missing a crucial item.
Essential Tools:
- Caulk Gun: You’ll need a standard caulk gun to apply the sealant from the tube.
- Utility Knife or Caulk Removal Tool: To cut away old caulk. A dedicated caulk removal tool can make this much easier and cleaner.
- Putty Knife or Scraper: For removing stubborn old caulk residue.
- Rubbing Alcohol or Mineral Spirits: To clean the area and ensure good adhesion.
- Masking Tape or Painter’s Tape: To create clean, straight lines and protect surrounding surfaces.
- Caulk Finishing Tool or Your Finger (wearing a glove): To smooth the bead of caulk.
- Paper Towels or Rags: For cleanup.
- Bucket: For water to clean tools and sponges.
- Gloves: To protect your hands.
- Safety Glasses: To protect your eyes from debris.
Materials:
- High-Quality Caulk: Choose a caulk specifically for kitchens and bathrooms that is mildew-resistant and waterproof, ideally an acrylic latex with silicone for ease of use. Ensure it’s the right color (white, clear, or almond are common).
- Newspaper or Drop Cloth: To protect your floor and surrounding areas from drips.
Step-by-Step Guide: How to Seal Your Bathtub

This section breaks down the process into easy-to-follow steps. Remember to take your time, especially on your first attempt. A little patience goes a long way!
Step 1: Prepare the Area and Remove Old Caulk
This is arguably the most important, and often the most tedious, step. A clean, dry surface is crucial for the new caulk to adhere properly.
- Protect Your Tub and Floor: Lay down newspaper or a drop cloth around the entire perimeter of the tub to catch any debris or old caulk.
- Cut Away Old Caulk: Use your utility knife or caulk removal tool to carefully cut along the edges of the old caulk. Work slowly and try to get the blade underneath it. You might hear a slight tearing sound as you pull away strips of the old caulk.
- Scrape Away Residue: For any remaining bits of old caulk, use a putty knife or scraper. Be gentle to avoid scratching the tub or tile.
- Clean Thoroughly: Once all the old caulk is gone, wipe down the entire area with a damp cloth to remove dust and debris. Then, wipe it down again with rubbing alcohol or mineral spirits. This will ensure the surface is completely clean and free of any grease or soap residue, promoting better adhesion for your new sealant.
- Ensure it’s Bone Dry: Let the area air dry completely. You can speed this up with a fan or a hairdryer on a cool setting. Any moisture left behind will prevent the new caulk from sticking.
Step 2: Apply Masking Tape for Clean Lines
Using tape is a secret weapon for achieving those perfectly straight, professional-looking caulk lines. It’s a game-changer for beginners!
- Apply Tape: Place a strip of masking tape or painter’s tape along the edge of the bathtub where it meets the wall, and another strip along the edge of the wall where it meets the tub.
- Space it Wisely: You want the tape to be about as far apart as the gap you need to fill. For example, if you have a 1/4-inch gap, place the tape strips about 1/4 inch apart. This creates a clean channel for your caulk.
- Press Firmly: Smooth down the edges of the tape firmly with your finger or a burnishing tool to ensure there are no gaps where caulk can seep underneath.
Step 3: Prepare and Load the Caulk Gun
Getting your caulk gun ready is simple, but there are a few tricks.
- Cut the Nozzle: On your caulk tube, cut the tip of the nozzle at a 45-degree angle. Start with a small opening – you can always cut more if you need a wider bead. A smaller opening is better for beginners.
- Puncture the Seal: Most caulk tubes have an inner seal. Your caulk gun likely has a long metal rod designed for this; push it through the nozzle opening to break the seal.
- Load the Gun: Pull back the plunger on the caulk gun, insert the caulk tube (nozzle first), and push the plunger rod back into the tube. Release the small lever on the back of the gun to release pressure when you stop applying caulk.
Step 4: Apply the Caulk
This is where the magic happens! Consistency is key here.
- Start in a Corner: Position the caulk gun at a 45-degree angle to the gap, with the tip of the nozzle directly over the seam you want to seal.
- Apply Steady Pressure: Gently squeeze the trigger of the caulk gun and move it smoothly along the seam. Aim for a continuous bead of caulk. Try to maintain even pressure on the trigger and a consistent speed.
- Work in Sections: It’s often easier to work in manageable sections, about 2-3 feet at a time, rather than trying to do the entire tub at once.
- Release Pressure and Overlap: When you want to stop, release the trigger and flip the small lever on the back of the caulk gun to release the hydraulic pressure that keeps the caulk flowing. If you need to start a new bead, slightly overlap the end of the previous one.
Step 5: Smooth the Caulk (Tooling)
This step turns that bead of caulk into a neat, waterproof seal.
- Use a Tool or Your Finger: You can use a dedicated caulk finishing tool, a slightly damp paper towel wrapped around your finger, or even just a gloved finger.
- Run Along the Bead: With a consistent, gentle pressure, run your chosen tool or finger along the entire length of the fresh caulk bead. The goal is to push the caulk slightly into the gap and smooth the surface.
- Wipe Away Excess: As you smooth, you’ll accumulate excess caulk on your tool or finger. Wipe this excess off onto a paper towel or rag frequently. If using your finger, a small bowl of water can help keep it smooth and prevent sticking.
- Admire Your Work (and Clean Up): You’ll see a clean, uniform line form.
Step 6: Remove the Tape and Clean Up
The final steps to a professional finish.
- Remove Tape Immediately: Once you’ve smoothed all the caulk, carefully and slowly peel away the masking tape. It’s best to do this while the caulk is still wet. Pull the tape away at an angle, away from the caulk bead.
- Final Touches: If you see any small imperfections or missed spots, you can touch them up carefully with a bit more caulk or a damp rag.
- Clean Tools: Clean your caulk gun and any tools immediately with water (for latex-based caulk) or mineral spirits (for silicone caulk).
- Let it Cure: Allow the caulk to cure fully according to the manufacturer’s instructions. This typically takes at least 12-24 hours, and sometimes longer, before you can use the shower or bathtub. Forcing it too soon can damage the seal.
Finding a Professional to Seal Bathtubs Near You

Sometimes, you might not have the time, confidence, or physical ability to tackle DIY projects. In such cases, hiring a professional is a great option. When searching for “seal bathtub near me,” consider these points to find a reliable service.
When to Call a Pro:
- You have extensive old caulk to remove or damaged grout.
- You’re uncomfortable working with sealants or tools.
- You want a guaranteed professional finish and peace of mind.
- Your bathroom has significant water damage that needs assessment.
How to Find a Reputable Professional:
Searching for “seal bathtub near me” will bring up various results, but not all service providers are created equal. Here’s how to vet them:
- Ask for Recommendations: Friends, family, or neighbors who have recently had bathroom work done can be a great source of referrals.
- Online Search & Reviews: Use search engines to find local handymen, bathroom renovation companies, or specialized caulking services. Look at reviews on Google, Yelp, or Angie’s List. Pay attention to comments about punctuality, cleanliness, and quality of work.
- Check Credentials: For larger jobs or companies, look for licenses and insurance. While a handyman might not need a full contractor’s license, ensure they are insured. Reputable companies will readily provide this information.
- Get Multiple Quotes: Don’t settle for the first quote. Contact at least three different professionals to compare pricing, services offered, and estimated timelines.
- Ask Specific Questions: When you call, ask about their experience with bathtub caulking, what type of sealant they use, and their process. Ensure they understand you want a mildew-resistant, waterproof seal.
- Look for Guarantees: Some professionals offer a guarantee on their work. This can provide extra assurance.
A good professional will be able to properly prepare the surface, apply the sealant expertly, and ensure a watertight, durable finish. When you search for “seal bathtub near me,” look for businesses that specialize in bathroom maintenance or tiling services.
Understanding the Costs Involved
Whether you DIY or hire a professional, there are costs associated with sealing a bathtub.
DIY Costs:
If you’re doing it yourself, your primary expenses will be for materials and tools:
-
- Caulk Gun: $10 – $30
- Caulk Tube(s): $5 – $15 per tube (you might need 1-2 tubes for a standard tub)
- Caulk Removal Tool: $5 – $15
- Masking Tape & Rags: $5 – $10
- Cleaning Supplies (Alcohol/Minerals Spirits): $5 – $10
Total DIY Cost: Roughly $30 – $80, depending on whether you need to buy new tools.
Professional Costs:
Hiring a professional will, of course, cost more due to labor. The price can vary significantly based on your location, the complexity of the job, and the professional’s rates.
-
- Handyman Services: Typically charge an hourly rate ($50 – $100+ per hour) or a flat fee. For a simple bathtub seal, expect a few hours of work.
- Specialized Contractors: Tiling or bathroom renovation companies might charge a flat rate for this service.
Estimated Professional Cost: You can typically expect to pay anywhere from $150 to $400 for professional bathtub caulking, with more complex jobs or higher-end services costing more. Always get a quote beforehand.
For more information on bathroom renovations and maintenance, the Consumer Product Safety Commission (CPSC) offers valuable safety tips that can apply to your bathroom upkeep.
Troubleshooting Common Caulking Issues
Even with careful preparation, you might run into minor issues. Here are a few common problems and how to fix them:
Problem: Caulk is not sticking or peeling
Cause: The surface was not clean, dry, or free of soap scum/grease before application. Old caulk residue might be present. Moisture trapped underneath.
Solution: Remove all the old caulk and residue. Clean the surface thoroughly with rubbing alcohol or mineral spirits. Ensure it’s completely dry before re-applying.
Problem: Caulk is lumpy or uneven
Cause: Uneven pressure on the caulk gun, inconsistent speed, or the caulk nozzle opening was too large. Improper tooling.
Solution: If the caulk is still wet, you can try to smooth it out again with your tooling tool or a damp cloth. If it’s already semi-hardened, you may need to carefully scrape it off and reapply, focusing on a steadier hand and consistent pressure. Ensure your tape is properly placed to guide a smooth bead.
Problem: Caulk cracked after drying
Cause: The caulk was not flexible enough for the joint, or the joint is moving too much.
