
A bathtub system involves the tub itself, the surrounding walls, and all the plumbing that fills and drains it. For beginners, understanding these components ensures proper use, maintenance, and simple fixes, preventing common issues and keeping your bathroom functional and clean. This guide breaks it down clearly.
Ever stepped into your bathroom and felt a little… clueless about how everything works? Especially when it comes to that big, watery centerpiece – the bathtub! It seems simple enough: turn a knob, water comes out, drain it. But what if something goes wrong, or you just want to make sure you’re taking the best care of it?
That’s where understanding your bathtub system comes in. Many homeowners, especially those new to managing a household, find the plumbing and components a bit intimidating. Don’t worry! This guide is designed to demystify the entire bathtub system, making it easy to grasp. We’ll walk through each part, explaining what it does in simple terms. Get ready to feel more confident about your bathroom’s star player!
Understanding Your Bathtub System: The Easy Way

Think of your bathtub system like a well-orchestrated team. Each part has a specific job, and they all work together to give you that relaxing soak or quick rinse. For beginners, knowing these parts and their functions is the first step to stress-free bathroom upkeep. We’ll cover the main players, from the tub itself to the hidden pipes.
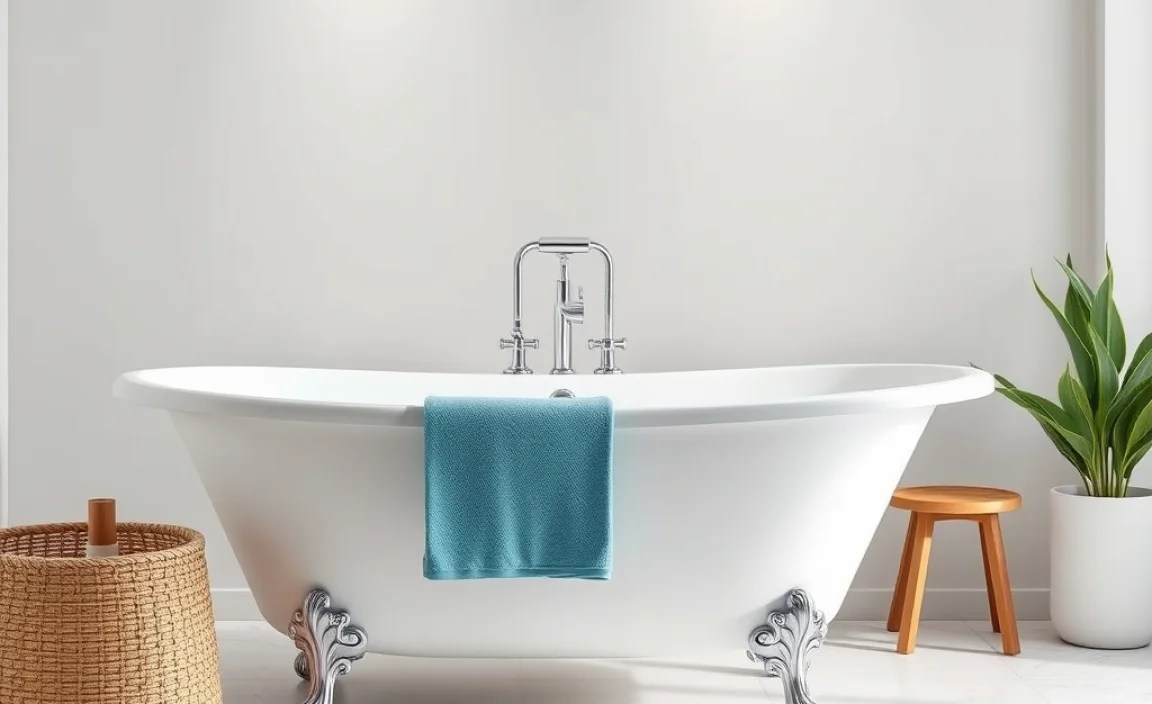
The Bathtub Itself: More Than Just a Basin
The bathtub is the most obvious part of the system. It’s the vessel that holds the water. Bathtubs come in various materials, shapes, and sizes, each with its own pros and cons. Understanding the material can help with cleaning and maintenance.
Common Bathtub Materials and Their Perks
Choosing or understanding the type of tub you have is important for maintenance. Here’s a quick rundown:
| Material | Pros | Cons | Beginner Friendliness (Maintenance) |
|---|---|---|---|
| Acrylic | Lightweight, easy to repair scratches, good heat retention, wide variety of designs. | Can scratch more easily than others, might fade over time without proper care. | High. Easy to clean with mild soaps. Scratches can often be buffed out. |
| Fiberglass | Lightweight, inexpensive, easy to install. | Can scratch and crack easily, porous surface can absorb stains and odors if not sealed well. | Medium. Requires careful cleaning to avoid scratching. Susceptible to damage from harsh chemicals. |
| Enamelled Cast Iron | Extremely durable, excellent heat retention, classic look, resists scratches and chips. | Very heavy, can be expensive, enamel can chip if impacted forcefully, cold to the touch initially. | Medium-High. Resilient, but chips in enamel need professional attention to prevent rust. Easy to clean surface. |
| Solid Surface (e.g., Corian) | Seamless appearance, non-porous, durable, repairable. | Can be heavy, may be more expensive, requires specific cleaning products. | High. Non-porous surface is easy to clean and resist stains. Minor scratches can be buffed out. |
For beginners, acrylic tubs are often the most forgiving due to their ease of cleaning and repairability. Enamelled cast iron, while heavy, is also very low maintenance for daily use.
The Plumbing: The Hidden Lifeline
This is where the magic happens – water comes in, and dirty water goes out. The plumbing system is a network of pipes, valves, and fixtures. For a bathtub, the key plumbing components are the faucet, the drain assembly, and the overflow.
The Faucet: Controlling the Flow
The faucet is your primary interface with the water supply. It’s responsible for turning the hot and cold water on and off, and mixing them to your desired temperature. For most bathtubs, you’ll find one of these common faucet types:
- Compression Faucets: These are older types, often with two separate handles for hot and cold water. They work by using a rubber washer to stop the flow. They are prone to drips if the washer wears out.
- Cartridge Faucets: These have a single handle that usually moves up/down for volume and left/right for temperature. They contain a cartridge that controls water flow. Repair often involves replacing the entire cartridge.
- Ball Faucets: Also common with single handles, these use a metal or plastic ball to control water flow and temperature. They have several seals and springs that can wear out.
- Ceramic Disc Faucets: These are very durable and use two ceramic discs that slide against each other to control water flow. They are less prone to leaks and are very reliable.
Understanding your faucet type is crucial if you ever need to fix a leak or replace parts. For most basic issues, like low water pressure or drips, knowing if you have a single handle or separate handles is a good starting point.
The Drain Assembly: Letting Go of Water
The drain assembly is what allows water to leave the tub after your bath. It consists of a drain flange (the strainer you see in the bottom of the tub), a stopper, and the pipework that connects to your home’s main drain line. Key parts include:
- Drain Flange and Strainer: The visible part. It catches hair and debris to prevent clogs.
- Stopper: This is what you use to plug the drain. Common types include pop-up stoppers (controlled by a lever near the faucet), push-and-pull stoppers, and lift-and-turn stoppers.
- Tailpiece and Waste Pipe: The vertical pipe below the tub that connects to the horizontal waste pipe leading to your sewer line.
Most clogs in bathtub drains happen in the strainer or the immediate pipes below it, often due to hair. Regular cleaning of the strainer is key.
The Overflow: A Safety Net
The overflow is a small opening located near the top of the bathtub, usually covered by a plate with small holes. Its job is to prevent the tub from flooding. When the water level rises to this opening, excess water flows through a pipe behind the tub wall and into the drain system. The overflow plate also often houses the mechanism for a pop-up drain stopper.
If your tub is draining slowly, it’s possible the overflow pipe is also clogged or obstructed. Cleaning this area can sometimes resolve slow draining issues.
The Walls and Surround: Protecting Your Space
While not directly part of the plumbing, the walls around your bathtub are an integral part of the system in terms of functionality and preventing water damage. These can be tiled, made of solid panels, or even incorporate a shower to the ceiling.
- Tiles and Grout: A common and attractive option. Grout fills the gaps between tiles and can be susceptible to mold and mildew if not properly sealed.
- Wall Panels (e.g., Acrylic, Fiberglass, Solid Surface): These are often seamless or have minimal seams, making them very water-resistant and easy to clean. They are frequently installed as a single unit or in multiple large sections.
- Caulking: This flexible, waterproof material is used to seal the gaps between the tub and the wall, and around fixtures. It prevents water from seeping behind walls or into the floor, which can cause serious damage.
Keeping the caulk in good condition is a vital, often overlooked, part of bathtub maintenance. It’s a simple DIY task that can prevent big problems.
Essential Bathtub Maintenance for Beginners

Maintaining your bathtub system is mostly about regular cleaning and minor checks. These steps will help keep everything running smoothly and prevent costly repairs down the line.
Daily/Weekly Cleaning: Keeping it Fresh
Regular cleaning prevents soap scum buildup, mold, and mildew. This is the most important maintenance you can do.
- Rinse After Use: After each bath or shower, give the tub and walls a quick rinse with water to wash away soap residue.
- Wipe Down: Use a soft cloth or sponge to wipe down the tub surfaces and surround. This removes excess moisture, which helps prevent hard water spots and mildew.
- Weekly Deep Clean: Use a non-abrasive bathroom cleaner or a mixture of baking soda and water. Apply it to the tub, let it sit for a few minutes, then scrub gently with a soft brush or sponge. Rinse thoroughly and wipe dry. Pay attention to the grout lines if you have tiled walls.
- Clean the Drain Strainer: Remove any visible hair or debris from the drain strainer regularly. This is a primary cause of slow drains.
Monthly Checks: Staying Ahead of Problems
A quick monthly check can catch small issues before they become big headaches.
- Inspect Caulking: Look for any areas where the caulk is cracked, peeling, or has mold. Damaged caulk can allow water to seep behind walls.
- Check Faucet Function: Ensure the faucet turns on and off smoothly and that there are no persistent drips.
- Test the Drain: Fill the tub partially and let it drain. Listen for any gurgling sounds, which might indicate a partial clog in the main drain line. Ensure it drains completely without leaving standing water.
- Check the Shower Head (if applicable): If you have a shower, check for clogged nozzles and ensure even water flow. Mineral buildup can often be cleaned with vinegar.
Annual Tasks: Proactive Care
Annual maintenance might involve slightly more involved tasks or professional attention.
- Recaulk as needed: If sections of caulk are significantly degraded, carefully remove the old caulk and apply new waterproof caulk. This is a very achievable DIY project with a bit of practice. For tips on removing old caulk, consider resources from the This Old House website, a trusted name in home repair.
- Clean or Replace Faucet Aerator: For low water pressure from the faucet, unscrew the aerator (the tip of the spout) and clean out any sediment or mineral buildup.
- Descale Faucet and Shower Head: If you have hard water, mineral deposits can affect performance. Soaking these parts in white vinegar can help dissolve buildup.
- Consider a Drain Cleaner: Periodically, you might use a gentle, enzyme-based drain cleaner to help break down any accumulated gunk in the pipes. Avoid harsh chemical drain cleaners, as they can damage pipes and are bad for the environment. The Environmental Protection Agency (EPA) offers guidance on environmentally friendly practices for home maintenance, which can be found on their EPA.gov website.
Bathtub Troubleshooting: Common Issues for Beginners
Even with the best maintenance, you might encounter a few common bathtub problems. Here’s how to address them without needing a plumber for every little thing.
Issue: Slow Draining Bathtub
What to do:
- Check the Drain Strainer: This is the first and easiest step. Remove any visible hair or debris. You might need a pair of pliers or a straightened coat hanger.
- Clean the Stopper: If you have a pop-up stopper, it often collects hair. Try to lift it out or unscrew it (check your faucet type’s manual if unsure) and clean it.
- Use a Plunger: Fill the tub with a few inches of water, block the overflow opening tightly with a wet rag, and plunge vigorously up and down.
- Try a Drain Snake (Auger): For deeper clogs, a small drain snake can be effective. Feed it into the drain and crank it to break up or pull out the clog. You can rent or buy these at hardware stores.
- Enzyme-Based Drain Cleaner: If the clog isn’t solid debris, an enzyme-based cleaner can help break down organic matter over time. Follow product instructions carefully.
Issue: Dripping Faucet
What to do:
- Identify Faucet Type: This will determine the repair. For single-handle faucets, it might be a cartridge issue. For older two-handle faucets, it’s often a worn-out washer or O-ring.
- Turn off Water Supply: Crucially, locate the shut-off valves for your bathroom sink or main water supply and turn them off before attempting any repairs.
- Replace Worn Parts: With the water off, carefully disassemble the faucet handle(s) to access the internal components. Replace any worn washers, O-rings, or cartridges as needed. Repair kits are often available at hardware stores.
- Professional Help: If you’re uncomfortable with disassembly or can’t identify the part, it’s time to call a plumber.
You can find detailed tutorials for specific faucet types on reputable DIY sites like Family Handyman, which offer step-by-step visual guides.
Issue: Mold or Mildew in Grout or Caulk
What to do:
- Ventilation is Key: Ensure your bathroom is well-ventilated during and after showers. Use an exhaust fan or open a window.
- Regular Cleaning: Use a dedicated mold and mildew bathroom cleaner or a paste of baking soda and water with a scrub brush. For stubborn spots, a diluted bleach solution (use with extreme caution and good ventilation) can be effective, but test in an inconspicuous area first.
- Recaulk: If mold has deeply penetrated the caulk or grout, or if the caulk is peeling, the best solution is to remove the old caulk and apply a fresh bead of waterproof, mildew-resistant caulk.
Issue: Water Leaking from Under the Tub
What to do:
- Immediate Action: This is a serious issue that needs prompt attention. Water leaking from under the tub indicates a breach in the sealing where the tub meets the wall, or a leak in the drain assembly.
- Inspect Visible Areas: Check the caulk line around the tub and the access panels for the drain if your tub has them. Look for signs of water damage on the floor or surrounding walls.
- Turn off Water to Tub: If the leak is continuous, turn off the water supply valves to the tub if possible, or the main water supply to your home.
- Call a Professional: Leaks under the tub can cause significant structural damage and mold growth. It’s highly recommended to call a qualified plumber immediately to diagnose and repair the source of the leak.
For those looking to tackle recaulking, this guide from the Home Depot blog provides excellent visual instructions and tips.
Tools Every Beginner Should Have for Bathtub Maintenance
You don’t need a professional toolkit to handle basic bathtub maintenance. A few simple, common tools can make a big difference.
Essential Tools:
- Screwdrivers: A set with various sizes and types (Phillips head and flathead) for disassembly of faucet handles or drain covers.
- Adjustable Wrench: Useful for tightening or loosening nuts and bolts on faucet connections or drain assemblies.
- Pliers: Needle-nose pliers are great for gripping small parts, while channel-lock pliers can handle larger pipes or fittings.
- Plunger: A flange plunger is ideal for toilets, but a standard cup plunger can also work for bathtub drains.
- Drain Snake/Auger: A small, flexible snake (about 15-25 feet) is perfect for clearing minor clogs in bathtub drains.
- Caulking Gun and Caulk: For applying new caulk to seal gaps.
- Scrub Brushes and Sponges: Non-abrasive options for regular cleaning.
- Utility Knife or Caulk Removal Tool: For carefully removing old caulk.
- Old Rags and Towels: For cleanup and protecting surfaces.
- Bucket: Useful for collecting water or holding cleaning solutions.
Investing in a few good basic tools will empower you to tackle many common bathroom issues with confidence. Many of these tools are also essential for other home maintenance tasks.
