
Quick Summary:
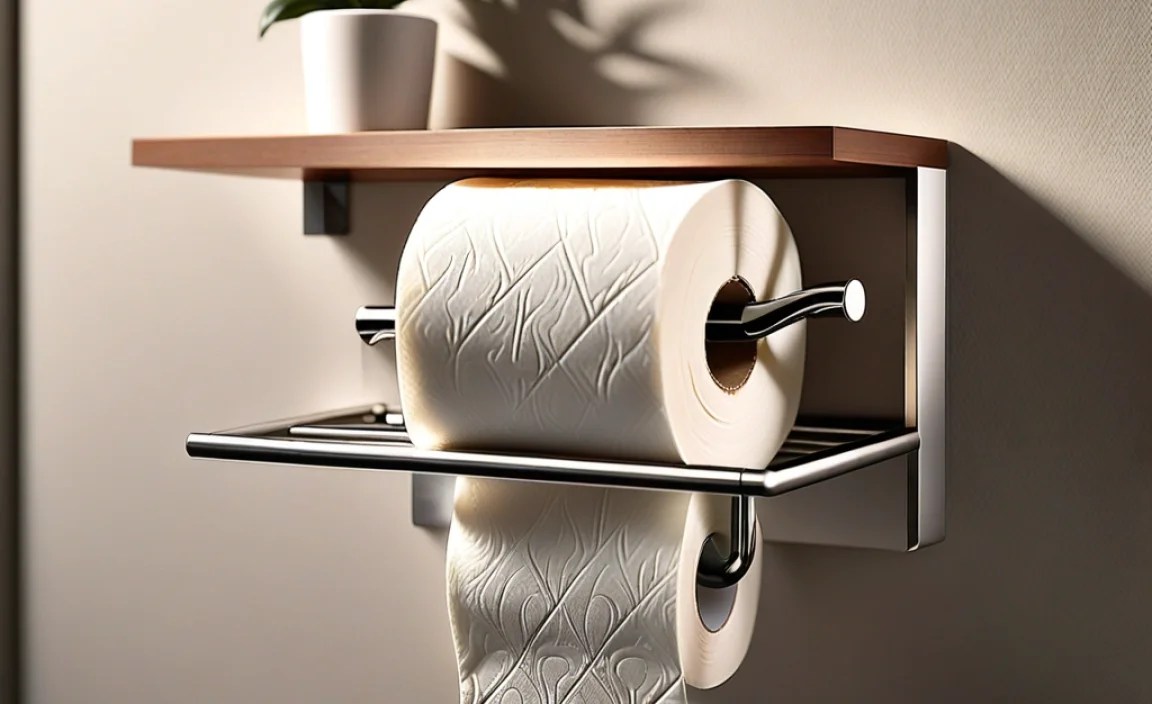
A toilet paper holder with a shelf offers minimal yet essential bathroom storage. It keeps essentials like your phone, a small plant, or air freshener within reach, decluttering your space with a sleek, modern design. Installation is straightforward, making it a practical upgrade for any bathroom.
Is your bathroom counter cluttered, or do you find yourself wishing you had a spot for your phone or a nice-smelling spray? A toilet paper holder with a minimalist shelf is a simple yet brilliant solution. It adds a touch of modern elegance while providing crucial, convenient storage right where you need it. Don’t worry if you’re new to DIY; we’ll walk you through everything you need to know, from choosing the right one to getting it installed. Get ready to transform your bathroom’s functionality and style!
Why a Minimalist Shelf Toilet Paper Holder is a Bathroom Game-Changer

In today’s world, we’re always looking for ways to make our homes more efficient and stylish. Bathrooms, often small spaces, can quickly become a dumping ground for everyday items. That’s where clever accessories come in. A toilet paper holder with a built-in shelf, especially one with a minimalist look, is more than just a place to hang your TP. It’s a smart storage solution that blends seamlessly into your bathroom’s decor. Think clean lines, simple materials, and maximum utility. It’s about adding value without adding visual noise.
Decluttering Your Small Space
Small bathrooms often lack adequate storage. Without a place for essentials, countertops get messy, and items can fall on the floor. A toilet paper holder with a shelf solves this problem directly. It provides a designated spot for your phone, so no more awkward balancing acts or fear of dropping it. It’s also perfect for a small air freshener, a tiny decorative plant, or even a spare roll of toilet paper. This decluttering effect makes the bathroom feel larger and more organized.
Adding Modern Style with Minimal Effort
The “minimalist look” is all about simplicity and clean design. These holders often feature sleek lines, neutral colors (like brushed nickel, matte black, or chrome), and a lack of ornate decoration. They’re designed to complement, not overpower, your existing bathroom aesthetic. Installing one is a straightforward DIY project that can significantly update the look and feel of your bathroom without breaking the bank or requiring extensive renovation. It’s an instant style boost.
Proven Essential: Practicality Meets Design
Let’s be honest, the “proven essential” part comes from pure practicality. We live in a world where our phones are practically glued to our hands. Having a safe, stable place for it while you’re in the bathroom is a modern necessity. Beyond the phone, the shelf can hold other small items that make your bathroom experience more comfortable. It’s a small change that makes a big difference in daily convenience.
Choosing Your Minimalist Shelf Toilet Paper Holder

With so many options available, picking the right holder can seem daunting. But a few key factors will help you narrow it down. Think about your bathroom’s existing style, the space you have, and what you intend to put on the shelf. Prioritize quality and functionality to ensure your new holder is both stylish and durable.
Material Matters: Durability and Aesthetics
The material of your toilet paper holder plays a significant role in its durability and how it looks. Common materials include:
- Stainless Steel: Excellent for rust resistance and durability. It often comes in brushed, polished, or matte finishes, fitting various modern decors.
- Aluminum: Lightweight and corrosion-resistant. Good for bathrooms with higher humidity, though sometimes less sturdy than steel.
- Zinc Alloy: A popular choice for its durability and ability to be cast into various shapes. Often plated with chrome or nickel.
- Plastic: The most budget-friendly option. While some high-quality plastics can look sleek, they may not feel as premium or last as long as metal options.
For a minimalist look, brushed finishes or matte black are excellent choices as they tend to hide water spots and fingerprints better than polished surfaces.
Size and Shape: Fitting Your Space
Consider the dimensions of the holder and the shelf. The shelf needs to be large enough to hold your essentials without being too obtrusive. Standard shelves can range from 4 to 8 inches in width, with depth typically around 3 to 5 inches. Also, think about the overall design – some are integrated directly into a single arm, while others have a separate arm and shelf unit. Measure the wall space where you plan to install it to ensure a good fit.
Installation Type: Wall-Mounted vs. Freestanding
Most minimalist shelf toilet paper holders are designed for wall mounting. This offers the most secure and streamlined look. However, there are also freestanding models if you prefer not to drill into your walls.
- Wall-Mounted:
- Permanent: These require drilling and are typically secured with screws and anchors for maximum stability. They offer the cleanest, most integrated look.
- Adhesive: Some models use strong adhesive pads. These are great for renters or those who don’t want to drill, but ensure the surface is smooth and clean for proper adhesion. They might not be suitable for heavy items.
- Freestanding: These usually have a weighted base and a stand that holds the toilet paper roll and has a small shelf. They offer flexibility in placement but can take up floor space and may not have as minimalist an appearance.
For a truly minimalist look and maximum stability, wall-mounted options are usually preferred.
Features to Consider:
Beyond the basics, some holders offer extra features:
- Integrated Phone Holder: Some shelves are specifically designed with a groove or lip to cradle your phone securely.
- Double Roll Capacity: Some models can hold two rolls of toilet paper, reducing the frequency of changes.
- Swinging Arm: Allows the roll to be easily replaced.
- Built-in Baskets: Less common for a truly minimalist look, but some might have small compartments.
Step-by-Step Guide: Installing Your Minimalist Shelf Toilet Paper Holder

Installing a wall-mounted toilet paper holder with a shelf is a manageable DIY project for most beginners. With the right tools and a bit of patience, you’ll have it up and ready in no time. Always prioritize safety and follow the instructions provided with your specific product.
Tools You’ll Need:
Gathering your tools beforehand will make the process smoother. Here’s a typical list:
- Your new toilet paper holder with shelf (and all included mounting hardware)
- Pencil
- Measuring tape
- Level
- Drill with appropriate drill bits (for pilot holes and wall anchors)
- Screwdriver (Phillips head is most common)
- Stud finder (highly recommended for secure installation)
- Safety glasses
- Wall anchors (if not mounting into a stud, the holder might come with them, or you may need to purchase suitable ones)
Finding the Perfect Spot: Placement is Key
Before you drill anything, decide on the best location:
- Height: The ideal height for a toilet paper holder is typically around 26 inches from the floor. This is usually at elbow height for someone seated.
- Distance from Toilet: Place it about 8-12 inches in front of the edge of the toilet bowl. You want it to be easily reachable but not so close that it’s in the way.
- Wall Type: If possible, mounting into a wall stud provides the most secure installation. Use a stud finder to locate one. If there’s no stud in your desired location, you’ll need appropriate wall anchors. For guidance on wall anchors and their types, resources from organizations like the This Old House website can be very helpful.
- Clearance: Ensure there’s enough space for the toilet paper roll to spin freely and for you to access the shelf.
Installation Steps:
Here’s a general guide. Always refer to your product’s specific instructions.
| Step | Action | Tips for Success |
|---|---|---|
| 1 | Mark Pilot Hole Locations: Hold the mounting bracket (or the holder itself, if it has a template) against the wall at your chosen height and position. Use a level to ensure it’s straight. Mark the screw hole locations lightly with a pencil. If your holder came with a paper template, use that. | Double-check the level before marking. Make sure your marks are clear but not too dark, so they are easy to remove later. |
| 2 | Drill Pilot Holes: If mounting into a stud, drill pilot holes slightly smaller than your screws. If using wall anchors, drill holes large enough for the anchors according to their specific instructions. You might need to install the anchors now. | Wear safety glasses. Ensure your drill bit is the correct size for your screws or anchors. |
| 3 | Install Wall Anchors (if needed): Gently tap the wall anchors into the drilled holes until they are flush with the wall surface. | Don’t force them too hard, as this can damage the wall. |
| 4 | Attach the Mounting Bracket/Holder: Align the bracket or the holder with the pilot holes or anchors. Insert the screws and begin tightening them with your screwdriver. | Tighten screws evenly, alternating between them, to ensure the holder is mounted flush against the wall. |
| 5 | Secure Tightly: Continue tightening until the holder is firmly secured to the wall. It should not wiggle or feel loose. | Do not overtighten, as this can strip the screws or damage the wall. |
| 6 | Attach the Shelf and Arm: If the shelf and arm are separate pieces that attach to the bracket, secure them now according to your product’s instructions. This often involves sliding them into place and tightening a small set screw on the underside. | Ensure all set screws are tightened to prevent the shelf or arm from rotating or coming loose. |
| 7 | Install Toilet Paper Roll: Place a roll of toilet paper onto the holder. | Ensure it spins freely and is securely in place. |
| 8 | Test and Clean: Gently test the stability of the holder and shelf. Wipe away any pencil marks with a damp cloth. | Place a small, non-valuable item on the shelf to test its weight capacity before placing your phone or other important items. |
Adhesive Installation (Alternative Method)
If your holder uses strong adhesive, the process is simpler:
- Clean the Wall: Thoroughly clean the wall area with rubbing alcohol to remove dust, grease, and moisture. Let it dry completely.
- Mark Position: Use a pencil and level to mark the desired spot.
- Apply Adhesive: Peel off the backing from the adhesive tape.
- Press Firmly: Press the holder firmly onto the marked spot. Hold it in place for at least 30 seconds to ensure good adhesion.
- Cure Time: Many adhesive mounts require a 24-72 hour curing period before use. Check your product’s instructions. During this time, avoid putting any weight on the shelf.
Important Note on Adhesives: Adhesive mounts are convenient but may not hold as much weight as screw-mounted ones. Always check the manufacturer’s weight limit and test it carefully.
Maintaining Your Minimalist Holder
Keeping your toilet paper holder with a shelf looking its best and functioning properly is simple. Regular, easy maintenance will ensure it remains a stylish and useful part of your bathroom for years to come.
Cleaning Tips:
The best way to clean your holder depends on its material:
- Stainless Steel/Chrome: For daily cleaning, a soft, damp cloth is usually sufficient. For smudges or water spots, use a mild soap and water solution. You can also use a dedicated stainless steel cleaner sparingly. Always wipe in the direction of the brushed grain if applicable.
- Matte Finishes: These can be sensitive to abrasive cleaners. Stick to a soft cloth with mild soap and water. Dry thoroughly to prevent water spots.
- Aluminum/Zinc Alloy: Similar to stainless steel, mild soap and water are best. Avoid harsh chemicals that could corrode the finish.
What to Avoid: Never use abrasive cleaners, steel wool, or harsh chemicals like bleach, as these can scratch or damage the finish, especially on plated or coated surfaces. For DIY cleaning tips, sites like EPA’s Greener Cleaning offer safe and effective methods.
Checking for Stability:
Periodically (every few months), give the holder a gentle tug to ensure it’s still securely attached to the wall. If it feels loose, check the screws or anchors and tighten them as needed. For adhesive mounts, ensure the adhesive is still holding firm. If you notice any peeling or loosening, it might be time to reapply or consider a more secure mounting method.
Replacing the Toilet Paper Roll:
This is the most frequent activity! Most holders have a simple mechanism:
- Spring-Loaded Bar: Compress the spring inside the bar, remove the empty roll, slide on the new one, and let the bar expand back into place.
- Fixed Arm with Hook: Some arms may have a small hook to lift or a base that unscrews to allow the roll to slide off and on.
Choose a holder where replacing the roll is effortless, even with one hand.
Troubleshooting Common Issues
Even with simple installations, little hiccups can occur. Here’s how to handle them:
Holder is Loose After Installation:
Cause: Screws not fully tightened, wrong size anchors used, or mounting into drywall without anchors or studs.
Solution:
- First, try tightening the screws.
- If it still wiggles, remove the holder. Check if the anchors are loose or inappropriate for the wall type. You may need to use larger anchors or different types designed for your wall (e.g., toggle bolts for hollow walls). See resources on choosing the right wall anchor.
- If mounting into drywall, ideally find and use a stud.
Shelf is Sagging:
Cause: Shelf is overloaded, or the mounting of the shelf arm is loose.
Solution:
- Remove some weight from the shelf. Ensure you’re not exceeding the manufacturer’s recommended weight limit.
- Check the tiny set screw underneath the shelf arm that often secures it to the main bracket. Tighten this screw.
Adhesive is Failing:
Cause: Wall not properly cleaned, humidity, or exceeding weight limits.
Solution:
- Remove the holder carefully. Scrape off old adhesive.
- Clean the wall and the back of the holder thoroughly with rubbing alcohol.
- Use a high-quality, heavy-duty mounting tape specifically designed for bathrooms (often rated for moisture and weight).
- For a more permanent solution, consider switching to a screw-mounted model.
FAQ: Your Questions Answered
Q1: How high should a toilet paper holder with a shelf be mounted?
A1: Generally, the bottom of the holder should be about 26 inches from the floor, aligning with typical seated elbow height. The shelf’s position will be slightly above that.
Q2: How far from the toilet should the holder be placed?
A2: Aim for 8 to 12 inches in front of the toilet bowl’s edge for easy reach without being in the way.
Q3: Can I install a shelf toilet paper holder on a tiled wall?
A3: Yes, but you’ll need a masonry drill bit and may need to use specialized anchors for tile and potentially grout. It’s a bit more challenging than drywall but achievable with the right tools and care.
