
Create a vibrant and organized travel bathroom kit with these essential colorful accessories. This guide helps beginners pack smart, ensuring you have everything you need for a comfortable trip, no matter your destination.
Packing for a trip can sometimes feel like a puzzle, especially when it comes to your bathroom essentials. You want to bring everything you need, but also keep things light and easy to access, right? Often, our toiletries end up scattered in different bags, making busy mornings on vacation a bit of a scramble. But what if your travel bathroom kit could be both functional and fun?
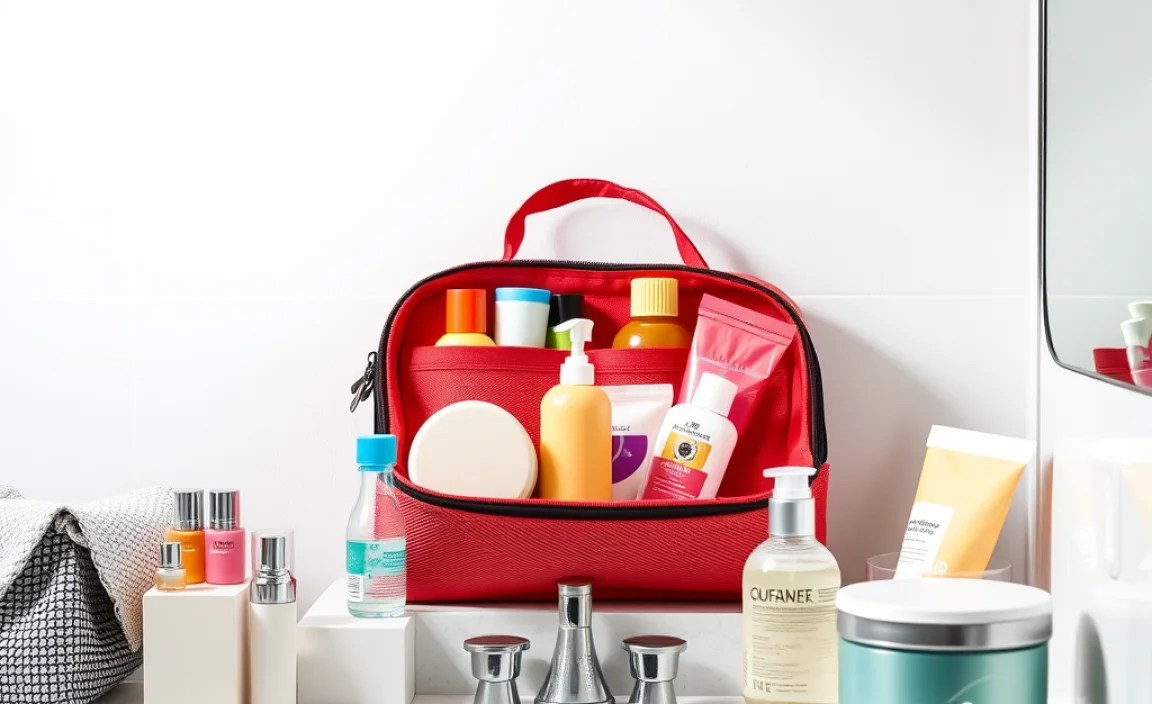
Imagine opening your bag to find neatly organized, brightly colored items that make your morning routine a breeze. That’s the magic of a well-put-together, colorful travel bathroom kit! We’ll walk you through exactly what you need and why choosing colorful accessories can make a big difference. Let’s get your travel toiletries looking sharp and feeling organized!
Why a Colorful Travel Bathroom Kit is a Smart Choice

When you think about packing, “organization” and “style” might not be the first words that come to mind. Usually, it’s about fitting everything in! But a colorful travel bathroom kit isn’t just about looks; it’s about making your travel experience smoother and more enjoyable. Think of it as giving your essential personal care items a happy home that’s easy to spot and manage.
The benefits go beyond just aesthetics. A well-chosen set of colorful travel bathroom accessories can:
- Boost Organization: Bright colors make it easy to distinguish your items, especially in dimly lit hotel bathrooms or shared hostel facilities. No more accidentally grabbing the wrong toothbrush or toothpaste!
- Prevent Loss: Vibrant items are less likely to get lost or left behind. That bright pink travel toothbrush or that cheerful yellow toiletry bag will stand out against hotel towels or dark luggage.
- Add a Touch of Joy: Travel can be stressful. Having aesthetically pleasing, colorful items can bring a small but significant dose of cheer to your daily routine. It’s like a little vacation for your senses.
- Simplify Packing: When your essentials are in matching or thematically colored containers, packing becomes more intuitive. You know exactly where each piece belongs.
- Enhance Security: In shared spaces like hostels or during travel itself, distinctively colored personal items can be easier to keep track of, reducing the risk of misplacement or accidental theft.
Let’s dive into what makes up the essential must-have colorful travel bathroom kit. It’s more than just a collection of items; it’s about curated choices that serve a purpose and bring a smile to your face.
Essential Components of Your Colorful Travel Bathroom Kit

Building a fantastic travel bathroom kit starts with selecting the right items. We’re looking for practicality, durability, and of course, that pop of color to make it distinctly yours. Here’s a breakdown of the must-haves and how choosing them in vibrant shades can elevate your packing game:
1. The Versatile Toiletry Bag or Pouch
This is the cornerstone of your kit. A good toiletry bag keeps everything contained and protected. When choosing one, look for:
- Material: Water-resistant materials like nylon or polyester are ideal. They’re durable and easy to wipe clean if any spills happen.
- Size: Big enough to hold your essentials but compact enough to fit easily into your suitcase or carry-on.
- Compartments: Multiple pockets and compartments help with organization, separating liquids from solids, or keeping smaller items from getting lost.
- Color: This is where the fun begins! Opt for a bright, cheerful color – a sapphire blue, a vibrant coral, a sunny yellow, or even a multi-colored patterned bag. This makes it instantly recognizable.
Why Color Matters Here: A colorful toiletry bag is the first thing you’ll see. It sets the tone for your entire kit and makes it incredibly easy to spot in a crowded luggage carousel or a dimly lit hotel room. Think of it as your personal travel flag!
2. Travel-Sized Containers, Bottles, and Jars
Bringing full-sized shampoo, conditioner, and lotions can take up too much space and weight. Investing in a set of colorful reusable travel containers is a game-changer.
- Types: You’ll need small bottles with flip-top or screw-on caps for liquids, and small jars or pots for creams and balms.
- Material: Choose BPA-free plastic or silicone. Silicone containers are often flexible, easy to squeeze, and durable.
- Color Options: Many sets come in multi-colored packs, allowing you to assign a color to each type of product (e.g., blue for shampoo, green for conditioner, pink for lotion). This is fantastic for quick identification.
- Leak-Proof Design: Ensure they have a good seal to prevent spills.
Why Color Matters Here: Assigning colors to specific products means you can grab the right bottle without having to read tiny labels, especially if you have vision issues or are in a hurry. It’s a practical organization hack visible at a glance.
3. Toothbrush and Protector
Oral hygiene is crucial, and your toothbrush needs a safe, clean spot.
- Toothbrush: Many travel toothbrushes have foldable heads or retractable handles to save space. Look for one in a bold color that you love.
- Protector: A dedicated toothbrush case or cover is essential. This keeps the bristles clean and prevents them from touching other items in your bag. These often come in transparent or brightly colored plastics.
Why Color Matters Here: A distinctively colored toothbrush or its case ensures it’s immediately identifiable and less likely to be accidentally mixed up with someone else’s, especially in family travel or shared accommodations. Plus, a bright color just feels more cheerful than a plain white one!
4. Compact Hairbrush or Comb
Keeping your hair in check is important for feeling put-together on the go.
- Options: A travel-sized brush with a folding handle or a compact comb will do the trick. Detangling brushes designed for wet hair are also great.
- Color: You can find these in almost any color imaginable, from neon pink to electric blue or lime green.
Why Color Matters Here: A colorful comb or brush adds a touch of personal style and is easy to find when you need it. It’s a small item that can get lost easily in your bag, so a bright color is a smart choice.
5. Travel-Sized First-Aid Essentials
Minor scrapes, headaches, or allergies can happen anywhere. Having a small, organized first-aid kit is wise.
- Contents: Include items like band-aids, antiseptic wipes, pain relievers, allergy medication, and any personal prescriptions.
- Container: Use a small, brightly colored pouch or container to house these items. A red or orange pouch is often associated with first-aid, making it immediately clear what it contains.
Why Color Matters Here: In an emergency or even a minor situation, quick identification is key. A brightly colored first-aid pouch ensures you can find what you need rapidly, without fumbling through other items.
6. Other Potential Colorful Additions
Depending on your needs, you might also consider:
- Colorful microfiber travel towel: Quickly drying and packs small.
- Brightly colored waterproof bags: For wet swimsuits or soiled laundry.
- Fun patterned makeup remover cloths
- Vibrant hair ties or clips
- Solid-form toiletries (shampoo bars, conditioner bars, solid toothpaste tabs) often come in colorful packaging or can be stored in colorful tins.
Choosing colorful versions of these items not only adds personality but also enhances the overall organization and ease of use of your travel bathroom kit.
Step-by-Step Guide to Building Your Colorful Travel Bathroom Kit

Creating your perfect travel bathroom kit doesn’t have to be complicated. Follow these simple steps to assemble a functional, organized, and stylish kit. We’ll focus on making it easy for beginners and ensuring every item is chosen with purpose.
Step 1: Choose Your Foundation – The Toiletry Bag
Start with the bag itself. Think about how much you typically pack and the length of your trips. Do you need something small for a weekend getaway, or a larger one for extended travel? Browse online or in stores for bags made from durable, water-resistant materials. Look for features like hanging hooks (great for small bathrooms!), multiple zippered compartments, and elastic loops for bottles. Select a color that truly speaks to you – this is your statement piece!
- Action: Select and purchase a travel toiletry bag in your preferred vibrant color.
- Tip: Consider the dimensions carefully. Measure it against your typical toiletries to ensure a good fit.
Step 2: Gather Your Liquids and Solids (in Travel Sizes!)
Now, think about the products you use daily. For liquids like shampoo, conditioner, body wash, and lotion, you’ll need to decant them. Invest in a set of reusable travel-sized bottles and jars. Many come in silicone, which is great for squeezing out every last drop. Opt for sets that include multiple colors so you can assign each color to a product type. This makes identifying them much easier.
- Action: Purchase a set of colorful, leak-proof travel containers (bottles and jars).
- Action: Fill these containers with your essential liquids and creams.
- Tip: Stick to TSA-approved sizes for carry-on luggage (typically 3.4 ounces or 100 milliliters per container). You can find more information on TSA guidelines for liquids here: TSA Liquids Rule.
Step 3: Select Your Oral Care Team
Don’t forget your toothbrush and toothpaste! A travel toothbrush with a protective cover is ideal. Choose a toothbrush in a fun color and ensure its case is equally vibrant or transparent so you can easily see it. For toothpaste, you can either use a travel-sized tube or even consider toothpaste tablets in a small, colorful tin.
- Action: Obtain a travel toothbrush and a brightly colored toothbrush cover/case.
- Action: Select your travel toothpaste solution (tube or tablets).
Step 4: Pack Your Hair and Skin Care Tools
Include a compact hairbrush or comb. Again, look for brightly colored options. If you use any specific hair accessories like clips or ties, gather a few in coordinating or contrasting vibrant colors. For skincare, consider solid options like facial cleansing bars or solid serums that don’t count towards liquid allowances and often come in attractive, eco-friendly packaging.
- Action: Choose a compact, colorful hairbrush or comb.
- Action: Gather any hair accessories you’ll need, perhaps in coordinating bold shades.
- Consider: Solid toiletries for reduced liquid hassle and potential for colorful storage.
Step 5: Organize Your Tiny But Mighty First-Aid Kit
A small, dedicated pouch for your first-aid essentials is a must. This could include a few band-aids, antiseptic wipes, pain relievers, and any personal medications. A red or orange pouch makes it stand out and signals its purpose immediately. Smaller zippered bags within your main toiletry bag work well for this.
- Action: Prepare a small collection of essential first-aid items.
- Action: Store them in a conveniently sized, brightly colored pouch.
Step 6: Populate and Arrange Your Kit
Now, it’s time to pack everything into your chosen toiletry bag. Place heavier items at the bottom to maintain balance. Use the internal compartments and pockets to separate items logically. For instance, keep shampoos and lotions in one section, toothbrushes and toothpaste in another, and first-aid supplies in their designated pouch. This systematic arrangement ensures everything has its place and is easy to find.
- Action: Carefully place all your prepared items into your toiletry bag.
- Action: Utilize internal pockets and compartments for optimal organization.
- Tip: Use small, colorful plastic bags to further group similar items (e.g., all makeup removal items together).
Step 7: Test for Leaks!
Before you zip up your bag for your trip, give your newly filled containers a good squeeze over a sink or some paper towels. Ensure all caps are tight and none of your precious liquids are escaping. This is a crucial step to avoid a messy surprise in your luggage!
- Action: Squeeze each travel container firmly to check for leaks.
- Action: Double-check that all lids and caps are securely fastened.
- Safety Note: A small leak can ruin clothes and other essentials. This small test saves you big headaches!
By following these steps, you’ll create a colorful, functional, and stress-free travel bathroom kit that’s ready for any adventure.
Color-Coding and Organization Tips for Your Kit
Making your travel bathroom kit work harder for you involves smart organization. Color-coding is a simple yet highly effective strategy to enhance both functionality and aesthetics. It’s especially helpful for beginners who are learning to pack efficiently.
1. Pre-assign Colors to Product Types
This is the foundation of color-coding. Before you even fill your containers, decide which color represents which product. For example:
- Blue = Shampoo
- Green = Conditioner
- Pink = Body Wash
- Yellow = Lotion
- Orange = Face Cream
This system makes grabbing the right product from your bag incredibly swift. You won’t need to squint at tiny labels or remember what’s in which bottle. This is particularly useful when you’re in a rush or in challenging lighting conditions.
2. Use Different Colored Pouches for Categories
Beyond individual containers, consider using small, brightly colored pouches to group related items within your main toiletry bag. For instance:
- Oral Hygiene Pouch: Keep your toothbrush, toothpaste, and floss together in a vibrant pouch.
- Skincare Pouch: Store your face wash, moisturizer, and serums in another distinctively colored pouch.
- First-Aid Pouch: As mentioned, a red or orange pouch for bandages, pain relief, etc., is practical and logical.
- “Clean Up” Pouch: A waterproof, colorful bag for items like cotton pads, Q-tips, or makeup removers.
These smaller pouches prevent items from scattering within the larger toiletry bag and make it easy to pull out just what you need. For example, if you only need your toothbrush, you can pull out the entire oral hygiene pouch instead of rummaging.
3. High-Contrast Matching
While matching colors can look cohesive, sometimes contrasting colors offer better immediate identification. For example, if your toiletry bag is a deep navy blue, having bright yellow or coral bottles inside will make them pop. If your primary containers are all one color family, use contrasting colors for accessories like toothbrush covers or small organizational pouches.
4. Labeling as a Backup (Optional but Recommended)
While color-coding is fantastic, adding simple, discreet labels to your travel containers can be a helpful backup, especially if you’re sharing your kit or if someone else needs to access it. You can use a waterproof marker or small label maker. This layer of detail ensures absolute.
