
Upgrade your bathtub without breaking the bank with these genius, budget-friendly ideas! Discover simple DIY tricks and smart material choices that can transform your bathroom for a fraction of the cost of a full replacement, making your space feel brand new and saving you money.
Upgrade Your Bathtub on a Budget: Genius Savings for a Stunning Bathroom

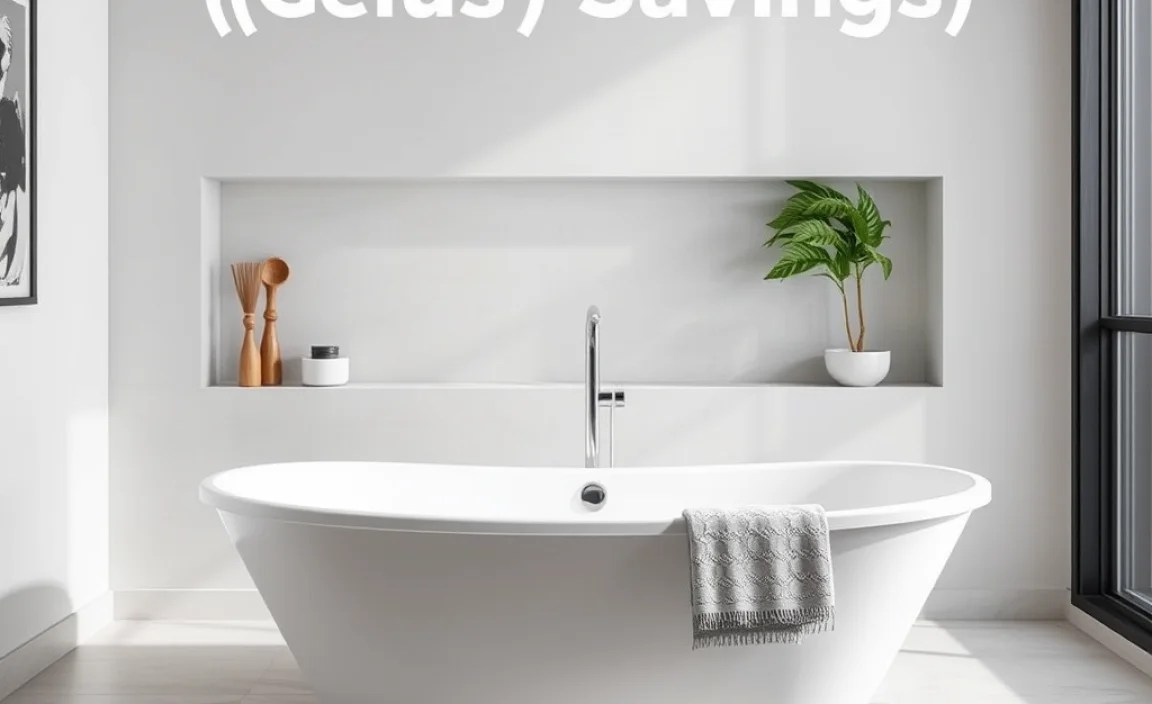
Is your bathtub looking a little tired, chipped, or just plain outdated? The thought of replacing it often conjures up images of hefty renovation bills and major disruption. But what if you could give your bathroom a fresh, luxurious feel without the huge expense? It’s entirely possible!
Many homeowners think a new bathtub means a new bathroom, but that’s not always the case. You can achieve a significant upgrade with clever, cost-effective methods. We’ll walk you through easy, DIY-friendly ways to refresh your tub, making it look fantastic and saving you a bundle.
This guide is packed with practical, beginner-friendly tips. We’ll cover everything from simple cleaning fixes to more involved cosmetic overhauls that you can tackle yourself. Get ready to transform your bathroom space and boost your home’s appeal—all while keeping your wallet happy!
Why Upgrade Your Bathtub Cheaply? The Benefits are Clear!

The desire to upgrade a bathtub often stems from a mix of aesthetics and functionality. A worn-out tub can make an entire bathroom feel dated and less appealing. However, the primary barrier for most people is the perceived cost and complexity of replacement. This is where “upgrading cheap” really shines.
- Boost Property Value: A refreshed bathroom, even with just an improved tub, can significantly increase your home’s appeal to potential buyers and can lead to a higher resale value.
- Enhance Daily Experience: Imagine stepping into a clean, bright, and inviting bathtub every day. A simple upgrade can transform your daily routine from mundane to a small luxury.
- Prevent Further Damage: Small issues like chips or cracks can worsen over time, leading to more expensive repairs or potential water damage. Addressing them early is cost-effective.
- Eco-Friendly Options: Sometimes, refurbishing or resurfacing an existing tub is more environmentally friendly than manufacturing and installing a new one, reducing waste.
- DIY Satisfaction: Completing a home improvement project yourself provides a great sense of accomplishment and teaches valuable skills.
Before You Start: Assess Your Bathtub’s Condition

Before diving into any upgrade, it’s crucial to understand what you’re working with. The best cheap upgrade solution depends heavily on the current state of your bathtub. Is it just scuffed, or is it severely damaged?
Take a good, hard look at your tub. Note any issues:
- Surface Scratches/Scuffs: These are usually superficial and can often be buffed out or covered.
- Chips and Dents: Minor chips are fixable with repair kits. Larger dents might require more involved work or might make a full resurfacing the better option.
- Stains and Discoloration: Persistent stains might indicate underlying issues or simply be deep-set dirt.
- Peeling Finish: If the existing enamel or coating is peeling, it’s a good sign that resurfacing is on the horizon.
- Cracks: Small hairline cracks can sometimes be repaired, but larger structural cracks typically mean the tub needs replacement or very specialized repair.
- Mold and Mildew: These issues need thorough cleaning and, if persistent, might point to ventilation problems or leaks.
The material your tub is made of also plays a role. Common materials include:
- Cast Iron: Extremely durable but heavy. Often chipped or rusted over time.
- Steel: Lighter than cast iron, but can be prone to chipping and rust, especially where the enamel is compromised.
- Acrylic: Lightweight, warm to the touch, and resistant to chipping and staining. Can scratch more easily than enamel.
- Fiberglass: The most affordable option, but also the least durable. Prone to scratching, cracking, and fading.
Knowing your tub’s material and its specific problems will help you choose the most effective and cost-efficient upgrade method.
The Cheapest Bathtub Upgrade Methods: DIY Wins!

Here are the most budget-friendly ways to give your bathtub a facelift. These methods are designed with beginners in mind!
1. Deep Cleaning & Restoration
Sometimes, all a bathtub needs is a serious deep clean. Old grime, soap scum, and mineral deposits can make even a relatively new tub look dingy. Before considering any other upgrade, try a thorough cleaning.
What you’ll need:
- Gloves
- Safety glasses
- All-purpose bathroom cleaner or a baking soda paste (baking soda + water)
- Non-abrasive scrub brush or sponge
- Microfiber cloths
- Optional: White vinegar for tough stains, a magic eraser
Steps:
- Ventilate: Open windows and turn on the bathroom fan.
- Pre-soak: Spray down the entire tub with your chosen cleaner or apply the baking soda paste. Let it sit for 10-15 minutes to break down grime.
- Scrub: Using your scrub brush or sponge, work in sections, scrubbing away dirt and soap scum. For tougher stains, a magic eraser can work wonders.
- Rinse: Thoroughly rinse the tub with clean water.
- Dry: Wipe down with microfiber cloths to prevent water spots and restore shine.
A deep clean can often remove surface stains and dullness, making the tub look significantly better for minimal cost and effort. For very stubborn mineral deposits, a 50/50 solution of white vinegar and water can be effective when sprayed on and left to sit for 30 minutes before scrubbing.
2. Bathtub Resurfacing (DIY Kits)
This is the most popular and effective “cheap upgrade” for tubs with chips, scratches, or faded finishes. Resurfacing involves applying a new coating over the existing surface, essentially giving it a brand-new look. You can buy DIY kits or hire a professional.
DIY kits are significantly cheaper but require careful preparation and application. Professional resurfacing costs more but usually comes with a warranty and a more durable finish.
DIY Kit Considerations:
- Material: Most DIY kits use an epoxy or enamel paint. They are durable but not as long-lasting as professional methods like acrylic or porcelain refinishing.
- Preparation is Key: The success of DIY resurfacing hinges entirely on how well you clean and prepare the tub. Any grease, soap scum, or moisture will cause the new coating to fail.
- Application: Follow the kit instructions precisely. Typically, it involves cleaning, sanding lightly, priming, and then applying multiple thin coats of the coating.
- Ventilation & Safety: These kits often contain strong chemicals. Ensure excellent ventilation and wear appropriate safety gear (respirator, gloves, eye protection).
What you’ll need (for DIY kit):
- Bathtub resurfacing kit (choose a reputable brand)
- Safety respirator mask
- Chemical-resistant gloves
- Eye protection
- Painter’s tape and plastic sheeting/old newspapers (for masking)
- Sandpaper (fine grit, included in some kits)
- Mineral spirits or degreaser
- Clean rags
- Screwdriver (for removing fixtures if necessary)
Basic Steps for DIY Resurfacing:
- Prepare the Area: Mask off all surrounding tiles, walls, and fixtures with painter’s tape and plastic sheeting. Remove the drain cover and overflow plate if the kit instructions advise.
- Clean Thoroughly: Clean the tub with a strong bathroom cleaner, then degrease it meticulously with mineral spirits or the recommended product. Any residue will ruin the finish.
- Repair Imperfections: For minor chips or cracks, follow the kit’s instructions for using putty or filler.
- Light Sanding: Lightly sand the entire tub surface to create a slightly rough texture for the new coating to adhere to. Clean off all dust.
- Apply Primer (if included): Apply the primer coat evenly, following drying time instructions.
- Apply Top Coat: Mix the coating components precisely as instructed. Apply in thin, even coats using a roller or brush, as specified by the kit. Avoid drips. Allow adequate drying time between coats.
- Cure: Let the tub cure completely. This can take several days, during which it must not be used or get wet. Check the curing time on the kit.
For more detailed guidance on specific resurfacing products, check out resources like the EPA which provides information on VOCs (Volatile Organic Compounds) in many coating products, highlighting the importance of ventilation and safety.
3. Bathtub Liners and Inserts
A bathtub liner is essentially a custom-molded acrylic shell that fits directly over your existing tub. It’s a durable, waterproof solution that hides all the imperfections of the original tub.
Pros:
- Quick Installation: Can often be installed in a single day.
- Durable Finish: Acrylic is resistant to chipping, scratching, and fading.
- Easy to Clean: The seamless acrylic surface is easy to wipe down.
- Hides Imperfections: Covers up chips, stains, and cracks completely.
Cons:
- Cost: More expensive than DIY resurfacing kits, but still cheaper than full replacement.
- Less DIY-Friendly: Requires precise measurements and professional installation for a proper fit and seal.
- Potential for Trapped Moisture: If not installed perfectly, moisture can get trapped between the liner and the old tub, leading to mold or mildew issues.
While not strictly a DIY project for first-timers, the cost of a liner is often a fraction of a full tub replacement, making it a “cheap upgrade” in the grand scheme of bathroom renovations.
4. Refurbishing Fixtures and Hardware
Don’t forget the details! Sometimes, old, tarnished fixtures can drag down the appearance of an otherwise decent bathtub. Upgrading these small elements can make a surprising difference.
What to Consider:
- Faucet and Showerhead: Replacing an old, leaky faucet or a low-pressure showerhead is a relatively easy and inexpensive DIY task. You can find stylish, modern fixtures at a wide range of prices.
- Drain and Overflow Plate: These metal components can become corroded or stained. Cleaning them thoroughly or replacing them with new ones (often available in stylish finishes like brushed nickel or matte black) can brighten the entire tub area.
- Handle Finials/Knobs: Even small details like the knobs on your faucet can be updated.
DIY Tip: Check out plumbing supply stores or online retailers like The Home Depot for a vast selection of affordable fixtures and hardware. Always ensure you purchase compatible parts for your existing plumbing.
5. Revitalize Grout and Caulk
Cracked, discolored grout and caulk can make a bathroom look dirty and neglected, even if the tub itself is in good shape. This is a very low-cost, high-impact upgrade that anyone can do.
What you’ll need:
- Grout removal tool or utility knife
- Stiff bristle brush
- Caulking gun
- Mildew-resistant caulk (kitchen & bath siliconized acrylic latex)
- Grout cleaner or bleach solution
- Painter’s tape
- Rags
Steps:
- Remove Old Caulk: Carefully cut out and remove all old caulk around the tub edge, using a utility knife or a dedicated caulk removal tool.
- Clean Grout: Scrub the grout lines with a stiff brush and a grout cleaner or a diluted bleach solution (wear gloves and ensure ventilation). Rinse thoroughly.
- Apply New Caulk: Apply painter’s tape along the edge of the tub and the wall to create a clean line. Load your caulk gun. Apply a consistent bead of caulk along the gap. Smooth the bead with a damp finger or a specialized caulking tool. Remove the tape while the caulk is still wet untuk a clean line.
- Refresh Grout (Optional): If your grout is stained but sound, you can use a grout pen to recolor it white or a sealant to protect it after cleaning. For badly damaged grout, consider regrouting or using a flexible grout.
Choosing the Right Cheap Upgrade: A Quick Comparison
Not sure which method is best for you? This table breaks down the key factors:
| Upgrade Method | Cost (Approximate) | DIY Friendliness | Durability | Best For |
|---|---|---|---|---|
| Deep Cleaning | $ – $$ (cleaning supplies) | Very High | Depends on original tub condition | Surface dirt, minor stains, dullness |
| DIY Resurfacing Kit | $$ (kit cost) | Medium (requires patience & precision) | 2-5 years (can vary greatly) | Scratches, chips, faded color, minor wear |
| Acrylic Liner | $$$ (material + installation) | Low (professional install recommended) | 10+ years | Worn-out tubs with significant damage needing a quick fix |
| Fixture/Hardware Update | $ – $$ (cost of new parts) | High | Long, depending on quality | Outdated faucets, worn-out drains |
| Grout/Caulk Refresh | $ (caulk, cleaner) | Very High | 2-5 years (for caulk) | Moldy, cracked, or discolored seals and lines |
Enhancing Your Tub’s Appeal Beyond the Surface
Once your tub surface is looking great, consider these small additions to enhance the overall experience without significant cost:
- Shower Curtain/Door: A new, stylish shower curtain can dramatically change the look of your bathroom. If you have a glass shower door that’s hard to clean, consider a high-quality vinyl or fabric liner to refresh its appearance or even a new, affordable curtain.
- Bath Mat: A plush, clean bath mat not only adds comfort and safety but also a touch of luxury.
- Storage Solutions: Over-the-tub caddies or wall-mounted organizers can reduce clutter and make the space look more streamlined and visually appealing.
- Lighting: Sometimes, a simple change of a light bulb to a brighter, warmer tone can make the whole bathroom feel more inviting.
Safety First: Essential Tips for Your DIY Bathtub Upgrade
When undertaking any DIY project, safety should always be your top priority. This is especially true when dealing with chemicals, adhesives, or working in a wet environment.
- Ventilation: Always ensure your work area is well-ventilated. Open windows, turn on exhaust fans, and consider using a portable fan to circulate air, especially when using chemical products like resurfacing kits.
- Protective Gear: Wear appropriate personal protective equipment (PPE). This includes:
- Gloves: Chemical-resistant gloves are crucial when handling cleaners or resurfacing compounds.
- Eye Protection: Safety glasses or goggles will protect your eyes from splashes or airborne particles.
- Respirator: For tasks involving strong fumes (like some resurfacing kits), a respirator mask is essential to protect your lungs.
- Read Instructions: Thoroughly read and understand all product instructions before you begin. This applies to cleaners, repair kits, resurfacing compounds, and caulk.
- Electrical Safety: Be mindful of electrical outlets and fixtures in the bathroom. Turn off power at the breaker if you’re working near any electrical components. Never use electrical tools near water. Tools designed for wet use should be plugged into GFCI (Ground Fault Circuit Interrupter) protected outlets, as are most bathroom outlets in modern homes. You can learn more about GFCI outlets from resources like.
