
Upgrade Bathtub Near Me: The Essential Guide for a Fresh Bath Space You’ll Love. This guide breaks down how to find local pros, understand costs, and prepare for a bathtub upgrade, making your search for a bathroom remodel simple and stress-free.
Dreaming of a sparkling new bathtub? You’re not alone! Many homeowners feel their current tub has seen better days, whether it’s stained, chipped, or just plain outdated. The good news is, upgrading your bathtub is a fantastic way to refresh your bathroom and boost your home’s value. But where do you start? Finding the right professional and understanding the process can feel a bit daunting at first. Don’t worry; this guide is here to help you every step of the way. We’ll make finding an “upgrade bathtub near me” service straightforward and manageable. Get ready to transform your bathroom into a relaxing oasis!
Why Upgrade Your Bathtub?
Your bathtub is often the centerpiece of your bathroom, and a worn-out tub can make the whole space feel less inviting. Upgrading isn’t just about looks; it offers several practical benefits:
- Improved Aesthetics: A new tub can instantly modernize your bathroom, making it feel cleaner, brighter, and more luxurious.
- Enhanced Functionality: Modern tubs come with better drainage, deeper soaking options, and ergonomic designs for a more comfortable experience.
- Increased Home Value: A renovated bathroom, especially with a new bathtub, is a significant selling point for potential buyers.
- Better Hygiene: Older tubs can harbor mold and mildew, which are hard to remove completely. A new tub means a fresh start.
- Energy and Water Efficiency: Newer models might offer better insulation or more efficient water usage features, saving you money on utility bills.
Finding Bathtub Upgrade Services Near You

The first step in your bathtub upgrade journey is finding reliable local professionals. When you search for “upgrade bathtub near me,” you’re looking for contractors who specialize in bathroom renovations or bathtub installations. Here’s how to find them:
1. Ask for Recommendations
Word-of-mouth is powerful. Talk to friends, family, and neighbors who have recently renovated their bathrooms. Ask about their experiences, who they used, and if they were happy with the results.
2. Online Search and Reviews
Use search engines with terms like “bathtub replacement near me,” “bathroom remodelers [your city],” or “local shower and tub installers.” Pay close attention to online reviews on platforms like Google, Yelp, or Angie’s List. Look for consistent positive feedback regarding professionalism, quality of work, and customer service.
3. Check Local Building Supply Stores
Sometimes, local hardware or building supply stores can recommend reputable contractors they work with regularly.
4. Professional Directories
Websites like Houzz or HomeAdvisor connect homeowners with local contractors. These platforms often have portfolios, reviews, and licensing information.
What to Look for in a Contractor

Choosing the right contractor is crucial for a successful and stress-free upgrade. Here are key factors to consider:
- Experience and Specialization: Ensure they have extensive experience specifically with bathtub installations and bathroom renovations.
- Licensing and Insurance: Always verify that the contractor is licensed and insured in your state. This protects you in case of accidents or damages. You can often check licensing status through your state’s professional licensing board website.
- Portfolio and References: Ask to see examples of their previous work, ideally similar to the project you envision. Contacting references can provide valuable insights.
- Clear Communication: A good contractor will communicate clearly, answer your questions patiently, and provide detailed quotes.
- Detailed Quotes: The quote should break down all costs, including materials, labor, permits, and any potential contingencies.
- Warranty: Inquire about warranties on both the materials and the labor. A reputable contractor will stand behind their work.
Types of Bathtub Upgrades

There are several ways to “upgrade” your bathtub, ranging from simple resurfacing to a complete replacement. Each has its own pros, cons, and costs.
1. Bathtub Refinishing/Resurfacing
This process involves cleaning, repairing minor chips or cracks, and then applying a durable coating (like an epoxy or acrylic) over the existing tub surface. It’s a cost-effective way to give an old tub a new look.
- Pros:
- Significantly cheaper than replacement.
- Can be done relatively quickly, often in a day.
- Less disruptive than a full remodel.
- Environmentally friendly as it avoids demolition and waste.
- Cons:
- The finish may not last as long as a new tub (typically 5-10 years).
- Not suitable for tubs with structural damage (like severe cracks or rust).
- Requires proper ventilation during the process.
2. Bathtub Liner Installation
A custom-made acrylic liner is installed directly over your existing bathtub. It’s like a shell that fits perfectly inside your old tub.
- Pros:
- Faster than full replacement.
- Can look very much like a brand-new tub.
- Easy to clean surface.
- Cons:
- More expensive than refinishing.
- Potential for trapped moisture if not installed correctly, leading to mold.
- Can sometimes feel less solid than a new tub.
3. Bathtub Replacement
This is the most comprehensive upgrade, involving the removal of your old tub and the installation of a completely new one. This is the best option for damaged tubs or when you want to change the tub’s style, size, or material.
- Pros:
- Brand new, durable surface.
- Opportunity to change tub style, size, or location.
- Solves structural issues with the old tub.
- Potentially increases home value the most.
- Cons:
- Most expensive option.
- Most disruptive and time-consuming, often requiring several days.
- May involve demolition and potential damage to surrounding tiles or walls.
Types of Bathtubs for Replacement

When opting for a full replacement, you’ll have a variety of materials and styles to choose from:
Bathtub Materials:
The material of your bathtub significantly impacts its durability, look, feel, and cost.
| Material | Pros | Cons | Typical Cost Range (Tub Only) |
|---|---|---|---|
| Acrylic | Lightweight, versatile shapes, good heat retention, relatively affordable. | Can scratch or crack, may feel less substantial than other materials. | $300 – $1,500 |
| Fiberglass | Economical, lightweight, easy to install. | Prone to scratching and cracking, poor heat retention, can feel flimsy. | $200 – $700 |
| Cast Iron | Extremely durable, excellent heat retention, luxurious feel, classic look. | Very heavy (requires floor reinforcement), expensive, prone to chipping if hit hard. | $1,000 – $4,000+ |
| Enameled Steel | Durable, less expensive than cast iron, good sheen. | Can chip or scratch, enamel can wear off over time, poor heat retention compared to cast iron. | $300 – $1,000 |
| Stone Resin/Solid Surface | Luxurious feel, durable, excellent heat retention, seamless look (for some), customizable. | Heavy, expensive, can be prone to staining with certain chemicals. | $1,500 – $5,000+ |
Bathtub Styles:
Beyond material, consider the style that best suits your bathroom and needs:
- Alcove Tubs: The most common type, designed to fit into a three-walled recess. They usually have an integrated skirt or apron on the front.
- Drop-In Tubs: These are installed into a deck or surround, and the rim of the tub is visible. They are generally easier to install than other types.
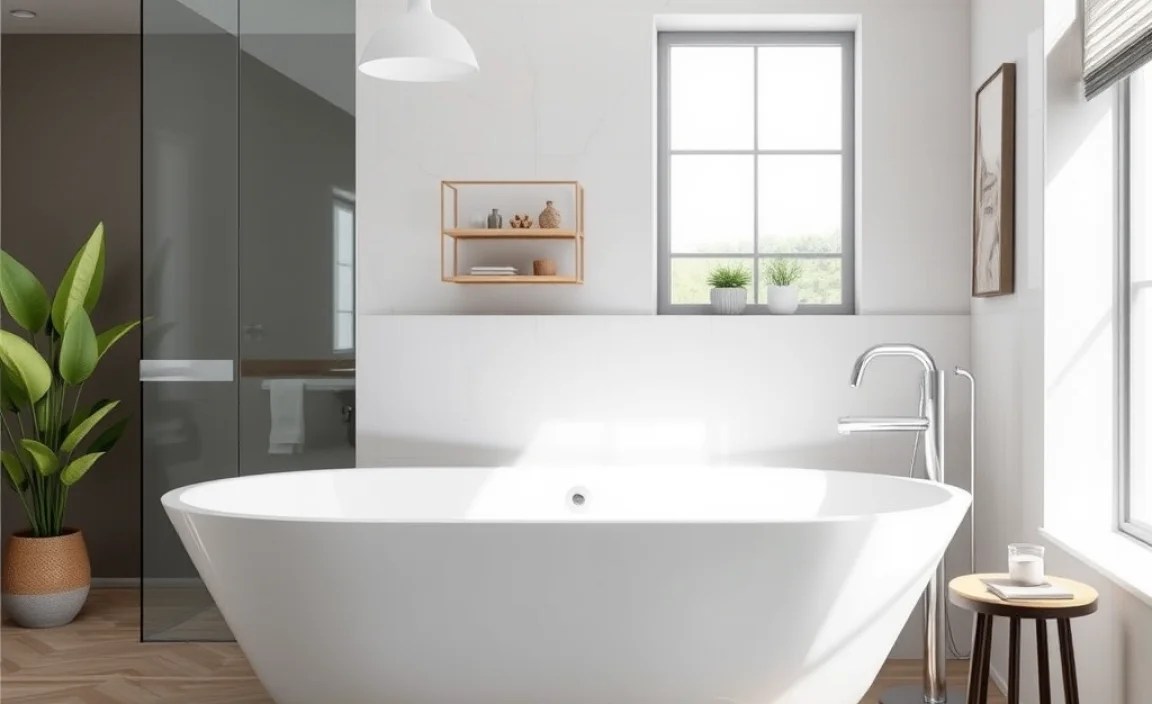
- Freestanding Tubs: These “tub-in-the-round” designs stand on their own, with finished surfaces all around. They make a dramatic statement but often require more space and specific plumbing. Clawfoot tubs are a classic freestanding style.
- Undermount Tubs: Similar to drop-in tubs, but the rim is completely hidden beneath the countertop or deck, creating a sleek, seamless look.
- Corner Tubs: Designed to fit into a corner, often larger and deeper than standard alcove tubs, sometimes featuring whirlpool or air jet systems.
- Soaking Tubs: Typically deeper than standard tubs, allowing for a more immersive bathing experience.
- Whirlpool/Jacuzzi Tubs: Feature jets that create a massaging water flow, ideal for relaxation and therapeutic benefits.
- Air Tubs: Force heated air through tiny jets for a gentle, effervescent massage. (See resources on tub types from ENERGY STAR for efficient options).
The Bathtub Upgrade Process: Step-by-Step
Once you’ve chosen your contractor and the type of upgrade, here’s a general idea of what to expect during the process:
Phase 1: Preparation and Planning
- Consultation and Quote: The contractor will visit your home, assess your existing tub and bathroom, discuss your design preferences, and provide a detailed quote.
- Tub Selection: You’ll choose the new tub, material, style, and any accompanying fixtures (faucets, drain assembly).
- Permits: Your contractor should handle any necessary building permits.
- Scheduling: Agree on a start date and estimated completion time.
Phase 2: Demolition and Removal (for Replacements)
- Protection: The contractor will cover floors and surrounding areas to protect them from dust and damage.
- Disconnecting Plumbing: Water supply lines and the drain are disconnected.
- Removing Old Tub: The existing tub is carefully removed. This can involve cutting it into pieces if it’s too large to fit through the doorway.
- Inspection: The exposed area is inspected for any subfloor damage or plumbing issues that need addressing.
Phase 3: Installation
- Preparation of Space: The area is cleaned and prepared for the new tub. For freestanding tubs, the precise location for plumbing is marked.
- Setting the New Tub: The new tub is carefully placed in position. For alcove tubs, it’s fitted snugly against the walls.
- Plumbing Connection: The new faucet, drain, and overflow assembly are connected to the existing plumbing.
- Securing the Tub: Depending on the type, the tub might be secured to wall studs or the floor.
- Water Testing: The plumbing is tested for leaks.
Phase 4: Finishing Touches
- Surround and Tile Work: If the walls around the tub were disturbed, new tile, waterproof panels, or other surround materials are installed and sealed.
- Caulking and Sealing: The edges where the tub meets the walls and floor are carefully caulked to prevent water damage.
- Fixture Installation: Faucets, showerheads, and handles are installed and tested.
- Cleanup: The work area is thoroughly cleaned.
- Final Inspection: You and the contractor will do a walk-through to ensure you are satisfied with the work.
DIY vs. Professional Installation
While the allure of saving money with a DIY project is strong, bathtub installation is a substantial undertaking. Here’s a comparison:
| Factor | DIY Installation | Professional Installation |
|---|---|---|
| Cost Savings | Potentially higher if you have tools and skills; can be offset by mistakes requiring pro fixes. | Higher upfront cost, but includes expertise and warranty. |
| Skill Level Required | High: Plumbing, carpentry, tiling, heavy lifting, detailed work. | N/A – Handled by experts. |
| Time Commitment | Significantly longer, especially for beginners. | Much faster, typically 1-3 days for a replacement. |
| Risk of Mistakes | High: Incorrect plumbing can cause leaks and water damage; improper sealing can lead to mold. | Low: Experienced pros minimize risks. |
| Warranties | Limited to manufacturer warranty on the tub itself. No warranty on labor. | Includes labor warranty and manufacturer warranty on the tub. |
| Tools and Equipment | Requires purchase or rental of specialized tools. | Contractor provides all necessary tools. |
For most homeowners, especially beginners, hiring a professional for “upgrade bathtub near me” services is the safer and more reliable choice. Professionals have the knowledge, tools, and experience to ensure the job is done correctly and up to code. For more on building codes and safety, check out resources from the U.S. Department of Housing and Urban Development (HUD) regarding healthy housing standards which often relate to proper bathroom ventilation and moisture control.
Budgeting for Your Bathtub Upgrade
The cost of a bathtub upgrade can vary widely based on the type of upgrade, materials chosen, labor rates in your area, and any unforeseen issues. Here’s a general breakdown:
- Bathtub Refinishing: $300 – $800
- Bathtub Liner Installation: $1,000 – $3,000
- Bathtub Replacement: $1,500 – $7,000+ (This can go higher for luxury materials or complex installations like freestanding tubs).
Additional costs to consider:
- New Fixtures: Faucets, showerheads, drains can add $100 – $1,000+ depending on style and brand.
- Plumbing Modifications: If you’re changing the tub’s location or adding jets, expect higher plumbing costs.
- Tile and Surround: If you need to replace surrounding tiles, this adds considerable cost.
- Permits: Typically $100 – $500, depending on your locale.
- Labor: This is a significant portion of the cost, especially for full replacements.
Tip: Always get multiple quotes (at least three) and ensure they are itemized. Don’t just go with the cheapest option; consider the value and reputation of the contractor.
Frequently Asked Questions (FAQ)
Q1: How long does a bathtub upgrade typically take?
A1: A refinish or liner installation can often be completed in a day. A full bathtub replacement usually takes 1 to 3 days, depending on the complexity and whether surrounding tile work is needed.
Q2: Do I need a permit for a bathtub upgrade?
A2: In most cases, replacing a bathtub in the same location without altering plumbing doesn’t require a permit. However, if you’re moving plumbing, altering the structure, or installing a whirlpool tub, a permit is likely necessary. Your contractor will know the local regulations.
Q3: What’s the difference between a whirlpool tub and an air tub?
A3: Whirlpool tubs use water jets to create a powerful massage, while air tubs use smaller jets to release heated air for a gentler, effervescent experience. Air tubs tend to be easier to clean.
Q4: Can I upgrade my small bathtub to a larger one?
A4: Yes, but it often involves more extensive work. This might include moving plumbing lines, potentially adjusting.
