
Upgrade bathtub tools for genius efficiency by choosing the right tools for cleaning, repair, and maintenance. Investing in quality, ergonomic, and specialized tools can make the job faster, easier, and more effective, saving you time and frustration. Discover essential tools that simplify common bathtub tasks and ensure a brilliant finish with less effort.
Is your bathtub looking a little tired? Maybe cleaning it feels like a wrestling match, or small repairs seem like a monumental task. We get it! Bathtub maintenance can feel like a Chore with a capital ‘C’. But what if we told you that the right tools can transform this dreaded chore into a surprisingly smooth and efficient process? It’s true!
Upgrading your bathtub tools isn’t just about having shiny new gadgets; it’s about working smarter, not harder. This guide is here to show you exactly how to pick the right gear to make your bathtub sparkle and function like new, with less sweat and more success. Get ready to say goodbye to frustration and hello to a beautifully maintained tub!
Why Upgrading Your Bathtub Tools Matters

Think about it: using dull knives to chop vegetables takes ages and is dangerous. The same principle applies to your DIY and home maintenance tasks. Old, worn-out, or just plain unsuitable tools can lead to:
- Increased time spent on tasks.
- More physical effort and strain.
- Poor results, leading to frustration.
- Potential for damage to your bathtub or surrounding areas.
- Safety hazards due to tools slipping or failing.
Simply put, the right tools are an investment in your time, your sanity, and the longevity of your bathroom fixtures. When you upgrade your bathtub tools, you’re not just buying something new; you’re buying efficiency, safety, and a better outcome. Let’s dive into the types of tools that will make a real difference.
Essential Tools for Bathtub Cleaning: Shine Brighter, Faster

Keeping your bathtub clean is probably the most frequent task. But cleaning doesn’t have to involve endless scrubbing with subpar equipment. Here are some tool upgrades that will make your tub gleam:
1. High-Quality Cleaning Brushes and Scrubbers
Forget those flimsy sponges that fall apart after a few uses. Investing in robust cleaning brushes makes a huge difference.
Types to Consider:
- Stiff-Bristled Nylon Brushes: Excellent for stubborn soap scum and grime on most tub surfaces (avoid scratching delicate finishes like acrylic).
- Microfiber Scrubbing Pads: Gentle yet effective for regular cleaning and polishing without damaging surfaces. They trap dirt well.
- Grout Brushes: Small, stiff brushes designed specifically to get into the narrow spaces between tiles.
- Extendable Handle Brushes: A game-changer for reaching the far ends of large soaking tubs or showers without straining your back.
Why They’re Efficient:
Durable bristles and effective scrubbing surfaces mean less elbow grease. Extendable handles mean you cover more area faster and with less discomfort. A clean tub is an inviting tub, and these tools make achieving that a breeze.
2. Power Scrubber Attachments
For those who want to take efficiency to the next level, power scrubbers are fantastic. These are attachments that fit onto your cordless drill or a dedicated electric scrubber base.
- Drill Brush Attachments: Various sizes and stiffnesses of brushes that attach to your power drill. They do the spinning work for you.
- Cordless Orbital Scrubbers: Handheld devices that use a vibrating or oscillating motion to scrub surfaces.
Why They’re Efficient:
The mechanical action of these tools dramatically reduces cleaning time and physical effort. They can tackle tough grime in a fraction of the time it would take manually. Always ensure the attachment is suitable for your bathtub material to prevent scratches.
3. Good Quality Squeegees
A squeegee is essential for preventing water spots and soap scum buildup after each use, especially in showers.
- Silicone Blade Squeegees: Look for flexible, durable silicone blades that conform to the tub surface for a streak-free finish.
- Ergonomic Handle: A comfortable grip makes it easy to use repeatedly.
Why They’re Efficient:
Regularly squeegeeing your tub walls and doors after showering drastically cuts down on deep cleaning needs. It’s a simple preventative measure that saves a lot of future work. A quick swipe after each use is far more efficient than scrubbing dried-on residue.
4. Specialized Cleaners and Applicators
While not strictly “tools,” the right chemical solutions and how you apply them are key.
- Spray Bottles with Adjustable Nozzles: For applying cleaning solutions evenly and effectively.
- Foaming Applicators: Some cleaners come in foaming formulations that cling to surfaces, giving them more time to work.
- Non-Toxic, Tub-Safe Cleaners: Choose cleaners appropriate for your tub material (e.g., acrylic, enamel, fiberglass). Always check EPA guidelines on greener cleaning for eco-friendly options. Many DIY cleaners using vinegar or baking soda can also be very effective.
Why They’re Efficient:
Applying cleaner effectively means it works better. Foaming agents and even sprays ensure complete coverage, reducing the need for reapplication. Using the right cleaner for your tub material prevents damage, saving you from costly repairs later.
Tools for Bathtub Repair: Fix it Right, the First Time

Minor issues like small chips, cracks, or leaky faucets are common. Having the right tools makes these repairs manageable and prevents them from becoming bigger problems.
1. Caulking and Sealing Tools
A good seal around your tub prevents water damage. Upgrading your caulking tools makes this job look professional.
- Caulk Gun (Drip-Free Model): Essential for a smooth, consistent bead of caulk. Drip-free models prevent messy drips when you release pressure.
- Caulk Removal Tool: A specialized tool designed to cleanly scrape away old caulk without damaging the surrounding surfaces.
- Caulking Finishing Tool (or a Wet Finger/Spatula): These tools help smooth the caulk bead for a neat, watertight finish.
- Tub and Tile Caulk (Silicone or Acrylic Latex): Choose a mildew-resistant, waterproof caulk appropriate for bathrooms.
Why They’re Efficient:
Old, cracked caulk can lead to leaks and mold. Removing it cleanly and applying a fresh, smooth bead using the right tools ensures a watertight seal, preventing long-term damage. A good caulk gun provides control, leading to a much cleaner and more effective job.
2. Patching and Filling Tools
Small chips or scratches can be annoying. Repair kits with the right applicators can fix them.
- Tub Repair Kits: These typically include a filler compound and a colorant to match your tub.
- Putty Knives or Spatulas: For mixing and applying filler smoothly.
- Fine-Grit Sandpaper: For smoothing the repaired area once it’s cured.
- Polishing Compound: To restore shine to the repaired spot.
Why They’re Efficient:
DIY tub repair kits are designed to be user-friendly. With the right tools to apply and smooth the filler, you can achieve a seamless repair, making the damaged spot virtually disappear. This saves you from the expense of replacing the entire tub for a minor imperfection.
3. Faucet and Drain Repair Tools
A dripping faucet or a slow-draining tub is more than an annoyance; it’s a waste of water and can lead to more significant issues.
- Adjustable Wrenches: For tightening or loosening nuts and bolts on faucets and drains.
- Pliers (Standard and Needle-Nose): Useful for gripping small parts or reaching into tight spaces.
- Plumber’s Tape (PTFE Tape): Essential for creating watertight seals on threaded pipe connections. You can find great resources on its use from organizations like Engineering Toolbox.
- Plunger and Drain Snake (or Auger): For clearing minor clogs.
- O-Ring and Washer Assortment: To replace worn-out seals in faucets and drains.
Why They’re Efficient:
Having these basic plumbing tools on hand means you can address issues like drips or minor clogs promptly. A simple washer replacement can stop a drip, and a drain snake can clear a clog quickly, preventing water backup and further damage. These tools empower you to handle many common plumbing nuisances yourself.
Tools for Bathtub Accessories and Upgrades: Enhance Your Experience

Beyond cleaning and repairs, there are tools that help you install or maintain accessories that make your bathtub experience better.
1. Showerhead Installation Tools
Upgrading your showerhead can significantly improve your showering experience, and installing it should be simple.
- Adjustable Wrench: For loosening the old showerhead and tightening the new one.
- Plumber’s Tape (PTFE Tape): Again, crucial for ensuring a watertight seal on the showerhead threads.
- Rag or Cloth: To protect the fixture’s finish from the wrench and to clean up any residual tape or debris.
Why They’re Efficient:
While often simple, the right tools ensure a leak-free installation. A proper seal made with plumber’s tape and snug tightening with an adjustable wrench means your new showerhead works perfectly from the start, avoiding frustrating drips or leaks.
2. Shelf and Caddy Installation Tools
Adding storage for your soaps and shampoos can declutter your tub area.
- Drill and Drill Bits: For creating pilot holes if you’re mounting shelves or racks.
- Level: To ensure shelves are straight and visually appealing.
- Screwdriver Set (Phillips and Flathead): For assembly and mounting.
- Stud Finder: If you’re mounting heavy items, a stud finder helps locate studs for secure mounting.
Why They’re Efficient:
Correct installation makes accessories functional and safe. Using a level ensures it looks good, and proper mounting with the right tools prevents shelves from falling down, keeping your belongings and the tub itself safe.
Smart Tool Organization: Keep Efficiency at Your Fingertips
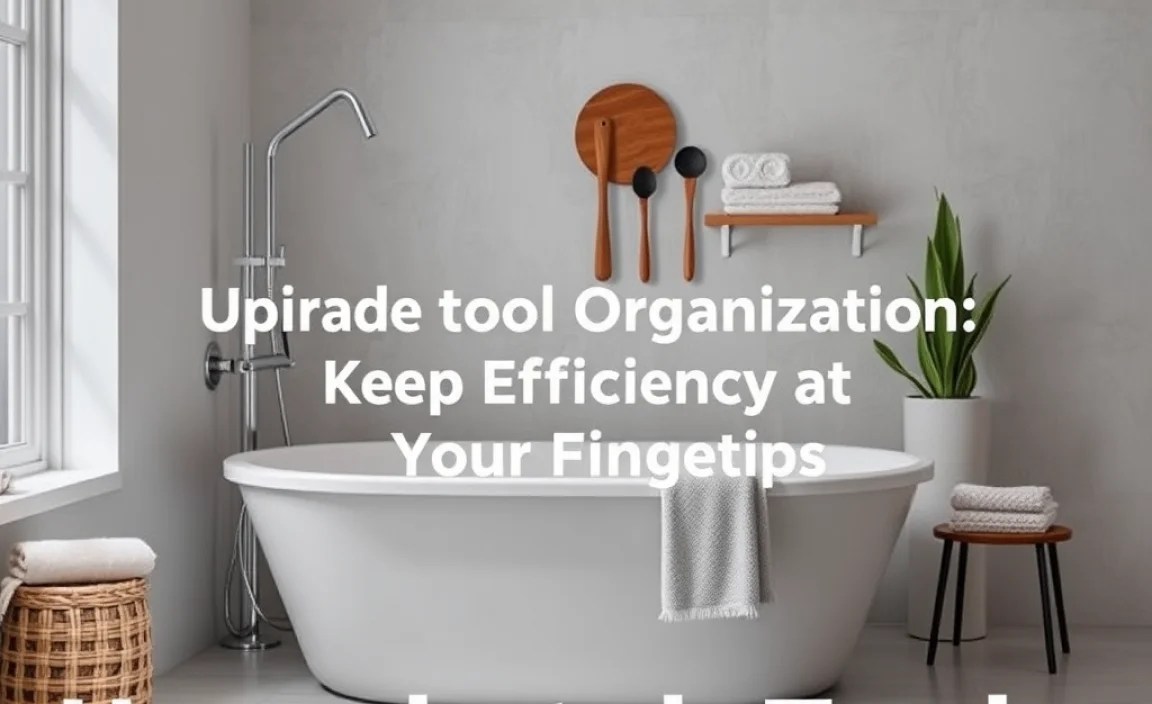
Having the best tools means nothing if you can’t find them when you need them. Efficient organization is part of efficient tool usage.
- Toolbox or Tool Bag: A dedicated space for your bathtub repair and maintenance essentials.
- Small Parts Organizers: For screws, washers, and other small components.
- Wall-Mounted Racks or Pegboards: Ideal for storing larger items like extension brushes or caulk guns, keeping them visible and accessible.
Why It’s Efficient:
Knowing where everything is saves precious time. Instead of rummaging through drawers or piles, you can grab the right tool instantly, keeping your workflow smooth and uninterrupted. This also protects your tools from damage.
Tables: Quick Comparison of Tool Needs
Here’s a quick look at which tools you might need for common bathtub tasks:
| Task | Core Tools | Helpful Extras | Frequency/Importance |
|---|---|---|---|
| Regular Cleaning | Microfiber cloths, good sponges, bathtub cleaner, squeegee | Extendable brush, grout brush, power scrubber attachment | High (Daily/Weekly) |
| Deep Cleaning / Stain Removal | Stiff-bristled brush, tub-safe cleaner, grout brush | Power scrubber, foaming cleaner | Medium (Monthly) |
| Re-caulking Edges | Caulk gun (drip-free), caulk removal tool, bathroom caulk | Caulking finishing tool | Medium (Annually or as needed) |
| Minor Chip/Scratch Repair | Tub repair kit, putty knife, fine-grit sandpaper | Polishing compound | Low (As needed) |
| Faucet Drip Repair | Adjustable wrench, plumber’s tape, new washers/O-rings | Needle-nose pliers | Low (As needed) |
| Showerhead Installation | Adjustable wrench, plumber’s tape | Rag | Low (When upgrading showerhead) |
Safety First: Always Use Tools Responsibly
Efficiency shouldn’t come at the cost of safety. Here are vital safety tips when using any bathtub tools:
- Read Manufacturer Instructions: Always follow the guidance for both tools and cleaning/repair products.
- Wear Protective Gear: Especially when using cleaners or power tools, wear safety glasses and gloves. A mask might be necessary for strong fumes.
- Ensure Good Ventilation: Open windows or run an exhaust fan when using cleaning chemicals.
- Disconnect Power: For power tools, ensure they are unplugged or batteries removed before changing attachments or cleaning.
- Know Your Tub Material: Using abrasive tools or harsh chemicals on the wrong material can cause irreparable damage. For example, porcelain enamel tubs can be scratched by steel wool, while acrylic tubs can be damaged by certain solvents. If unsure, consult your tub manufacturer’s guide or a professional resource like the HomeTips Bathtub Materials guide.
- Stable Footing: Ensure you have a stable surface to stand on, especially when reaching high or in a wet environment. A non-slip mat can be a great addition.
By treating your tools and your bathroom with respect, you ensure a safe and productive DIY experience.
FAQ: Your Bathtub Tool Questions Answered
Q1: What is the most important tool for keeping my bathtub clean regularly?
The most important tool for regular bathtub cleaning is a good quality, durable microfiber cloth or sponge paired with a gentle, tub-appropriate cleaner. For shower areas, a squeegee used after each shower is also incredibly efficient for preventing buildup.
Q2: Do I really need a special caulk removal tool?
While you can try to scrape old caulk with a utility knife, a dedicated caulk removal tool is much safer and more effective. It’s designed to get into the caulk line and remove it cleanly without damaging the tub’s edge or surrounding tiles, saving you time and preventing accidental nicks.
Q3: Can I use a power drill to clean my bathtub?
Yes, you can! There are specific drill brush attachments designed for cleaning tubs. They can significantly speed up the process and reduce physical effort. However, always use the correct brush stiffness for your tub material (softer for acrylic, stiffer for tile/grout) and start with a low drill speed to avoid damage.
Q4: What’s the best way to fix a small chip on my acrylic bathtub?
For small chips on an acrylic bathtub, a dedicated acrylic bathtub repair kit is your best bet. These kits usually contain a filler compound and colorant. You’ll need a putty knife or spatula to apply the filler smoothly and fine-grit sandpaper to gently smooth the area once it cures. Ensure the bathroom is well-ventilated and follow the kit’s instructions precisely.
Q5: My faucet is dripping. What basic tools will I need to fix it?
For a typical faucet drip, an adjustable wrench and plumber’s tape are essential. You’ll likely need to identify the type of faucet to get the correct replacement washer or O-ring. Needle-nose pliers can be helpful for handling small parts. Watching a video tutorial specific to your faucet model can also be very beneficial.
Q6: How often should I replace the caulk around my bathtub?
The lifespan of caulk varies depending on the quality of the caulk, installation, and bathroom humidity. However, it’s generally recommended to inspect it every 6-12 months and replace it when you see signs of cracking, peeling, mold growth, or separation from the tub or tile. Proactive replacement prevents water damage.
Q7: Are expensive tools necessary for basic bathtub maintenance?
Not always, but investing in quality over the cheapest option can save you time, effort, and frustration in the long run. For example, a good quality caulk gun makes a huge difference in the final appearance and effectiveness of your caulking job, making it a worthwhile upgrade even for occasional use.
