
Quick Summary: Get the Latest Vintage Bathroom Decor! Essential updates seamlessly blend timeless charm with modern functionality. This guide shows beginner-friendly ways to refresh your space with classic styles, focusing on easy-to-implement changes for a beautiful, updated vintage feel without overwhelming renovations.
Dreaming of a bathroom that feels both elegantly vintage and perfectly functional for today? You’re not alone! Many of us love the charm of older styles but worry about them feeling outdated or impractical. The good news is you don’t need a massive renovation to achieve that beautiful, vintage aesthetic. This guide is built to help you, even if you’re new to DIY or design. We’ll walk through the “vintage bathroom decor latest” trends and the essential updates that make them work for your modern life. Get ready to transform your bathroom into a stylish sanctuary!
Embracing the Latest in Vintage Bathroom Decor: What’s Trending?

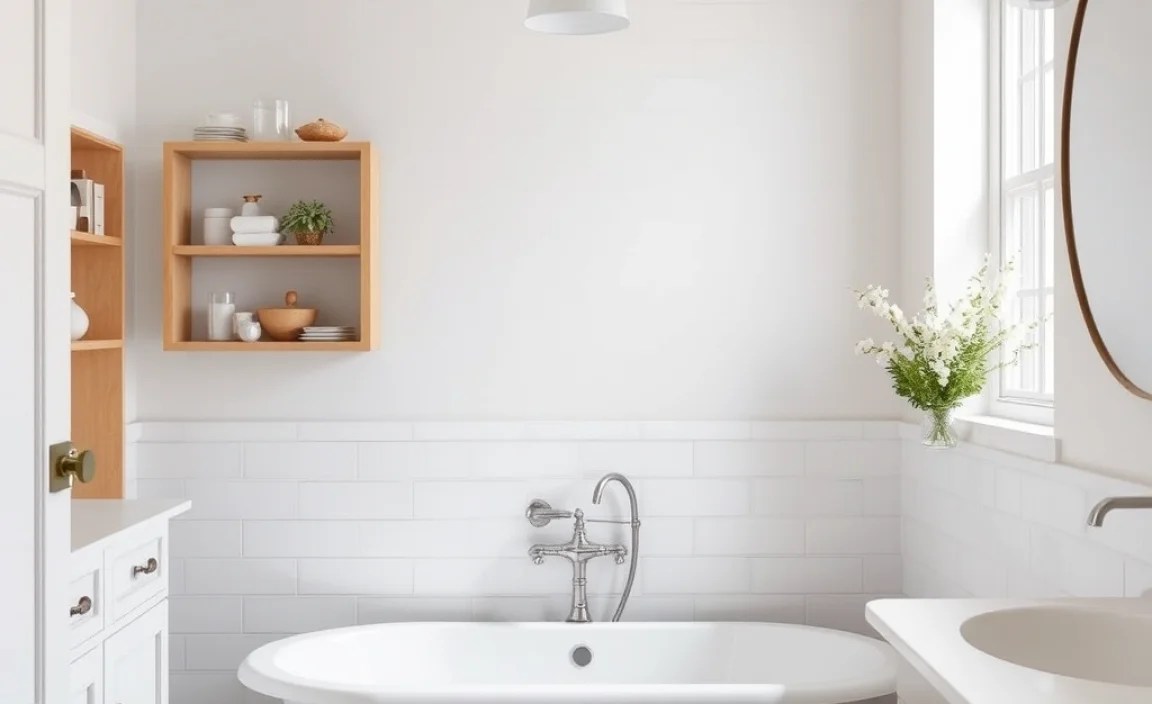
Vintage bathroom decor isn’t about recreating a specific era perfectly; it’s about capturing a feeling – a sense of history, craftsmanship, and enduring style. The latest trends focus on a curated approach, mixing classic elements with practical modern needs. Think less dusty museum piece and more sophisticated, lived-in elegance. The goal is to bring in that timeless appeal without sacrificing convenience or hygiene.
The key is to select elements that evoke a vintage feel while being readily available and easy to integrate. This might involve choosing specific color palettes, materials, or fixtures that hint at the past but are designed for today’s standards. We’re seeing a move towards “modern vintage,” where the feel is undeniably classic, but the underlying functionality and ease of use are paramount.
Popular Vintage Aesthetics for Today’s Bathrooms:
- Farmhouse Charm: Think shiplap, subway tiles, and a clawfoot tub. This style is cozy, inviting, and feels timeless.
- Mid-Century Modern Revival: Characterized by clean lines, geometric patterns, and a mix of wood and subtle pops of color.
- Art Deco Glam: Featuring bold geometric shapes, metallic accents (like brass or chrome), and luxurious materials.
- Classic Victorian Elegance: Rich colors, ornate details, pedestal sinks, and clawfoot tubs are hallmarks of this romantic style.
Essential Updates for a Modern Vintage Bathroom

Updating your bathroom with vintage flair doesn’t mean you have to rip out everything. It’s about smart, essential additions and thoughtful choices. We’ll focus on elements that make a big impact with minimal fuss, perfect for beginners.
1. The Color Palette: Setting the Vintage Mood
Color is a powerful tool in creating a vintage atmosphere. You don’t need to go for deep, moody hues if that’s not your style. Lighter, airier palettes can also evoke a vintage feel when paired with the right textures and fixtures.
Popular Vintage-Inspired Color Schemes:
- Soft Neutrals: Think creamy whites, warm beiges, and light greys. These provide a clean, classic backdrop and make any space feel larger.
- Muted Pastels: Soft blues, gentle greens, and dusty rose shades can add a touch of old-world romance without being overwhelming.
- Classic Black & White: This is a foolproof vintage combination, especially when using patterned tiles or bold fixtures.
Beginner Tip: Start with paint! A fresh coat of paint in a vintage-inspired shade is one of the most affordable and impactful ways to change the feel of your bathroom.
2. Fixtures & Hardware: The Devil’s in the Details
The right fixtures can instantly transport your bathroom. When looking for “vintage bathroom decor latest” updates, pay close attention to faucets, doorknobs, light fixtures, and cabinet pulls. These small elements have a huge influence.
Choosing Vintage-Style Fixtures:
- Faucets: Look for widespread faucets with porcelain or lever handles, or cross-handles. Finishes like brushed nickel, oil-rubbed bronze, or polished chrome can all lend a vintage feel.
- Hardware: Drawer pulls and doorknobs can be ceramic, glass, or simple metal styles. Consider vintage-inspired labels or glass knobs for cabinets.
- Lighting: Sconces with frosted glass shades, pendant lights with a retro feel, or even a classic vanity light bar can enhance the vintage charm.
Where to Find Them: Many major home improvement stores offer “vintage” or “traditional” collections. Online marketplaces and salvage yards are also great for unique finds, but ensure you check their condition carefully.
3. Tile Trends: Timeless Patterns for Modern Spaces
Tile is a foundational element in any bathroom, and it plays a huge role in its aesthetic. For vintage bathrooms, certain tile styles are classics for a reason.
Essential Vintage Tile Choices:
- Subway Tile: The absolute king of vintage bathrooms. White subway tile with dark grout is a timeless combination. Consider it for backsplashes or even as a shower surround.
- Hexagon Tile: Small, often white or black, hexagon tiles on the floor create a classic, graphic look.
- Penny Round Tile: These small, circular tiles are perfect for floors, shower pans, and even as decorative accents.
- Patterned Floor Tiles: Black and white geometric patterns, or more intricate encaustic-style tiles, can make a bold vintage statement on the floor.
Accessibility Tip: Many affordable options for these classic tiles are now available. Vinyl or peel-and-stick tiles can also offer a budget-friendly way to achieve a similar look for floors and backsplashes.
4. Vanity & Sink Selection: The Heart of the Bathroom
Your vanity and sink are central pieces. You can update an existing vanity or choose a new one that echoes a vintage style.
Vintage Vanity & Sink Ideas:
- Pedestal Sink: A classic for smaller bathrooms or powder rooms. It offers a light, airy feel and a timeless silhouette.
- Console Sink: Similar to a pedestal sink but with legs, offering a bit more support and often a shelf.
- Vintage-Inspired Cabinet Vanity: Look for furniture-style vanities with clean lines, beadboard detailing, or a distressed finish. Painted vanities in soft colors are very popular.
- Farmhouse Sink: Apron-front sinks, often made of ceramic or cast iron, bring a rustic, vintage charm.
Beginner Maintenance Tip: If you’re keeping an existing vanity, a coat of paint and new hardware can make a world of difference. Ensure you use a primer and paint suitable for cabinets to ensure durability.
5. Mirrors & Wall Decor: The Finishing Touches
Don’t underestimate the power of mirrors and wall art to complete your vintage look.
Vintage Mirror & Decor Ideas:
- Ornate Framed Mirrors: A mirror with an antique gold, silver, or dark wood frame can instantly elevate the vintage feel.
- Medicine Cabinets: Recessed or surface-mount medicine cabinets with a classic design, perhaps with a mirrored front or subtle detailing, are both functional and stylish.
- Shelving: Open shelving made of reclaimed wood or with vintage-style brackets can add character and provide display space.
- Artwork: Black and white historical prints, botanical illustrations, or even vintage advertisements can add personality without clutter.
6. Textiles & Accessories: Soft Touches
The soft furnishings and accessories are the easiest way to add personality and reinforce your vintage theme.
Vintage-Inspired Textile & Accessory Choices:
- Towels: Opt for high-quality cotton towels in neutral colors, muted tones, or classic stripes. Monogrammed towels add a touch of luxury.
- Shower Curtain: A simple linen or cotton curtain in a solid color, a delicate floral pattern, or a classic stripe can work wonders.
- Bath Mats: Woven cotton or jute mats add texture and warmth.
- Décor Items: Vintage-inspired soap dispensers, toothbrush holders, trays, or even a decorative watering can can complete the look.
DIY Idea: Thrift stores are goldmines for unique vintage accessories that can be repurposed for your bathroom!
Step-by-Step: How to Implement Essential Vintage Updates (Beginner Friendly!)
Let’s break down how you can start bringing these vintage elements into your bathroom. We’ll focus on achievable steps.
Phase 1: Planning and Preparation
- Assess Your Space: Look at what you have. What can stay? What needs to go? What’s your budget?
- Choose Your Style: Decide on a specific vintage vibe (e.g., farmhouse, art deco, classic). This will guide your choices.
- Create a Mood Board: Pin images of bathrooms you love, color swatches, fixture styles, and tile ideas. This helps visualize the end result.
- Measure Everything: Before buying new fixtures or vanities, measure your space to ensure they will fit.
- Gather Basic Tools: For most of these updates, you’ll need a screwdriver set, a tape measure, a level, and perhaps a putty knife. For painting, you’ll need brushes, rollers, paint trays, and painter’s tape.
Phase 2: Easy Wins (DIY Quick Wins)
These are the simplest updates to start with.
- Paint the Walls:
- Clean walls thoroughly.
- Apply painter’s tape to trim and fixtures.
- Apply a primer if necessary (especially if changing significantly from the current color).
- Apply two coats of your chosen vintage-inspired paint color.
- Allow to dry completely and remove tape.
- Update Hardware:
- Use a screwdriver to remove existing cabinet knobs and drawer pulls.
- Screw in your new vintage-style hardware.
- If changing a doorknob on a cabinet, you might need to fill old holes and drill new ones, but often new hardware fits existing placements.
- Swap Out Light Fixtures (Optional but impactful):
- Safety First: Turn off the power to the light fixture at the circuit breaker! Verify power is off with a non-contact voltage tester.
- Unscrew the old fixture.
- Disconnect the wires (usually black to black, white to white, ground to ground).
- Connect the new fixture’s wires according to its instructions.
- Secure the new fixture.
- Turn power back on at the breaker and test. If you’re unsure, hire an electrician. Learn more about energy-efficient lighting choices from the Department of Energy.
- Add or Replace Accessories:
- Place your new vintage-inspired soap dispenser, toothbrush holder, waste bin, etc.
- Hang your new mirror and any chosen artwork or shelves.
Phase 3: More Involved Updates (If Ready!)
These steps might require a bit more effort or a helper, but are still manageable for beginners.
- Update a Vanity (Cosmetic):
- Remove the old hardware and faucet.
- Clean and prep the vanity for painting.
- Paint or re-stain the vanity.
- Install the new vintage-style hardware.
- Install a new faucet and connect water supply lines. Refer to the Federal Trade Commission’s guide for general faucet installation concepts.
- If you have a separate sink, re-caulk around it and around the countertop edge.
- Install New Tile (Backsplash or Small Floor Area):
- This is a more significant DIY project. You’ll need tools like a tile saw, trowel, grout float, and sponges.
- Preparation includes ensuring the surface is clean, level, and dry.
- Apply tile adhesive (thin-set mortar or mastic) with a trowel.
- Place tiles, ensuring even spacing with tile spacers.
- Cut tiles as needed for edges and corners (practice cuts first!).
- Allow adhesive to cure completely.
- Mix and apply grout.
- Wipe away excess grout as it firms up.
- Allow grout to cure and seal if necessary. The Ceramic Tile and Stone industry offers detailed installation guidelines.
Comparing Vintage Update Options
Not all updates are created equal in terms of effort, cost, and impact. Here’s a quick look:
| Update Type | Estimated Cost (Low to High) | DIY Skill Level | Visual Impact (Low to High) | Time Commitment (Hours) |
|---|---|---|---|---|
| Paint Color | $ | Beginner | Medium | 2-6 |
| Hardware Swap | $ | Beginner | Medium | 1-3 |
| Accessory & Mirror Update | $ – $$ | Beginner | Medium | 1-4 |
| Light Fixture Swap | $$ | Beginner to Intermediate (Electrical) | High | 2-4 |
| Vanity Refurbish (Paint) | $$ | Beginner to Intermediate | High | 8-24 (drying time) |
| New Faucet Installation | $$ – $$$ | Intermediate | High | 3-6 |
| Tile Installation (Small area) | $$$ – $$$$ | Intermediate to Advanced | Very High | 16-48 (cure time) |
Conclusion: Your Stylish Vintage Bathroom Awaits
Updating your bathroom with the latest in vintage decor is an achievable and rewarding project. By focusing on essential updates like color palettes, carefully chosen fixtures, classic tile patterns, and charming accessories, you can create a space that feels both timeless and perfectly suited to your modern life. Remember, it’s about finding a balance that speaks to you.
Whether you start with a simple coat of paint or decide to tackle a new faucet, each step brings you closer to your dream vintage bathroom. Don’t be afraid to experiment and let your personal style shine through. With these tips and a little bit of DIY spirit, your bathroom will soon be a beautiful, inviting retreat that you’ll love for years to come.
Frequently Asked Questions (FAQ)
Q1: How can I make my modern bathroom look more vintage without major renovations?
You can easily add vintage charm by changing your paint color to a vintage-inspired shade, updating hardware on cabinets, swapping out light fixtures for a retro style, and incorporating vintage-style accessories like mirrors, trays, and decorative items. Focusing on these smaller details makes a big difference.
Q2: What are the best colors for a vintage bathroom?
Classic choices include soft neutrals like creamy whites, beiges, and greys. Muted pastels such as pale blues, sage greens, and dusty pinks are also excellent. Black and white is a timeless, graphic combination, especially with patterned tiles.
Q3: Is subway tile still popular for vintage bathrooms?
Yes, subway tile is a perennial favorite for vintage bathrooms! Its clean, classic look, especially in white with dark grout, has stood the test of time and continues to be a go-to choice for backsplashes and shower surrounds.
Q4: What kind of sink is most “vintage”?
Pedestal sinks and console sinks offer a very classic, vintage look, especially for smaller bathrooms. Furniture-style vanities with traditional detailing or apron-front sinks (like farmhouse sinks) also evoke a strong sense of vintage or rustic charm.
Q5: Do I need to be an expert DIYer to update my bathroom with vintage decor?
Not at all! Many essential vintage updates, like painting, changing hardware, or adding accessories, are beginner-friendly. For more complex tasks like electrical work or tiling, it’s always wise to consult a professional or ensure you have proper guidance and tools.
Q6: Where can I find authentic vintage bathroom items?
Great places to look include antique shops, salvage yards, flea markets, and online marketplaces like eBay or Etsy. Don’t forget to check thrift stores – you might find unique treasures!
Q7: How do I mix modern functionality with vintage style?
The trick is to choose vintage-looking fixtures that are actually modern and efficient. For example, opt for a vintage-style faucet that uses contemporary internal mechanisms for better water flow and fewer leaks. You can also incorporate modern organizational tools discreetly within a vintage aesthetic.
