
Wet Room Basics: Pros and Cons Revealed! A wet room is a fully waterproofed bathroom where the shower area isn’t enclosed. It’s a modern, space-saving solution that can transform your bathroom. We’ll break down the advantages and disadvantages so you can decide if it’s the right choice for your home.
Dreaming of a sleek, modern bathroom that feels more open and spacious? A wet room might be exactly what you’re looking for. This design concept, where the shower area is completely open and waterproofed, is gaining popularity for good reason. It can make even small bathrooms feel larger and more luxurious. But like any home improvement, it’s important to know both the good and the not-so-good before diving in.
Don’t worry, Bryan’s here to guide you through the wet room basics, revealing all the pros and cons in a way that’s easy to understand. We’ll cover everything you need to know to make an informed decision. Ready to explore the world of sophisticated, open-plan showering? Let’s get started!
What Exactly is a Wet Room?
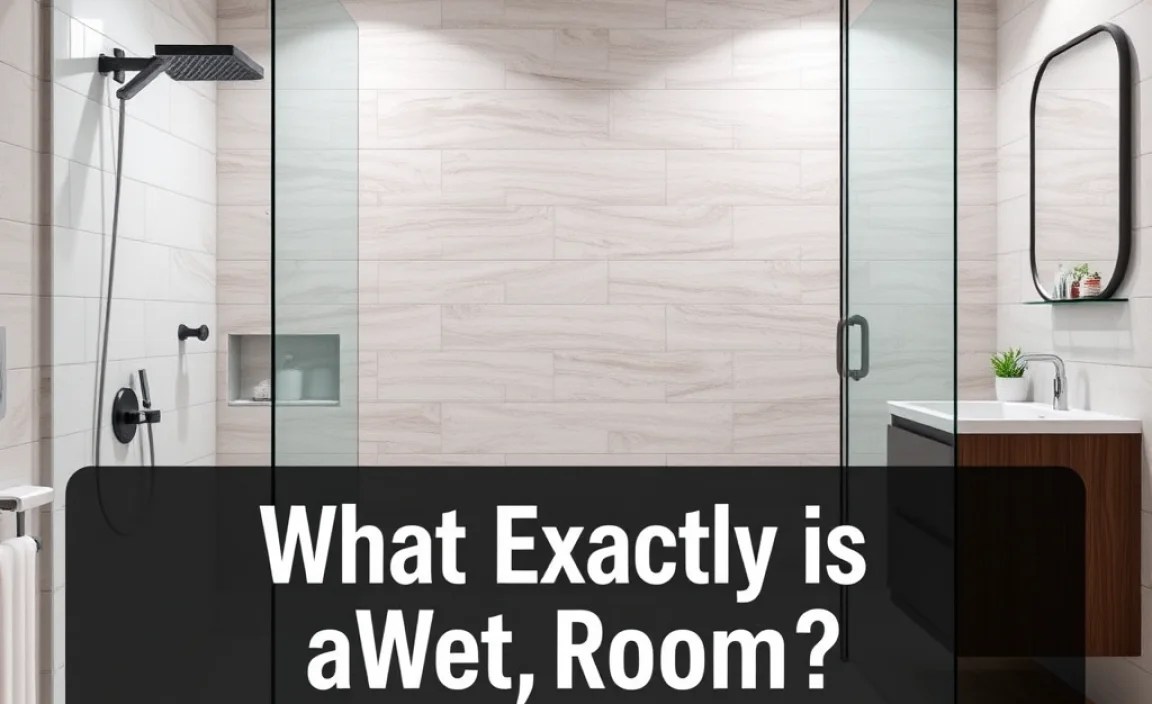
Think of a wet room as a bathroom designed to get wet. Unlike a traditional bathroom with a separate shower enclosure, a wet room is one continuous, waterproofed space. The entire room, or at least the showering zone, is designed to handle water safely and effectively. This means specialized waterproofing techniques and drainage systems are key. Often, a wet room will feature a shower drain installed directly into the floor, and the shower area itself is usually delineated by a stylish screen or simply by the gradient of the floor directing water towards the drain.
The magic of a wet room lies in its seamless design. There are no trays to step over, no glass doors to clean (or break!). This creates an elegant, minimalist aesthetic that can truly elevate your bathroom. It’s a design that’s not only beautiful but also highly practical, especially for those who value ease of use and accessibility.
The Pros of Having a Wet Room

Wet rooms offer a compelling blend of style, function, and smart design. For many homeowners, the benefits far outweigh any potential drawbacks. Let’s dive into the advantages that make wet rooms such an attractive option.
1. Space-Saving Marvel
Perhaps the biggest draw for many is how effectively wet rooms utilize space. Without the need for a bulky shower cubicle, the entire bathroom feels larger and more open. This is an absolute game-changer for smaller bathrooms or en-suites where every inch counts. You can create a feeling of spaciousness that’s hard to achieve with conventional shower setups.
2. Modern and Stylish Aesthetic
Wet rooms embody a chic, contemporary look. The clean lines and minimalist design are incredibly appealing. They offer a spa-like feel, transforming your everyday bathroom into a tranquil retreat. Imagine stepping into a beautifully tiled space where the shower flows seamlessly into the rest of the room – it’s pure sophistication.
3. Enhanced Accessibility
The absence of a raised shower tray or steps makes wet rooms exceptionally accessible. This is fantastic for families with young children, individuals with mobility issues, or elderly relatives. Easy entry and exit improve safety and independence, making the bathroom a more inclusive space for everyone.
4. Easier Cleaning
Fewer nooks and crannies mean less cleaning! With a simple, open design, you’ll find that cleaning a wet room is significantly easier than scrubbing down a traditional shower enclosure with its doors, tracks, and trays. A quick wipe-down is often all that’s needed, saving you time and effort.
5. Increased Property Value
A well-designed wet room can be a significant selling point. It’s a modern feature that appeals to many buyers, suggesting a renovated and up-to-date home. This can add to your property’s appeal and potentially increase its value.
6. Versatile Design Options
Wet rooms are incredibly adaptable. You can customize them to fit your style, whether you prefer minimalist tiling, striking feature walls, or integrated seating. The open design allows for creative use of space and materials, truly making it your own.
The Cons of Having a Wet Room

While the allure of a wet room is strong, it’s essential to be aware of the potential downsides. Understanding these challenges will help you make a well-informed decision and plan accordingly.
1. The Importance of Professional Waterproofing
This is non-negotiable. Proper waterproofing is paramount for a wet room. If not installed correctly by experienced professionals, water can leak into walls, floors, and ceilings, causing significant structural damage, mold growth, and costly repairs. This isn’t a DIY job for the faint of heart or the inexperienced.
According to the UK Government’s Building Regulations, specific standards must be met for work that affects the structural integrity and safety of a building. Waterproofing of wet areas falls under this, requiring adherence to strict guidelines to prevent damp and decay. In the US, the Department of Housing and Urban Development (HUD) also provides guidelines for safe and healthy building practices, which include considerations for wet areas.
2. Potential for Water Splashing
Because there’s no enclosure, water can splash further than you might expect. You’ll need to ensure that the entire bathroom floor is waterproofed and that items like towels, toilet paper, and electrical appliances are kept well away from the shower area. Strategic screen placement can help, but complete containment isn’t always possible.
3. Require a Good Drainage System
An efficient drainage system is crucial. If the drain can’t handle the water flow, or if it’s not positioned correctly, you’ll end up with standing water, which is not only unsightly but can also lead to problems. A properly sloped floor towards the drain is essential.
4. Heating Considerations
An open wet room can feel cooler than a traditional bathroom, especially in colder climates. You’ll need to think about heating solutions, such as underfloor heating, heated towel rails, or a good extractor fan to manage moisture and keep the room comfortable.
5. Cost of Installation
While it might seem simpler, a properly installed wet room can be more expensive than a standard shower cubicle. The specialized waterproofing materials, drainage systems, and often the need for professional installation contribute to the overall cost.
6. Stepping Risk for Some
While generally more accessible, for those with very specific balance issues, the lack of a defined edge to step into or out of could be a slight concern, though a well-designed wet room with a slight floor gradient generally mitigates this.
Wet Room vs. Traditional Bathroom: A Comparison

To help you visualize the differences, let’s compare a wet room directly with a traditional bathroom setup. This table highlights key distinctions:
| Feature | Wet Room | Traditional Bathroom |
|---|---|---|
| Shower Enclosure | None; open floor plan shower area | Separate shower cubicle, tray, or bath with screen/doors |
| Waterproofing | Entire floor and lower walls of shower zone are waterproofed | Shower area requires waterproofing behind tiles; tray/enclosure contains water |
| Drainage | Floor drain typically installed in shower area | Drain within shower tray or bath |
| Space Perception | Can make small bathrooms feel larger | Enclosure can reduce perceived space |
| Accessibility | High; no steps or trays | Lower; often involves stepping into a tray or bath |
| Installation Complexity | High due to critical waterproofing requirements | Moderate, depending on enclosure type |
| Cleaning Ease | Generally easier due to open plan | Can be more challenging due to multiple surfaces, tracks, and doors |
Key Components of a Well-Designed Wet Room

Building a successful wet room isn’t just about removing a shower tray. It requires specific elements to ensure it’s functional, safe, and durable. Here are the essential components:
1. Waterproofing Membrane
This is the critical layer that prevents water from penetrating your walls and floors. Applied over the subfloor and up the walls to a certain height (usually at least 1.5 meters or 5 feet in the shower area), it creates a waterproof barrier. Reputable brands like Schlüter-Systems offer robust waterproofing solutions designed for wet areas.
2. Floor Former / Tray Former
This is a pre-formed, rigid board that creates the necessary slope for the water to drain away. It’s usually installed over the subfloor and then tiled over. These are crucial for guiding water towards the drain without pooling.
3. Drainage System
A high-quality drain is essential. This can be a simple point drain or a linear drain (channel drain) placed along a wall. The rate of water flow (liters per minute) is important, especially if you have a powerful showerhead.
Consider the following when choosing a drain:
- Flow Rate: Ensure it can handle the volume of water from your shower.
- Trap Type: A water trap prevents odors from rising up through the drain.
- Aesthetics: Drains come in various styles and finishes to match your decor.
4. Shower Screen (Optional but Recommended)
While not strictly necessary for all wet rooms, a shower screen is often used to contain the majority of the water spray and prevent it from hitting towels or toiletries placed further into the room. These are typically made of toughened safety glass.
5. Tiling and Grouting
All tiles in the wet room, especially in the shower zone, should be water-resistant and properly sealed. Grout also needs to be waterproof and durable. Epoxy grout is a good option as it’s highly water-resistant and less prone to staining than cement-based grouts.
6. Ventilation
Excellent ventilation is a must. An efficient extractor fan will remove moisture, prevent condensation, and help to keep the room dry and free from mold. A timer function is useful, allowing the fan to continue running for a set period after you’ve finished showering.
Steps to Creating a Wet Room
While we strongly recommend professional installation for the critical waterproofing and drainage elements, understanding the process can empower you. Here’s a simplified look at the key stages:
Preparation and Planning
- Design: Plan the layout, including the shower location, drain placement, and any desired screens or furniture.
- Structural Check: Ensure your subfloor can support the new weight and that plumbing is in the correct position.
- Professional Consultation: Discuss your plans with plumbers and waterproofing specialists.
Waterproofing and Drainage Installation
- Install Floor Former: Lay and secure the sloped floor former (like a bespoke tray) to create the gradient towards the drain.
- Install Drainage: Fit the drain into the floor former, ensuring a watertight seal with the pipework.
- Apply Waterproofing Membrane: Cover the floor former and extend the membrane up the walls around the shower area, overlapping seams for complete protection. Pay special attention to corners and edges.
- Seal All Penetrations: Any pipes or fixtures passing through the membrane must be sealed securely.
Tiling and Finishing
- Tile the Area: Once the waterproofing is cured, tile the floor and walls of the shower zone.
- Grout and Seal: Use waterproof grout and thoroughly seal all grout lines.
- Install Shower Screen: If using a screen, fit it securely, ensuring seals are watertight.
- Final Touches: Install shower fixtures, ventilation, and any other accessories.
Best Practices for Wet Room Maintenance
Once your wet room is installed, keeping it in top condition is straightforward with a few good habits. This will ensure its longevity and keep it looking its best.
Daily Habits
- Squeegee Use: After each shower, use a squeegee to wipe down the shower screen and walls. This removes excess water and prevents limescale buildup.
- Ventilation: Always turn on your extractor fan during and after showering. Leave it running for at least 20-30 minutes to remove all moisture.
- Wipe Down Surfaces: Quickly wipe down any wet spots on the floor or vanity with a towel to ensure everything is dry.
Weekly Cleaning
- General Clean: Clean tiles, grout, and screens with a mild, non-abrasive bathroom cleaner.
- Check Drain: Ensure the drain is clear of any hair or soap scum. You can use a drain cleaner or a simple mesh catcher to prevent blockages.
- Wipe Fixtures: Clean and polish your showerhead, taps, and other fixtures to prevent water spots.
Grout and Sealant Checks (Monthly/Bi-Annually)
- Inspect Grout: Look for any signs of cracking or degradation. Small cracks can be a gateway for water.
- Reseal if Necessary: If your grout and sealant look worn, consider re-sealing or applying a grout protector to maintain their water resistance.
For a comprehensive guide on bathroom cleaning, the Which? consumer advice website offers excellent, practical tips for maintaining a sparkling bathroom.
Conclusion
So there you have it – a comprehensive look at wet room basics, from their brilliant advantages to the crucial considerations you need to know. Wet rooms offer an incredible opportunity to modernize your bathroom, enhance its perceived space, and boost accessibility. They bring a touch of luxury and spa-like serenity into your home.
However, the success of a wet room hinges entirely on meticulous planning and professional installation, particularly when it comes to waterproofing and drainage. By understanding both the pros and cons, you’re now well-equipped to decide if a wet room is the right fit for your home and lifestyle. If you decide to proceed, remember to prioritize quality materials and skilled craftsmanship for a beautiful, functional, and long-lasting bathroom transformation. Happy renovating!
Frequently Asked Questions About Wet Rooms
Many people contemplating a wet room have similar questions. Here are some common ones answered:
Q1: Do I need special tiles for a wet room?
A: While not strictly “special” tiles, you need tiles that are water-resistant and suitable for wet areas. Porcelain and ceramic tiles are excellent choices. Avoid porous natural stones unless they are properly sealed. It’s also crucial that your grout is waterproof, like epoxy grout.
Q2: Can I put a toilet or vanity in a wet room?
A: Absolutely! Modern wet room designs often incorporate toilets and vanities. However, they must be placed outside the direct splash zone of the shower. Waterproofing should extend around these areas, and items like toilet paper holders and electrical outlets need careful consideration to avoid water damage.
Q3: How large does a bathroom need to be for a wet room?
A: Wet rooms are fantastic for small bathrooms because they create a sense of space. However, you still need enough room for the shower area to function without water splashing onto everything. A minimum shower area of about 80cm x 80cm (around 30×30 inches) is often recommended, but larger is always better if space allows.
Q4: Is a wet room more expensive than a regular shower?
A: The initial cost can be higher. This is due to the specialized waterproofing system, the floor former, the drainage, and the professional labor required to ensure it’s done correctly. A standard shower installation might be cheaper upfront, but a well-built wet room offers long-term value and benefits.
Q5: What about underfloor heating in a wet room?
A: Underfloor heating is a popular and highly recommended addition to wet rooms, especially in colder climates. It helps to dry the room more quickly after use and makes the tiled floor warm and comfortable underfoot, turning a potentially chilly space into a cozy one.
Q6: How do I prevent mold in a wet room?
A: The best prevention is excellent ventilation and immediate drying of excess water. Ensure your extractor fan is powerful and used consistently. Squeegeeing walls and screens after use and wiping down any standing water on the floor will significantly reduce the risk of mold growth.
