
Yes, wooden bathroom accessories can be made waterproof with proper sealing and maintenance, allowing you to enjoy their natural beauty and warmth in your bathroom environment. This guide will show you how to choose, protect, and care for them to ensure they last.
Are you dreaming of a bathroom that feels like a serene spa, complete with the natural warmth of wood? That’s a fantastic goal! But then you might worry, “Can wood really handle a steamy bathroom?” It’s a common question because we all know bathrooms can get pretty damp. The good news is, with the right approach, your wooden bathroom accessories can not only survive but thrive, adding that essential touch of style without any fuss. We’re going to walk through everything you need to know, from picking the best wood to keeping it looking gorgeous for years to come. Get ready to bring that cozy, elegant vibe into your bathroom safely and smartly!
Understanding Wood in the Bathroom: More Than Just Looks

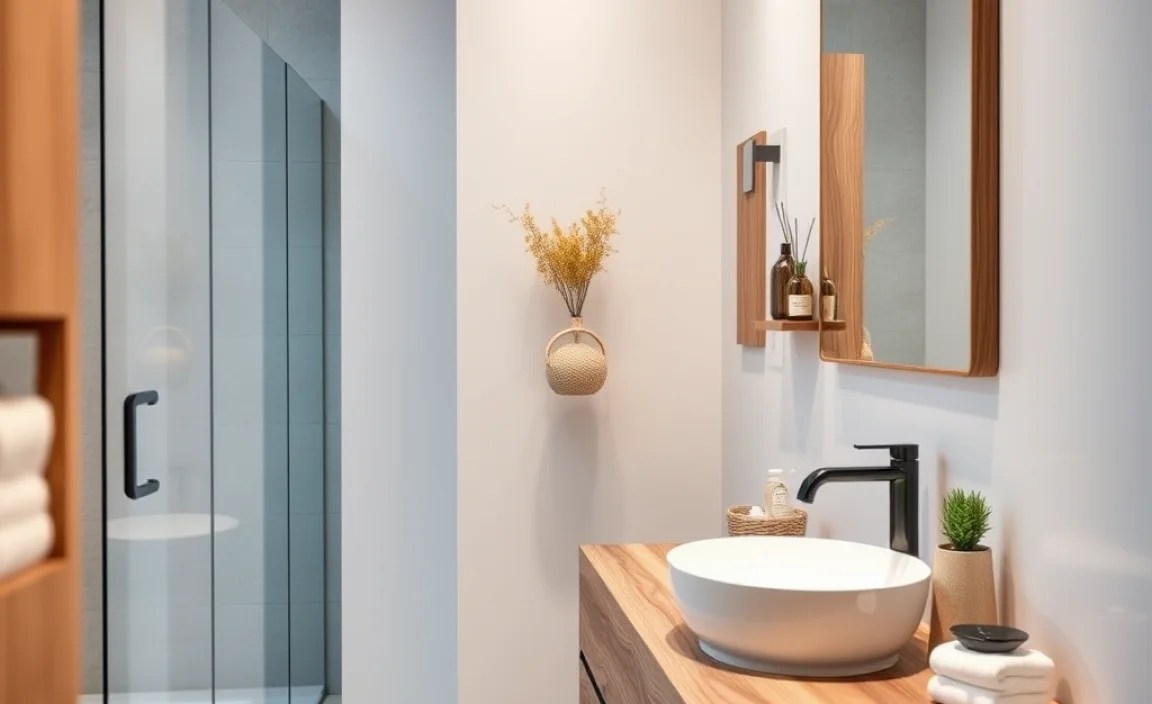
When we talk about wooden bathroom accessories, we’re talking about more than just aesthetics. Wood brings a unique texture and warmth that no other material can quite replicate. Think of a beautifully crafted wooden soap dish, a bamboo toothbrush holder, or even a teak shower stool – these pieces can elevate your bathroom from functional to fabulous. However, the bathroom environment, with its high humidity and direct contact with water, presents a unique challenge for this organic material. Understanding how wood reacts to moisture is the first step in making it work for you.
Wood is a porous material, meaning it has tiny holes that can absorb water. When wood absorbs too much moisture, it can swell, warp, crack, or even develop mold and mildew. This is why many people hesitate to bring wood into their bathrooms. But don’t let that deter you! With the right knowledge and a little effort, you can create a waterproof barrier that keeps your wooden treasures looking beautiful and lasting for ages. It’s all about choosing the right type of wood and, crucially, treating it correctly.
Why Choose Wood for Your Bathroom?
Before we dive into making it waterproof, let’s quickly touch on why wood is such a popular choice for bathroom decor:
Natural Beauty: Wood offers a unique, organic aesthetic that can make any bathroom feel more inviting and luxurious.
Warmth and Texture: Unlike cold tiles or metal, wood provides a sense of warmth and comfort.
Sustainability: Many wooden accessories are made from sustainable sources like bamboo or reclaimed wood, fitting into eco-conscious home designs.
Versatility: Wood complements a wide range of bathroom styles, from minimalist modern to rustic farmhouse.
Durability (with care): When properly sealed and maintained, wooden items can be just as durable as other materials.
Choosing the Right Wood for Bathroom Accessories

Not all woods are created equal when it comes to moisture resistance. Some timbers have natural oils and a denser grain that makes them inherently better suited for damp environments like bathrooms. Focusing on these can give you a head start in creating a durable and beautiful wooden bathroom.
Naturally Moisture-Resistant Woods
When selecting wooden bathroom accessories, prioritize woods known for their natural resilience to water. These woods contain oils and have a tight grain structure that repels moisture, making them excellent choices for humid conditions.
Teak: Often considered the king of water-resistant woods, teak is rich in natural oils and silica, making it incredibly durable and resistant to rot and decay. It’s commonly used in boat building and marine applications for good reason.
Bamboo: While technically a grass, bamboo is incredibly strong, sustainable, and has a natural resistance to moisture. Its rapid growth makes it an environmentally friendly option.
Cedar: Known for its aromatic properties and excellent resistance to moisture and insects, cedar is another great choice. Its natural oils help protect it from rot.
Cypress: This wood also boasts natural oils that make it resistant to decay and water damage, making it suitable for outdoor and damp applications.
Mahogany: With its dense grain and natural oils, mahogany offers good resistance to water and rot, though it can be more expensive.
Woods to Be Cautious With
Some woods are naturally more porous or prone to moisture damage. While they can still be used with very thorough sealing, they might require more diligent maintenance.
Pine: A softer wood that is more absorbent. It needs thorough sealing and is best for areas with less direct water exposure.
Oak: While durable, standard oak can be prone to staining and water damage if not properly sealed due to its open grain.
Maple: Can be a decent choice if sealed well, but it’s less naturally resistant than teak or cedar.
The key takeaway is that even naturally resistant woods benefit greatly from additional sealing to ensure they remain waterproof in a bathroom setting.
Making Your Wooden Accessories Waterproof: The DIY Guide

Achieving a waterproof finish on your wooden bathroom accessories is crucial for their longevity and appearance. It’s not as complicated as it might sound and can be a rewarding DIY project. The goal is to create a barrier that prevents water from penetrating the wood’s surface.
What You’ll Need: Tools and Materials
Gathering the right supplies before you start will make the process smooth and efficient. Here’s a list of common items you’ll likely need:
Your Wooden Accessory: The item you want to waterproof.
Fine-Grit Sandpaper (180-220 grit): For preparing the surface.
Clean, Lint-Free Cloths: For applying sealant and wiping away excess.
Waterproof Sealant: Options include:
Polyurethane Varnish (Water-based or Oil-based): Durable and readily available. Water-based is lower in VOCs and dries faster.
Epoxy Resin: Creates a very hard, durable, and completely waterproof coating. Requires careful mixing.
Water-Based Wood Sealers/Water Repellents: Designed specifically for wood protection.
Natural Oils (like Tung Oil or Linseed Oil): These penetrate the wood and polymerize, offering water resistance and a natural look. Note: These require more frequent reapplication than varnishes or resins.
Applicator Tools:
Foam brushes or natural bristle brushes (for varnish/oil).
Stir sticks (for epoxy resin).
Gloves (latex or nitrile) for protection.
Mask (if working with oil-based products or in a poorly ventilated area).
Drop cloth or old newspaper to protect your work surface.
Step-by-Step Waterproofing Process
Follow these steps to effectively waterproof your wooden bathroom accessories. This process can be applied to new items or items that need refreshing.
1. Prepare the Surface:
Ensure the wooden accessory is clean and completely dry.
Lightly sand the entire surface with fine-grit sandpaper. This creates a smooth surface and helps the sealant adhere better.
Wipe away all dust with a clean, dry cloth. For a perfect finish, you can use a tack cloth.
2. Apply the First Coat of Sealant:
For Varnish/Sealer: Apply a thin, even coat using a foam brush or cloth. Work in the direction of the wood grain. Avoid applying too thickly, as this can cause drips and an uneven finish.
For Natural Oil: Apply generously with a cloth, allowing it to soak into the wood for 15-30 minutes. Then, wipe off any excess oil that hasn’t penetrated.
For Epoxy Resin: Follow the manufacturer’s instructions precisely. This usually involves mixing two parts together thoroughly. Apply the mixed resin evenly with a brush or squeegee. Work quickly as epoxy has a limited working time.
3. Allow for Drying/Curing:
Let the first coat dry completely according to the product’s instructions. Drying times can vary significantly between products. Water-based polyurethanes might take 2-4 hours, while oil-based ones can take 12-24 hours. Natural oils need several hours to cure before the next coat. Epoxy resins typically cure in 24 hours for light handling but longer for full hardness.
4. Sand Lightly (Optional but Recommended):
Once dry, lightly sand the surface again with very fine-grit sandpaper (around 320 grit) or a fine sanding sponge. This knocks down any raised wood fibers or minor imperfections, ensuring a smoother final finish.
Clean off any dust thoroughly.
5. Apply Subsequent Coats:
Apply a second thin, even coat of your chosen sealant, following the same application method as the first.
Allow each coat to dry and cure according to the manufacturer’s instructions.
For maximum protection, especially in high-moisture areas, apply 3-4 coats. For items like shower stools that have constant water contact, more coats are better.
6. Final Curing:
After the final coat, allow the accessory to cure fully before exposing it to heavy moisture. This can take several days to a week for some products, especially oil-based varnishes and epoxy resins, to reach their maximum hardness and water resistance.
External Link: For more detailed information on wood finishes and their properties, the U.S. Forest Products Laboratory offers valuable technical resources on wood finishing.
Choosing the Right Sealant: A Comparison
The type of sealant you choose will impact the look, feel, and level of protection your wooden accessory receives. Here’s a quick comparison to help you decide:
| Sealant Type | Pros | Cons | Best For |
|---|---|---|---|
| Polyurethane Varnish (Water-Based) | Low VOCs, fast drying, non-yellowing, good durability. Easier cleanup. | Can be prone to scratches with heavy use compared to oil-based. | General accessories, shelves, moderate moisture areas. |
| Polyurethane Varnish (Oil-Based) | Highly durable, excellent water and abrasion resistance, rich appearance. | Longer drying times, strong fumes (requires ventilation), can yellow over time. | High-traffic items, areas with frequent direct water exposure. |
| Epoxy Resin | Extremely hard, durable, and impermeable. Creates a glossy, waterproof jacket. | Requires precise mixing, can be more difficult to apply evenly, fumes may be strong, can be brittle if applied too thin. | Items constantly submerged or in shower, exceptionally durable finish required. |
| Natural Oils (Tung, Linseed) | Penetrates wood, enhances natural grain, matte to satin finish, easy to reapply. | Requires more frequent reapplication than varnishes, less protective against heavy scratches, can darken wood. | For a natural look, accessories outside direct splash zones, those you don’t mind re-oiling occasionally. |
Maintenance Tips for Waterproofed Wood
Even with the best waterproofing, a little regular care will go a long way in keeping your wooden bathroom accessories looking their best and extending their lifespan. Think of it as a spa day for your accessories!
Daily Care: Simple Steps for Lasting Beauty
Wipe Down Regularly: After each shower or bath, take a moment to wipe down your wooden accessories with a dry cloth. This removes excess moisture and prevents it from sitting on the surface.
Ensure Ventilation: Good airflow is your best friend. After showering, open a window or turn on the exhaust fan to help dry out the room quickly. Avoid leaving damp towels draped directly over wooden items.
Avoid Standing Water: Try to prevent water from pooling on or around your wooden accessories. For items like soap dishes, ensure they have good drainage.
Periodic Maintenance for Renewed Protection
The frequency of deeper maintenance will depend on the sealant you used and how much moisture exposure the item gets.
Inspect for Wear: Every few months, inspect your wooden accessories for any signs of wear, such as dulling of the finish, small cracks, or water spots.
Reapply Sealant (as needed):
Varnish/Sealer: If you notice the finish becoming dull or water no longer beading on the surface, it’s time for a refresh. Lightly sand the surface and apply one or two new coats as described in the waterproofing process.
Natural Oils: These typically need reapplication every 3-6 months, or whenever the wood looks dry or the water resistance diminishes. Simply wipe on a fresh coat, let it penetrate, and wipe off the excess. The North American Retail Hardware Association (NRHA) offers helpful advice on furniture care here, which can be adapted for bathroom wood items.
Epoxy Resin: This is the most durable. You typically won’t need to reapply unless the coating is severely damaged.
Deep Cleaning: If your wooden accessories become dirty or stained, clean them gently. Use a mild soap with water and a soft cloth. Avoid abrasive cleaners, steel wool, or harsh chemicals, as these can damage the finish and the wood. Always rinse thoroughly and dry completely.
Common Issues and How to Fix Them
Even with the best care, occasional problems can arise. Here’s how to address them:
Water Spots/Stains: For fresh water spots, try gently buffing with a soft cloth. For stubborn spots, a very light sanding and reapplication of sealant in that area might be needed.
Minor Scratches: Light scratches can sometimes be buffed out with a soft cloth and a bit of polish (if using a Varnish). For deeper scratches, you’ll need to reapply sealant to the affected area.
Mildew/Mold: If you spot mild mildew, gently scrub the area with a soft cloth dampened with a solution of equal parts white vinegar and water. Rinse thoroughly and dry completely, then reapply sealant to the affected area. Ensure the bathroom is well-ventilated to prevent recurrence.
Styling Your Bathroom with Wooden Accessories

Beyond waterproofing, let’s talk about how to best incorporate these stylish wooden elements into your bathroom design. The right placement and coordination can make a significant impact.
Coordinating with Your Bathroom Scheme
Modern Minimalist: Clean lines and light-colored woods like bamboo or pale oak work beautifully. Think a simple bamboo soap dispenser and toothbrush holder.
