
Bathtub layout for beginners is all about planning your bathroom space for both functionality and flow. It involves understanding standard tub sizes, placement considerations, and plumbing needs to create a practical and comfortable bathing area. This guide simplifies the process, ensuring you make informed decisions for your bathroom project.
Choosing where to put your bathtub might seem like a simple decision at first, but it’s one of the most important steps in any bathroom remodel or new build. Getting the bathtub layout right means your bathroom will feel spacious, easy to use, and look great. Sometimes, bathrooms can feel cramped or awkward, and often, it’s because the tub wasn’t placed thoughtfully. Don’t worry if this feels a bit daunting! We’re here to break it down into easy, manageable steps. You’ll learn exactly what you need to consider to plan a bathtub layout that works perfectly for you. Let’s dive in and make your bathroom dreams a reality!
Understanding Bathtub Basics for Your Layout

Before we even think about where the tub will go, it’s crucial to understand the different types of bathtubs and their general sizes. This knowledge is the foundation of a good bathtub layout.
Common Bathtub Types and Their Dimensions
Bathtubs come in various styles, each suiting different bathroom sizes and aesthetic preferences. Knowing these can help you visualize what might fit best in your space.
- Alcove Tubs: These are the most common type, designed to fit into a pre-existing three-walled space. They are typically rectangular and have a finished front apron. Standard sizes range from 60 inches long and 30-32 inches wide, with heights usually around 14-20 inches.
- Drop-In Tubs: These are installed into a deck or support structure, often found in larger bathrooms where they can be surrounded by tiles or other materials. They have a finished rim that rests on the deck. Sizes vary, but common dimensions are similar to alcove tubs, with some larger options available.
- Freestanding Tubs: These tubs stand alone, creating a focal point in the bathroom. They require more space and are not typically built into an alcove. Common sizes are around 60-70 inches long and 30-34 inches wide.
- Corner Tubs: Designed to fit into a corner, these can be triangular or quarter-round to maximize space. They often offer a larger bathing area than standard tubs and can range significantly in size, but typically require more width and depth.
It’s important to measure your chosen tub carefully and compare it to the available space in your bathroom. Don’t forget to account for the surrounding area needed for comfortable access and potential surrounding features like vanities or toilets.
Material Matters: How Tub Material Affects Your Layout
The material of your bathtub is not just about aesthetics; it can also influence installation, weight, and durability, which are all factors in planning your layout.
- Acrylic: Lightweight, versatile, and relatively affordable. Easy to cut and shape, making it a popular choice for many DIYers.
- Cast Iron: Extremely durable and retains heat well, but very heavy. This means it needs a sturdy subfloor and can be challenging to maneuver into place, impacting installation timing and requiring more robust planning.
- Fiberglass: Lightweight and inexpensive, but can be prone to scratching and fading over time. A good budget-friendly option.
- Stone Resin/Composite: Offers a luxurious feel and excellent heat retention. Can be quite heavy, similar to cast iron, but often more durable.
For beginners, lighter materials like acrylic and fiberglass are generally easier to handle during installation, which can simplify your layout and placement tasks. Heavy materials like cast iron may require professional help and more structural considerations.
Essential Bathtub Layout Considerations

Now that you have a handle on tub types and materials, let’s talk about the crucial factors that will guide your bathtub layout decisions. These are the building blocks for a functional and appealing bathroom space.
Spatial Planning and Flow
The most critical aspect of bathtub layout is how it fits within the overall bathroom space. You need to ensure there’s enough room to move around freely and safely.
- Minimum Clearance: Aim for at least 30 inches of clear space in front of the bathtub for comfortable entry and exit. More is always better if space allows.
- Access to Fixtures: Make sure the tub doesn’t obstruct access to the toilet, vanity, or any windows.
- Door Swing: Consider how the bathroom door swings open. It shouldn’t hit the tub, and you should be able to open it fully without interference.
- Ergonomics: Think about how someone will actually use the space. Can they easily reach the faucet? Is there enough room to dry off without bumping into things?
A good visual walkthrough of your planned layout is key. Imagine yourself and others using the bathroom. Does everything feel natural and uncrowded?
Plumbing Requirements and Placement
Plumbing is a significant consideration for any bathtub layout. You can’t just place a tub anywhere; it needs to connect to water supply and drainage systems.
- Drain Location: Tubs have specific drain locations. You’ll need to ensure your plumbing rough-in aligns with the tub’s drain position. Standard drains are usually at the foot end of the tub.
- Water Supply: The faucet and showerhead will need hot and cold water supply lines. The closer these lines are to existing plumbing, the easier and cheaper the installation will be.
- Venting: Plumbing systems require proper venting to function correctly and prevent sewer gases from entering your home. This is crucial for drainage efficiency. You can learn more about plumbing vent systems from resources like the U.S. Environmental Protection Agency’s guidance on plumbing.
- Rough-in Measurements: Always consult the manufacturer’s specifications for your chosen tub model. These will provide exact rough-in measurements for plumbing connections.
For beginners, identifying the current plumbing locations is the first step. Significant relocation of plumbing can be complex and might require professional help. It’s often easier to plan your tub layout around existing plumbing if possible.
Electrical Considerations
While not as direct as plumbing, electrical components can influence your bathtub layout, especially if you’re considering features like jetted tubs or integrated lighting.
- GFCI Protection: Any electrical outlets or fixtures near the tub must be protected by a Ground Fault Circuit Interrupter (GFCI). Bathrooms require specific electrical code compliance.
- Jetted Tubs: If you’re opting for a jetted or air tub, these require dedicated electrical circuits and motors. The placement of the motor and access panels needs to be considered in your layout.
- Lighting: While not directly tied to the tub’s position, consider how lighting will illuminate the tub area.
It’s always best to consult with a qualified electrician to ensure all electrical work meets safety standards and local building codes. Your bathtub layout should accommodate any necessary electrical runs and access for future maintenance.
Building Codes and Regulations
Your bathtub layout must comply with local building codes. These codes ensure safety and functionality.
- Minimum Door Widths: Codes often specify minimum door widths for accessibility.
- Clearances: Codes dictate minimum clearances around fixtures like toilets and tubs. For example, the International Residential Code (IRC) often specifies minimum space requirements. You can find code information from sources like the International Code Council (ICC).
- Ventilation: Proper bathroom ventilation (either through an exhaust fan or a window) is usually mandated.
- Waterproofing: Codes will have requirements for waterproofing around bathing areas.
Ignoring building codes can lead to costly rework or issues when selling your home. Familiarize yourself with your local requirements before finalizing your layout.
Step-by-Step Bathtub Layout Planning for Beginners

Let’s get practical! Here’s a step-by-step approach to planning your bathtub layout, designed to be clear and actionable for anyone new to this process.
Step 1: Measure Your Bathroom
This is the absolute first step. You need accurate measurements of your existing bathroom or the space where the new bathroom will be.
- Measure the Length and Width: Get precise dimensions of the entire room.
- Measure Ceiling Height: Note this, especially if considering taller shower enclosures or overhead fixtures.
- Locate Existing Fixtures: Mark the exact positions of existing toilets, sinks, windows, and doors.
- Identify Plumbing Rough-ins: If renovating, find where your supply lines (hot and cold water) and drain pipes are located. You might need to open a small section of wall or floor to see these.
- Note Obstructions: Mark any structural beams, vents, or other elements that cannot be moved and might affect layout.
Using a large piece of paper or a digital tool, draw a scaled floor plan of your bathroom. This will be your canvas for planning the tub layout.
Step 2: Choose Your Bathtub Type and Size
Based on your measurements and available space, decide which type of bathtub will work best. Consider your budget, desired bathing experience (e.g., deep soak, whirlpool), and how the tub will complement the overall bathroom design.
- For small bathrooms: Alcove tubs are often the most space-efficient. Compact freestanding tubs or corner tubs might also be options.
- For medium bathrooms: Alcove, drop-in, or a moderately sized freestanding tub can work well.
- For large bathrooms: You have more flexibility, allowing for larger freestanding tubs, corner tubs, or even multi-person tubs.
Once you have a type in mind, find specific models and get their exact dimensions, including the rough-in measurements for plumbing. Always add a few inches to the tub’s length and width for required clearances.
Step 3: Decide on Tub Placement
This is where your scaled floor plan comes in handy! Start placing your chosen tub onto the plan.
Here are common placement options:
| Placement Type | Best For | Pros | Cons |
|---|---|---|---|
| Alcove/Recessed | Standard and smaller bathrooms where space is limited. | Maximizes space, easy plumbing integration, often cost-effective. | Limited design flexibility, can feel enclosed. |
| Corner Placement | Medium to large bathrooms, or square-shaped rooms. | Can offer more bathing space, utilizes often underused corner space. | May require custom or specialized tub models, can impact other fixture placement. |
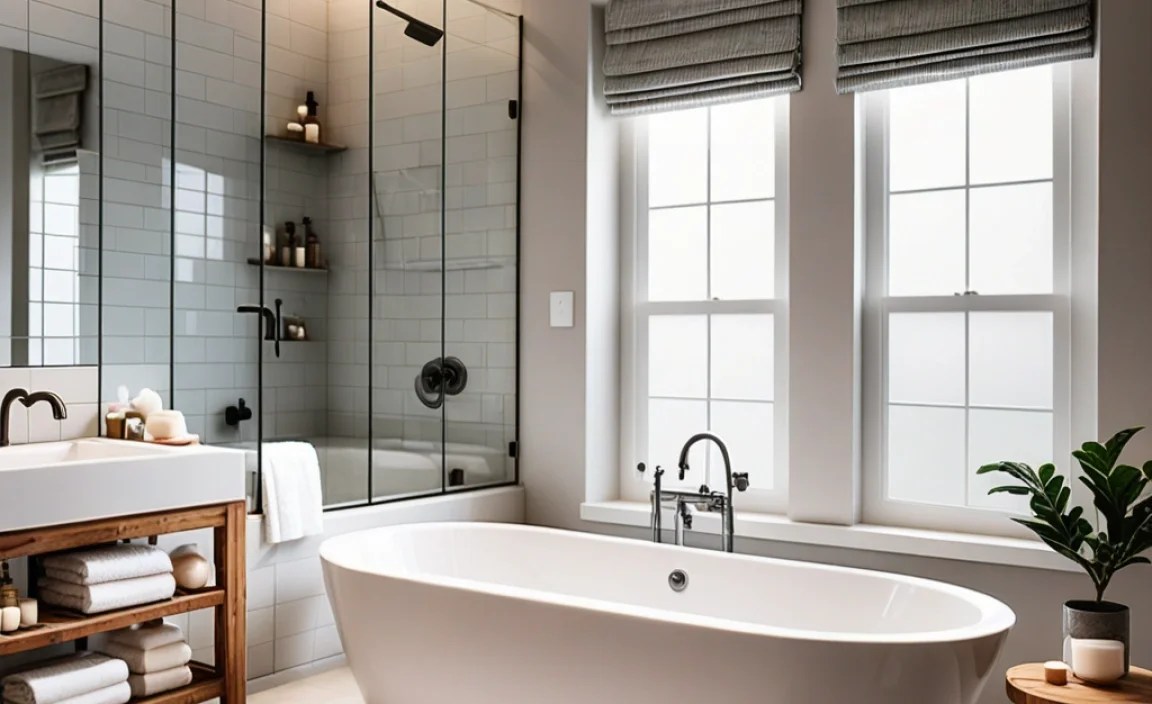
| Against a Wall (Freestanding) | Medium to large bathrooms, creates a visual feature. | Aesthetically pleasing, can be placed along any suitable wall. | Requires space from walls for access and finishing, plumbing can be more complex (often ceiling or wall mount fixtures needed). Needs careful consideration of surrounding materials and access. |
| Center of the Room (Freestanding) | Very large bathrooms or open-concept spa-like bathrooms. | Ultimate statement piece, offers unique design opportunities. | Requires significant space, complex plumbing (often needs a floor-mounted faucet), can make the bathroom feel less functional. |
For Beginners: Prioritize space-saving solutions like alcove tubs if your bathroom is on the smaller side. If you have more room and want a statement piece, carefully consider the space needed around a freestanding tub.
Step 4: Map Out Plumbing and Drainage
With the tub’s position decided, meticulously plan how the plumbing will connect.
- Align with Existing Plumbing: The best-case scenario is placing the tub where existing drain and water lines are located. This significantly reduces complexity and cost.
- Rough-in Diagram: If relocating plumbing, draw lines on your floor plan showing the new pipe routes. Ensure adequate slope for drainage (typically 1/4 inch per foot).
- Faucet and Shower Fixture Placement: Decide on the type of faucet (deck-mounted, wall-mounted) and shower controls. Mark their exact locations.
- Consider Access for Maintenance: You need to be able to access the plumbing for repairs. This might involve an access panel behind the faucet or a removable skirt on the tub.
It’s advisable to consult a licensed plumber at this stage, especially if you’re making significant changes to your plumbing. They can verify your plan meets code and is feasible.
Step 5: Check Clearances and Accessibility
This is a crucial sanity check before you commit to any construction. Walk through your planned layout on paper, or by using tape on the floor in the actual room.
- Entry/Exit: Is there enough clear space (ideally 30+ inches) to get in and out of the tub easily and safely?
- Around Fixtures: Is there adequate space to use the toilet and vanity without feeling cramped?
- Door Swing: Does the bathroom door conflict with the tub or any other fixtures?
- Accessibility: Think about potential future needs. While not mandatory for all renovations, considering slightly more space can be beneficial.
If your measurements on paper show conflicts, revisit Step 3 and adjust the tub’s position or consider a different tub size/type.
Step 6: Consider Surrounding Materials and Features
Your bathtub layout isn’t isolated; it interacts with everything else in the bathroom.
- Tile/Wall Surround: If the tub is in an alcove, plan for wall tile or a surround. Ensure the tub deck is properly supported for these materials.
- Flooring: The flooring should extend under the tub if possible, especially for alcove tubs. For freestanding tubs, ensure the floor is level and adequately sealed.
- Lighting: Plan lighting to ensure the tub area is well-lit but also comfortable for relaxing soaks. Task lighting near the faucet is also important.
- Accessories: Where will towel bars, bath shelves, or grab bars be located? Ensure they don’t interfere with the tub’s usage or access.
Thinking about these details now will prevent headaches during installation and ensure a polished finished product.
Common Beginner Bathtub Layout Mistakes to Avoid

Even with the best intentions, beginners can sometimes overlook crucial aspects of bathtub layout. Here are some common pitfalls to steer clear of.
- Ignoring Plumbing: Assuming plumbing can go anywhere without considering existing lines or the cost/effort of relocation.
- Underestimating Space Requirements: Choosing a tub that looks great on paper but is too large for the actual bathroom, leading to a cramped feel.
- Forgetting Clearance for Doors and Drawers: Not accounting for the swing of bathroom doors or vanity drawers, which can cause them to hit the tub.
- Overlooking Venting and Codes: Failing to plan for proper plumbing venting or ignoring local building codes related to clearances and fixture placement.
- Not Planning for Access Panels: Placing a tub or surrounding structure without providing a way to access valves and drains for potential repairs.
- Ignoring Water Pressure and Flow: Not ensuring the plumbing can supply adequate hot and cold water to the tub, especially for larger or jetted models.
By being aware of these potential issues, you can proactively address them in your planning phase.
Tools and Resources for Bathtub Layout Planning

While planning your bathtub layout, having the right tools and knowing where to find reliable information can make a huge difference.
Essential Tools:
- Measuring Tape: Essential for accurate room and tub dimensions.
- Pencil: For marking plans and on-site measurements.
- Paper or Graph Paper: For drawing scaled floor plans.
- Level: To ensure your tub is installed correctly and your subfloor is even.
- Stud Finder: To locate wall studs for mounting support or identifying structural limitations.
- Safety Glasses and Gloves: Always wear appropriate safety gear when working.
- Light Source (e.g., flashlight): To inspect plumbing and hidden areas.
Helpful Resources:
- Manufacturer’s Installation Manuals: Always the first stop for tub-specific measurements and requirements.
