
Quick Summary:
A breakdown of caulking involves understanding its purpose, types, application tools, and proper removal and reapplication. This guide simplifies these concepts, empowering you to tackle common household sealing tasks with confidence and achieve a neat, watertight finish, saving you time and money.
Ever notice those unsightly gaps around your sink, bathtub, or window frames? That’s where caulk comes in! It’s the unsung hero of sealing up tiny openings, preventing water leaks, drafts, and even pest entry. But what exactly is caulk, and how do you use it without making a mess? If you’ve ever felt a little intimidated by that tube of goo, you’re in the right place. We’re going to break down everything you need to know about caulking in a way that’s easy to understand. Get ready to feel confident and capable as we show you how to get a clean, professional-looking seal every time.
What is Caulking and Why Do We Use It?

Caulking is essentially a flexible sealant used to fill and seal gaps or joints in buildings and other structures. Think of it as the sealant that keeps water out, drafts away, and your home more comfortable and energy-efficient. It’s a crucial part of home maintenance, preventing common issues like:
- Water Damage: Small cracks and gaps can let water seep in, leading to mold, mildew, and structural damage over time. Caulking creates a waterproof barrier.
- Energy Loss: Gaps around windows, doors, and other openings allow heated or cooled air to escape your home, making your HVAC system work harder and increasing your energy bills.
- Pest Entry: Even tiny openings can be an invitation for insects and other small pests to enter your home.
- Appearance: Fresh caulk can make a big difference in the visual appeal of your kitchen, bathroom, or exterior. A neat, clean caulk line makes a space look finished and well-maintained.
At its core, caulking is about creating a barrier. It’s flexible enough to move slightly with temperature changes and building shifts, preventing the caulk itself from cracking or pulling away. This makes it ideal for areas that experience minor movement, unlike rigid materials.
Understanding Caulking Materials: The Different Types
Walking down the aisle at the hardware store can be a bit overwhelming with all the different caulk options. But don’t worry, most DIY projects can be handled with just a few common types. Understanding the basic materials will help you pick the right one for the job.
Latex (Acrylic) Caulk
This is probably the most common and easiest type of caulk for beginners to use. It’s water-based, meaning:
- Easy Cleanup: You can clean up tools and any mistakes with soap and water.
- Paintable: Most latex caulks can be painted over once they’re dry, which is great for matching trim colors or covering up the caulk line.
- Flexibility: It’s flexible enough for most interior uses.
- Shrinkage: Some latex caulks can shrink slightly as they dry, which might require a second application in larger gaps.
Latex caulk is best suited for interior applications like sealing gaps around baseboards, window frames, and door trim. It’s generally not recommended for areas that will be in constant contact with water or for exterior use where it needs to withstand harsh weather.
Silicone Caulk
Silicone caulk is known for its superior waterproof and flexible properties, making it a go-to for high-moisture areas.
- Excellent Waterproofing: It creates a very durable, watertight seal.
- Highly Flexible: It remains flexible even in extreme temperatures, making it ideal for expansion joints.
- Mold and Mildew Resistant: Many silicone caulks are formulated to resist mold and mildew growth, which is essential in bathrooms and kitchens.
The Downsides: Silicone caulk can be trickier to work with. It’s non-paintable, meaning you can’t cover it with paint. Cleanup requires mineral spirits or a specific silicone caulk remover. If you make a mistake, it can be challenging to remove completely. For best results, look for 100% silicone caulk for the most durable and water-resistant seal.
Hybrid/Advanced Formulations (Alex Plus, Siliconized Acrylic)
These newer formulations aim to combine the best of both worlds: the ease of use and paintability of latex with some of the durability and flexibility of silicone.
- Good All-Around: Often offer better adhesion, flexibility, and water resistance than pure latex.
- Paintable: Most are designed to be painted over.
- Easier Cleanup: Usually cleanable with water when wet.
These are excellent choices for a wide range of DIY tasks, including bathrooms, kitchens, windows, and doors. Siliconized acrylics are a good happy medium for most home projects.
Polyurethane Caulk
Also known as “construction caulk” or “exterior caulk,” polyurethane is a very durable and flexible option. It adheres well to a variety of surfaces, including wood, metal, and masonry. It’s often used for exterior applications like sealing around windows, doors, and expansion joints in concrete or masonry because it’s very tough and weather-resistant.
- Exceptional Durability: Withstands extreme weather and U.V. exposure.
- Strong Adhesion: Bonds to a wide range of materials.
- Paintable: Usually can be painted over.
The Downsides: Polyurethane caulk can be expensive, difficult to work with (it’s sticky and can be messy), and cleanup typically requires mineral spirits. It also needs to cure fully before being exposed to moisture or paint. It’s generally overkill for most interior jobs.
| Caulk Type | Best For | Pros | Cons | Paintable? | Cleanup |
|---|---|---|---|---|---|
| Latex (Acrylic) | Interior trim, windows, minor gaps | Easy to use, water-cleanup, affordable | Can shrink, less durable, not for wet areas | Yes | Soap and Water |
| Silicone | Bathrooms, kitchens, tubs, showers, exteriors (if specified) | Waterproof, flexible, mold/mildew resistant | Difficult to remove, non-paintable, requires solvent for cleanup | No | Mineral Spirits / Solvent |
| Siliconized Acrylic / Hybrid | Versatile: bathrooms, kitchens, windows, doors | Good balance of ease of use and durability, paintable where specified | Can be pricier than latex, check specs for waterproofing | Usually | Soap and Water (when wet) |
| Polyurethane | Exterior joints, masonry, heavy-duty sealing | Very durable, strong adhesion, weather-resistant, paintable | Difficult to work with, sticky, solvent cleanup, expensive | Yes | Mineral Spirits / Solvent |
Tools of the Trade: What You’ll Need for Caulking

While the caulk tube itself is the star, having the right tools can turn a messy job into a smooth, professional finish. Here’s a basic rundown:
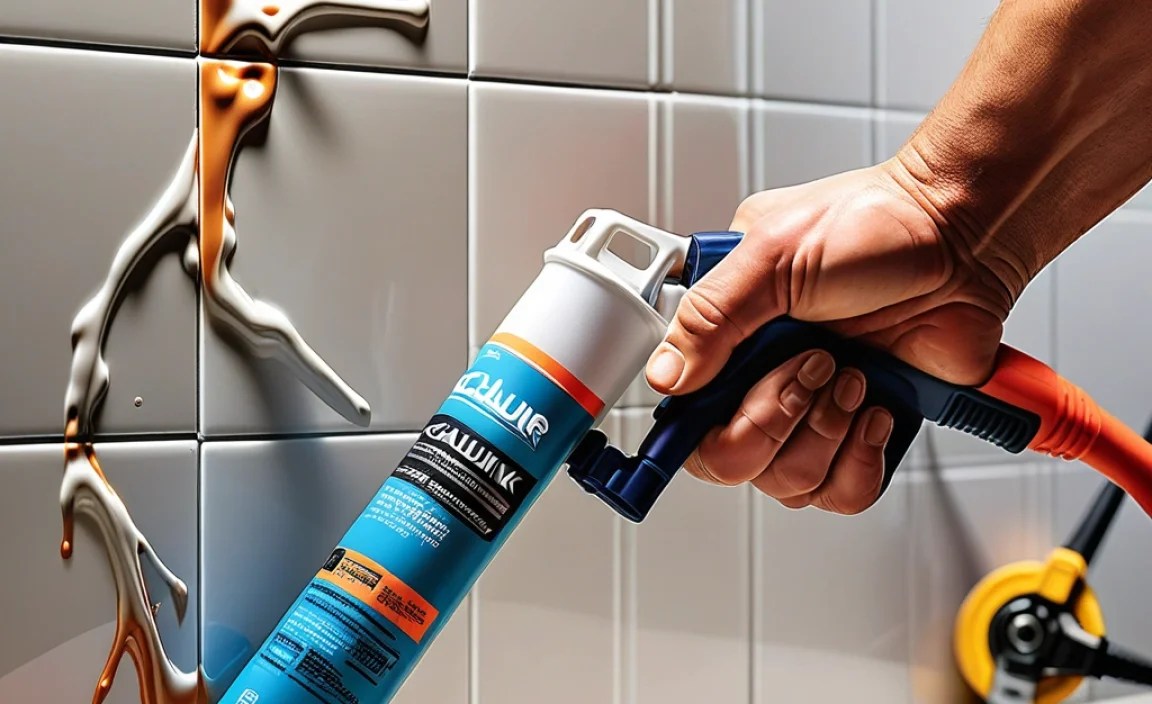
The Caulk Gun
This is the handle that holds the caulk tube. You’ll see a few types:
- Basic Caulk Gun: These are the most common and affordable. They use a trigger mechanism to push the sealant out. Look for one with a release lever (usually on the handle) to stop the flow of caulk instantly. Some also have a spout cutter built-in.
- Drip-Free Caulk Gun: These are more advanced and automatically release pressure when you let go of the trigger, preventing unwanted drips. A worthwhile investment if you plan to caulk often.
- Electric or Cordless Caulk Guns: These are for heavy-duty use and can make applying caulk less strenuous, but they are generally not necessary for typical home DIY.
Caulk Tube Cutter
Most caulk tubes have a seal at the tip and a plastic nozzle. You’ll need to cut the nozzle to create the opening for the caulk. Many caulk guns have a small cutter, or you can use a utility knife or the pointy end of a nail or screw. A dedicated caulk tube cutter is often the safest and most precise option.
Caulk Removal Tool or Putty Knife
Before you can apply new caulk, you often need to remove the old, cracked, or moldy caulk. A specialized caulk removal tool is excellent for this. A flexible putty knife, old screwdriver, or even a razor blade can also work, but be careful not to damage the surface you’re working on.
Sponge, Damp Cloths, or Paper Towels
Essential for wiping away excess caulk, smoothing beads, and cleaning up mistakes. Have plenty on hand for latex and siliconized caulks. For silicone, you might also want a small container of mineral spirits for stubborn bits.
Bucket of Water
For latex and siliconized acrylic caulks, a bucket of clean water is your best friend for rinsing your tools and smoothing fingers.
Painter’s Tape
This is a secret weapon for beginners! Applying painter’s tape along the edges of the gap you want to caulk can help you create perfectly straight, clean lines. You peel it off immediately after smoothing the caulk for a crisp edge.
Disposable Gloves
Caulk can be messy and difficult to wash off your hands. Gloves are a great way to keep your hands clean.
Step-by-Step Guide: How to Apply Caulk Like a Pro

Applying caulk might seem simple, but a little technique goes a long way. Follow these steps for a neat, durable seal.
Step 1: Prep Your Surface – Remove Old Caulk
This is one of the most critical steps. New caulk won’t adhere well to old caulk, dirt, or mildew. If there’s old caulk present, you must remove it.
- Use a Caulk Removal Tool or Putty Knife: Gently scrape along the existing caulk line to break its seal. Work slowly and carefully to avoid gouging the surrounding material (wood, tile, drywall).
- Cut Along the Edge: For stubborn bits, you might need to use a utility knife to score the caulk line before scraping.
- Clean the Area: Once the bulk of the old caulk is removed, clean the remaining residue. For latex caulks, a damp cloth might suffice. For silicone, you may need a dedicated silicone caulk remover or mineral spirits. Ensure the area is completely dry before moving on. A scrub brush with some all-purpose cleaner can help remove mold or mildew.
Step 2: Prepare Your New Caulk Tube
Getting the tube ready is key to a good flow of caulk.
- Cut the Tip: Most caulk tubes have a plastic nozzle with a seal inside. Use your caulk tube cutter or a utility knife to cut the very tip of the nozzle at a 45-degree angle. Start with a small opening – you can always cut it larger if needed. The angle helps you apply the caulk in a smooth bead.
- Puncture the Inner Seal: Many caulk guns have a long, thin rod to puncture the seal inside the tube. If yours doesn’t, use a long nail or a stiff piece of wire to poke through the seal at the base of the nozzle.
- Load the Caulk Gun: Pull back the plunger rod on the caulk gun. Insert the caulk tube, nozzle first. Push the plunger rod firmly against the back of the tube.
Step 3: Apply Painter’s Tape (For Precision)
If you want super-sharp, straight lines, painter’s tape is your best friend.
- Apply Tape on Both Sides: Place a strip of painter’s tape along each edge of the gap you’re filling. Ensure the tape lines are parallel and create a clean channel for the caulk bead. Leave a gap between the tape strips that’s about the width you want your caulk bead to be.
- Press Firmly: Make sure the tape is pressed down firmly to prevent caulk from seeping underneath.
Step 4: Apply a Consistent Bead of Caulk
This is where the magic happens (or doesn’t, if you go too fast!).
- Position the Gun: Hold the caulk gun at a 45-degree angle to the gap. The angled cut on the nozzle should be flat against the surface, with the opening facing the gap.
- Squeeze the Trigger Steadily: Gently and steadily squeeze the caulk gun trigger. Move the gun along the gap in a smooth, continuous motion.
- Maintain Even Pressure: Try to apply even pressure to the trigger and move the gun at a consistent speed. This will create a uniform bead of caulk. Don’t try to fill the entire gap in one go; a slightly recessed bead is better.
- Release the Trigger and Plunger: When you reach the end of the gap or need to stop, release the trigger. Then, pull back on the caulk gun’s release lever or plunger rod to stop the flow of caulk. This prevents the caulk from oozing out unexpectedly.
Step 5: Smooth the Bead
This step is crucial for both appearance and function. It pushes the caulk into the gap and creates a clean finish.
- Use a Damp Finger or Tool: Immediately after applying a section of caulk, smooth the bead. For latex or siliconized acrylics, you can lightly wet your finger (wear a glove!) and run it along the caulk line. For silicone, you might use a damp rag without soap, or a caulk smoothing tool. The key is to gently press the caulk into the gap and create a slightly concave surface.
- Wipe Excess: As you smooth, excess caulk will build up on your finger or tool. Wipe it off frequently onto a damp cloth or paper towel.
- For Tight Spots: If you’re working in a tight corner or around a curve, a specialized caulk smoothing tool with various edge profiles can be incredibly helpful.
Step 6: Remove Painter’s Tape
Timing is everything here!
- Remove While Wet: For the cleanest lines, pull off the painter’s tape immediately after you’ve smoothed the caulk. If you let the caulk dry with the tape on, you risk pulling up the caulk line or leaving a ragged edge.
- Pull at an Angle: Pull the tape off slowly and at a 45-degree angle away from the caulk bead.
Step 7: Final Cleanup and Curing
Almost there!
- Wipe Any Smears: Use a damp cloth to gently wipe away any stray caulk smudges on the surrounding surfaces. For silicone caulk, you might need mineral spirits for any stubborn spots.
- Allow for Curing: Read the caulk manufacturer’s instructions for drying and curing times. This can vary significantly by product. Avoid exposing the caulk to water or painting it until it’s fully cured to ensure a long-lasting seal. Curing times can range from a few hours to several days.
