
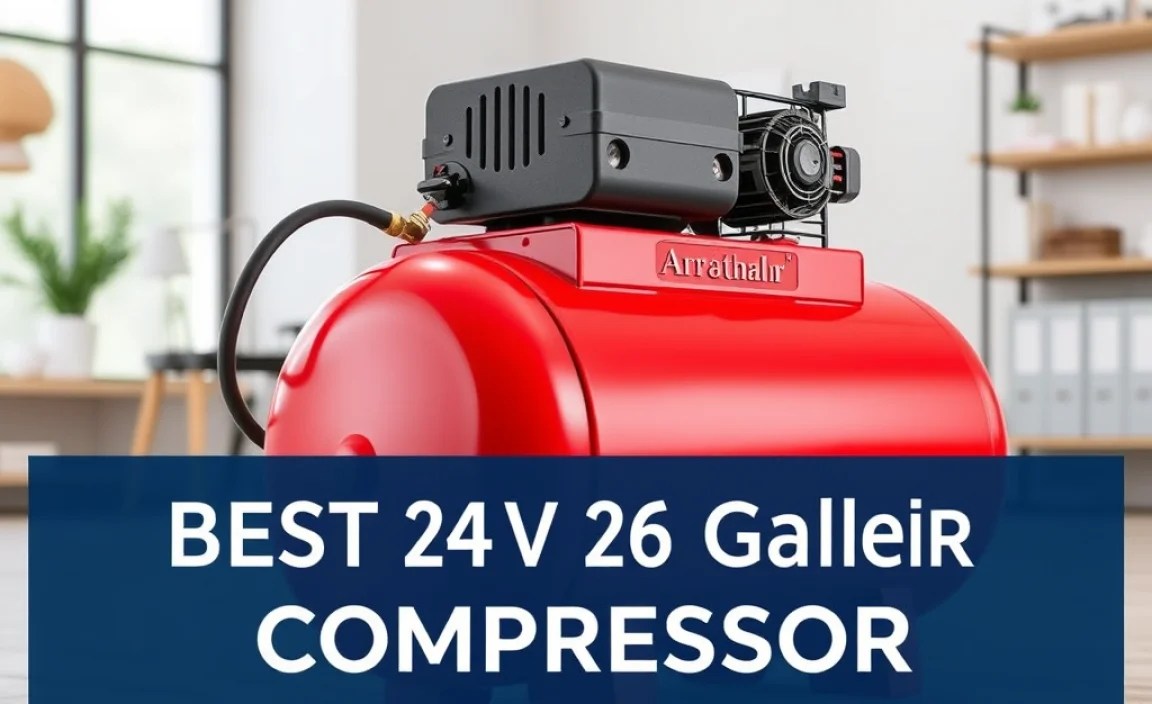
The best 240V 26-gallon air compressor offers essential power for demanding DIY tasks, balancing capacity and performance. Look for models with durable cast iron pumps, high CFM ratings for tool efficiency, and reliable motors for consistent operation, ensuring your projects get done right.
Ever felt like your DIY projects hit a wall because your tools just aren’t getting enough power? You’re not alone! Many of us dream of tackling bigger jobs, from car repairs to woodworking, but a weak air compressor can leave us feeling frustrated. The good news is, upgrading to the right equipment makes a world of difference. A 240V, 26-gallon air compressor is a fantastic sweet spot, offering serious power without needing a professional shop. It’s the kind of tool that brings your home workshop ambitions to life. We’ll walk you through everything you need to know to find the ideal one for your needs, making your next project a breeze.
Why a 240V 26 Gallon Air Compressor is Your DIY Powerhouse

So, why is this specific type of air compressor so popular among home enthusiasts and serious DIYers? It boils down to a perfect blend of power, capacity, and practicality. Let’s break it down:
The Power of 240V
Traditional 120V outlets are common in most homes, but they have limitations when it comes to high-demand tools. A 240V outlet, often found in garages or workshops (and easily installed by an electrician if you don’t have one), delivers twice the voltage. This means your air compressor can run more efficiently and powerfully. For tools that gulp air quickly, like impact wrenches, die grinders, or even larger spray guns, 240V is a game-changer. It provides a more sustained and robust airflow, ensuring your tools perform at their best without bogging down.
The Sweet Spot of 26 Gallons
The tank size is crucial for how long you can use your air-powered tools before the compressor needs to cycle and refill. A 26-gallon tank offers a substantial reservoir of compressed air. This is generally enough to power most common DIY tools for extended periods without constant interruption. Unlike smaller tanks that might run out of air mid-task, the 26-gallon size provides a consistent supply, making it ideal for jobs that require continuous air, such as painting, sanding, or operating pneumatic nail guns for longer stretches. It strikes a great balance – big enough for serious work, but not so large that it consumes an excessive amount of space or power.
Applications for Your 240V 26 Gallon Compressor
With this kind of power and capacity, what can you actually do? The possibilities are vast:
- Automotive Work: Powering impact wrenches for tire changes or major repairs, air ratchets for tight spots, and inflators for tires.
- Woodworking: Running nail guns (brad, finish, framing), staplers, and pneumatic sanders for smooth finishes.
- Tire Inflation: Quickly and efficiently inflating car, truck, or bicycle tires.
- Painting and Finishing: Operating HVLP (High Volume Low Pressure) spray guns for smooth, even paint application on furniture, vehicles, or walls.
- Cleaning: Using blow guns to clear away dust and debris from workshops or equipment.
- Running Multiple Tools: Depending on the CFM (Cubic Feet per Minute) rating, it can often support running more than one smaller air tool simultaneously.
Key Features to Look For in the Best 240V 26 Gallon Air Compressor

Not all 240V, 26-gallon compressors are created equal. To ensure you’re getting the most bang for your buck and a tool that will last, keep an eye out for these essential features:
Pump Type and Material
The heart of your air compressor is its pump. You’ll typically find two main types:
- Oil-Lubricated Pumps: These are generally more durable and efficient for heavy-duty use. They require regular oil checks and changes but offer a longer lifespan and better performance under pressure. For a 240V, 26-gallon unit, an oil-lubricated, cast-iron pump is highly recommended for its longevity and ability to handle sustained workloads.
- Oil-Free Pumps: These are lighter, require less maintenance (no oil changes), and are often quieter. However, they can run hotter and may not be as durable for continuous, heavy use as their oil-lubricated counterparts. While improving, they are still generally better suited for lighter-duty applications.
Recommendation: For a 26-gallon model intended for demanding DIY tasks, opt for a pump with a cast iron cylinder. Cast iron is known for its durability, heat dissipation, and ability to withstand higher pressures for longer periods.
CFM (Cubic Feet per Minute)
This is arguably the most critical specification. CFM tells you how much air the compressor can deliver at a specific pressure. Your tools have air requirements, often listed in CFM. You need a compressor that can meet or exceed those requirements to ensure your tools work correctly. A common recommendation is to choose a compressor with a CFM rating that is at least 1.5 times the CFM requirement of your most air-hungry tool.
For a 240V, 26-gallon compressor, you’ll typically see CFM ratings at 90 PSI (pounds per square inch), a standard measurement. Look for models that offer at least 5 CFM at 90 PSI, with many excellent options exceeding 6 or even 7 CFM. Higher CFM means your tools will run more powerfully and for longer periods without the compressor needing to constantly catch up.
Horsepower (HP)
Horsepower indicates the motor’s power. While important, it’s not the sole determinant of performance. A higher HP motor generally means more power to run the pump efficiently. For a 240V, 26-gallon unit, expect motor ratings typically between 2 HP and 5 HP. A motor in the 3-4 HP range is usually sufficient for this size tank and voltage, especially when paired with an efficient pump and a good CFM rating.
Duty Cycle
Duty cycle refers to how long a compressor can run continuously before needing to cool down. It’s usually expressed as a percentage (e.g., 50% duty cycle means it can run for 5 minutes out of every 10). For DIY use where tasks might stretch, a higher duty cycle is beneficial. Many quality 240V compressors are designed for 75% or even 100% duty cycles, meaning they can run almost continuously, which is ideal for prolonged projects like painting or extensive woodworking.
Noise Level
Air compressors can be loud. If your workshop is near living spaces or you value a quieter environment, pay attention to the decibel (dB) rating. While a 240V unit might be inherently more powerful and potentially louder, manufacturers are increasingly producing quieter models. Look for ratings below 75 dB if noise is a concern.
Portability and Design
While a 26-gallon tank has some heft, most are designed with wheels and handles for maneuverability. Consider:
- Wheel Size: Larger wheels handle rougher terrain better.
- Foot Placement: Stable feet to prevent tipping during operation.
- Drain Valve Accessibility: Easy access to drain the tank is crucial for maintenance.
Additional Features
- Pressure Regulator: Allows you to set the output pressure for different tools.
- Quick Connect Couplers: For easy attachment and detachment of hoses.
- Automatic Shut-off: The compressor turns off once the tank is full and restarts automatically when the pressure drops.
- Thermal Overload Protection: Protects the motor from overheating.
Comparing Popular 240V 26 Gallon Air Compressors

To give you a head start, here’s a look at some common types and considerations you might encounter when shopping. Prices and exact specifications can vary, so always check the latest details from the manufacturer.
| Feature | Model Type A (Workhorse) | Model Type B (Balanced) | Model Type C (Value-Oriented) |
|---|---|---|---|
| Tank Size | 26 Gallons | 26 Gallons | 26 Gallons |
| Voltage | 240V | 240V | 240V |
| Pump Type | Oil-Lubricated, Cast Iron | Oil-Lubricated, Cast Iron | Oil-Lubricated, Cast Iron |
| Motor HP | 3.5 – 5 HP | 3 – 4 HP | 2.5 – 3.5 HP |
| CFM @ 90 PSI | 6.0 – 7.5+ CFM | 5.0 – 6.5 CFM | 4.5 – 5.5 CFM |
| Duty Cycle | 75%-100% | 75% | 50%-75% |
| Noise Level | 75-85 dB | 70-80 dB | 75-85 dB |
| Typical Price Range | $$$ | $$ | $ |
| Best For | Heavy-duty, continuous use; professional-grade DIYers. | Versatile DIY, automotive, woodworking, moderate painting. | Hobbyists, occasional larger projects, budget-conscious buyers. |
When researching specific models, look for brands known for their durability and customer support. Reading reviews from other DIYers who use these compressors for similar tasks can provide invaluable real-world insights. Websites like ToolReviews.com (hypothetical site for example) often have detailed comparisons and user feedback.
Installation and Setup: A Beginner’s Guide
Getting your new 240V, 26-gallon air compressor up and running is usually straightforward, but safety is paramount. If you’re not comfortable with electrical connections, hiring an electrician for the 240V outlet installation is always the safest bet. Here’s a general setup guide:
Step 1: Unpacking and Inspection
- Carefully unpack the compressor and inspect it for any shipping damage.
- Gather all included parts and accessories.
- Read the manufacturer’s manual thoroughly. It contains vital safety information and specific instructions for your model.
Step 2: Adding Oil (If Required)
For oil-lubricated models, this is a critical first step.
- Locate the oil fill cap on the pump.
- Use only the type and amount of oil specified in your manual. Using the wrong oil can damage the pump.
- Fill the reservoir to the indicated level.
- Replace the oil cap securely.
Step 3: Connecting to Power
This is where the 240V comes into play.
- Ensure the compressor is switched OFF.
- Your compressor will likely come with a power cord and plug. Ensure your 240V outlet matches the plug type. Common 240V plugs for this type of equipment might be a NEMA 6-15 or 6-20 type.
- For models that require hardwiring or if you’re unsure about your outlet, have a qualified electrician set this up. Improper electrical connections can be dangerous and damage the equipment. For basic plug-in models, simply plug the compressor into the correctly wired 240V outlet.
Important Note on Electrical Safety: Always ensure your home’s electrical system can handle the load of a 240V, higher-horsepower compressor. Consult an electrician if you have any doubts about your circuit breaker capacity or wiring.
Step 4: Placement and Ventilation
Where you put your compressor matters.
- Place it on a level, stable surface.
- Ensure adequate ventilation around the compressor. The motor and pump generate heat, and good airflow helps prevent overheating.
- Avoid placing it in areas with high dust or moisture.
Step 5: Initial Startup and Leak Check
Now for the moment of truth!
- Turn the compressor on. You should hear the motor engage and the pump start building pressure.
- Let it run until it reaches its maximum pressure and shuts off automatically.
- Listen for any unusual noises or vibrations.
- While it’s running and after it shuts off, use a spray bottle with soapy water to check all fittings, hoses, and connections for air leaks. Small leaks are common initially, and tightening fittings can resolve them. If you find a significant leak from a faulty seal or fitting, address it before using tools.
Step 6: Connecting Tools
Once you’ve confirmed the compressor is working correctly and holding pressure:
- Attach your air hose to the compressor’s outlet coupler.
- Connect your desired tool to the other end of the hose.
- Adjust the regulator on the compressor to the recommended pressure for your specific tool (check your tool’s manual).
- Turn on the tool.
Maintenance Tips for Longevity
A well-maintained air compressor will serve you reliably for years. Here are the essential maintenance tasks:
Regular Drainage
- Why: Water naturallyCondenses as air is compressed. If left in the tank, it can cause rust and corrosion from the inside out, which is a major safety hazard.
- How: Open the drain valve (usually at the bottom of the tank) at the end of each use or at least daily. Let all air and moisture escape. Some compressors have manual drain valves, while others have automatic ones.
Oil Checks and Changes (Oil-Lubricated Models)
- Why: Lubricating oil is essential for the smooth operation and cooling of the pump. Old or contaminated oil can lead to premature wear.
- How: Check the oil level regularly (weekly or bi-weekly, depending on usage) using the sight glass or dipstick. Add oil if low, using only the type specified by the manufacturer. Change the oil completely according to the manual’s recommendation, typically every 500-1000 hours of use or annually.
Air Filter Cleaning or Replacement
- Why: The air filter prevents dust, debris, and contaminants from entering the pump. A clogged filter restricts airflow, reduces performance, and can damage the pump.
- How: Check the filter regularly (monthly is a good starting point). Clean foam filters by washing them (following manufacturer instructions) and replace paper element filters when they appear dirty or damaged.
Checking Belts and Fittings
- Why: Loose belts can slip, reducing efficiency and potentially causing the motor to overheat. Loose fittings can lead.
