
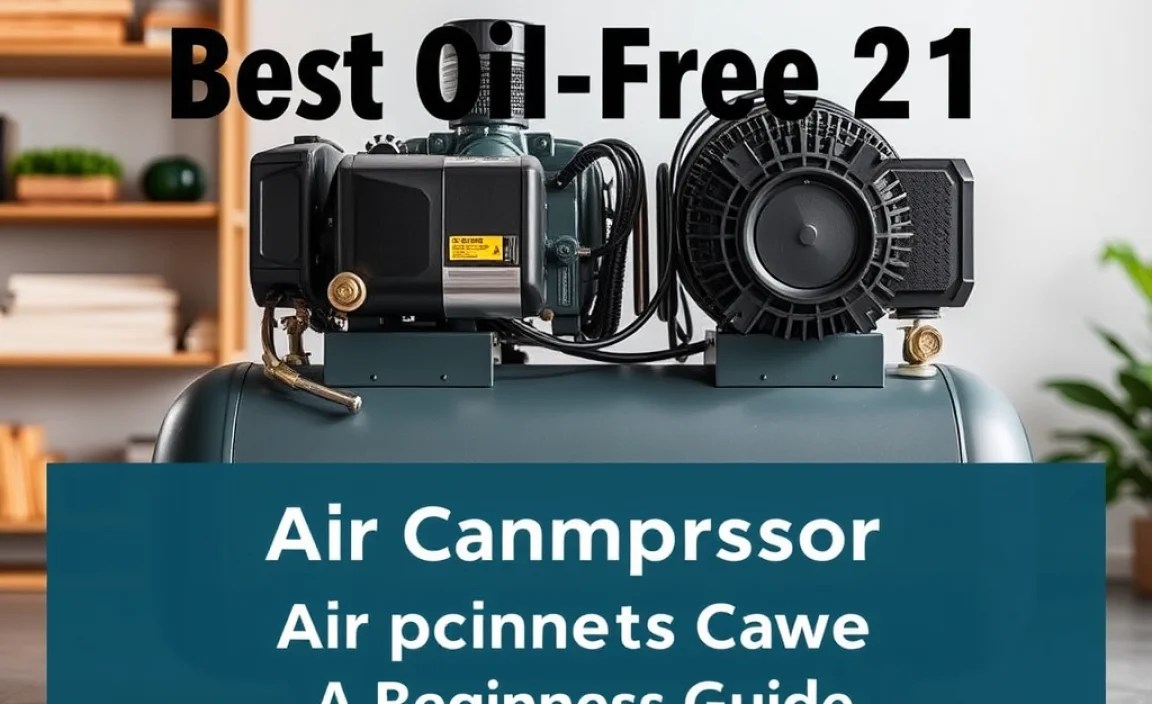
Summary: The best oil-free 21-gallon air compressor offers a powerful, low-maintenance solution for your DIY projects, providing consistent air for tools without the mess. It’s ideal for home garages, delivering reliable performance for tasks from inflation to powering pneumatic tools.
Is wrestling with a noisy, messy air compressor taking the fun out of your projects? You’re not alone! Many DIYers find air compressors to be essential, but the oil changes and maintenance can be a hassle. A 21-gallon oil-free air compressor is a fantastic middle ground, giving you substantial air capacity without the upkeep headaches. These units are perfect for home garages, versatile enough for various tasks, and much quieter than their oil-lubricated counterparts.
We’ll guide you through choosing the right one and keeping it running smoothly, so you can focus on what matters: finishing your project with confidence! This guide will break down exactly what to look for, compare top models, and offer simple tips to get the most out of your new air compressor. You’ll be powering through tasks in no time!
Why Choose an Oil-Free 21 Gallon Air Compressor?

When you’re starting out in the DIY world or upgrading your workshop, choosing the right air compressor can seem a bit daunting. Thankfully, the “oil-free” design makes things much simpler. Unlike traditional compressors that need regular oil top-ups and checks, oil-free models use advanced materials in their pump to run smoothly and powerfully without lubrication. This means less maintenance, cleaner operation, and often, a lighter-weight unit. A 21-gallon tank size strikes a sweet spot: it’s large enough to handle many common air tools without constantly running, but not so massive that it takes up your entire garage.
Think of it this way: you get a generous supply of compressed air for tasks like inflating tires, powering nail guns, or even running smaller sanders, without the greasy mess and frequent maintenance associated with older compressor types. This makes them perfect for homeowners and hobbyists who want reliable performance with minimal fuss.
Benefits of Going Oil-Free
- Lower Maintenance: No oil to check, change, or spill. This is a huge win for beginners and busy people.
- Cleaner Operation: Oil-free compressors don’t expel oily mist with the air, which is crucial for sensitive applications like painting or inflating air mattresses.
- Quieter Operation (Often): Many oil-free designs are engineered for reduced noise, making your workspace more pleasant.
- Lighter Weight: The absence of oil can make these units easier to move around your garage or job site.
- Longer Lifespan (Modern Designs): While historically oil-lubricated might have lasted longer, modern technological advancements have made oil-free pumps incredibly durable.
The 21 Gallon Advantage
The 21-gallon tank size is a popular choice for a reason. It offers a good balance between air supply and portability. A larger tank means the compressor doesn’t have to cycle on as frequently to maintain pressure. This is super helpful when you’re using air tools that consume a lot of air, like impact wrenches or pneumatic sanders. You can work for longer stretches without interruptions. Plus, a 21-gallon compressor is usually manageable enough for most home garages or workshops.
What to Look For in an Oil-Free 21 Gallon Air Compressor

When you’re ready to pick out the “best oil-free 21 gallon air compressor” for your needs, a few key features will make a big difference. Think of these as your checklist to ensure you’re getting a powerhouse that’s also user-friendly. We want a compressor that’s powerful enough for your tasks, reliable, and easy to operate.
Crucial Features to Consider
- PSI (Pounds per Square Inch): This measures the air pressure. Most DIY tasks require a compressor that can deliver at least 90-100 PSI. For more demanding tools, look for higher PSI ratings.
- CFM (Cubic Feet per Minute): This indicates the volume of air the compressor can deliver. Check the CFM rating at 90 PSI for the tools you plan to use. A higher CFM is generally better for tools that need a continuous air supply. For example, a brad nailer might need 1-2 CFM, while an impact wrench could need 5-8 CFM.
- Horsepower (HP): While often advertised, HP can be a bit misleading. Look more closely at the actual CFM and PSI ratings, as these are more critical for tool performance. However, a higher HP usually indicates a more powerful motor capable of sustaining higher CFM.
- Pump Type: Since we’re focusing on oil-free, you’ll want to confirm the pump is indeed oil-free. Most will be “single-stage” for home use, meaning the air is compressed in one step.
- Tank Size: As we discussed, 21 gallons is our sweet spot. This provides a good reserve of air for extended use.
- Noise Level (Decibels – dB): Oil-free compressors are generally quieter, but measuring the decibel level can help you find a unit that won’t disrupt your household or neighbors. Lower is better! Some units are advertised as “quiet” or “low noise.”
- Portability: While a 21-gallon tank isn’t small, look for features like sturdy wheels and a well-placed handle to make moving it easier.
- Duty Cycle: This tells you how long the compressor can run before needing to cool down. A higher duty cycle (e.g., 50% or 75%) means it can work for longer periods.
Understanding Technical Specs
Don’t let numbers scare you! Let’s demystify PSI and CFM a bit:
- PSI: Think of this as how hard the air is pushing. The higher the PSI, the more forceful the air. Most common air tools operate efficiently between 70-100 PSI. You need a compressor that can reach a maximum pressure (shut-off pressure) higher than what your tools typically use, so it has a reserve and doesn’t run constantly.
- CFM: This is the volume or how much air is being delivered over time. It’s like the flow rate. If you’re using a tool that requires a constant air supply, like spray painting or using a sander, you need enough CFM to keep up. Always check the CFM requirement for your specific tools. Websites like Toolandhome.com’s air compressor guide often have helpful breakdowns.
Top Oil-Free 21 Gallon Air Compressor Models (Examples)
While specific models can change rapidly and availability varies, here are some popular and well-regarded types of oil-free 21-gallon air compressors that frequently hit the mark for DIYers. These examples are based on common features and brand reputations consumers often look for.
When looking for the “best oil-free 21 gallon air compressor,” consider brands known for reliability and performance in the DIY space.
Example Compressor Comparison Table
| Feature | Model A (e.g., Brand X Quiet Series) | Model B (e.g., Brand Y Workhorse) | Model C (e.g., Brand Z Contractor) |
|---|---|---|---|
| Tank Size | 21 Gallons | 21 Gallons | 21 Gallons |
| Max PSI | 150 PSI | 175 PSI | 165 PSI |
| CFM @ 90 PSI | 4.8 CFM | 5.5 CFM | 5.0 CFM |
| Horsepower (Advertised) | 2.0 HP | 2.5 HP | 2.2 HP |
| Noise Level (Approx.) | 65 dB (Very Quiet) | 75 dB (Standard) | 70 dB (Moderately Quiet) |
| Weight | ~100 lbs | ~115 lbs | ~105 lbs |
| Key Benefit | Extremely quiet operation, ideal for residential areas. | High air output, great for demanding tools. | Good all-around performance with decent portability. |
Note: These are illustrative examples. Always check the most current specifications and reviews before purchasing.
Popular Brands to Explore:
- California Air Tools: Often lauded for their exceptionally quiet, lightweight, and durable oil-free operation. They frequently appear in “best of” lists for their innovative pump designs.
- DeWalt: A trusted name in power tools, DeWalt offers robust compressors with good performance metrics. They tend to be reliable workhorses for longer projects.
- Porter-Cable: Known for providing good value and reliable tools for DIYers and professionals alike. Their compressors are often designed with portability and ease of use in mind.
- Kobalt: The in-house brand for Lowe’s, Kobalt compressors offer a good balance of features and price, making them accessible for many homeowners.
- Ingersoll Rand: A long-standing leader in industrial-quality air compressors, they also offer excellent oil-free options that are built to last, though sometimes at a higher price point.
When researching the “best oil-free 21 gallon air compressor,” pay attention to user reviews. They can offer real-world insights into a compressor’s performance, durability, and ease of use that spec sheets alone can’t convey. Look for consistent praise regarding noise levels, air output, and longevity.
Setting Up Your New Compressor: A Beginner’s Guide

Getting your new oil-free 21-gallon air compressor ready to go is straightforward. We’ll walk through the essential setup steps so you can start using it with confidence and safety.
Step-by-Step Setup Process
- Unboxing and Inspection: Carefully remove the compressor from its packaging. Check for any visible damage that might have occurred during shipping. Keep the manual handy!
- Placement: Find a stable, level surface for your compressor. It should be in a well-ventilated area, away from direct heat sources or flammable materials. Ensure there’s enough space around it for airflow, typically at least a few inches on all sides. This is crucial for preventing overheating.
- Install Wheels and Handle (if applicable): Many larger compressors come with wheels and a handle for mobility. Follow the instructions in your manual to attach these. This makes it much easier to move the unit when needed.
- Attach Air Filter: Most oil-free compressors have an intake air filter. This prevents dust and debris from entering the pump. Simply screw or attach the filter onto the designated intake port, usually near the pump.
- Connect Air Hose: You’ll need an air hose designed for the pressure your compressor outputs. Connect one end to the compressor’s outlet port (often a quick-connect fitting) and the other end to your air tool. Ensure connections are secure to prevent leaks. For safety, using a regulator and moisture trap is highly recommended, especially for painting or delicate tools. You can learn more about essential air compressor accessories from resources like Family Handyman.
- Electrical Connection: Plug your compressor into a suitable electrical outlet. Ensure your circuit can handle the compressor’s power draw. Heavy-duty compressors sometimes require a dedicated circuit. The manual will specify the voltage and amperage requirements.
- Initial Run (Break-in): Some manufacturers recommend an initial run-in period without attaching a tool. This helps seat the piston rings (even in oil-free designs) and checks for any immediate issues. Consult your manual for specific break-in procedures.
Safety First! Essential Precautions
Air compressors store pressurized air, which can be dangerous if mishandled. Always prioritize safety:
- Read Your Manual: This is the most important step. Every compressor is slightly different.
- Wear Safety Glasses: Always wear safety glasses when operating or working near an air compressor.
- Secure Connections: Ensure all air hoses and fittings are securely attached. A leaky or blown-off hose can cause injury.
- Pressure Regulator: Use a pressure regulator to set the correct PSI for your tool. Over-pressurizing a tool can damage it or cause it to fail.
- Inspect Hoses: Regularly check air hoses for cracks, wear, or damage. Replace them if they show any signs of wear.
- Supervise Children: Keep children and pets away from the compressor when it’s in operation.
- Cooling: Allow the compressor to cool down after extended use, especially if it feels excessively hot.
Operating Your Oil-Free 21 Gallon Air Compressor
Once your compressor is set up, using it is generally easy, but understanding a few operational points will ensure you get the best performance and longevity. The beauty of oil-free is simplicity, meaning less time worrying about the machine and more time working.
Getting Started with Your Tools
1. Turn on the Compressor: Flip the power switch. The motor will start, and the pump will begin to build pressure in the tank. You’ll hear it working.
2. Monitor Pressure Gauge: Watch the pressure gauge. The compressor will automatically shut off when it reaches its maximum preset pressure (often around 150-175 PSI for these units).
3. Connect Your Tool: Attach your air tool to the air hose.
4. Set Regulator: Adjust the pressure regulator on your compressor (or inline if you have one) to the PSI recommended for your specific tool. Most tools will have this information printed on them or in their manual.
5. Use Your Tool: Operate your air tool as needed. The tank’s 21-gallon capacity will help maintain pressure for a good duration. As you use air, the pressure in the tank will drop.
6. Compressor Cycles On: When the tank pressure drops to a certain level (the cut-in pressure, typically around 110-130 PSI), the compressor will automatically turn back on to repressurize the tank. This is normal operation.
7. Shutting Down: When you’re finished using the compressor, turn it off at the power switch. For long-term storage or to relieve pressure, most compressors have a drain valve at the bottom of the tank. Slowly open this valve to release any remaining air. Be careful, as this can be noisy!
Draining the Tank and Maintaining Moisture Control
Moisture buildup in the air tank is a common issue with all air compressors, oil-free or not. Water can condense from the air as it’s compressed and cool in the tank. This moisture can rust the tank from the inside and damage your tools over time. Regularly draining the tank is therefore essential for proper maintenance.
- The Drain Valve: Located at the very bottom of the tank, this is your primary tool for removing moisture. It often looks like a small faucet or a ball valve.
- Draining Procedure:
- Ensure the compressor is turned off and unplugged.
- Place a suitable container under the drain valve to catch any water.
- Slowly open the drain valve. You’ll hear air escaping.
- Let the air and any water drain out completely. Close the valve when done.
- Frequency: For best results, drain the tank after every use. If you can’t do it after every use, aim for at least once a week, or more often if you live in a humid environment or use the compressor frequently.
- Inline Filters/Dryers: For critical applications like painting or if you’re in a very humid climate, consider using an inline air dryer or moisture trap connected between the compressor and your tool. These devices further remove water vapor from the air stream.
Essential Maintenance for Your Oil-Free 21 Gallon Air Compressor
The “oil-free” design significantly simplifies compressor maintenance, but it doesn’t eliminate it entirely. A few basic checks and tasks will keep your “best oil-free 21 gallon air compressor” running efficiently for years to come.
Routine Checks and Simple Tasks
- Drain the Tank: As mentioned, this is critical. Do it after every use.
- Clean the Air Filter: The intake air filter prevents dust from entering the pump. Over time, it can get clogged.
- Locate the air filter.
- Unscrew or detach it.
- Gently tap it to remove loose dust. You can often wash certain types of filters with soap.
