
Quick Summary: For DIYers and homeowners needing reliable air power, the best single-stage 22-gallon air compressor offers a versatile balance of portability and capacity for various tasks. This guide helps you choose a dependable model that fits your needs, ensuring efficient operation for both simple and more demanding projects.
Tackling DIY projects around the house often requires the right tools, and an air compressor can be a game-changer. But with so many options, finding the “best single-stage 22-gallon air compressor” can feel a bit puzzling. You want something powerful enough for your inflatable tires and paint sprayers, yet manageable enough not to be a behemoth in your garage. This guide will demystify the choices, focusing on what makes a 22-gallon single-stage compressor a smart pick for many homeowners. We’ll break down what to look for, what features matter, and how to make a confident selection. Get ready to power up your projects!
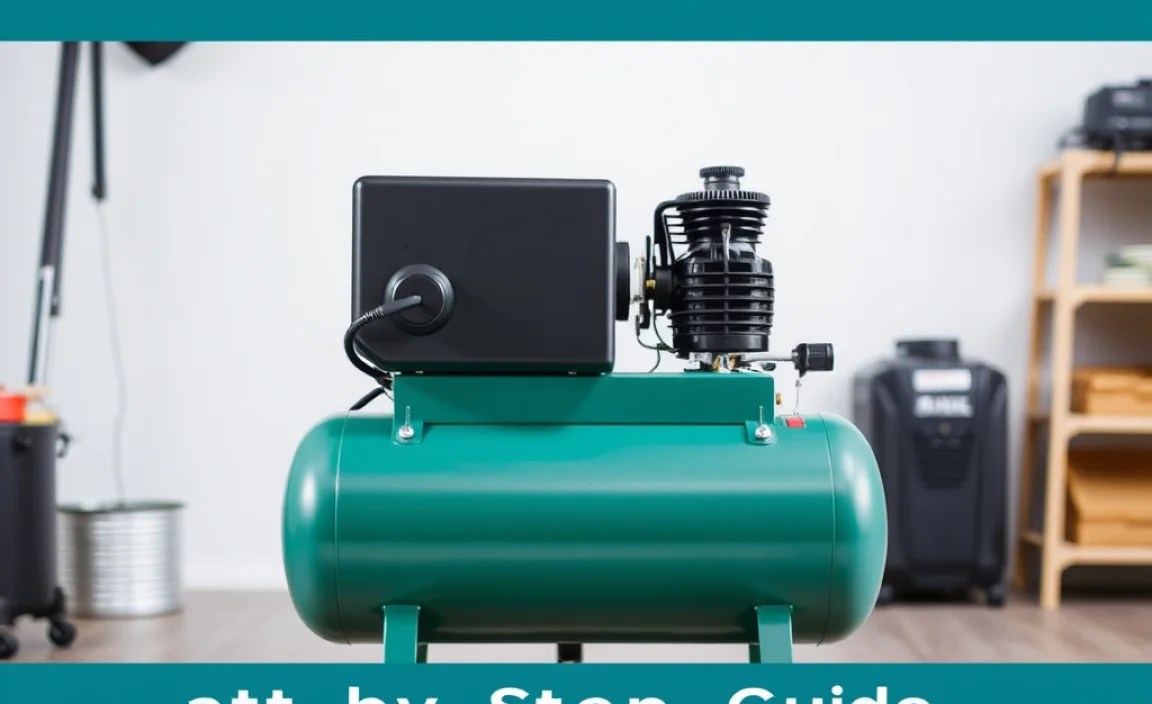
Why a 22 Gallon Single-Stage Air Compressor is Your Go-To

When you’re outfitting your home workshop or garage, an air compressor is one of those few tools that truly unlocks a world of possibilities. From inflating tires on your car or bike to running nail guns for woodworking projects, or even powering up spray painting jobs, compressed air is incredibly versatile. For the average homeowner and DIY enthusiast, a 22-gallon air compressor strikes an excellent sweet spot.
Why this specific size and type? Let’s break it down:
- Capacity: A 22-gallon tank is generous enough to store a good amount of compressed air. This means you can run air-powered tools for longer periods before the compressor needs to cycle up and refill the tank. It’s crucial for tasks that demand continuous airflow, like using impact wrenches or sanders, without constant downtime.
- Single-Stage Simplicity: Single-stage compressors are generally simpler in design than their two-stage counterparts. They compress air in one go. This usually translates to lower cost, a smaller footprint, and easier maintenance, making them ideal for beginners or those who don’t need to power industrial-grade tools all day long.
- Portability (Relatively Speaking): While not as small as portable pancake compressors, many 22-gallon models are designed with wheels and handles, making them reasonably easy to move around your garage or yard as needed. This avoids having to permanently install a larger unit.
- Versatility: This size and type of compressor can handle a wide range of common household and DIY tasks. Whether you’re inflating paddling pools, cleaning out dusty corners with an air blower, or tackling small carpentry projects, it’s up to the job.
The “best” compressor for you isn’t just about horsepower or tank size; it’s about how those elements work together to serve your specific needs reliably and safely. We’re here to guide you through the features that make a 22-gallon single-stage compressor a fantastic “essential pick” for many!
Understanding Air Compressor Basics: What You Need to Know

Before diving into specific models, let’s quickly cover a few fundamental terms. Don’t worry, we’ll keep it simple!
1. Gallons (Tank Size)
This refers to how much air the tank can hold when fully pressurized. A larger tank means more stored air, allowing you to use air tools for longer periods without the compressor running constantly. For a 22-gallon compressor, this is a solid size for many home projects.
2. CFM (Cubic Feet per Minute)
This is arguably the most important spec. CFM tells you how much volume of air the compressor can deliver per minute at a specific pressure. Almost every air tool has a CFM requirement. You need a compressor that can meet or exceed the CFM needs of the tools you plan to use. Higher CFM means more powerful tool operation and the ability to run multiple tools or more demanding ones.
A good rule of thumb is to choose a compressor with a CFM rating that is at least 1.5 times the CFM requirement of your most air-hungry tool. This provides a buffer and ensures your tools perform at their best.
3. PSI (Pounds per Square Inch)
This is the measure of air pressure. Most common air tools operate in the 70-90 PSI range. 22-gallon compressors typically offer a maximum PSI of 120-175 PSI, which is more than sufficient for most homeowner tasks.
4. Horsepower (HP)
Horsepower indicates the power of the motor driving the compressor. While it’s a common metric, it’s less critical than CFM. A higher HP can help a compressor build pressure faster and maintain it better, especially for larger tanks, but CFM is the indicator of how much air is actually delivered.
5. Oil-Lubricated vs. Oil-Free
- Oil-Lubricated: These compressors use oil to lubricate the pump. They tend to be quieter, run cooler, last longer, and are generally more durable. However, they require regular oil checks and changes.
- Oil-Free: These compressors are often lighter, require less maintenance (no oil to check or change), and come with a lower price tag. The trade-off is they can be louder, run hotter, and may not last as long as oil-lubricated models, though modern oil-free designs have improved significantly.
For a 22-gallon compressor that you might use frequently for various tasks, an oil-lubricated model often provides better longevity and a quieter user experience, but an oil-free unit can be a great, low-maintenance option if noise and extreme durability are less of a concern.
Key Features to Look for in the Best Single-Stage 22 Gallon Air Compressor

When shopping for your ideal 22-gallon single-stage air compressor, several features can make a real difference in usability and performance. Think about how and where you’ll be using your compressor most often.
1. Air Output (CFM) at 90 PSI
This is your primary performance metric. Look for a compressor that states its CFM rating specifically at 90 PSI, as this is a common operating pressure. For general DIY tasks, aim for at least 4-6 CFM at 90 PSI. If you plan on running more demanding tools like grinders or sanders, you’ll want to aim higher, perhaps 6.5 CFM or more.
2. Durability and Build Quality
A good compressor is an investment. Look for sturdy construction. Cast iron pump construction is a hallmark of durability in oil-lubricated models. Thick gauge metal for the tank and housing also indicates a robust build. Check reviews for common complaints about leaks or premature wear.
3. Noise Level
Compressors can be loud! If you’re working in a home setting, especially a shared garage or a proximity to neighbors, noise level is a significant factor. Some manufacturers will list a decibel (dB) rating. Models with lower dB ratings and oil-lubricated pumps are generally quieter.
4. Portability and Ergonomics
Even though it’s a 22-gallon tank, it should still be reasonably maneuverable. Look for:
- Wheels: Sturdy, large wheels are better for navigating different surfaces.
- Handles: Well-placed, comfortable handles make it easier to lift and move.
- Balance: A well-balanced unit is less likely to tip over.
5. Pressure Gauge and Regulator
You need to monitor the tank pressure and control the output pressure for your tools. A clear, easy-to-read tank pressure gauge is essential. An adjustable regulator allows you to set the output pressure precisely for different tools. Most compressors come with these, but quality can vary.
6. Drain Valve
Moisture builds up in the tank as air is compressed, especially in humid conditions. A manual or automatic drain valve at the bottom of the tank is crucial for draining this condensation. Failing to drain the tank regularly can lead to rust and damage to the tank and your tools. Look for an easy-to-access drain, ideally a ball valve type, which is much easier to operate than smaller petcocks.
7. Safety Features
Look for safety relief valves to prevent over-pressurization and thermal overload protection for the motor. These are standard on reputable models but worth confirming.
8. Power Cord Length and Type
Ensure the compressor comes with a power cord long enough to reach your outlets without strain. For 22-gallon models, they often require a 120V outlet, but some higher-powered ones might necessitate a 240V outlet or a dedicated circuit. Always check the power requirements!
Top Picks: The Best Single-Stage 22 Gallon Air Compressors
Choosing the absolute “best” depends on your unique needs, but here are a few types and brands that consistently perform well in the 22-gallon single-stage category. We’ll highlight their strengths.
When evaluating, pay close attention to the CFM rating at 90 PSI, noise levels, and user reviews regarding reliability and build quality.
| Compressor Type/Brand Focus | Key Features & Strengths | Ideal Use Case |
|---|---|---|
| Quiet Operation Models (e.g., California Air Tools, some DeWalt/Porter-Cable variants) | Often feature enhanced sound dampening, oil-free designs that focus on quieter running (<70 dB for some), good CFM for their size, and quick recovery times. | Home garages, workshop spaces where noise is a concern, smaller automotive tasks, blowing dust, inflating. |
| Robust & Reliable (e.g., Some older style Craftsman, Campbell Hausfeld, DeWalt) | Generally oil-lubricated, cast-iron pump construction, known for durability and longevity. May be slightly louder and heavier. Often provide good CFM for continuous use. | Woodworking, frequent use of pneumatic tools, automotive repair, general shop use where durability is paramount. |
| Value & Accessibility (e.g., Store Brands, entry-level models from major tool companies) | Lower price point, often oil-free for simplicity. May have slightly lower CFM or be less durable under heavy, continuous use. | Occasional DIY tasks, inflating, powering small brad nailers, basic automotive maintenance. Often a great starting point for beginners. |
Note: Specific model numbers change frequently, and availability varies. Always check the latest specifications and reviews for current offerings.
For instance, a manufacturer like DeWalt often produces robust compressors known for their power and durability, typically with cast-iron pumps that promise longevity. Their 22-gallon single-stage models can be a solid anchor for a home shop.
Conversely, brands like California Air Tools have carved a niche with their ultra-quiet, often oil-free, but still powerful compressors. These are fantastic if your workspace is close to living areas or if you simply prefer a more peaceful environment.
When comparing models, always have the CFM requirements of your primary tools handy. A compressor with a slightly higher CFM than your tool demands will ensure consistent performance. For instance, if your nail gun needs 2.8 CFM at 90 PSI, a compressor delivering 4.0 CFM at 90 PSI is a safe bet, allowing for a little wiggle room and faster tank recovery.
Step-by-Step Guide: Setting Up & Using Your Air Compressor Safely
Getting your new 22-gallon air compressor set up and running doesn’t have to be complicated. Follow these steps for a safe and efficient start. Safety first is always the best approach in DIY!
Step 1: Unboxing and Initial Inspection
- Carefully unpack your compressor.
- Check for any visible damage that may have occurred during shipping.
- Ensure all accessories mentioned in the manual are present.
- Read the owner’s manual thoroughly. This is crucial for understanding its specific features, maintenance, and safety guidelines.
Step 2: Placement and Ventilation
Where you put your compressor matters. Choose a location that:
- Is level and stable.
- Has good ventilation so the motor and pump can stay cool. Avoid placing it in a small, enclosed space without airflow.
- Is protected from extreme weather (rain, direct sun, freezing temperatures).
- Is close enough to your power source and the area where you’ll use your tools, minimizing the need for excessively long or daisy-chained extension cords (which can cause voltage drop and reduce performance).
Step 3: Pre-Use Check (Oil-Lubricated Models)
If you have an oil-lubricated model:
- Locate the oil fill cap/dipstick.
- Check the oil level. It should be at the indicated mark on the dipstick or sight glass.
- If needed, add compressor oil of the type specified in your manual. Do NOT overfill. Typically, you’ll use SAE 30 Non-Detergent oil for these types of compressors.
Do not skip this! Running a compressor without the proper oil can cause immediate and severe damage.
Step 4: Connecting the Air Hose and Tool
- Ensure the compressor is switched OFF and unplugged before making connections.
- Attach your air hose to the compressor’s outlet port using a suitable fitting. Make sure the connection is secure.
- Connect your air tool to the other end of the air hose.
- Ensure your tool’s required PSI is set correctly on the compressor’s regulator.
Step 5: Powering On and Pressurizing
- Plug the compressor into a grounded electrical outlet. For 22-gallon models, this is typically a standard 120V outlet. If it requires 240V, ensure you have the correct outlet and wiring. Refer to National Association of Home Builders (NAHB) resources for general electrical safety guidelines.
- Turn the compressor’s power switch ON.
- The compressor will start to fill the tank. You’ll hear it running and see the pressure gauge climb.
- Once the tank reaches its maximum pressure, the compressor should automatically turn off.
Step 6: Using Your Air Tool
- Before activating your tool, check the regulator setting on the compressor to ensure it’s set to the recommended PSI for your specific tool.
- Slightly overshoot the required PSI and then dial it back down using the regulator. This ensures the regulator is actively controlling the output.
- Operate your air tool as intended.
- Keep an ear out for any unusual noises or changes in performance.
Step 7: Shutting Down and Draining
- Turn the compressor’s power switch OFF.
- Unplug the compressor to ensure it cannot accidentally start.
- Crucially, drain the moisture from the tank. Open the drain valve at the bottom of the tank (this might release a hiss of air). Allow all condensation to escape. This is vital for preventing rust and maintaining the compressor’s lifespan. For ball valves, a quarter turn is usually enough to open.
- Once drained, close the valve. Store the compressor in a clean, dry place.
Maintenance for Longevity: Keeping Your Compressor in Top Shape
A little regular maintenance goes a long way in ensuring your 22-gallon air compressor serves you well for years to come. These tasks are straightforward and will prevent costly repairs down the line.
Regular Checks (Before/After Each Use):
- Drain the Tank: As mentioned, this is the most critical step. Moisture in the tank leads to corrosion. Regularly use the drain valve to release all condensation.
- Inspect Air Filter: Check and clean or replace the air intake filter regularly. A clogged filter restricts airflow, reducing performance and straining the motor. Consult your manual for filter type and cleaning instructions. For many, a quick tap to dislodge dust is enough, but they are often replaceable and inexpensive.
- Check for Leaks: Listen for any hissing sounds of escaping air around fittings or hoses. Small leaks can waste energy and reduce efficiency.
Monthly Checks (or as per manual):
- Oil Level (Oil-Lubricated Models): Check and top up the oil if necessary. Ensure you’re using the correct type and grade of compressor oil.
