
Understanding water pressure in construction is vital for safe, efficient plumbing systems. It ensures water reaches every faucet and fixture effectively. We’ll cover what it is, why it matters, how it’s measured, common issues, and how you can manage it in your projects or home.
Understanding Water Pressure in Construction: Your Essential Guide

Ever turned on a faucet and gotten a weak dribble instead of a strong stream? It’s frustrating, right? Low water pressure can be a real headache, affecting everything from your morning shower to how quickly you can fill a pot for dinner. In construction, getting water pressure right from the start is super important. It’s not just about convenience; it’s about making sure fixtures work as they should and that your plumbing system is reliable. Don’t worry if you’re new to this!
This guide will break down all the details of water pressure in construction in a way that’s easy to understand, so you can tackle any project with confidence. We’ll explore what water pressure actually is, why it’s so critical in building and renovations, and the common pressures you’ll see. Plus, we’ll look at typical problems and how to fix them. Let’s dive in and become water pressure pros together!
What is Water Pressure?
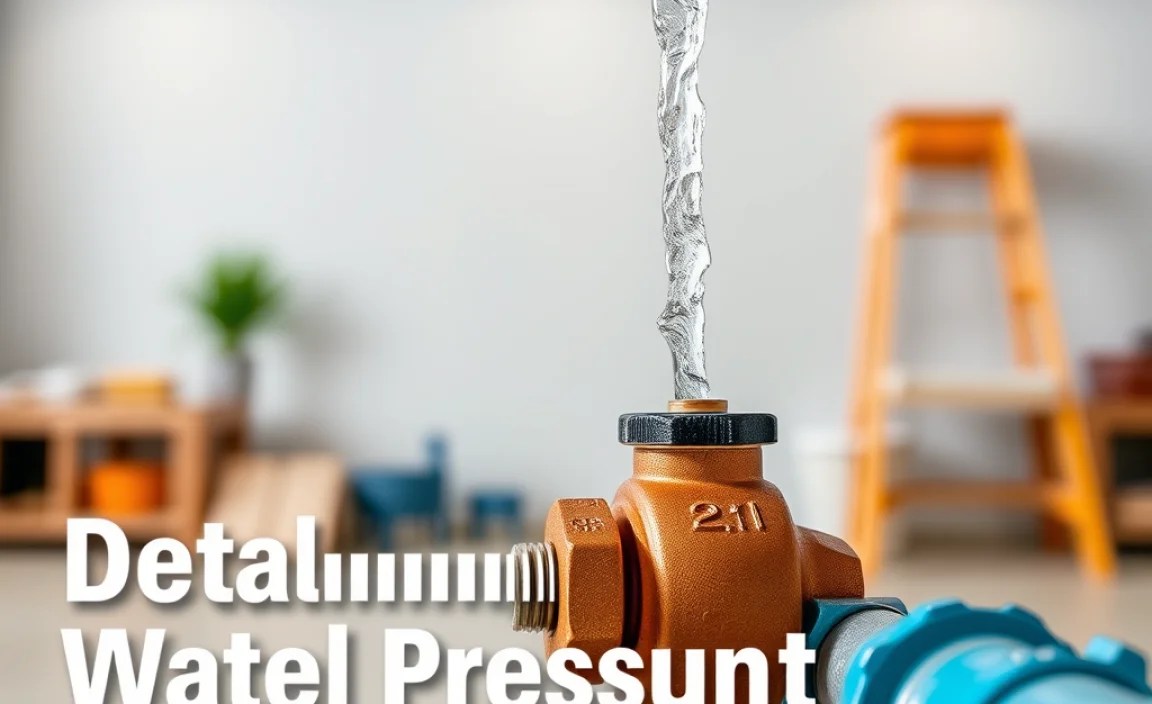
Simply put, water pressure is the force that pushes water through your pipes. Think of it like the pressure you feel when you squeeze a water balloon – the harder you squeeze, the faster the water shoots out. In your home’s plumbing system, this “squeeze” is created by gravity and pumps.
The amount of pressure is measured in pounds per square inch (PSI). A higher PSI means stronger force, while a lower PSI means a gentler flow. It’s the invisible force that brings clean water to your taps, showers, toilets, and appliances, and it’s crucial for them to function correctly.
Why Water Pressure Matters in Construction
Getting water pressure right during construction is a big deal for several reasons:
- Fixture Performance: Many modern appliances and fixtures, like dishwashers, washing machines, and showerheads, are designed to work within a specific pressure range. Too low, and they might not operate efficiently (or at all). Too high, and they can be damaged or wear out faster.
- Water Delivery: Adequate pressure ensures water can reach all parts of a building, even those on higher floors. Without it, upper levels might have little to no water.
- System Longevity: Extremely high water pressure can put unnecessary stress on pipes, joints, and fixtures, leading to leaks and premature failure. This means costly repairs down the line.
- Safety and Comfort: Nobody likes a shower that suddenly turns cold or has weak flow. Proper pressure ensures a comfortable and safe experience for building occupants.
- Code Compliance: Building codes often specify minimum and maximum water pressure requirements to ensure safety and performance standards are met.
Understanding Water Pressure Units: PSI Explained

As mentioned, the standard unit for measuring water pressure is Pounds per Square Inch (PSI). This tells us how much force is being applied to one square inch of surface area. For example, 50 PSI means there are 50 pounds of force being applied to every square inch.
Different parts of the water system operate under various pressure conditions:
- Municipal Water Supply: The pressure coming from the city or town water main can vary significantly. It’s often regulated at a main connection point but can fluctuate based on demand and the distance from the water source.
- Inside the Home: Once water enters a building, its pressure is managed to fall within a safe and functional range.
A common and ideal range for residential water pressure is typically between 40 PSI and 60 PSI. Some sources suggest that 45-55 PSI is optimal for most homes.
Typical Water Pressure Ranges in Construction Projects
During the construction phase, you’ll encounter and need to manage water pressure at different stages:
- Municipal Main Pressure: This can range widely, often from 30 PSI to over 100 PSI, depending on your location and elevation. It’s the starting point for water entering the property.
- Service Line Pressure: After the meter but before the main shut-off valve, the pressure should ideally be close to the municipal pressure, unless there are significant restrictions.
- Post-Pressure Reducing Valve (PRV): If the incoming municipal pressure is too high (above 80 PSI is often considered too high for residential systems), a PRV is installed. This device lowers the pressure to a safe level, usually set between 50 PSI and 75 PSI, with 60 PSI being a common target.
- Out of Faucets/Fixtures: The pressure delivered to your actual taps should be within the 40-60 PSI range for optimal performance and fixture longevity.
It’s important to remember that these are general ranges. Local codes and specific project requirements might dictate other pressures. You can find more information on plumbing standards from organizations like the International Code Council (ICC), which develops building codes used worldwide.
The Role of Water Pressure in Plumbing Design and Installation

Plumbers and builders don’t just connect pipes; they design a system that accounts for water pressure. This involves several key considerations:
- Pipe Sizing: The diameter of pipes is crucial. Larger pipes can handle higher flow rates with less pressure loss due to friction. Smaller pipes are more prone to pressure drops, especially over long distances or with multiple fixtures running.
- Elevation Changes: Water pressure decreases the higher it has to travel. For multi-story buildings, a well-designed system might require pumps or pressure boosters to ensure adequate pressure on upper floors. Conversely, pressure increases with a downward flow, which can also be a factor.
- Friction Loss: As water flows through pipes, bends, valves, and fittings, it loses some pressure due to friction. The longer the pipe run and the more fittings there are, the greater the friction loss. This needs to be factored into the overall design.
- Fixture Requirements: Each fixture has a minimum and maximum pressure requirement for proper operation. A showerhead needing 2.5 gallons per minute (GPM) at 45 PSI will perform differently at 20 PSI or 80 PSI.
- System Pressure Testing: During construction, plumbers perform pressure tests on the installed piping system before it’s covered up. This ensures there are no leaks and that the system can hold the required pressure.
Common Water Pressure Problems in Construction and How to Address Them
Even with careful planning, water pressure issues can arise during or after construction. Here are some common ones:
1. Low Water Pressure
Symptoms: Weak streams from faucets, slow-filling toilets, showers with poor spray, appliances not filling or working effectively.
Causes:
- Partially Closed Shut-off Valve: Someone might have closed a valve (main shut-off, or one to a specific fixture) and not reopened it fully.
- Clogged Aerators or Showerheads: Mineral buildup or debris can restrict water flow.
- Leaks in the System: An unseen leak can reduce overall pressure.
- Under-sized Piping: If pipes are too small for the building’s needs, pressure will drop.
- Municipal Supply Issues: Problems with the main water line or issues in the neighborhood can affect pressure.
- Worn-out Pressure Reducing Valve (PRV): A faulty PRV might not be allowing enough water through.
- Water Softener Issues: If the system is clogged or not functioning correctly, it can restrict flow.
Solutions:
- Check All Valves: Ensure all shut-off valves are fully open.
- Clean Fixtures: Unscrew aerators and showerheads and soak them in vinegar to remove mineral deposits. Clean out any debris.
- Inspect for Leaks: Look for damp spots, pools of water, or unusually high water bills.
- Test Pressure: Use a water pressure gauge attached to an outdoor hose bib or washing machine hookup to measure PSI. If it’s consistently below 40 PSI, further investigation is needed.
- PRV Check: If pressure is too high and then drops, or is inconsistently low, the PRV might need adjustment or replacement.
- Consult a Professional: For persistent low pressure, it’s best to call a qualified plumber.
2. High Water Pressure
Symptoms: Water hammer (banging noises in pipes), sputtering faucets, toilets that fill too quickly, washing machines that overfill, premature wear on appliances and fixtures.
Causes:
- High Municipal Supply Pressure: The water main might simply have very high pressure.
- Faulty Pressure Reducing Valve (PRV): A PRV that is stuck open or set too high will allow excessive pressure into the system.
- No PRV Installed: In some cases, a PRV might have been overlooked during construction.
Solutions:
- Install or Adjust a PRV: If your home’s pressure is consistently above 80 PSI, installing a PRV is essential. If you have one, have it checked and adjusted to the ideal range (typically 50-60 PSI).
- Test Pressure Regularly: Use a pressure gauge to monitor your home’s PSI.
- Consider Expansion Tanks: In hot water systems, high pressure can cause thermal expansion. An expansion tank can help manage this.
3. Inconsistent Water Pressure
Symptoms: Pressure fluctuates randomly, sometimes strong, sometimes weak.
Causes:
- Water Flow Fluctuations: This can happen in neighborhoods with high demand (e.g., during hot weather when everyone is watering lawns).
- Faulty PRV: An aging or malfunctioning PRV might not regulate pressure smoothly.
- Issues with Water Heater: A clogged dip tube in a water heater can sometimes cause fluctuating pressure.
- Partially Blocked Pipes: Deposits or debris can cause intermittent blockages.
Solutions:
- Check PRV: This is often the culprit for inconsistent pressure.
- Inspect Water Heater: Have your water heater inspected if you suspect it’s the cause.
- Monitor Municipal Issues: Sometimes, it’s an issue with the water utility that will resolve itself.
Tools for Measuring and Managing Water Pressure
For DIYers and construction professionals alike, having the right tools makes a world of difference when dealing with water pressure.
Essential Tools
- Water Pressure Gauge: This is your most important tool. It screws onto an outdoor hose bib, washing machine hookup, or utility sink faucet. They are inexpensive and provide an instant reading.
- Adjustable Wrench: Useful for turning valves, tightening connections, and working with PRVs or gauges.
- Pipe Wrench: For gripping and turning pipes, especially when dealing with larger fittings.
- Pliers (Channel Locks): Versatile for gripping and turning various pipe sizes and fittings.
- Thread Sealant Tape (Teflon Tape) or Pipe Dope: Essential for creating leak-free threaded connections when installing gauges or working on fittings.
- Bucket and Rags: For catching drips during tests and cleanup.
Advanced Tools (Typically for Professionals)
- Pressure and Flow Meters: More sophisticated tools that can measure both pressure and flow rate simultaneously, giving a more complete picture of system performance.
- Pipe Inspection Cameras: Used to visually inspect the inside of pipes for blockages or damage if other methods aren’t conclusive.
How to Test Your Water Pressure
Testing your water pressure is a straightforward process. Here’s how:
- Find a Fixture: The best places are an outdoor hose bib or the cold-water connection for your washing machine. These are usually directly connected to the main water line entering your house.
- Get Your Gauge: Make sure you have a clean, functioning water pressure gauge.
- Attach the Gauge: Screw the gauge tightly onto the hose bib or washing machine valve. Ensure it’s snug to prevent leaks and inaccurate readings.
- Turn on the Water: Open the valve attached to the gauge completely. If using a hose bib, you might need to turn on a nearby faucet inside the house to get a true “static” pressure reading (water at rest). For a washing machine valve, just turning it on should give you a good reading.
- Read the Gauge: Wait for the needle on the gauge to stabilize. This is your current water pressure in PSI.
- Turn Off Water: Close the valve and remove the gauge.
It’s a good idea to test pressure at different times of the day to see if it fluctuates. A consistent reading is ideal. If your readings are consistently below 40 PSI or above 80 PSI, it’s time to investigate further or call a professional.
Water Pressure and Building Codes
Building codes exist to ensure safety, health, and welfare. When it comes to water pressure, codes typically set maximum limits to prevent damage to plumbing systems and hazardous situations (like scalding from sudden pressure changes).
For example, the International Plumbing Code (IPC) often recommends that the water pressure supplied to a building not exceed 80 PSI at any point in the system. If the municipal supply pressure is higher than this, a pressure-reducing device (like a PRV) is mandatory. The code also specifies minimum pressure requirements at various fixture outlets to ensure they function correctly.
These codes are crucial for builders and plumbers because:
- They ensure a baseline level of performance and safety for building occupants.
- They protect against property damage caused by excessively high pressure.
- Compliance is checked during building inspections.
Always consult your local building department or a qualified professional to understand the specific water pressure requirements in your area, as codes can vary.
Water Pressure in Different Construction Scenarios
Water pressure considerations can change depending on the type of construction project:
Residential Homes
For single-family homes, the focus is on providing consistent, comfortable pressure (40-60 PSI) to all fixtures. This often involves a PRV if the municipal supply is too high, and proper pipe sizing to avoid pressure drops.
Multi-Story Buildings (Apartments, Offices)
In taller buildings, gravity becomes a major factor. Pressure is highest on lower floors and weakest on upper floors. Systems here often require specialized designs:
- Booster Pumps: Installed to increase pressure to higher levels.
- Pressure Zones: Dividing the building into different pressure zones, each with its own PRV and potentially pumps, to manage pressure effectively.
- Return Lines: Sometimes incorporated to help maintain hot water temperature and pressure consistency.
Commercial Buildings (Restaurants, Hospitals)
These buildings have high water demand and specialized equipment. They often require higher flow rates and consistent pressure for things like industrial dishwashers, commercial kitchens, and specialized medical equipment. Their plumbing systems are usually more robust and complex, designed by specialized engineers.
Industrial Facilities
Industrial settings can have vastly different pressure needs, ranging from very low pressure for sensitive equipment to extremely high pressure for processes like hydraulic systems or cleaning. These systems are highly specialized and engineered for specific operational requirements.
Water Pressure and Water Hammer
Water hammer, also known as hydraulic shock, is a common and disruptive problem. It’s that loud banging or knocking noise you hear in your pipes, usually when a valve is shut off quickly.
How it Happens: When water is moving through a pipe and suddenly stops, its momentum has nowhere to go. This creates a shock wave that travels back through the pipe, causing it to vibrate and bang against surrounding structures. High water pressure exacerbates water hammer.
Why It’s a Problem:
- Annoying Noise: It’s a clear sign something isn’t right.
- Damage: Repeated shock waves can loosen pipe supports, damage valves, and even cause leaks or burst pipes over time.
Solutions:
- Install an Air Chamber or Water Hammer Arrestor: These devices are installed near quick-closing valves (like washing machine valves or dishwashers) and contain a pocket of air or a spring-loaded piston that absorbs the shockwave.
