
Yes, you can absolutely fix many common shower problems yourself without calling a plumber! This guide provides clear, step-by-step instructions for troubleshooting issues like leaks, low water pressure, and dripping faucets, empowering you to save money and gain confidence with simple DIY repairs.
A leaky shower can be more than just annoying; it’s a waste of water and can lead to higher utility bills and potential damage. Don’t let a dripping faucet or a weak stream discourage you. With a few basic tools and this easy-to-follow guide, you can tackle many common shower issues yourself. We’ll walk you through identifying the problem and finding a simple, effective solution, so you can enjoy a perfectly functioning shower again.
Understanding Common Shower Problems
Showers are pretty straightforward, but like anything, they can develop little quirks. Most of the time, these issues stem from just a few common culprits. By understanding what usually goes wrong, you’ll be better equipped to fix it.
Leaky Shower Heads
The most common symptom is a steady drip, drip, drip even when the shower is turned off. This is often caused by a worn-out washer or O-ring inside the faucet handle or the shower head connection.
Low Water Pressure
Is your invigorating shower reduced to a gentle sprinkle? Low water pressure can be frustrating. It might be due to a clogged showerhead, a problem with the water supply valve, or even issues further back in your home’s plumbing system.
Leaky Shower Valves
If you notice water pooling around the base of your shower or a persistent drip from the faucet itself when it’s off, it could be your shower valve. This part controls the flow and temperature of the water and can develop leaks over time.
Running Toilet (in adjacent bathrooms)
While not directly a shower problem, a constantly running toilet can be linked to water pressure issues in your home’s overall system, which might also affect your shower. Sometimes, it’s the flapper valve in the tank that’s the culprit.
Essential Tools for DIY Shower Repair

Before you start fixing anything, gathering the right tools will make the job much smoother and safer. You don’t need a professional plumber’s arsenal, just a few handy items.
Must-Have Tools:
- Adjustable Wrench: Essential for loosening and tightening nuts and fittings without damaging them.
- Screwdriver Set: Both Phillips head and flathead screwdrivers are needed for various components.
- Plumber’s Tape (Teflon Tape): Seals threaded pipe connections to prevent leaks.
- Penetrating Oil: Helps to loosen stubborn or corroded parts.
- Old Towels or Rags: To catch drips and protect your shower floor.
- Bucket: To collect any residual water.
- Utility Knife: For cutting away old caulk or seals if needed.
- Safety Glasses: Always protect your eyes, especially when working overhead.
- Pliers: Various types, including slip-joint and needle-nose, can be helpful.
Optional (but helpful) Tools:
- Basin Wrench: Specifically designed for reaching nuts in tight spaces, like under a sink or behind a shower valve.
- Caulking Gun and Silicone Caulk: For resealing around the tub or shower base if you find leaks there.
- Wire Brush: For cleaning threads or corroded parts.
Safety First!
Before you touch any part of your shower, remember these crucial safety steps:
- Turn off the water supply: Locate the main water shut-off valve for your home or, if possible, specific shut-off valves for your bathroom (often behind an access panel). This is the most critical step to prevent flooding.
- Test the water shut-off: Turn on your faucet to confirm the water is completely off before starting any work.
- Protect yourself: Wear safety glasses. If you’re working with sealant or old pipes, gloves can be a good idea.
- Don’t force it: If a part is stuck, use penetrating oil and be patient. Forcing things can cause more damage.
Fixing a Dripping Shower Head: Step-by-Step
This is one of the most common issues and usually the easiest to fix. A persistent drip is often due to a worn-out washer or O-ring inside the shower valve stem, or a buildup of mineral deposits.
Step 1: Turn Off Water & Disassemble Handle
- First, ensure the water is turned off using the steps mentioned in the safety section.
- Look for a decorative cap on the shower handle. Gently pry it off with a small flathead screwdriver or a utility knife.
- Underneath, you’ll find a screw. Undo this screw to remove the handle. You might need to wiggle it gently if it’s a bit stuck.
Step 2: Identify and Remove the Escutcheon Plate
- Once the handle is off, you’ll see a metal plate called an escutcheon. This plate usually covers the opening where the valve stem protrudes.
- The escutcheon might be held on by screws. If so, unscrew them. In some cases, it might be held in place by a retaining nut or simply press-fit against the wall.
- Carefully remove the escutcheon. Be prepared for some water to drain out from inside the wall; have your bucket and towels ready.
Step 3: Access and Replace the Stem and Washers
- Behind the escutcheon, you’ll see the valve stem, often with a packing nut around it.
- Use your adjustable wrench to carefully loosen and remove the packing nut.
- Once the packing nut is off, you should be able to pull or unscrew the valve stem out of the valve body.
- Inspect the stem. You’ll likely see a rubber washer at the end, held in place by a screw. If this washer is cracked, stiff, or worn, it’s the likely cause of the leak. Also, check the O-ring around the stem.
- Remove the old washer and O-ring. Take them to a hardware store to find exact replacements. They are inexpensive.
- Install the new washer and O-ring. Ensure they fit snugly.
Step 4: Reassemble and Test
- Reinsert the valve stem back into the valve body.
- Tighten the packing nut with your wrench, but don’t overtighten – snug is usually good.
- Replace the escutcheon plate and secure it with screws if it had any.
- Reattach the shower handle by screwing it back in and replacing the decorative cap.
- Slowly turn the water supply back on and check for leaks. Test the shower handle to ensure it operates smoothly and the dripping has stopped.
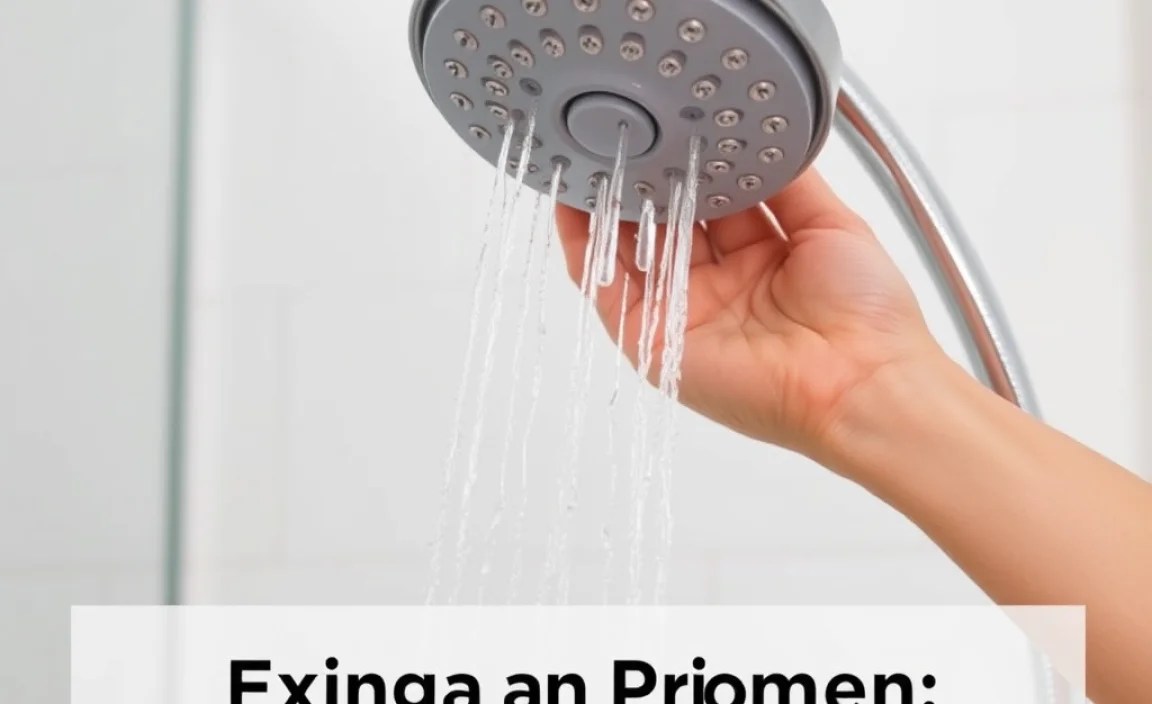
Boosting Shower Water Pressure

Low water pressure can make showering feel less effective. Here’s how to address common causes.
Cause 1: Clogged Shower Head
Mineral deposits from hard water can clog the tiny nozzles of your shower head, restricting water flow.
DIY Fix: Cleaning Your Shower Head
- Remove the shower head: Use an adjustable wrench to unscrew the shower head from the shower arm. Wrap the arm connection with a rag to prevent scratching.
- Soak it: Place the shower head in a bowl or plastic bag filled with white vinegar. Ensure the shower head is fully submerged. Let it soak for at least a few hours, or even overnight for stubborn clogs. Vinegar helps dissolve mineral deposits.
- Scrub and rinse: After soaking, use an old toothbrush or a small brush to scrub away any remaining debris from the nozzles.
- Reattach: Wrap the threads of the shower arm with plumber’s tape. Screw the cleaned shower head back on tightly, but not so tight that you can’t remove it later.
- Test: Turn on the water to check the flow.
Cause 2: Partially Closed Shut-off Valve
Sometimes, the valve controlling water to your shower might have been accidentally turned down.
DIY Fix: Check and Adjust Shut-off Valve
- If you have an access panel behind your shower or in the basement/crawlspace directly below, locate the pipe leading to your shower valve.
- You’ll find a shut-off valve on this pipe. Ensure the handle is turned parallel to the pipe (fully open). Some valves have levers; others are round knobs. If it’s a lever, it should point in the same direction as the pipe. If it’s a knob, it should be turned as far as it goes counter-clockwise.
- If the valve was partially closed, open it fully and test your shower.
Note: If you don’t have easy access to your shower’s shut-off valve, this might require a professional. For general home plumbing, check out resources like EPA’s WaterSense program for water-saving tips, which often include information on efficient water use that ties into pressure.
Cause 3: Buildup in the Shower Arm
Minerals can also build up inside the shower arm itself, restricting flow before it even reaches the shower head.
DIY Fix: Cleaning the Shower Arm
- Remove the shower head as described above.
- Look inside the end of the shower arm. If you see visible mineral deposits, try to clear them with a small pick or a wire brush.
- You can also try carefully pouring some vinegar into the shower arm opening and letting it sit for a while before rinsing.
- Reattach the shower head with plumber’s tape and test.
When to Call a Plumber
While many shower issues are DIY-friendly, there are times when you should definitely call in the professionals. It’s important to recognize these limits to avoid causing more damage or injury.
Signs You Need a Plumber:
- Persistent Leaks from the Wall: Water seeping from behind the tiles or around the valve handle suggests a deeper issue with the valve body or pipes that requires professional expertise and potentially specialized tools.
- Major Overflows or Water Damage: If you’ve attempted a repair and caused an overflow, or if you notice significant water damage already present, contact a plumber immediately to mitigate the problem.
- Issues with Hot Water Temperature: If your shower consistently runs cold or has wildly fluctuating temperatures, it might be a problem with your water heater or the mixing valve, which can be complex to diagnose and fix.
- Recurring Problems: If you fix something, and it breaks again shortly after, there might be an underlying issue with your home’s plumbing system that a plumber can identify.
- Lack of Confidence or the Right Tools: If you’re uncomfortable with any step, lack the necessary tools, or are unsure about what you’re doing, it’s always safer to call a professional plumber. They have the experience and equipment to handle it safely and effectively.
For more complex plumbing situations, consulting with a certified plumber is the safest and most reliable option. Organizations like the Plumbing-Heating-Cooling Contractors Association (PHCC) can often help you find qualified professionals in your area.
Table: Common Shower Problems and DIY Solutions
| Problem | Likely Cause | DIY Solution | Difficulty Level |
|---|---|---|---|
| Dripping Shower Head | Worn washer, O-ring, or mineral buildup | Replace washer/O-ring, clean shower head | Easy |
| Low Water Pressure | Clogged shower head, partially closed valve, clogged shower arm | Clean shower head, check/open valve, clean shower arm | Easy to Moderate |
| Leaky Faucet Handle (when off) | Worn stem, O-ring, or cartridge | Replace stem components, cartridge | Moderate |
| Running Toilet (if related to water pressure) | Faulty flapper valve, float adjustment | Replace flapper, adjust float | Easy |
Maintaining Your Shower for Longevity
Prevention is always better than cure! Taking a few simple steps can help keep your shower in top shape and reduce the need for repairs.
Regular Cleaning:
Clean your shower head and faucet regularly to prevent mineral buildup. A weekly wipe-down with a damp cloth and a monthly vinegar spray can make a big difference.
Check for Leaks:
Periodically inspect around your shower for any signs of moisture or small drips. Catching leaks early can save you from bigger, more expensive repairs down the line.
Use Water-Softening Products (if applicable):
If you live in an area with hard water, consider using a water softener for your home or shower head filters. This significantly reduces mineral buildup.
Be Gentle:
Avoid forcing shower handles or faucets. If they feel stiff, investigate the cause rather than simply applying more force, which can damage internal components.
For more advanced home maintenance tips and best practices in plumbing, resources like those provided by the Centers for Disease Control and Prevention (CDC) on healthy water and home maintenance offer valuable insights.
Conclusion
Fixing common shower problems yourself is a rewarding experience that not only saves you money but also builds your confidence in maintaining your home. From tackling that persistent drip to boosting lukewarm water pressure, you now have the knowledge and steps to address these issues effectively. Remember to always prioritize safety by turning off the water and using the right tools. By following this guide and performing regular maintenance, you can keep your shower running smoothly and efficiently for years to come, enjoying that revitalizing spray without any annoying interruptions. Happy fixing!
FAQ: Your Shower DIY Questions Answered
Q1: How do I know if I need to turn off the water supply?
A: You MUST turn off the water supply before attempting any repair that involves disassembling or removing parts of the faucet or shower valve. This prevents flooding and ensures your safety. Always test the shut-off by trying to run the water before you begin.
Q2: What if I can’t find the shut-off valve for my shower?
A: If you can’t locate individual shut-off valves for your shower, you’ll need to turn off the main water supply to your entire house. This valve is typically located in the basement, crawl space, utility room, or near your water meter.
Q3: How tight should I make the nuts and screws when reassembling?
A: You want to make them snug and secure but avoid overtightening. Overtightening can strip threads, crack plastic parts, or damage seals, leading to new leaks. If in doubt, err on the side of caution; you can always tighten a bit more if you notice a slight drip.
Q4: My shower head still drips after replacing the washer. What else could it be?
A: If replacing the washer didn’t fix a dripping shower head, the issue might be with the valve seat (where the washer presses) or the entire cartridge. Inspect the valve seat for any nicks or corrosion; a valve seat dresser tool can sometimes fix minor imperfections. Otherwise, the entire valve cartridge may need replacement, which is a more involved process. If you’re uncomfortable with this, it’s time to call a pro.
Q5: How often should I replace parts like washers and O-rings?
A: There’s no set schedule. They wear out over time due to constant use, water quality (hard water accelerates wear), and temperature fluctuations. If you notice new leaks or drips, it’s a good time to inspect and replace them.
Q6: Can I use regular tape instead of plumber’s tape?
A: No, it’s crucial to use plumber’s tape (Teflon tape). Regular tape won’t create the watertight seal needed for threaded pipe connections. Plumber’s tape compresses to fill gaps and prevent leaks effectively.
