
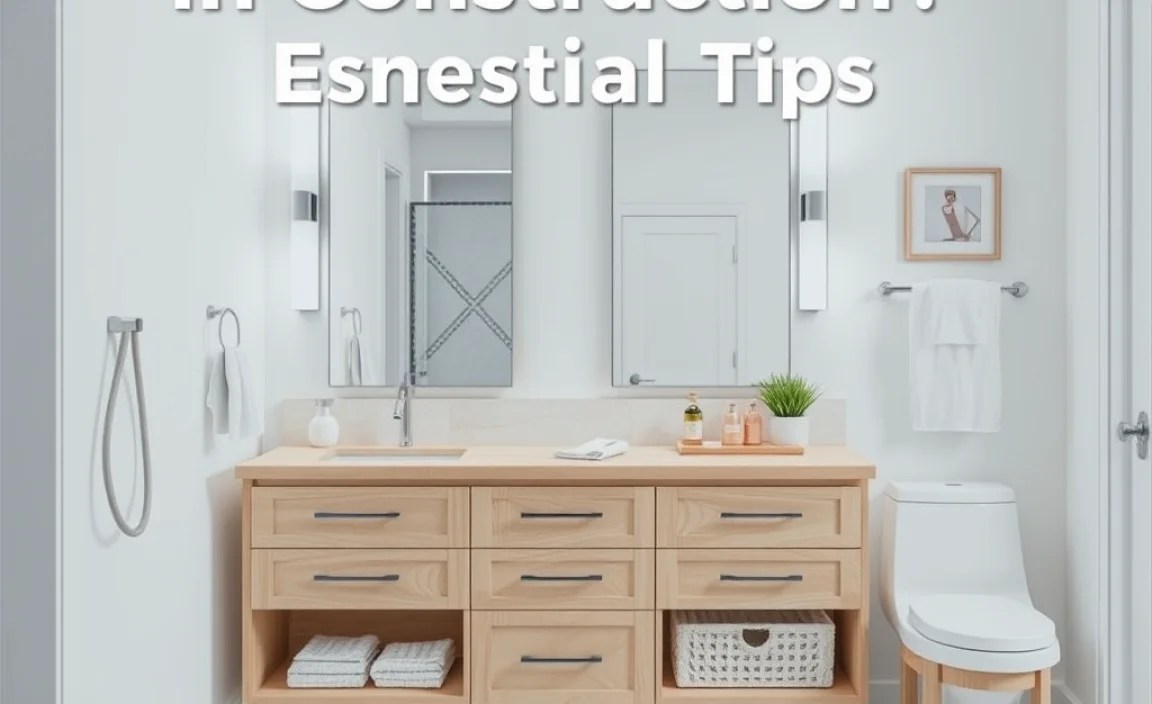
Quick Summary: Planning the layout of a vanity in construction is crucial for a functional and comfortable bathroom. Key considerations include plumbing accessibility, sufficient counter space, adequate storage, and proper clearances for doors and walking paths. A well-planned vanity ensures a smooth renovation and a beautiful, practical end result.
Hey there, DIYers and homeowners! Ever stood in a bathroom and felt like something just wasn’t quite right? Maybe there’s not enough space to move, or you constantly bump into things. Often, the culprit is a poorly planned vanity layout. It’s a common headache that can turn a dream bathroom into a daily frustration. But don’t worry! Getting the layout right from the start is totally achievable, even for beginners. We’re going to break down everything you need to know to ensure your vanity installation is a success, leading to a beautiful and super-functional bathroom space. Ready to create a bathroom that feels just right?
Understanding Vanity Layout in Construction
Choosing the perfect vanity is exciting, but its placement – the layout – is what truly makes or breaks a bathroom’s usability. In construction, this means thinking beyond just the cabinet and countertop. It involves looking at how the vanity fits within the entire bathroom space, interacting with plumbing, electrical, doors, and even the smallest of corners. A well-thought-out layout means ample legroom, easy access to storage, and no awkward maneuvering. Conversely, a hastily planned layout can lead to constant inconvenience, making even simple tasks feel like a chore.
Why Vanity Layout Matters
Think of your vanity as the command center of your bathroom. It’s where you brush your teeth, style your hair, and store all your essentials. When its placement isn’t optimal, it impacts everything.
- Functionality: You need enough space around it to open drawers and doors, and to comfortably stand and use the sink.
- Flow: The vanity’s position affects how you move around the bathroom. It shouldn’t obstruct pathways or doorways.
- Plumbing & Electrical: Proper layout ensures easy access to water supply lines, drains, and electrical outlets for lighting and appliances, which is vital for installation and future maintenance.
- Aesthetics: A well-integrated vanity contributes to the overall look and feel of the bathroom, making it feel balanced and spacious.
Getting this right in the construction phase saves a lot of headaches, and potentially costly rework, down the line. It’s all about smart planning before the tools come out!
Key Factors for an Effective Vanity Layout

Before you even pick out a vanity style, you need to consider the space you’re working with and how the vanity will fit into it. This involves a few crucial elements that will guide your placement decisions.
1. Plumbing and Drainage Considerations
This is often the first and most critical aspect. Where are your existing water supply lines and drain pipe located?
- Rough-in Locations: In new construction, plumbers will “rough-in” the pipes to specific locations. The vanity placement needs to align with these rough-ins.
- Drain Height: The drain pipe’s height relative to the cabinet floor is important. Too high, and you might have a P-trap visible or difficult to connect. Too low, and it might interfere with vanity drawers or shelving.
- Supply Lines: Ensure that the vanity cabinet has enough depth and space to accommodate the water supply valves without them protruding awkwardly or being impossible to reach.
- Modifications: If you’re set on a specific vanity location that doesn’t match the existing plumbing, be prepared for potential costs to move the pipes. Consult with a licensed plumber for this. Safety first!
Understanding your plumbing rough-ins is non-negotiable. It dictates where your vanity can go, and often, where it should go.
2. Counter Space and Sink Requirements
How much counter space do you actually need? This depends on your daily routine.
- Single vs. Double Vanity: A double vanity requires significantly more wall space and can be a focal point, but it also demands adequate room to prevent feeling cramped.
- Sink Type: Undermount sinks often allow for more usable counter space around them than drop-in sinks. Vessel sinks, while stylish, can require specific faucet heights and may not maximize counter utility.
- Workflow: Think about what you do at the counter. Do you lay out makeup? Need space for toiletries? Consider how much clear surface area you’ll want on either side of the sink.
Aim for at least 18-24 inches of clear counter space on each side of a sink in a single vanity, and 15-20 inches on each side of each sink in a double vanity for comfortable use.
3. Storage Needs and Cabinet Design
Vanities aren’t just about the surface; they’re prime real estate for storage.
- Drawer vs. Door: Drawers are fantastic for organizing smaller items like makeup and toiletries, while cabinets with doors are great for bulkier items like cleaning supplies or extra towels.
- Internal Layout: Look at the interior. Are there adjustable shelves? Are the drawers deep enough? Consider pull-out shelves or specialized organizers for maximum efficiency.
- Plumbing Obstructions: Be mindful of how the cabinet’s internal structure accommodates the plumbing. Some vanity designs have cutouts or shallower depths in the back to work around pipes.
A well-designed vanity with smart storage can declutter your entire bathroom.
4. Clearance and Accessibility
This is about ensuring the bathroom is comfortable and safe to move around in. Building codes often specify minimum clearances, which are great guidelines to follow.
- Front Clearance: You need ample space between the front of the vanity and the opposite wall or fixture (like a toilet or shower door). A minimum of 30 inches is recommended for comfortable standing and movement.
- Side Clearance: Ensure there’s enough room to open vanity doors and drawers fully, and to comfortably access the sink area. At least 15 inches of clear space on one side of the vanity is a good benchmark.
- Door Swings: Crucially, the vanity layout must not impede the swing of the bathroom door. Ensure there’s enough space for the door to open fully without hitting the vanity, toilet, or any other fixture.
- Toilet Clearance: If the vanity is near the toilet, maintain adequate distance. Most codes require at least 15 inches from the center of the toilet to any side obstruction (like a vanity or wall) and 21 inches in front.
These clearances are vital for a bathroom that feels open and easy to navigate, especially for multiple users or those with mobility considerations.
Referencing local building codes is always a smart move. For example, the International Residential Code (IRC) provides guidelines for minimum clearances in bathrooms, which you can often find on government websites like the International Code Council (ICC). While specific requirements can vary, they offer a solid foundation for safe and functional design.
Common Vanity Layout Scenarios and Tips

Let’s explore some typical bathroom setups and how to best approach the vanity layout in each.
Scenario 1: Standard Rectangular Bathroom
In a typical rectangular bathroom, the vanity is often placed along one of the longer walls, opposite the door or the toilet.
- Placement: Centering the vanity on a wall can create a balanced look, especially if it’s a single, focal-point piece.
- Double Vanities: If you’re fitting a double vanity, ensure there’s enough width to accommodate both sinks and sufficient counter space between them. Measure carefully!
- Door Swing: Always position the vanity so the main bathroom door can open completely without obstruction.
- Toilet Proximity: Keep a comfortable distance between the vanity and the toilet. Placing them equidistant from the center of the room can create a sense of symmetry.
- Storage Walls: If the vanity is on the wall opposite the entrance, consider if this wall offers space for other storage, like medicine cabinets or linen towers, without making the room feel crowded.
Scenario 2: Small Bathroom or Powder Room
Space is at a premium here, so every inch counts.
- Corner Vanities: A corner vanity can maximize floor space and offer surprisingly good storage. Ensure it allows comfortable access to the sink and doesn’t jut out too far.
- Pedestal Sinks vs. Vanities: In extremely tight spaces, a pedestal sink might be considered if storage isn’t a priority, as it offers more legroom. However, modern wall-mounted vanities or narrow console tables can provide storage with a minimal footprint.
- Depth is Key: Opt for shallower depth vanities (e.g., 18-20 inches instead of the standard 21-24 inches) if space is severely limited. This can give you crucial inches of walkway.
- Wall-Mounted Vanities: These can make a small bathroom feel larger by leaving floor space visible.
- Vertical Storage: Compensate for limited counter space with tall, narrow cabinets or shelves mounted on walls above the toilet or in unused corners.
Scenario 3: Vanity in an Alcove or Nook
An alcove can be a great place to recess a vanity, making it feel integrated and saving floor space.
- Fit Precisely: Measure the alcove meticulously. You want a vanity that fits snugly without being so tight that you can’t access the sides or the back for maintenance. Leave a small gap if possible.
- Depth Considerations: Ensure the vanity depth doesn’t make the alcove feel claustrophobic.
- Lighting: Alcoves can sometimes be dark. Plan for good task lighting above or beside the vanity.
- Plumbing Access: Ensure the plumbing rough-ins align well with the alcove’s position and that there’s enough space behind the vanity for connections and potential repairs.
Tools and Materials for Planning and Installation

While we’re focusing on layout, here are some essential tools and materials that will help you visualize and execute your plan:
Essential Measuring and Layout Tools:
- Tape Measure: A reliable, long tape measure is your best friend for accurate measurements of walls, existing plumbing, and potential vanity sizes.
- Pencil and Paper/Sketchpad: For drawing out your ideal layouts, noting measurements, and marking potential fixture locations.
- Level: Crucial for ensuring your vanity is installed straight and even, preventing issues with doors, drawers, and aesthetics.
- Stud Finder: Essential for locating wall studs, vital for securely mounting heavy vanities and ensuring proper support for plumbing connections or any wall-mounted elements.
- Painter’s Tape: Use this to mark out the proposed vanity footprint on the floor and on the walls. This is a fantastic way to visually check clearances and flow.
Materials to Consider:
- Vanity Cabinet: The physical unit you’ll be installing.
- Countertop Material: Granite, quartz, marble, laminate, etc.
- Sink: Undermount, drop-in, vessel.
- Faucet and Drain Assembly: Ensure compatibility with your sink and plumbing.
- Plumbing Supplies: P-traps, supply lines, shut-off valves (if you are doing plumbing work yourself, which requires expertise).
- Mounting Hardware: Screws, anchors appropriate for your wall type and vanity weight.
For plumbing tasks, always use materials rated for potable water. If you’re unsure about any plumbing or electrical aspects, it’s always best to consult or hire a professional. For example, the EPA’s WaterSense program offers insights into water-efficient plumbing products and practices, which can be relevant even in layout planning.
Step-by-Step Guide to Planning Your Vanity Layout

Here’s a simplified approach to planning your vanity’s position. Think of this as your initial blueprint phase.
Step 1: Measure Your Space Accurately
- Measure Room Dimensions: Note the length, width, and height of the entire bathroom.
- Locate Existing Plumbing: Measure the exact position of the water supply valves and the center point of the drainpipe from the nearest walls. Note the height of the drainpipe from the floor.
- Mark Door Swings: Open the bathroom door and the vanity’s intended door (if it exists) fully. Mark the arc they sweep on the floor and walls.
- Identify Obstructions: Note the placement of toilets, showers, tubs, windows, vents, and electrical outlets.
Step 2: Determine Vanity Size and Type
- Choose Vanity Width: This is often dictated by available wall space, accounting for side clearances.
- Select Depth: Consider standard depths (21-24 inches) but be prepared to go shallower (18-20 inches) if needed. Measure the front clearance you have.
- Decide on Height: Standard vanity height is around 30-34 inches, but can be adjusted for comfort (e.g., taller vanities for less bending).
- Single vs. Double Sink: This directly impacts the required width.
Step 3: Sketch and Mock-Up Your Layout
- Draw to Scale: On paper, draw a birds-eye view of your bathroom. Mark all fixed elements and then sketch in potential vanity placements.
- Use Painter’s Tape: On the actual floor, use painter’s tape to outline the dimensions of your potential vanity. This is a visual test drive! Walk around it. Open imaginary doors and drawers.
- Check Clearances: Ensure your taped-out vanity allows for the minimum clearances discussed earlier (e.g., walkability, door swings, toilet access).
Step 4: Align with Plumbing and Utilities
- Overlay Plumbing: Ensure your chosen vanity location can accommodate the existing (or planned) plumbing rough-ins without excessive modification or awkward pipe placement within the cabinet.
- Electrical Outlets: If you need outlets behind the vanity for hairdryers or other items, ensure they will be accessible and correctly positioned within the vanity’s footprint or in a nearby wall.
Step 5: Finalize and Mark for Installation
- Confirm Placement: Once you’re happy with the mock-up and clearances, confirm the exact final placement.
- Mark Studs: Use your stud finder to mark the locations of wall studs where the vanity will be mounted. This is critical for secure installation.
- Mark Plumbing and Electrical: If precise cuts or adjustments are needed for plumbing or electrical access within the vanity cabinet, mark these locations carefully.
This iterative process of measuring, sketching, and mock-up is invaluable for preventing costly mistakes and ensuring satisfaction with the final layout.
Table: Standard Bathroom Clearances (Beginner-Friendly)
Understanding basic clearances helps you visualize the space needed around your vanity. These are general guidelines; always check local building codes!
| Fixture/Element | Minimum Clearance | Notes |
|---|---|---|
| Vanity Front | 30 inches (width) | Space between vanity front and opposite wall/fixture for standing and comfortable use. |
| Vanity Side | 15 inches (width) | Clearance on one side for opening doors/drawers and access. |
| Toilet Center to Side Wall/Vanity | 15 inches (width) | Essential for comfortable toilet use and accessibility. |
| Toilet Front | 21 inches (width) | Space in front of the toilet bowl for comfortable use. |
| Door Swing | Clearance for full swing | Ensure the main bathroom door opens without hitting the vanity, toilet, or shower. |
These clearances ensure your bathroom isn’t just functional but also comfortable and safe to navigate daily. It’s about creating a pleasant user experience.
Common Mistakes to Avoid in Vanity Layout
Even with the best intentions, beginners can stumble. Here are a few pitfalls to steer clear of:
- Ignoring Plumbing Rough-ins: Rushing into buying a vanity without knowing your existing plumbing location is a recipe for costly rework.
- Insufficient Clearances: Cramming a vanity into a space that’s too small makes the bathroom feel cramped and difficult to use. Don’t sacrifice essential walkways or door swings.
- Not Considering Door Swings: This is a BIG one. A vanity that blocks the bathroom door is a daily annoyance. Always test this out!
- Overlooking Storage Access: A vanity might look good, but can you actually open its drawers and doors where it’s placed? Make sure there’s.
