
Quick Summary: Ready to remove an exhaust fan easily? Follow these simple, safe steps: turn off power, remove the grille, detach the motor housing, disconnect wiring, and pull out the fan. We’ll guide you through each stage, ensuring a smooth, stress-free DIY project for any homeowner.
Is that old bathroom exhaust fan looking a bit tired, or perhaps you’re upgrading to a newer model? The thought of tackling this home maintenance task might seem a bit daunting, especially if you’re new to DIY projects. You might be standing there, wondering where to even begin, and worried about making a mistake. But don’t you worry! Removing an exhaust fan is actually a straightforward process that anyone can manage with the right guidance.
We’re here to break it down into simple, easy-to-follow steps. By the end of this guide, you’ll feel confident and ready to get the job done safely and efficiently. We’ll cover everything you need to know, from preparation to the final removal, so you can achieve a clean, successful outcome. Let’s get started on making this task a breeze!
Why You Might Need to Remove an Exhaust Fan

There are several good reasons why you might find yourself needing to remove an exhaust fan. Often, it’s simply a matter of age and functionality. Exhaust fans, like any mechanical component, don’t last forever. They can become noisy, inefficient, or stop working altogether.
Other common scenarios include:
- Upgrading to a Newer Model: You might want a more powerful, quieter, or energy-efficient fan, or one with added features like a light or heater.
- Maintenance or Repair: Sometimes, you need to remove the fan to clean it thoroughly or to access other parts of your ventilation system.
- Home Renovations: During a bathroom or kitchen remodel, you might need to remove the existing fan to make way for structural changes or different fixture placements.
- Troubleshooting Issues: If a fan is making strange noises or not running, removing it can help diagnose the problem or facilitate a replacement.
- Selling Your Home: Addressing a faulty or outdated exhaust fan can be a small but important improvement for home staging.
Whatever your reason, understanding how to remove it safely is key. This guide is designed to make that process as simple and clear as possible, so you can proceed with confidence.
Safety First: Essential Precautions Before You Start

Before we even think about touching a screwdriver, let’s talk about safety. This is the most crucial part of any DIY project, and electrical work is no exception. Taking a few simple precautions will ensure you don’t get hurt and prevent any damage to your home’s electrical system.
The overwhelming majority of exhaust fans are connected to your home’s electrical wiring. Therefore, the absolute first and most important step is to cut off the power to the fan. Do not rely on just flipping the switch off. You need to go to the source.
Here’s what you must do:
- Identify the Correct Circuit Breaker: Locate your home’s electrical panel. This is usually in a basement, garage, or utility closet. You’ll need to find the breaker that controls the exhaust fan. If your panel isn’t clearly labeled, you might need to do some testing.
- Turn Off the Power: Once you’ve identified the breaker, flip it firmly to the “OFF” position. For added safety, especially if you’re unsure, you can consider also turning off the main breaker for that area of your house.
- Test for Power: After turning off the breaker, go back to the bathroom or room where the fan is located and try to turn on the light switch that controls the fan. It should absolutely not turn on. If it does, go back to the breaker box and try the next likely breaker until you are certain the power is off. Do not proceed until you are 100% sure there is no power.
- Use Safely Rated Tools: Ensure your tools are in good condition. For electrical work, it’s a good idea to use insulated tools, though with the power completely shut off, standard tools are generally fine.
- Work with Good Lighting: When the power is off, you’ll need plenty of light. Use a good flashlight or a battery-powered work light.
- Have a Helper if Needed: If you’re working in a tight space or feel uncomfortable, don’t hesitate to ask a friend or family member to assist you.
Remember, if at any point you feel unsure or overwhelmed, it’s always best to consult a qualified electrician. Your safety is paramount.
Gathering Your Tools and Supplies

Before you start unscrewing anything, let’s make sure you have all the necessary tools and supplies on hand. Having everything ready will make the process go much smoother and prevent you from having to stop mid-task to find something you need.
Here’s a list of what you’ll likely need to remove an exhaust fan:
- Screwdriver Set: You’ll probably need a Phillips head screwdriver for removing the grille and possibly other components. A flathead screwdriver might also come in handy for prying or adjusting.
- Wire Strippers/Cutters: If you need to disconnect wires and are not comfortable disconnecting them at existing wire nuts, these will be essential.
- Pliers: Needle-nose pliers can be very useful for manipulating small wires or screws.
- Utility Knife or Putty Knife: This can help gently release any caulk or paint that might be sealing the fan housing to the ceiling.
- Stepladder: A stable stepladder is essential to safely reach the exhaust fan. Make sure it’s sturdy and placed on a level surface.
- Drop Cloth or Old Sheets: To protect your floor or furniture below from any dust or debris that might fall during the removal process.
- Gloves: To protect your hands from dust and sharp edges.
- Safety Glasses: To protect your eyes from falling debris.
- Flashlight or Headlamp: Crucial for seeing clearly, especially after the power is turned off.
Optional, but helpful:
- Work Light: A portable work light can be very useful if the room lighting is insufficient.
- Wire Nuts: If you are replacing the fan and need to cap off the existing wires securely.
- Duct Tape: To temporarily seal the opening if you’re not immediately installing a new fan.
Having these items ready will turn a potentially frustrating task into a manageable one. Now that you’re prepared, let’s dive into the step-by-step removal process.
Step-by-Step Guide: How to Remove an Exhaust Fan Easy
Let’s get this done! Follow these steps carefully, and you’ll have that exhaust fan out in no time. Remember, safety first – double-check that the power is off before you begin!
Step 1: Turn Off the Power to the Fan
As we’ve stressed, this is non-negotiable. Go to your electrical panel and flip the breaker that controls the exhaust fan to the “OFF” position. Then, go to the fan location and test its switch to confirm there’s no power. If your fan is also controlled by a light switch in the room, ensure that switch is in the “OFF” position as well.
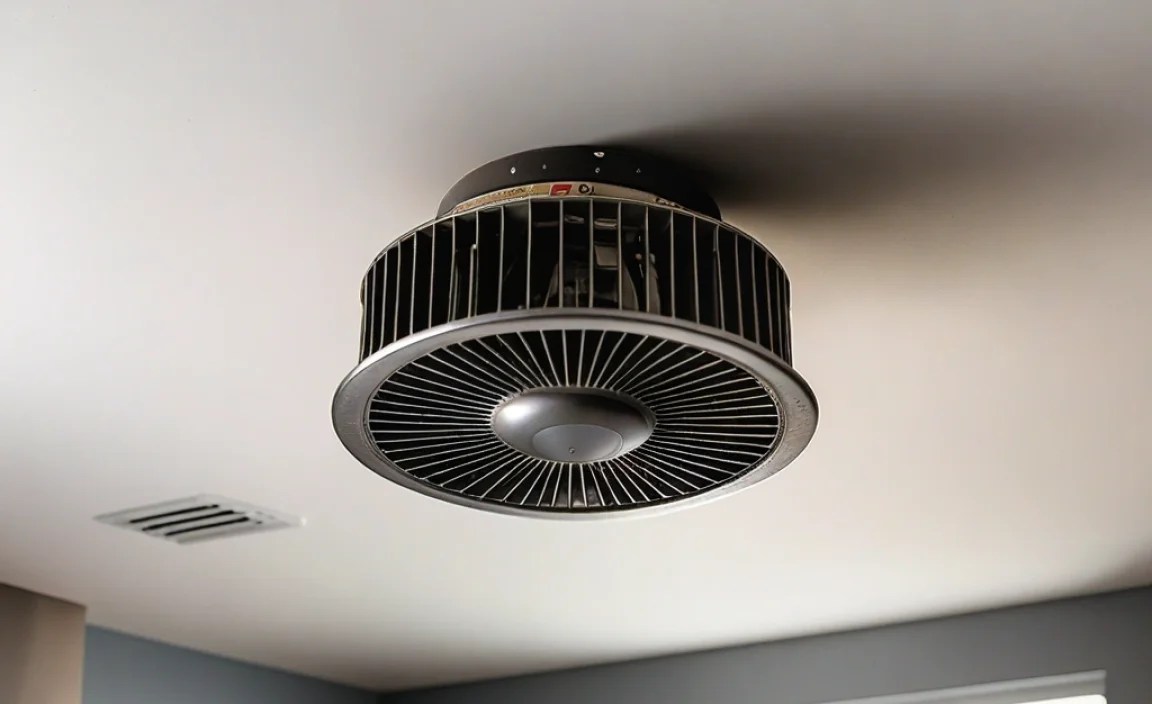
Step 2: Remove the Fan Grille
Most exhaust fan grilles are attached with small springs or clips, or sometimes small screws. Look closely at the edges of the grille (the part you see in the room). You might see small clips that can be gently pushed inward with a flathead screwdriver to release the grille, or the grille might simply pull down. Some older models may have two small screws holding the grille in place.
- Gently pull the grille downwards.
- If it’s resistant, look for screws or clips.
- If there are springs, you might need to grasp the grille and pull firmly but carefully downwards. The springs are usually small and located on the sides.
Once the grille is off, you’ll have better access to the fan’s interior components.
Step 3: Detach the Fan Housing and Motor Assembly
With the grille removed, you’ll see the motor and fan blades. The housing unit containing the motor is typically screwed into the joists above your ceiling. You’ll need to locate these screws. They are often along the edges of the housing.
- Look for screws holding the main fan housing to the ceiling joists or the framing.
- Use your screwdriver to remove these screws. Keep them in a safe place, as you might need them if you decide to replace the fan yourself or for a different project.
- Some fan housings might also be held in place by tabs or clips. You may need to gently wiggle or pry the housing away from the ceiling once the screws are removed.
Step 4: Disconnect the Wiring
This is where you’ll be directly dealing with electrical wires. Even though the power is off, it’s crucial to be careful and methodical.
- Locate where the fan’s wiring connects to the house’s wiring. This is typically done using wire nuts (small plastic caps that twist onto the ends of wires).
- Carefully twist off the wire nuts. You might need pliers for a good grip.
- Once the nuts are off, gently pull the wires apart. You’ll usually see three wires: black (hot), white (neutral), and green or bare copper (ground).
- If you plan on immediately installing a new fan, you can leave the house wires accessible. If you are not installing a new fan right away, the proper way to cap off the house wires is a safety measure. Use new wire nuts to cover the ends of the black, white, and ground wires from your house’s electrical system.
Note: If the wiring is not done with wire nuts (e.g., permanently connected or using terminal blocks), proceed with extreme caution. If you are unsure how to safely disconnect these, it’s best to call an electrician. Always refer to local building codes for proper electrical work. The U.S. Department of Energy offers resources on efficient ventilation practices.
Step 5: Remove the Fan Unit from the Ceiling
Now that the fan is detached from the ceiling structure and disconnected from the wiring, it should be ready to come out completely.
- Gently pull the fan unit down and away from the ceiling opening.
- Be prepared for it to be a bit heavier than you might expect, and watch out for any dust or debris that might fall from the ceiling cavity.
- If the fan seems stuck, check again for any missed screws or clips. You might also need to use your utility knife to carefully cut through any sealant or paint around the fan housing.
Congratulations! You’ve successfully removed the exhaust fan. You’ll now have an opening in your ceiling where the fan used to be.
What to Do With the Opening
Once the old exhaust fan is out, you’ll be left with an opening in your ceiling. What you do with it depends on your plans:
- Installing a New Fan: The most common next step is to install a replacement or an upgraded exhaust fan. You can use this guide in reverse, or follow the instructions specific to your new fan model.
- Leaving it Open Temporarily: If you’re not ready to install a new fan, you’ll need to temporarily cover the opening to prevent drafts, dust, and pests from entering your home. You can use a piece of plywood or rigid insulation board cut to size and temporarily taped or screwed in place.
- Patching and Repairing: If you no longer need ventilation in that space, you might want to patch the hole. This typically involves installing backing material, cutting a piece of drywall to fit, screwing it in place, and then taping, mudding, and painting to blend it seamlessly with the surrounding ceiling. This is a more involved drywall repair task.
For immediate use, consider purchasing a simple air vent cover or a piece of cardboard taped securely over the opening until you can implement a more permanent solution.
Troubleshooting Common Issues
Even with the best preparation, sometimes things don’t go exactly as planned. Here are a few common issues you might encounter and how to address them:
| Problem | Possible Cause | Solution |
|---|---|---|
| Grille won’t budge. | Stuck with paint or caulk; hidden screws. | Carefully score around the edge with a utility knife. Double-check carefully for small screws. |
| Screws won’t turn or are stripped. | Rusted or damaged screw head. | Try a slightly larger Phillips head bit. If stripped, use a screw extractor tool designed for this purpose. |
| Fan housing is stuck. | Hidden clips or attached to ductwork. | Inspect for any remaining fasteners. Gently pry if possible, or check if it’s connected to a flexible duct that needs to be detached. |
| Can’t locate the correct breaker. | Panel is unlabeled or mislabeled. | Systematically flip breakers off/on and test the fan’s operation each time. Or, consult your home’s electrical schematics if available. Tag the correct breaker clearly once identified. |
| Sparking or shock when trying to disconnect wires. | Power is still on! | IMMEDIATELY stop. Return to the breaker panel and triple-check that the correct breaker is OFF. If still unsure, call an electrician. |
Remember, taking your time and assessing each situation carefully is key. If you’re dealing with electrical issues beyond simple wire nut disconnection, it’s always safer to call a professional. Organizations like OSHA provide valuable information on electrical safety standards.
When to Call a Professional
While removing an exhaust fan is generally a manageable DIY task, there are situations where it’s best to hand it over to a professional electrician or contractor:
- Electrical Uncertainty: If you are uncomfortable with any aspect of working with electricity, or if the wiring looks old, damaged, or unusual.
- Complex Installations: If the fan is part of a more complex ventilation system, is connected to a custom control panel, or is integrated with a light fixture in a way that seems uncommon.
- Structural Issues: If you encounter unexpected structural problems in the ceiling or attic space during removal, such as water damage or faulty framing.
- Lack of Proper Tools: If you don’t have the necessary tools and are unwilling or unable to acquire them.
- Persistent Problems: If you’ve tried to remove it and encountered significant difficulties or damage, it’s time to call for expert help.
A professional has the experience, tools, and knowledge to handle these situations safely and efficiently, preventing potential hazards and ensuring the job is done correctly. For guidance on finding qualified professionals, resources like the National Association of Home Builders (NAHB) offer tips on hiring contractors.
Conclusion
There you have it! You’ve successfully learned how to remove an exhaust fan with straightforward, proven steps. From ensuring electrical safety by turning off the power at the breaker to carefully detaching the grille, housing, and wiring, each stage is designed to be handled by a beginner with confidence. You’ve also learned what to do with the resulting opening and when it’s wise to call in the experts.
Removing an old or unwanted exhaust fan is a rewarding DIY accomplishment that opens the door to upgrades, repairs, or renovations. By following this guide, you’ve not only completed a practical home maintenance task but also gained valuable experience. Remember, preparation and a focus
