
To remove faucet tips, you’ll need to turn off the water supply, gather basic tools like a screwdriver and pliers, and carefully detach any decorative caps and screws holding the aerator in place. Gentle force and the right tools ensure a smooth removal without damaging your faucet.
Dealing with a stubborn faucet tip, or aerator, can be a bit of a puzzle. If your faucet’s spray has become weak, uneven, or it’s just time for a good cleaning, knowing how to remove that little tip is a super handy skill. Sometimes, mineral deposits build up, or small debris can get lodged, affecting the water flow. Don’t worry if you’ve never done it before; it’s a straightforward task! We’ll walk you through it, step-by-step, making sure you feel confident and can get your faucet working perfectly again. Ready to tackle this common home maintenance challenge?
Why Am I Removing My Faucet Tip Anyway?

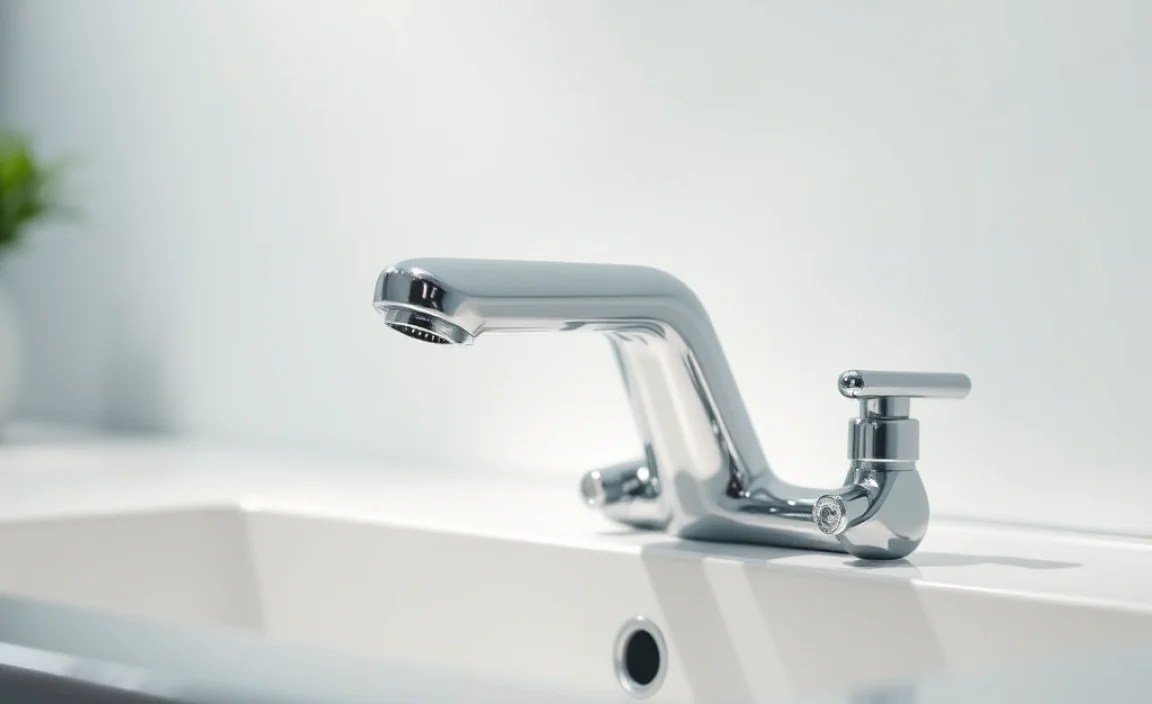
You might be wondering what exactly a faucet tip is and why you’d ever need to remove it. The “faucet tip” is more commonly known as the aerator. It’s that small, circular component screwed onto the very end of your faucet spout. Its main job is to mix air with water. This does a couple of fantastic things: it reduces water consumption (saving you money on your water bill!) and it softens the stream, preventing splashing.
So, why remove it?
- Improved Water Flow: Over time, minerals from your water (like calcium and magnesium) can build up inside the aerator, creating a crusty layer that restricts water flow. This leads to a weak or sputtering stream.
- Cleaning and Maintenance: Regular cleaning can prevent build-up and keep your faucet working efficiently. It’s also a good idea to remove it if you’ve had any plumbing work done, as small bits of debris can sometimes get into the pipes and end up at the faucet.
- Replacement: If the aerator is damaged, or if you want to install a different type (e.g., one with a different flow rate or a sprayer function), you’ll need to remove the old one.
Think of it like clearing a tiny traffic jam in your faucet!
Tools You’ll Need: The Simple Toolkit

The good news is that you don’t need a professional plumber’s arsenal to tackle this. Most of the time, you’ll find everything you need right in your home toolbox. Here’s a simple list of what might come in handy:
- Adjustable Wrench or Pliers: These are key for gripping the aerator if it’s stuck. Look for ones with rubber grips or consider wrapping the jaws with a cloth to protect your faucet’s finish.
- Screwdriver (Flathead and/or Phillips): Some faucet aerators have decorative caps that can be gently pried off with a small flathead screwdriver.
- Old Cloth or Rag: Essential for protecting your faucet’s finish from scratches when using tools, and for wiping away any drips or debris.
- Small Bowl or Container: Useful for holding small parts if you fully disassemble the aerator.
- Old Toothbrush or Cleaning Brush: For scrubbing away mineral deposits once the aerator is removed.
- Vinegar (White or Apple Cider): A natural and effective agent for dissolving mineral build-up.
- Penetrating Oil (Optional): For extremely stubborn aerators, a small amount of penetrating oil can help loosen threads. Use sparingly and according to product instructions.
Having these items ready before you start will make the process much smoother and quicker. It’s always better to be prepared!
Step-by-Step Guide: Removing Your Faucet Aerator Like a Pro

Now, let’s get down to business. Follow these steps carefully, and you’ll have that aerator out in no time. Remember, patience is your best friend here!
Step 1: Turn Off the Water Supply
This is the absolute MOST important first step for any plumbing task. You don’t want any unexpected water surprises!
- Locate the shut-off valves for your faucet. These are usually found underneath the sink, attached to the pipes leading up to the faucet. There will typically be one for hot water and one for cold water.
- Turn these valves clockwise until they are completely closed. You might need a wrench for some older valve types.
- Once the valves are closed, turn on the faucet to drain any remaining water in the pipes and confirm that the water is indeed off. Let it run for a few seconds until the water stops flowing.
If you can’t find individual shut-off valves or they don’t work, you’ll need to turn off the main water supply to your house. This valve is usually located where the water pipe enters your home (e.g., in the basement, garage, or utility closet).
Step 2: Protect Your Faucet
Before you start applying any pressure or using tools, it’s crucial to protect your faucet’s finish. New faucets can be expensive, and we don’t want to scratch or damage them.
- Wrap a soft cloth around the base of the aerator where you’ll be applying your wrench or pliers. This acts as a buffer between the metal tool and the faucet material.
- If you’re using pliers, consider wrapping the jaws too, or use pliers specifically designed for plumbing that have protective coverings.
Step 3: Identify the Aerator Type and Removal Method
Faucet aerators come in a few different designs, and how you remove them can vary slightly.
Type 1: External Thread Aerator
This is the most common type. The aerator itself screws directly into the end of the faucet spout. You’ll see the threads on the outside of the spout that the aerator covers.
Type 2: Internal Thread Aerator
Less common, but these aerators have threads on the inside. The aerator itself is usually flush with the end of the spout, and you might need a special tool (often provided with a new aerator, or available at hardware stores) to grip it.
Type 3: Aerator with a Decorative Cap
Some faucets have a decorative cap that covers the aerator. This cap might screw off or might be held on by a small set screw or clip.
Step 4: Attempt Manual Removal (If Possible)
Many aerators can be removed by hand, especially if they aren’t too tight or calcified.
- Grip the aerator firmly but gently.
- Try to turn it counter-clockwise (lefty-loosey).
- If it budges even slightly, continue by hand.
If it feels completely stuck or won’t budge with gentle hand pressure, it’s time to bring in your tools.
Step 5: Using Tools for Removal
This is where your wrench or pliers come in.
- Place the cloth-wrapped jaws of your adjustable wrench or pliers around the aerator body. Make sure you have a good grip on the metal part of the aerator, not any plastic components if present.
- Apply gentle, steady pressure counter-clockwise. Avoid sudden, jerky movements, as this can damage the faucet.
- If the aerator still doesn’t move, try very slightly tightening it first (clockwise) for a quarter turn. Sometimes this can break the seal of mineral deposits, allowing it to loosen more easily when you turn it counter-clockwise again.
- If it’s still incredibly stubborn, a tiny spritz of penetrating oil (like WD-40) around the seam can help. Let it sit for a few minutes (check the product label for specific times). Be very careful not to get oil inside the faucet or onto sensitive finishes. Wipe up any excess immediately.
For aerators with decorative caps: If you suspect a cap needs removing, look for a seam. You might be able to gently pry the cap off with a small flathead screwdriver. Be extremely careful not to gouge the faucet. Some caps unscrew counter-clockwise.
Step 6: Dealing with Stuck Aerators
If after all these attempts, the aerator still won’t budge, it might be severely corroded or fused. In such cases:
- Soaking: You can try applying a vinegar-soaked rag directly to the aerator and letting it sit for a few hours or overnight. This helps dissolve mineral deposits. Then, try with the wrench again.
- Heat (Use with extreme caution!): For very old, stubborn aerators on metal faucets (not plastic!), a hairdryer on a medium setting held against the aerator for a few minutes can cause the metal to expand slightly, potentially loosening the threads. Be very careful not to overheat, especially if there are plastic parts nearby, and always have a damp cloth ready.
- Aerator Removal Key: For recessed or internal-thread aerators, you might need a specific aerator wrench or removal key. These have small nubs that fit into slots or notches designed for them. You can often buy a universal kit at hardware stores.
If all else fails, it might be time to consider calling a plumber to avoid causing damage to your faucet or sink. However, for most DIYers, the steps above will be sufficient.
Step 7: Disassemble and Clean the Aerator
Once you have the aerator off, you’ll likely see it’s composed of a few parts: the outer casing, a sieve or screen, and possibly a flow-restricting washer or O-ring.
- Most aerators can be unscrewed by hand. You might need to use your wrench lightly again if the outer casing is tight.
- Lay out the parts on your cloth, making note of how they fit together. Taking a quick picture with your phone can be helpful if you’re unsure.
- Use an old toothbrush to gently scrub away any visible mineral deposits or debris from each part.
- For tougher build-up, soak the disassembled aerator parts in a small bowl of white vinegar for an hour or two. You can also use CLR (Calcium, Lime, Rust Remover) if vinegar isn’t strong enough, but follow product instructions carefully and rinse thoroughly. The EPA WaterSense program offers great tips on water conservation, which aerators help with by reducing unnecessary water use.
- Rinse all parts thoroughly under running water.
- Reassemble the aerator carefully, ensuring all parts are back in their original positions and gaskets or O-rings are seated properly.
Step 8: Reinstall the Aerator
Putting the aerator back on is the reverse of removal.
- Ensure the faucet threads are clean.
- Screw the reassembled aerator back into the faucet spout, turning clockwise (righty-tighty).
- Hand-tighten it as much as you comfortably can.
- If it still feels a bit loose, you can use your wrench with the cloth again for a very gentle snug-up – just a tiny turn. Overtightening can strip the threads or make future removal difficult.
Step 9: Turn the Water Back On and Test
The moment of truth!
- Slowly turn the hot and cold water shut-off valves back on (counter-clockwise).
- Turn the faucet on to check for leaks around the aerator.
- Observe the water flow. It should be smooth, strong, and splash-free.
If you notice any leaks, it might mean the aerator needs to be tightened a touch more, or an O-ring might be out of place. If the flow is still poor, double-check that all parts of the aerator are clean and correctly assembled.
Troubleshooting Common Aerator Issues
Even with the best intentions, you might run into a hiccup. Here are some common problems and how to solve them.
| Problem | Possible Causes | Solutions |
|---|---|---|
| Aerator won’t unscrew | Mineral deposits (calcification), corrosion, overtightening | Use a cloth-covered wrench/pliers, gentle but firm pressure, penetrating oil, vinegar soak. Try slightly tightening first. |
| Leaking after reinstallation | Aerator not tight enough, damaged/missing O-ring or washer, debris on threads | Tighten gently, ensure O-ring is in place and undamaged. Clean faucet threads. |
| Weak or sputtering water flow | Aerator not fully clean, debris in faucet lines, kinked supply line (rare) | Ensure aerator is thoroughly cleaned and reassembled correctly. Flush faucet lines by running water without the aerator briefly if comfortable. |
| Threads on faucet spout stripped | Overtightening when removing or installing, cross-threading | This is a more serious issue. May require faucet replacement or repair by a professional. |
| Aerator casing breaks during removal | Material fatigue, overtightening, excessive force | Carefully remove remaining pieces (may need pliers or a screw extractor). Replace the entire aerator. |
It’s good to know that some issues are more common than others. Mineral build-up is probably the most frequent culprit, and a good cleaning usually solves it. If you encounter stripped threads, that’s a more complex repair, but it’s rare with typical aerator maintenance.
When to Call a Professional

While removing and cleaning a faucet aerator is a perfect beginner DIY task, there are times when you should step back and call in a professional plumber. These situations include:
- If you have turned off the water supply valves, but water still comes out forcefully, indicating the valves may be faulty.
- If you suspect the threads on your faucet spout are damaged or stripped.
- If you’ve tried all the methods above, including soaking and gentle heat, and the aerator absolutely will not budge, and you risk damaging the faucet itself.
- If you’re uncomfortable at any point, especially when dealing with water shut-off valves or potentially damaging components.
- If you’ve replaced the aerator and the problem persists (indicating a deeper issue within the faucet or plumbing).
A plumber has specialized tools and expertise to handle complex or risky situations safely and efficiently. Don’t hesitate to lean on their skills when needed!
Frequently Asked Questions About Removing Faucet Tips
Q1: How do I know if my faucet aerator is clogged?
You’ll usually notice a weaker water stream, an uneven spray pattern, or sputtering. If the water pressure seems fine at other fixtures but is low at this specific faucet, the aerator is a prime suspect.
Q2: Can I spray the aerator with lubricant first?
Yes, a small amount of household penetrating oil (like WD-40) can help loosen stubborn aerators. Ensure your water supply is off, and use it sparingly around the seam where the aerator meets the spout. Always wipe away excess and be cautious around finishes.
Q3: My aerator seems to be made of plastic. Can I still use a wrench?
Be extra careful with plastic aerators and spouts. Plastic is more prone to cracking or stripping. If possible, try unscrewing it by hand first. If you must use a tool, use pliers with rubber grips or wrap the plastic with a thick cloth, apply minimal pressure, and try to protect the surrounding faucet material.
Q4: What if I lose a small part of the aerator when taking it apart?
If you’ve disassembled the aerator and lost a washer, O-ring, or screen, it’s usually best to buy a new aerator. Replacement aerators are inexpensive and readily available at hardware stores. Make sure to get one that matches the thread size and type of your faucet.
Q5: How often should I clean my faucet aerator?
This depends heavily on your water quality. If you have hard water, you might want to clean it every 3-6 months. If your water is soft and you don’t see any issues, once a year is often sufficient. A good rule of thumb is to clean it whenever you notice a decrease in water flow or an uneven spray.
Q6: What is the “size” of an aerator?
Aerators are defined by their thread size. Common sizes for bathroom faucets are 15/16″ male or 55/64″ female. Kitchen faucets often use larger sizes. If you need a replacement, you can measure the diameter where it screws in, or more reliably, bring the old one to a hardware store to match the threads. Understanding plumbing terms like thread size can be helpful.
