
Bolded Quick Summary: Leaky faucets are common, but fixing them is within your DIY reach! Learn how to seal a faucet near you with simple tools and clear steps to stop drips and save water. This guide covers common faucet types and essential fixes for immediate relief.
A dripping faucet can be more than just annoying; it’s a constant reminder of wasted water and potentially higher utility bills. But don’t let that drip keep you up at night! Many common faucet leaks are surprisingly easy to fix yourself. You don’t need to be a plumbing wizard to tackle this. With a few basic tools and this step-by-step guide, you’ll be able to seal that leaky faucet and enjoy a quiet, water-efficient home.
We’ll walk you through identifying the common culprits behind your faucet’s drips and how to address them, no matter what type of faucet you have. Get ready to impress yourself with your DIY skills and reclaim your peace!
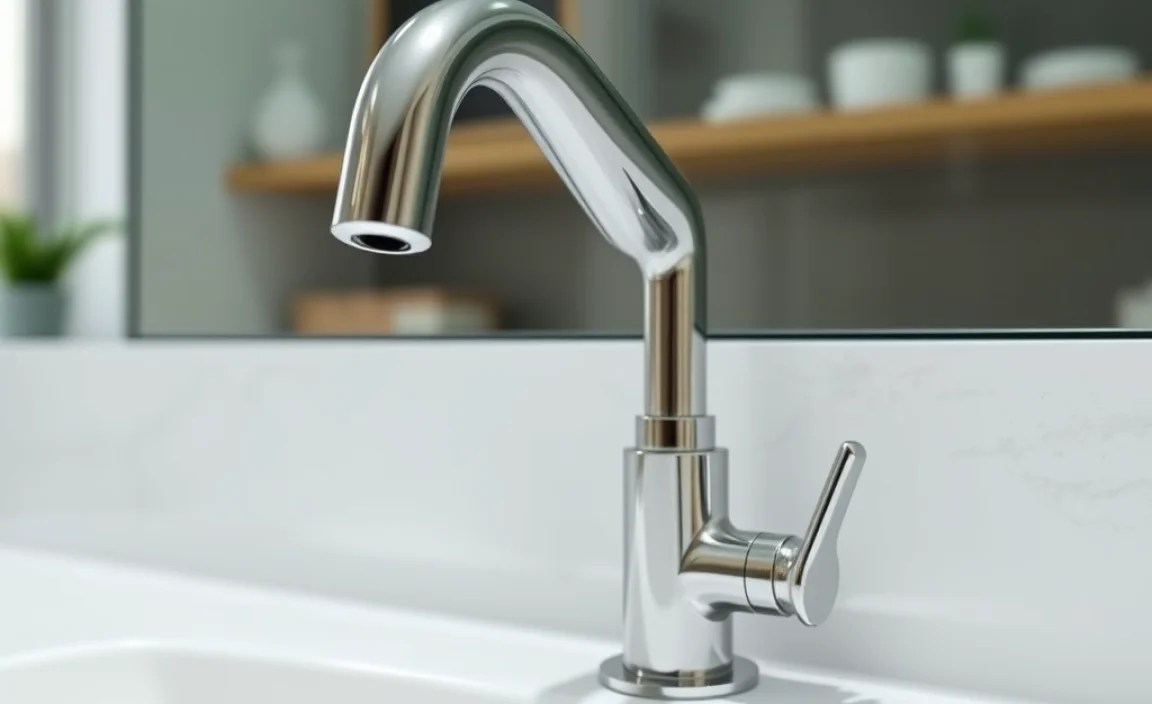
Why is My Faucet Leaking? Understanding the Common Culprits

Before you can fix a leaky faucet, it helps to understand why it’s leaking. Most faucet drips happen because a small, inexpensive part inside has worn out or become loose. Think of your faucet like a complex system, and these tiny worn-out parts are like a tiny hole in a tire – they cause the whole thing to underperform.
The most common reasons for leaks involve:
- Worn-out washers: These are small, rubbery discs that create a seal. Over time, they can harden, crack, or get dislodged.
- Damaged O-rings: These are small rubber rings that create a watertight seal around the faucet’s central stem or spindle. Like washers, they can degrade.
- Loose parts: Sometimes, a component within the faucet assembly can simply loosen up over time due to vibrations or regular use.
- Corroded valve seats: This is the surface where the washer presses to stop water flow. If it’s corroded or pitted, it won’t seal properly.
Understanding these common issues helps us zero in on the fix. The good news is that most of these problems can be resolved with simple maintenance and readily available replacement parts.
Essential Tools You’ll Need to Seal a Faucet

Gathering the right tools before you start is key to a smooth and successful repair. You don’t need a professional’s toolbox; most of these items are likely already in your home or are inexpensive to purchase. Having them ready will prevent frustration later.
Here’s a list of the most common tools that will help you seal a faucet:
- Adjustable Wrench: This is your go-to for loosening and tightening nuts and bolts of various sizes.
- Pliers (Slip-joint or Channel-lock): Useful for gripping and holding parts, especially when they’re stubborn.
- Screwdriver Set (Phillips and Flathead): Faucets often use different types of screws, so having both is essential.
- Plumber’s Grease (Silicone Grease): This specialty lubricant helps create a better seal and makes reassembling parts easier. It also protects rubber components.
- Replacement Parts: This is crucial! You’ll likely need new washers, O-rings, or maybe even a new cartridge, depending on your faucet type. It’s often best to buy a variety pack for common faucet brands if you’re unsure.
- Old Rags or Towels: For cleaning up water and protecting your sink or vanity.
- Bucket: To catch any residual water when you disconnect parts.
- Utility Knife or Small Pick: Useful for gently prying out old O-rings or washers.
Pro-tip: Before you buy replacement parts, try to identify your faucet’s brand and model. Many manufacturers have diagrams and parts lists available on their websites. For example, I Can Supply offers a helpful guide on identifying faucet parts, which can be a great starting point.
| Tool | Purpose | Why It’s Essential |
|---|---|---|
| Adjustable Wrench | Loosening/tightening nuts | Versatile for various nut sizes |
| Pliers | Gripping parts | Aids in handling stubborn or small components |
| Screwdriver Set | Removing screws | Accommodates different screw types found in faucets |
| Plumber’s Grease | Lubricating and sealing | Ensures proper seal and smooth assembly of rubber parts |
| Replacement Parts | Fixing the leak | The actual components that resolve the worn-out issue |
Step-by-Step Guide: How to Seal a Leaky Faucet
Let’s get down to business! Fixing a dripping faucet is a methodical process. The key is to work carefully and systematically. We’ll break this down into general steps that apply to most faucets, then touch on specific types.
Safety First: Turn Off the Water!
This is the absolute most critical step. Before you do anything else, you need to shut off the water supply to the faucet. Look for the shut-off valves. These are usually located under the sink. There will typically be one for hot water and one for cold water.
Turn the handles of these valves clockwise until they stop. If you can’t find or operate these valves, you may need to shut off the main water supply to your house. You can usually find the main shut-off valve in your basement, garage, or near your water meter. After turning off the water, open the faucet you’re working on to drain any remaining water in the pipes. This relieves pressure.
Step 1: Disassemble the Faucet Handle
Your faucet handle usually has a decorative cap that hides a screw. Gently pry off this cap using a flathead screwdriver or a utility knife. Be careful not to scratch the finish. Once the screw is exposed, use the appropriate screwdriver (Phillips or flathead) to remove it. Keep the screw safe – perhaps in a small dish or your pocket!
After removing the screw, you should be able to lift or pull the handle off the faucet body. Some handles might be a bit stuck due to mineral buildup. Try wiggling it gently. If it’s really stubborn, a little gentle persuasion with a rubber mallet might help, but be cautious not to damage it.
Step 2: Access the Inner Workings
Once the handle is off, you’ll see the inner mechanism. This varies depending on your faucet type:
- Compression Faucets: You’ll see a packing nut. Loosen this nut with your adjustable wrench.
- Cartridge, Ball, or Ceramic Disc Faucets: You might see a threaded retaining nut or clip that holds a cartridge or ball assembly in place.
Carefully remove any nuts, clips, or decorative covers that are holding the internal mechanism in place. Again, use your wrench or pliers as needed, turning counter-clockwise to loosen. Place these small parts in your dish so they don’t get lost.
Step 3: Identify and Replace the Faulty Part
This is where you’ll find the source of the leak. The most common culprits are:
- Washers (Compression Faucets): At the bottom of the faucet stem, you’ll likely find a rubber washer held in place by a screw. Remove the screw and the old washer. Replace it with an identical new one. Apply a small amount of plumber’s grease to the new washer and the threads of the stem.
- O-rings (Most Faucet Types): These small rubber rings are often found around the faucet stem or spout. Look for any that are cracked, brittle, or worn. Gently remove the old O-rings using a utility knife or pick and replace them with new ones. Lubricate the new O-rings with plumber’s grease.
- Cartridge (Cartridge Faucets): The entire cartridge may need to be replaced. Once you remove the retaining nut or clip, you should be able to pull the cartridge straight out. Take the old cartridge to the hardware store to ensure you get an exact match. Some cartridges have delicate seals or springs that can be sensitive.
- Ball or Disc (Ball/Ceramic Disc Faucets): These have more complex mechanisms. For ball faucets, you’ll typically replace springs and seals. For ceramic disc faucets, the entire disc assembly might need replacement if damaged. Refer to your faucet’s manual or manufacturer’s website for specific instructions.
For detailed information on specific faucet types and their internal components, resources like Family Handyman offer excellent visual guides.
Step 4: Reassemble the Faucet
Put everything back together in the reverse order you took it apart. Ensure all parts are seated correctly and that screws and nuts are snug, but don’t overtighten, as this can strip threads or damage components.
Start by placing the new or repaired internal component back into the faucet body. Then, reattach any retaining nuts, packing nuts, or clips. Finally, place the handle back on and secure it with its screw. Don’t forget to pop the decorative cap back on!
Step 5: Test Your Repair
Once everything is reassembled, slowly turn the water supply valves back on (counter-clockwise). Check for any immediate leaks around the handle or base of the faucet. Then, turn the faucet on and off a few times to check for drips from the spout.
If the leak has stopped, congratulations! You’ve successfully sealed your faucet. If you still notice a drip or a leak around the handle, you may need to go back and check that you replaced the correct part or ensure everything is tightened appropriately. Sometimes, a second attempt is all it takes.
Troubleshooting Common Faucet Types

While the general steps are similar, different faucet types have specific components that are prone to leaks. Knowing your faucet type can make the repair process more straightforward.
Compression Faucets
These are the oldest and simplest type, usually found in older homes. They have two separate handles (hot and cold) and work by tightening a screw that presses a rubber washer against a valve seat to stop water flow.
- The Main Culprit: The rubber washer at the end of the stem.
- How to Fix: Disassemble the handle and stem, remove the screw holding the washer, replace the washer, and reassemble. Also check the O-ring around the stem, which can also cause leaks.
Cartridge Faucets
These have a single handle that controls both water flow and temperature. Inside, a removable cartridge acts as the valve. They are common in both kitchens and bathrooms.
- The Main Culprit: The cartridge itself can become worn or damaged, or the O-rings around its base.
- How to Fix: Remove the handle, then loosen and remove the retaining nut or clip holding the cartridge. Pull the old cartridge out and replace it with an identical new one. Lubricate any O-rings.
Ball Faucets
These single-handle faucets use a metal or plastic ball with slots to control water flow and temperature. They are recognized by their single lever that moves over a rounded cap.
- The Main Culprit: Worn seals and springs within the ball assembly, or a damaged ball itself.
- How to Fix: After removing the handle and cap, you’ll see the ball, springs, and seals. You can often buy a repair kit that includes new springs, seals, and sometimes a new ball. Carefully replace these worn components, ensuring they are properly seated.
Ceramic Disc Faucets
These are durable and modern, featuring a single handle. They use two ceramic discs that slide against each other to control water flow. They are known for their longevity.
- The Main Culprit: While rare, the ceramic discs can chip or crack. More commonly, sediment can get trapped between the discs, or the seals at the base of the disc assembly can wear out.
- How to Fix: Remove the handle and escutcheon cap to access the ceramic disc cartridge. You may need to clean out any debris. If a disc is damaged or seals are worn, the entire cartridge assembly usually needs to be replaced.
Knowing your faucet type is half the battle. The U.S. Environmental Protection Agency (EPA) WaterSense program provides excellent information on water-saving plumbing fixtures, which indirectly helps homeowners identify common types and their maintenance needs.
| Faucet Type | Handle Type | Common Leak Cause | Primary Fix |
|---|---|---|---|
| Compression | Two Handles (Hot & Cold) | Worn rubber washer, O-ring | Replace washer and/or O-ring |
| Cartridge | Single Handle | Worn cartridge, O-ring | Replace cartridge and/or O-ring |
| Ball | Single Handle (lever over dome) | Worn seals, springs, or ball | Replace seals and springs (repair kit) |
| Ceramic Disc | Single Handle | Damaged discs, worn seals, sediment | Clean or replace disc cartridge |
When to Call a Professional Plumber
While most faucet leaks are DIY-friendly, there are times when it’s best to call in an expert. Don’t hesitate to reach out for professional help if:
- You’re Unsure of Your Faucet Type: If you can’t identify your faucet or find the right parts, a plumber can quickly diagnose and fix it.
- The Leak Persists After Your Repair Attempts: If you’ve tried to fix it and the drip is still there, or a new leak appears, a plumber has the experience to find the hidden problem.
- Parts Are Severely Corroded or Damaged: If components are rusted solid, broken, or fused, trying to force them can cause more damage. A plumber can safely remove them.
- You Don’t Have the Necessary Tools: While we listed basic tools, sometimes specialized tools are needed for certain faucet models.
- The Shut-Off Valves Don’t Work: If you can’t turn off the water supply to your faucet, a plumber can work around it or replace the faulty valves.
- The Leak is More Than Just a Drip: If you have a significant leak or the faucet is spraying water, it’s an emergency situation that warrants professional attention immediately to prevent water damage.
Remember, a plumber is trained to handle complex issues safely and efficiently. Sometimes, the peace of mind and the assurance of a proper repair are well worth the cost.
Frequently Asked Questions (FAQ)
Q1: How often should I expect a faucet to need sealing?
A: Faucets can last for many years, but it’s not uncommon for washers or O-rings to need replacement every 5-10 years, depending on water quality and usage. Higher usage or hard water can shorten their lifespan.
Q2: Can I use regular grease instead of plumber’s grease?
A: No, it’s best to stick with plumber’s grease (silicone grease). Regular greases can break down more quickly in water and may contain chemicals that could damage rubber seals over time.
Q3: My faucet still leaks after replacing the washer. What’s wrong?
A: This often means the valve seat is worn or corroded. You can try to reface the valve seat with a special tool called a valve seat dresser, or if that fails, you might need to replace the entire valve or cartridge assembly.
Q4: How do I know if I have a leak from my faucet or somewhere else?
A: A faucet leak usually appears as visible drips from the spout or around the handle. Listen for persistent dripping sounds. If you suspect a leak but don’t see it at the faucet, check under the sink for wetness on pipes or the cabinet floor.
Q5: What’s the benefit of fixing a leaky faucet myself?
A: The main benefits are cost savings (no plumber’s fee), a sense of accomplishment, and the satisfaction of doing something productive for your home. Plus, it prevents water waste, saving you money on your water bill.
