
Don’t let sealing grout stress you out! The right seal grout tools make the job easy and effective. You’ll need a grout sealer applicator, a quality sealant, microfiber cloths, painter’s tape, and good ventilation. Following these pro tips ensures a protected, beautiful grout line with minimal fuss. Get ready for a professional finish at home!
Tired of grout looking dingy and worn? Sealing your grout is one of the best ways to keep it looking fresh and new. It’s a simple step that makes a huge difference in protecting your tile surfaces from stains and moisture. Many homeowners find this task a bit daunting, but it doesn’t have to be. With the right tools and a little know-how, you can achieve professional-looking results. This guide will walk you through exactly what you need and how to use it. Let’s dive into the essential tools that will make sealing your grout a breeze!
Why Sealing Grout Matters

Grout is like a sponge for your tile. It’s porous, meaning it can easily absorb spills, dirt, and moisture. Over time, this leads to unsightly stains, mold, and mildew growth, which can be tough to clean and can even damage your grout. Sealing creates a protective barrier that repels liquids and makes cleaning much simpler. Think of it as giving your grout its own superhero shield!
Essential Seal Grout Tools Explained

Choosing the right tools is half the battle when it comes to sealing grout. You don’t need a massive toolbox, but the few items you do need are crucial for a clean and effective seal. Here’s a breakdown of the must-haves:
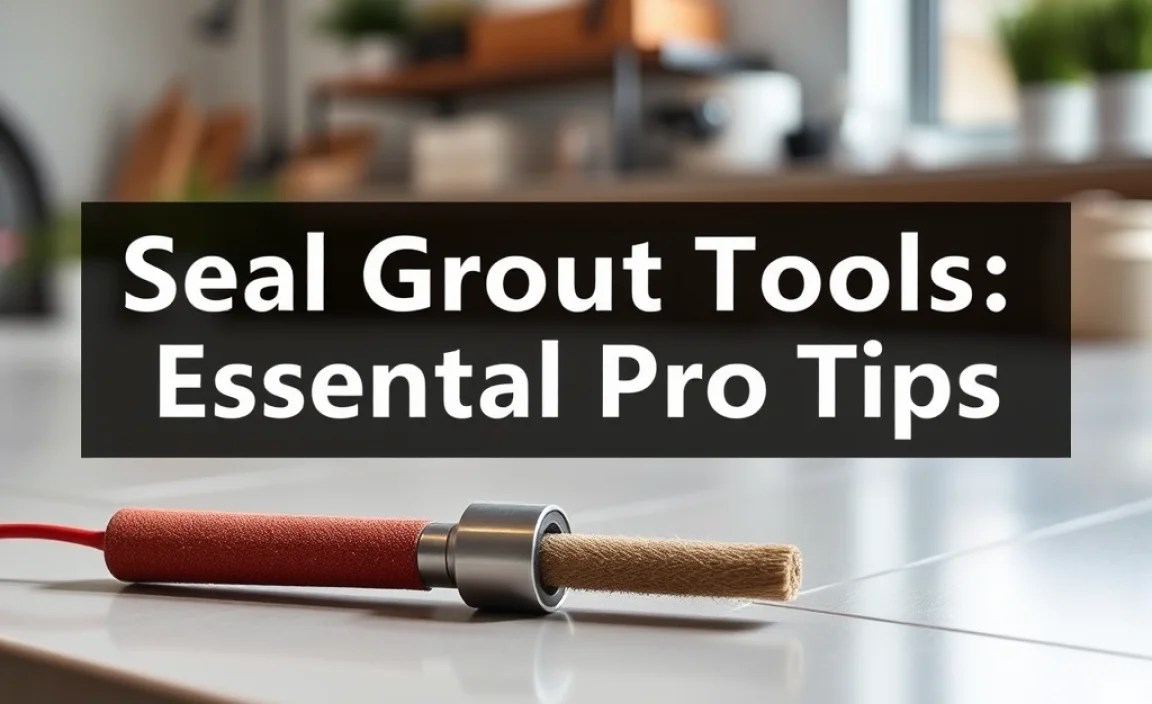
1. Grout Sealer Applicator
This is your primary tool for getting the sealant precisely where it needs to go. There are a few types, each with its own benefits:
Applicator Bottles/Squeeze Bottles: These often come with a fine tip, similar to a glue bottle. They allow for controlled application directly onto the grout lines.
Roller Applicators: These look like mini paint rollers and are great for larger tile jobs. They offer even coverage across long stretches of grout.
Brush Applicators: Some sealers come with a brush built into the cap, or you can use a small, stiff-bristled paintbrush (dedicated for this purpose, of course). These are good for smaller areas or if you need to really work the sealer into the grout.
Battery-Operated Sprayer Applicators: For very large areas, these can speed things up, but require careful masking to avoid overspray.
When selecting an applicator, consider the size of your tile and the length of the grout lines. For most DIY projects, a bottle with a fine tip or a small roller will be your best bet.
2. High-Quality Grout Sealer
The sealer itself is just as important as the tool you use to apply it! There are two main types:
Penetrating Sealers: These soak into the porous grout, creating an invisible barrier from within. They are excellent for stain resistance and don’t change the look of your grout. They are typically a great choice for natural stone tiles.
Topical Sealers: These form a protective film on the surface of the grout. They can add a sheen or enhance color but may wear away over time with heavy foot traffic or harsh cleaning.
Always choose a sealer that is appropriate for your type of tile and grout. Many are water-based, making cleanup easier.
3. Microfiber Cloths
These are your best friends for wiping away excess sealer. Microfiber is super absorbent and non-abrasive, so it won’t scratch your tiles. You’ll need several clean cloths on hand.
4. Painter’s Tape (Low-Tack)
For a super clean finish, especially around delicate tiles or edges, painter’s tape is essential. It protects the surface of your tiles from accidental sealer drips or smudges. Make sure to use a low-tack version so it doesn’t damage the tile’s finish or leave adhesive residue.
5. Small Bucket or Container
You might need this to pour some sealer into if you’re using a brush or roller, making it easier to dip your tool.
6. Safety Gear: Gloves and Eye Protection
Sealers can be harsh chemicals. Always wear nitrile gloves to protect your skin and safety glasses to protect your eyes from any splashes.
7. Ventilation Tools**
Good airflow is key. Open windows and doors, or use fans to ensure the area is well-ventilated while you’re working and while the sealer dries. Check the sealer’s product label for specific ventilation requirements.
Pro Tips for Sealing Grout Like a Champ

Now that you know your tools, let’s get to the good stuff – the expert tips that will make your grout sealing project a success!
Preparation is Key: Cleaning & Masking
This is arguably the most important step. No sealer will work properly if applied to dirty grout.
- Thoroughly Clean the Grout: Use a dedicated grout cleaner and a stiff-bristled brush to scrub the grout lines. You want to remove all dirt, soap scum, and old sealant residue. A deep clean is essential for the new sealer to adhere properly.
- Rinse and Dry Completely: After cleaning, rinse the area thoroughly with clean water. Then, let the grout dry completely. This can take 24-48 hours, depending on humidity. Damp grout will prevent the sealer from penetrating effectively. You can speed up drying with fans or a hairdryer on a cool setting.
- Masking for Precision: Carefully apply painter’s tape along the edges of your tile lines. This creates a barrier, ensuring that only the grout gets sealed. This step is crucial for achieving a clean, professional look and saving you from tedious tile cleanup later.
Applying the Sealer: Technique Matters
This is where your chosen applicator tool comes into play. The goal is to get an even coat directly onto the grout line without excessive pooling.
Using an Applicator Bottle/Squeeze Bottle:
- Shake or Stir the Sealer: Most sealers need to be mixed before use. Follow the manufacturer’s instructions.
- Apply in Sections: Work on a small area at a time (e.g., 3-4 square feet). This allows you to manage the sealer and clean up excess before it dries.
- Controlled Application: Hold the tip of the bottle directly on the grout line and squeeze gently. Move slowly and steadily along the grout line, ensuring the sealer penetrates.
- Work it In (Optional): For particularly porous grout, you can use a clean brush to gently work the sealer into the line and ensure full coverage.
Using a Roller Applicator:
- Pour Sealer into a Tray or Bucket: If your roller isn’t self-dispensing, pour a moderate amount of sealer into a shallow container.
- Load the Roller: Dip the roller into the sealer, ensuring it’s coated but not dripping.
- Apply Evenly: Roll the sealer directly over the grout lines. Aim for consistent pressure and coverage.
- Work in Sections: Similar to the bottle method, tackle small areas to manage the application.
Wiping Away Excess: Speed is Your Friend
This step is critical. Sealer left on the tile surface can create a cloudy film or be very difficult to remove once dry.
- Wipe Immediately: After applying sealer to a section, immediately use a clean microfiber cloth to wipe away any excess sealer that has gotten onto the tile surface.
- Buff Gently: Don’t scrub hard; just buff enough to remove the excess. You want the sealer to stay in the grout lines, not on top of the tiles.
- Change Cloths as Needed: As your cloth gets saturated with excess sealer, switch to a fresh, dry one. This prevents spreading the sealer back onto the tiles.
A helpful resource for understanding different grout types is provided by The Ceramic Tile and Vật liệu Institute (CTI), which offers in-depth guides on tile and grout best practices.
Drying and Curing: Patience Pays Off
Once you’ve sealed and wiped down a section, you need to let it do its job.
- Drying Time vs. Curing Time: Pay close attention to the product label. “Drying time” is usually the time until the surface is dry to the touch and you can walk on it carefully. “Curing time” is the longer period (often several days to a week) during which the sealer fully hardens and reaches maximum protection.
- Avoid Water Exposure: During the curing period, avoid getting the sealed grout wet. This means no mopping, no showers (if it’s a bathroom floor or wall), and immediate cleanup of any spills.
- Ventilation: Keep the area well-ventilated throughout the drying and curing process to help the sealer set properly and to dissipate any fumes.
When to Reapply Sealer

The lifespan of grout sealer varies depending on the type of sealer, the amount of traffic the area receives, and how it’s cleaned. As a general rule:
- Water Test: To check if your grout needs resealing, spill a small amount of water on it. If the water beads up, the sealer is still effective. If the water soaks in and darkens the grout, it’s time to reseal.
- Timeframe: Most sealers need to be reapplied every 1-5 years. High-traffic areas like kitchen floors or bathroom floors may need it more frequently than shower walls.
Tools Compared: Applicator Types
To help you visualize the best tool for your job, here’s a quick comparison of common applicator types:
| Applicator Type | Best For | Pros | Cons |
|---|---|---|---|
| Squeeze Bottle with Fine Tip | Most DIYers, detailed work, various tile sizes | Precise control, easy to use, minimal waste. | Can be slow for very large areas. |
| Roller Applicator | Larger tiles, long grout lines, consistent application | Good for speed on larger jobs, even coverage. | Less precise than a bottle; requires careful masking. |
| Brush (Small, Stiff Bristle) | Touch-ups, very porous grout, small areas | Can push sealer deep into grout, good for intricate areas. | Can be slow, messy if not careful, requires a separate sealer source. |
| Battery-Operated Sprayer | Very large floor or wall areas | Fastest option for extensive areas. | Requires extensive masking, potential for overspray, expensive. |
Beyond the Tools: Maintenance Tips
Once your grout is sealed, keeping it that way is simple.
- Gentle Cleaning: Use pH-neutral cleaners. Avoid harsh chemicals like bleach or ammonia, as they can break down the sealer over time. A mild dish soap and water solution is often sufficient.
- Immediate Spill Cleanup: Wipe up spills as soon as they happen, especially on kitchen and bathroom floors. This gives the sealer less time to be tested.
- Regular Rinsing: After cleaning, rinse the area thoroughly with clean water to remove any cleaner residue.
Conclusion: Your Grout’s New Best Friend
Sealing your grout is a maintenance task that offers significant rewards: enhanced durability, easier cleaning, and a consistently beautiful appearance for your tiled surfaces. By gathering the right seal grout tools – including a reliable applicator, quality sealer, and essential cleaning supplies – and following these pro tips, you’re well-equipped to tackle this project with confidence. Remember that preparation, careful application, and proper drying are the foundations of a job well done. With a little effort, you can protect your investment in your home and enjoy pristine grout for years to come. Happy sealing!
FAQs
Here are some frequently asked questions to help you feel even more confident.
What is the best way to apply grout sealer?
The best way to apply grout sealer is to ensure your grout is perfectly clean and dry. Use a specialized grout sealer applicator, like a squeeze bottle with a fine tip or a roller, to apply the sealer evenly directly onto the grout lines. Work in small sections, and immediately wipe away any excess sealer from the tile surfaces with a clean microfiber cloth. Patience during the drying and curing process is also crucial for longevity.
Can I use a paintbrush to apply grout sealer?
Yes, you can use a small, stiff-bristled paintbrush to apply grout sealer, especially for smaller areas or uneven grout lines. However, dedicate the brush solely for this purpose as sealer residue can be difficult to clean. Ensure you apply evenly and wipe away excess promptly.
How long does grout sealer take to dry?
Drying time varies by product and environmental conditions, but most grout sealers are dry to the touch within 1-4 hours. However, this is different from the curing time, which can take 24-72 hours or even longer for the sealer to reach its full protective strength. Always check the manufacturer’s instructions. Avoid any moisture contact during the full curing period.
Do I need to seal grout on every tile surface?
Sealing is most important for porous tile and grout materials, such as ceramic, porcelain, natural stone (like marble, granite, travertine), and cementitious grout. Less porous tiles and epoxy grout may not require sealing. It’s always best to check the tile and grout manufacturer’s recommendations. For instance, USGBC (U.S. Green Building Council) sometimes offers resources that touch upon material choices in sustainable building, which can include tile and grout considerations.
What happens if I don’t wipe away excess sealer?
If excess sealer is not wiped away from the tile surface before it dries, it can leave a cloudy, chalky, or hazy film. In some cases, it can create a sticky residue that hardens and becomes very difficult to remove, potentially requiring harsh chemical strippers or even damaging the tile surface. Prompt wiping is essential for a clean finish.
How often should I reseal my grout?
The frequency for resealing grout depends on the sealer type and traffic. Generally, penetrating sealers may last longer. For most residential applications, resealing is recommended every 1 to 5 years. Performing a simple water test can help determine if it’s time to reseal. If water beads up, your grout is still protected; if it soaks in, it’s time for a new coat.
Can I seal grout myself?
Absolutely! Sealing grout is a very manageable DIY project for homeowners. With the right tools, clear instructions, and attention to detail, you can achieve a professional, protective seal for your grout lines. It’s a cost-effective way to maintain the beauty and integrity of your tiled surfaces.
