
A soap dispenser and dish set with a holder is an essential bathroom accessory that keeps your sink areas tidy, prevents soap from becoming mushy, and adds a touch of style. This guide will show you how to choose, install, and maintain one for a cleaner, more organized space.
Soap Dispenser and Dish Set with Holder: Your Essential Guide

Tired of slippery soap bars melting away in messy puddles? Does your liquid soap dispenser always seem to be just out of reach, or worse, leave drips on your pristine countertop? You’re not alone! Maintaining a clean and organized bathroom sink can feel like a constant battle against dampness and clutter. But what if there was a simple, stylish solution? A soap dispenser and dish set, especially one with a built-in holder, isn’t just about aesthetics; it’s about functionality.
It’s designed to keep your sinks neat, your soaps dry, and your hand soap – whether bar or liquid – conveniently accessible. This guide is your go-to resource for understanding why these sets are so valuable. We’ll walk you through everything you need to know, from selecting the perfect set for your bathroom’s style and needs, to understanding how to best use and care for it. Get ready to transform your sink area from cluttered chaos to a calm, collected sanctuary.
Why a Soap Dispenser and Dish Set with Holder is a Smart Choice

Let’s break down the practical magic of a soap dispenser and dish set with an integrated holder. It’s more than just matching accessories; it’s a system designed for efficiency and tidiness. Imagine this: no more soap scum rings forming around your sink, no more bar soap dissolving into a goopy mess, and your hand soap always within easy reach without searching. This combination is a small upgrade that makes a big difference in the daily upkeep of your bathroom.
Keeping Bar Soap in Prime Condition
Bar soap has a notorious habit of becoming soft and gooey when exposed to constant moisture. A good soap dish is designed with drainage in mind. This means it allows water to escape, air to circulate, and your bar soap to dry out between uses. When your soap can dry properly, it lasts significantly longer and maintains its shape and firmness. This not only saves you money but also makes for a much more pleasant washing experience.
Liquid Soap Convenience and Control
Liquid soap dispensers offer a hygienic and controlled way to dispense soap. They help prevent the spread of germs since each person uses their own pump. Plus, you get just the right amount of soap with each press, reducing waste and preventing messy drips compared to just leaving a bottle on the counter. A set with a dispenser means you have a stylish, dedicated spot for it, keeping your vanity clutter-free.
The Holder: Organization and Accessibility
The “holder” component of these sets is the unsung hero. It’s the element that brings everything together. A well-designed holder typically has a dedicated spot for both the soap dish and the liquid soap dispenser. This means:
- Reduced Clutter: Instead of two separate items taking up space and potentially sliding around, they are unified.
- Improved Aesthetics: A matching set with a unified holder looks intentionally designed and polished.
- Accessibility: Crucially, it keeps your soap within easy reach. Whether you’re washing your hands or brushing your teeth, the soap is right where you need it, not buried under other items or precariously balanced.
- Water Containment: The holder itself often acts as a secondary tray, catching any stray drips from the dispenser or excess water from the soap dish, keeping your surfaces cleaner.
Understanding the Anatomy of a Soap Dispenser and Dish Set with Holder

Before you choose, it’s helpful to know the different parts and styles you’ll encounter. These sets are designed to work together harmoniously, with each piece serving a specific purpose.
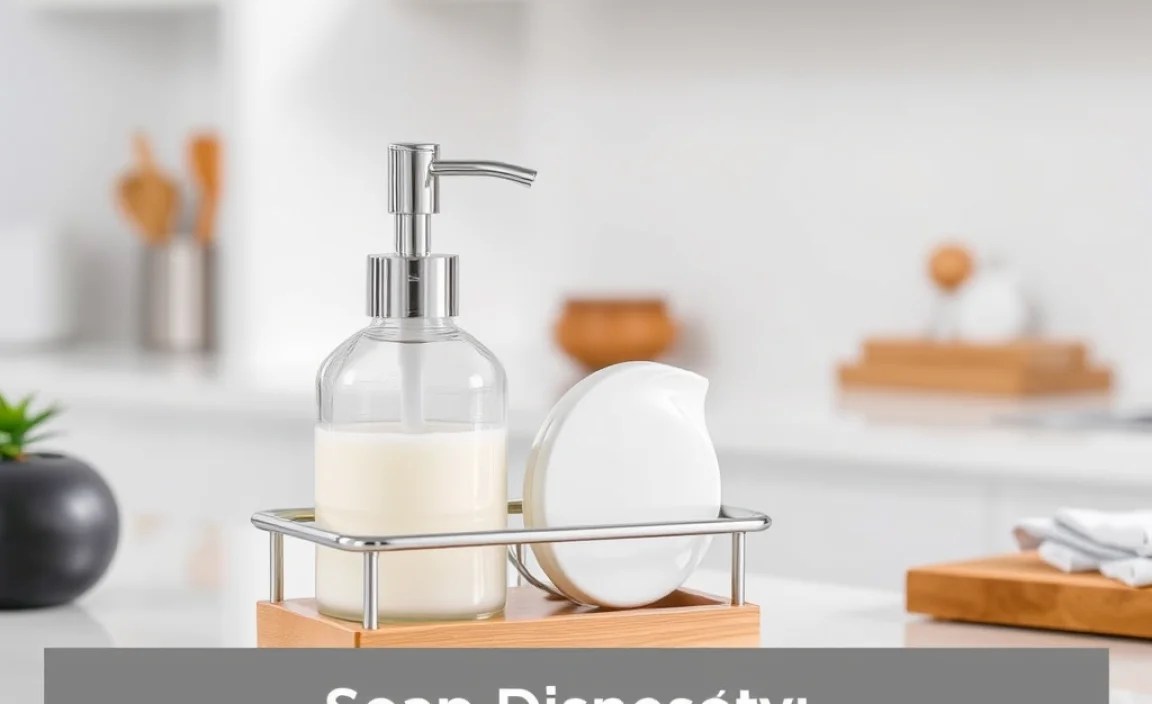
The Soap Dispenser
This is typically for liquid soap. Dispensers come in various types:
- Manual Pump Dispensers: The most common type. You press down on the pump head to release soap into your hand.
- Automatic (Sensor) Dispensers: These use a sensor to detect your hand and dispense soap. They are more hygienic as they involve no touching.
- Foaming Dispensers: These mix air with the liquid soap as it’s dispensed, creating a rich foam. This uses less soap per wash.
The Soap Dish
For bar soap, the dish is designed for drainage. Key features include:
- Drainage Holes/Slats: These allow water to flow away from the soap.
- Raised Edges: To contain any water that doesn’t drain immediately.
- Non-Slip Base: To prevent the dish from sliding on wet surfaces.
The Holder
This is the unifying element. Holders can vary widely in design:
- Integrated Base: A single platform or tray designed to hold both the dispenser and the dish.
- Wall-Mounted Holders: These attach to the wall and often have separate arms or compartments for the dispenser and dish. This is excellent for saving counter space.
- Tray with Compartments: A simple tray with molded or separate sections for each item.
- Caddy Style: Sometimes, the holder resembles a small caddy or basket, providing a more robust and often decorative way to keep items together.
Choosing the Perfect Soap Dispenser and Dish Set with Holder

With so many options, how do you pick the one that’s just right for your bathroom? Consider these factors:
Material Matters
The material impacts durability, aesthetics, and ease of cleaning. Common choices include:
| Material | Pros | Cons | Best For |
|---|---|---|---|
| Ceramic/Porcelain | Elegant, heavy (stable), easy to clean, wide range of colors and patterns. | Can chip or break if dropped, heavier to install if wall-mounted. | Classic and modern bathrooms, guest bathrooms where durability is less critical than style. |
| Glass | Sleek, non-porous (hygienic), good for seeing soap levels, available in many finishes (frosted, colored). | Can break if dropped, may show water spots more easily, can be slippery when wet. | Modern and minimalist bathrooms, bathrooms where visual appeal is a priority. |
| Stainless Steel | Durable, rust-resistant, modern look, fingerprint-resistant finishes available. | Can be prone to scratches, may show water spots, can feel less “warm” than other materials. | Modern, industrial, or minimalist bathrooms, high-traffic bathrooms requiring durability. |
| Resin/Plastic | Lightweight, shatterproof, affordable, wide variety of colors and designs. | Can look less premium, may degrade over time with harsh cleaners or sun exposure. | Children’s bathrooms, budget-friendly upgrades, temporary solutions. |
| Natural Stone (e.g., Marble, Travertine) | Luxurious, unique natural patterns, adds a spa-like feel. | Porous (can stain if not sealed properly), heavy, requires specific cleaning care. | High-end bathrooms, creating a sophisticated and natural aesthetic. |
Style and Design
Your soap set should complement your bathroom’s existing decor. Think about:
- Modern: Sleek lines, minimalist designs, chrome, glass, or matte black finishes.
- Traditional/Classic: Ornate details, ceramic with subtle patterns, brushed nickel, or oil-rubbed bronze.
- Rustic/Farmhouse: Natural materials, matte finishes, perhaps in wood-look resin or distressed ceramic.
- Coastal: Blues, whites, perhaps with shell motifs or natural textures like driftwood-inspired resin.
Size and Space Considerations
Measure your sink area. Do you have ample counter space, or are you looking to free it up? This will help you decide between a countertop set with a holder or a wall-mounted option.
- Countertop Sets: Generally easier to install (often no installation required!), but take up space. Holders for these are great for keeping things neat and unified on the vanity.
- Wall-Mounted Sets: Ideal for small bathrooms or powder rooms. They require installation, but the payoff is significant counter space. Check how items attach – some are suction-based, others require drilling. For a more permanent and secure solution, drilling is usually best. Authorities like the CDC emphasize proper handwashing, and accessible soap makes this easier!
Functionality Features
Beyond looks, think about how you’ll use them:
- Pump Mechanism: Is it smooth and easy to use? Does it dispense a good amount of soap without being excessive?
- Soap Dish Drainage: Does it look like it will effectively allow water to drain and air to circulate?
- Ease of Refill: How easy is it to open the dispenser to refill liquid soap, or clean the soap dish?
- Stability: Does the holder feel sturdy? Will it stay put on the counter or be secure on the wall?
Installation and Setup: Getting Your Set Ready
Setting up your new soap dispenser and dish set with a holder is usually straightforward, but the process can vary depending on the type of set you choose.
For Countertop Sets with Holders
This is the simplest scenario!
- Unpack and Inspect: Carefully remove all components from the packaging. Check for any damage.
- Clean Components: It’s a good idea to wash the dispenser, dish, and holder with mild soap and water before first use. Rinse thoroughly and dry.
- Place the Holder: Position the holder on your countertop in your desired location near the sink.
- Place the Dispenser: Put the liquid soap dispenser into its designated spot within the holder. Fill it with your chosen liquid soap.
- Place the Soap Dish: Put the bar soap dish into its spot in the holder. Ensure it sits securely.
- Add Bar Soap: Place your bar of soap in the dish. Ensure there’s some space around it for air circulation.
And that’s it! Your countertop set is ready to go.
For Wall-Mounted Sets with Holders
This requires a bit more effort but often provides better space-saving and a more permanent fixture. Always prioritize safety when using tools.
Tools You Might Need:
- Drill with appropriate drill bits (for pilot holes and potentially wall anchors)
- Level
- Screwdriver (matching the screws provided)
- Pencil
- Measuring tape
- Wall anchors (if not drilling into studs or if walls are drywall)
- Hammer (to gently tap in wall anchors if needed)
- Stud finder (highly recommended for secure mounting)
Step-by-Step Wall Mounting Process:
- Choose the Location: Decide where you want to mount the set. Ensure it’s at a comfortable height for easy reach and won’t interfere with other fixtures. Use a level to make sure it’s straight.
- Mark Mounting Points: Hold the holder or template (if provided) against the wall at the desired height. Use a pencil to mark the screw hole locations. Ensure the marks are level! A helpful resource for understanding wall types and mounting techniques can be found on sites like This Old House.
- Check for Studs: Use a stud finder to see if your marked spots align with wall studs. Mounting directly into studs is the most secure method. If you can’t align with studs, you’ll need to use wall anchors.
- Drill Pilot Holes: If mounting into studs, drill small pilot holes at your marked points, slightly smaller than the screws. If using wall anchors, drill holes according to the anchor manufacturer’s instructions (the hole size will depend on the anchor type).
- Insert Wall Anchors (if needed): Gently tap the wall anchors into the drilled holes until they are flush with the wall.
- Attach the Holder: Align the holder’s mounting bracket with the pilot holes or anchors. Insert the screws provided and tighten them securely with your screwdriver. Do not overtighten, as this can strip the screws or damage the wall.
- Mount the Dispenser and Dish: Once the holder is firmly attached to the wall, place the soap dispenser and soap dish into their designated spots.
- Fill and Use: Fill the dispenser with liquid soap and place your bar soap in the dish.
Safety Tip: If you are unsure about drilling into your walls or identifying studs, it’s always best to consult a professional or a handy friend. Improper wall mounting can lead to damage and safety hazards.
Maintaining Your Soap Dispenser and Dish Set
To keep your soap set looking great and functioning well, regular cleaning is key. This prevents grime buildup, soap scum, and keeps the accessories hygienic.
Daily and Weekly Tasks
- Wipe Down Surfaces: Use a damp cloth to wipe down the dispenser, dish, and holder daily or every few days. This removes water spots, fingerprints, and minor spills.
- Rinse the Soap Dish: Once a week, remove the bar soap and rinse the soap dish to wash away any accumulated residue. Let it air dry thoroughly.
- Clean the Dispenser Pump: If the dispenser nozzle gets clogged or dirty, wipe it with a damp cloth. You can also pump a little water through it to clear any residue.
Deep Cleaning (Monthly)
Every month, or as needed, give your set a more thorough cleaning:
- Disassemble (if possible): If your set allows for easy disassembly, take apart the components that you can.
- Wash with Soap and Water: Wash all parts with warm water and a mild dish soap. For stubborn stains or soap scum, you can use a soft sponge or cloth. Avoid abrasive cleaners or scrubbers, as they can scratch surfaces, especially on glass, ceramic, or shiny metal finishes.
- Address Dispenser Issues: If your liquid soap dispenser has become clogged, try this trick:
- Fill the dispenser with hot water (not boiling).
- Pump the hot water through several times.
- Let it sit for a few minutes.
- Pump again with hot water.
- Rinse thoroughly with clean water.
For persistent clogs, you might need to consult the manufacturer’s instructions. The EPA offers great advice on environmentally friendly cleaning practices.
- Clean the Soap Dish Thoroughly: Ensure all soap residue is removed from the drainage holes or slats. A small brush (like an old toothbrush) can be helpful here.
- Dry Completely: Make sure all parts are completely dry before reassembling or putting them back in place. This prevents mold and mildew growth.
- Polish (Optional): For materials like stainless steel or glass, you can use a glass cleaner or appropriate polish to restore shine.
Material-Specific Care
- Ceramic/Porcelain: Gentle soap and water are usually sufficient. For tougher stains, a paste of baking soda and water can be effective, but test in an inconspicuous spot first.
- Glass: Clean with glass cleaner for a streak-free finish. Be gentle to avoid chips or cracks.
- Stainless Steel: Use a cleaner specifically designed for stainless steel to avoid scratches and maintain the finish. Wipe in the direction of the grain.
- Natural Stone: Use pH-neutral cleaners. Avoid acidic products like vinegar or lemon juice, which can etch the stone. Sealing is also important.
Troubleshooting Common Issues
Even the most well-designed accessories can encounter minor hiccups. Here’s how to address them:
Dispenser Not Pumping Soap
- Check for clogs: As mentioned in the maintenance section, hot water can often clear this.
- Is it primed? Some new dispensers need several pumps to draw the soap up to the pump mechanism.
- Is the dip tube submerged? Ensure the straw-like tube inside the dispenser reaches the bottom of the soap reservoir.
- Is the soap too thick? Very thick liquid soaps might need to be slightly diluted with water.
