
A soap holder works by keeping bars of soap dry between uses, preventing them from becoming mushy and extending their lifespan. It typically features drainage or ventilation to allow water to escape, either through holes, sloped designs, or porous materials, ensuring your soap stays firm and ready to use.
Ever grabbed your bar soap, only to find it a soggy, gooey mess? It’s a common frustration that can make even a simple shower feel a bit messy. This happens when your soap sits in a puddle of water, slowly dissolving away. Thankfully, there’s a simple, effective solution: a soap holder. This handy gadget isn’t just about tidiness; it’s about preserving your favorite soaps and making your bathroom routine smoother. In this guide, we’ll break down exactly how soap holders work, why they’re a game-changer, and how to pick the right one for you. Get ready to say goodbye to mushy soap for good!
What Exactly is a Soap Holder and Why Do You Need One?

At its core, a soap holder is a device designed to contain a bar of soap and, crucially, allow it to dry out between uses. Think of it as a mini-stage for your soap, elevating it from the constant threat of waterlogged decay. Without one, your soap bar often sits in its own puddle in the shower or by the sink, which is the fast track to a soft, dissolving mess. This not only wastes soap but can also leave little gooey residue behind.
The primary goal of a soap holder is simple: to extend the life of your soap bar. By preventing it from sitting in water, the soap hardens up again after each use, meaning you get more washes out of every bar. This saves you money and reduces waste, making it an economical and eco-friendly choice.
Beyond practicality, soap holders also contribute to a cleaner and more organized bathroom. No more soap scum rings on the sink edge or a slimy residue in a dish. A good soap holder keeps things neat, tidy, and visually appealing. It’s a small change that makes a big difference in the overall feel and functionality of your bathroom.
How Do Soap Holders Work? The Science of Dry Soap

The magicbehind a soap holder lies in its ability to manage water. Most soap holders achieve this in one of a few key ways, all centered around preventing the soap from being submerged.
1. Drainage: The Hole Story
Many soap holders, especially those mounted on walls or shower caddies, feature strategic holes or slots. When water runs off the soap, it easily passes through these openings and drains away. This constant airflow and water escape prevent any pooling.
For example, a classic wall-mounted soap dish might have a sloped base with small perforations at the lowest point. As water drips from the soap, it flows down the slope and out through the holes, leaving the soap bar elevated and dry.
How Drainage Helps:
- Prevents pooling: Water can’t collect around the soap bar.
- Facilitates airflow: Air circulates better, aiding evaporation.
- Reduces residue: Less soap remains wet and sticky.
2. Ventilation: Letting It Breathe
Similar to drainage, ventilation focuses on air circulation. Some soap holders are designed with open structures or raised elements that allow air to flow freely around the entire soap bar. This continuous movement of air helps to evaporate any residual moisture.
Think of a shower caddy with an open wire design. The soap rests on the wire grate, with air reaching it from all sides. This prevents moisture from getting trapped underneath and allows it to evaporate quickly.
3. Absorption: The Porous Approach
A less common, but effective method, involves using absorbent materials. Some soap dishes are made from materials like diatomaceous earth or ceramic. These materials are porous and can soak up excess water, wicking it away from the soap bar.
Diatomaceous earth, for instance, is made from fossilized algae and has a structure filled with microscopic holes. These holes can absorb a surprising amount of water, keeping the soap dry. Once the material is saturated, it can be left to dry out in the air before its next use.
4. Elevation and Containment: The Simple Slant
Even simpler designs achieve their goal by just elevating the soap and providing a slight slant. A basic plastic or ceramic dish with a raised edge might have a gently sloped bottom. This ensures that any water that does come into contact with the soap runs off towards the edge and away from the main body of the bar. The key is that the soap is never sitting directly in a pool of water.
Types of Soap Holders: Finding Your Perfect Match

The world of soap holders is surprisingly diverse! Different types cater to different bathroom layouts, personal preferences, and even decorative styles. Understanding these options can help you choose the best fit for your needs.
Wall-Mounted Soap Holders
These are a popular choice for showers and bathrooms where counter space is limited. They attach directly to the wall, keeping soap easily accessible near the showerhead or tap.
- How they work: Typically feature a dish or a bar with drainage holes. They are secured to the wall using screws, adhesive strips, or suction cups.
- Pros: Space-saving, keeps surfaces clear, easy to install (especially adhesive/suction types).
- Cons: May require drilling for permanent fixtures, adhesive can sometimes fail in humid conditions.
- Best for: Small bathrooms, showers, or anyone who prefers a minimalist look.
Countertop Soap Dishes
These are the classic, sit-on-the-sink types. They are simple, require no installation, and can be easily moved or cleaned.
- How they work: Usually a shallow dish with raised edges. Some have drainage holes or a sloped design to let water run off. The best ones have a separate inner tray for easy cleaning.
- Pros: No installation needed, portable, available in many styles and materials.
- Cons: Can take up counter space, may accumulate water if not designed well.
- Best for: Bathroom sinks, kitchen sinks, guest bathrooms, or if you prefer not to alter your walls.
Shower Caddies and Organizers
These are larger units that can hold multiple items, including soap. They often hang over the shower head or mount to the shower rod.
- How they work: Usually have baskets or shelves with drainage holes. The soap sits in one of these compartments, allowing water to pass through.
- Pros: Holds multiple toiletries, customizable storage options.
- Cons: Can be bulky, may not fit all shower setups.
- Best for: Families or individuals who need to store various shower essentials.
Magnetic Soap Holders
A clever, minimalist option. A small metal disc attaches to your bar of soap, and a magnetic fixture mounts to the wall or sink edge.
- How they work: The magnetic mount sticks to the wall, and the disc on the back of the soap allows it to cling. This suspends the soap in the air, providing maximum ventilation.
- Pros: Very clean look, excellent ventilation, no soggy bottom.
- Cons: Requires inserting a disc into the soap (can be tricky with some soaps), the magnet needs a solid mounting surface.
- Best for: Those who love a modern, uncluttered aesthetic and have smooth walls.
Soap Saver Bags / Exfoliating Pouches
These are mesh or sisal bags that you place your soap bar inside. They often have a drawstring closure.
- How they work: When not in use, you hang the bag to dry. The mesh material allows excellent air circulation, and any water drains easily. They can also be used directly to lather and exfoliate.
- Pros: Excellent ventilation, can be used directly as an exfoliating tool, great for using up small soap slivers.
- Cons: Not as aesthetically pleasing as some holders, can extend drying time if left very wet.
- Best for: Eco-conscious users, people who want to maximize soap use, or those who enjoy a little scrub.
Automatic Soap Dispensers
While not for bar soap, these are worth mentioning as they solve the “mushy soap” problem for liquid soaps. They dispense a set amount of liquid soap with a motion sensor.
- How they work: A motor and sensor inside dispense liquid soap.
- Pros: Hygienic, controlled portions, efficient for liquid soaps.
- Cons: Only for liquid soap, requires batteries or charging, can be more expensive.
- Best for: Households wanting touch-free, hygienic soap dispensing for liquid soaps.
Choosing the right type depends on your bathroom’s size, your installation preferences, and your personal style. For beginners, countertop dishes or soap saver bags are often the easiest starting points as they require no fitting.
Choosing the Right Material: Durability and Style
The material of your soap holder plays a role in its durability, how it looks, and how it interacts with moisture. Here’s a look at common materials:
| Material | Pros | Cons | Best For |
|---|---|---|---|
| Plastic | Inexpensive, lightweight, often comes with suction cups for easy mounting. | Can look cheap, may stain or crack over time, suction cups can lose grip. | Budget-friendly bathrooms, temporary solutions. |
| Ceramic/Porcelain | Aesthetically pleasing, easy to clean, can be heavy and stable for countertops. | Can be fragile and break if dropped, heavier for wall mounting. | More traditional or decorative bathrooms, countertop use. |
| Stainless Steel | Durable, rust-resistant, modern look, hygienic. | Can be more expensive, might show water spots. | Modern or minimalist bathrooms, high-moisture areas like showers. |
| Bamboo/Wood | Natural aesthetic, eco-friendly, can absorb some moisture. | Needs to be well-sealed to prevent mold/rot, may not last as long as metal in very wet environments. | Spas, natural-themed bathrooms, or for those who like organic materials. Ensure good drainage. |
| Silicone | Flexible, non-slip, can often be molded into unique shapes, easy to clean. | Can sometimes retain moisture if not designed with good drainage, might not feel as rigid. | Modern sinks, shower corners, offers a soft-touch feel. |
Consider what you’re looking for in terms of longevity and appearance. For a shower where it will be constantly exposed to water, stainless steel or a well-sealed ceramic with excellent drainage is often a safe bet. For a guest bathroom sink, a decorative ceramic or bamboo dish might be more appealing.
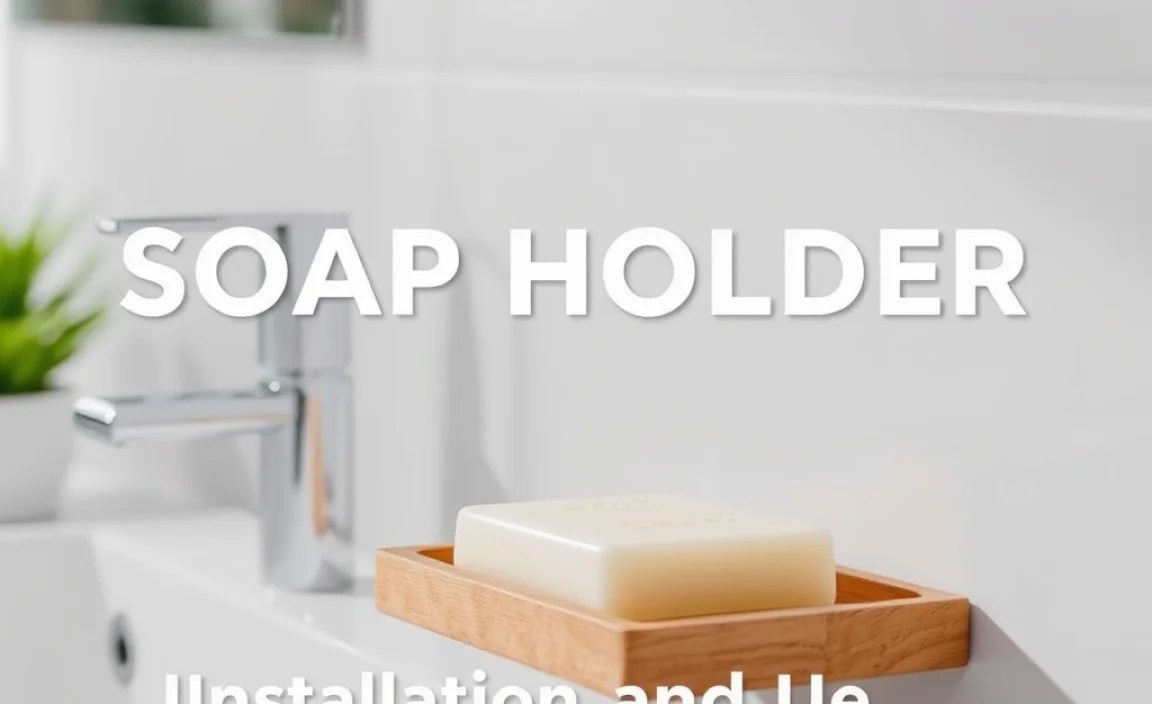
Installation and Use: A Beginner’s Step-by-Step
Installing and using a soap holder is typically very straightforward. Let’s break down the common methods.
Installing a Suction Cup Soap Holder
This is one of the easiest methods, perfect for renters or those who dislike drilling holes.
- Clean the Surface: Thoroughly clean the tile or surface where you want to mount the holder with soap and water, then dry it completely. A clean surface is crucial for good suction.
- Moisten the Suction Cup: Lightly dampen the suction cup with water. This helps create a better seal.
- Press Firmly: Position the soap holder and press the suction cup firmly against the wall. Hold it for a few seconds to ensure it’s adhered.
- Test the Grip: Gently pull on the holder to make sure it’s secure. If it feels loose, remove it, clean the surface and cup again, and reapply.
- Place Your Soap: Once secure, place your bar of soap in the holder. Ensure it sits flat and has room for water to drain.
Installing an Adhesive Soap Holder
Adhesive holders offer a more permanent solution than suction cups but can still be removed without major damage.
- Choose Location: Select a clean, flat, and dry spot.
- Prepare Surface: Clean the area thoroughly with rubbing alcohol to remove any soap scum, oils, or residue. Let it dry completely.
- Apply Adhesive: Remove the backing from the adhesive strip on the soap holder.
- Press and Hold: Firmly press the soap holder onto the cleaned surface. Hold it in place for at least 10-20 seconds to ensure a strong bond.
- Wait Before Use: Most adhesives require a curing time—typically 24 hours—before the holder can bear weight. Check the product’s instructions.
- Add Soap: After the curing period, place your soap.
Using a Countertop Soap Dish
This is the simplest of all!
- Place on Surface: Simply place the soap dish on a flat, dry surface like your sink edge or a shelf.
- Position Soap: Place your bar of soap in the dish. If it has drainage holes, angle the soap so water runs towards them.
- Maintain: Occasionally rinse out the dish to remove any soap residue and keep it looking clean.
Using a Soap Saver Bag
These are incredibly easy to use for both holding and showering.
- Insert Soap: Place your bar of soap inside the mesh bag.
- Secure: Close the bag using the drawstring.
- Hang to Dry: Hang the bag from a hook or faucet in your shower. The mesh allows for excellent air circulation and drainage.
- Use for Showering: When ready to wash, wet the bag and rub it between your hands or directly on your body to create lather. The bag can also provide a gentle exfoliating effect.
Tips for Optimal Use
- Position for Drainage: Always orient your soap so that water can run off it easily. Avoid placing it flat with no way for water to escape.
- Keep it Clean: Regularly clean your soap holder to prevent the buildup of soap scum and mildew. A quick rinse and wipe-down often suffices.
- Allow Airflow: Ensure there’s good airflow around the soap. Don’t pile other items directly against your soap holder, as this can trap moisture.
- Check Mountings: Periodically check that suction cups are still adhering firmly and that any adhesives haven’t loosened, especially in humid environments.
Benefits of Using a Soap Holder: More Than Just Dry Soap
The advantages of using a soap holder go beyond simply keeping your bar from becoming a slippery mess. It’s a small accessory that contributes to a more pleasant and efficient bathroom experience.
Extended Soap Lifespan = Cost Savings
As we’ve discussed, extending the life of your soap bar directly translates into saving money. Instead of buying new bars every few weeks due to their dissolving in water, a properly maintained bar can last significantly longer. This is especially true for handmade or specialty soaps that can be quite expensive.
Cleaner Countertops and Showers
No more sticky rings or slimy residue left behind on your sink or shower ledge! A soap holder contains the soap and directs the water away, keeping your surfaces much cleaner and reducing the frequency of deep cleaning needed to tackle soap scum.
Improved Hygiene
When soap sits in water, it can become a breeding ground for bacteria. By keeping soap dry and allowing it to air out, you help to maintain a more hygienic bathing environment. This is particularly important for families with children.
Reduced Waste
Less wasted soap means less waste going into landfills. It’s a small but significant step towards a more sustainable lifestyle. Using up every last bit of your soap with a soap saver bag is another excellent way to minimize waste.
Enhanced Bathroom Aesthetics
A well-chosen soap holder can actually add to your bathroom’s decor. Whether you opt for sleek stainless steel, elegant ceramic, or natural bamboo, it contributes to a more organized and visually appealing space.
Convenience and Ease of Use
Having your soap neatly held and easily accessible in the shower or at the sink simply makes life easier. You always know where your soap is, and it’s ready to use without any fuss.
Troubleshooting Common Soap Holder Issues
Even with the best intentions, you might run into a few hiccups. Here are some common problems and how to fix them.
