
The “unclog cabinet guide” offers simple, effective ways to organize your cabinets. Learn to declutter, group items logically, and use smart storage solutions to regain space and find things easily. Master these effortless tips for a tidier, more functional home.
Tired of cabinets that refuse to close properly, packed so tight you can barely reach what you need? It’s a common frustration, turning what should be organized storage into a chaotic mess. But don’t worry! This guide is here to help you conquer those overflowing cabinets and transform them into models of efficiency. We’ll walk you through easy, step-by-step methods to declutter, organize, and maintain your cabinets, making them a joy to open and close again. Get ready to say goodbye to cabinet clutter and hello to a more peaceful home!
Why Do Cabinets Get Clogged? Unpacking the Problem

Cabinets are the unsung heroes of our homes, silently storing everything from kitchen essentials and bathroom toiletries to craft supplies and cleaning products. But over time, their pristine order can easily devolve into a jumbled heap. Several factors contribute to this common household issue:
- Accumulation Over Time: We tend to buy things without really thinking about where they’ll go, or we keep items “just in case” for too long. Small additions from daily life, grocery hauls, or seasonal items can slowly but surely overwhelm cabinet space.
- Lack of a System: Without a clear plan for what goes where, items get stashed haphazardly. This makes it hard to find things and even harder to put them back, leading to a vicious cycle of disorganization.
- Items We Forget We Have: Duplicates, expired products, or things we bought for a specific project but never used again often linger in the back of cabinets, taking up valuable real estate.
- Inefficient Use of Space: Cabinets often have a lot of vertical and horizontal space that is poorly utilized. Dead zones can form, leaving you with less usable storage than you think.
- Lifestyle Changes: Our needs change, and so does the stuff we own. What worked for storage a year ago might not work today, requiring a fresh look.
Understanding these culprits is the first step to an effective unclogging strategy. It’s not about having too much stuff; it’s about how that stuff is managed within your cabinet space. This guide will equip you with the tools and techniques to tackle each of these challenges head-on.
The Unclog Cabinet Guide: Your Step-by-Step Strategy

Getting your cabinets back in ship-shape doesn’t require a complete overhaul or expensive organizers. We’re going to break down the process into manageable steps, focusing on simplicity and effectiveness. Think of this as a gentle decluttering and reorganization mission that will leave you feeling accomplished and your cabinets feeling spacious.
Step 1: The Great Cabinet Emptying
This is the foundational step, and it might seem daunting at first, but it’s crucial. You need to see exactly what you have and how much space you’re working with.
- Choose One Cabinet (or Area) at a Time: Don’t try to tackle your entire kitchen at once. Start with a single cabinet that is particularly problematic. This makes the task less overwhelming and allows for focused cleaning and organization.
- Take Everything Out: Yes, everything! Place all items on a clear surface nearby, like your kitchen island, dining table, or even the floor. This visual representation is eye-opening.
- Clean the Empty Cabinet: While the cabinet is empty, give it a good wipe-down. Remove any crumbs, dust, or sticky spots. A clean slate is a more pleasant place to put things back. You might use a damp cloth with a mild all-purpose cleaner. For tougher spots, a paste of baking soda and water can work wonders. Ensure it’s completely dry before returning items.
This initial emptying allows you to assess the true volume of your belongings and ensures you’re organizing clean spaces. It’s a powerful first move that sets the stage for everything else.
Step 2: The Ruthless (But Kind) Decluttering
Now that everything is out, it’s time to decide what actually needs to stay and what can go. This is where you get to be discerning.
- The “Keep,” “Donate/Sell,” and “Toss” Piles: As you look at each item, make a quick decision.
- Keep: Items you use regularly, love, or truly need.
- Donate/Sell: Items in good condition that you no longer use but someone else might. Think about clothing, books, or gently used kitchen gadgets.
- Toss: Items that are broken, expired, stained, or beyond repair. Be ruthless here – these items are taking up valuable space.
- Check Expiration Dates: Especially crucial for food items, medications, and cleaning supplies stored in pantry or under-sink cabinets.
- Identify Duplicates: Do you really need five whisks? Keep the best one and consider donating or discarding the others. The same applies to most tools and gadgets.
- Ask the “When Was the Last Time?” Question: If you can’t remember the last time you used an item, and it’s not something seasonal or a sentimental keepsake, it might be time to let it go.
This decluttering phase is about making conscious choices. It’s okay to let go of things; it frees up space and mental energy. Websites like EPA’s Reduce, Reuse, Recycle page offer great, long-term strategies for managing household items sustainably.
Step 3: Strategic Grouping and Zones
With only the keepers in hand, it’s time to think about how to put them back in a way that makes sense. This is where organization really begins.
- Group Like Items Together: This is the golden rule of cabinet organization. All your baking supplies should be together, all your cleaning supplies in one spot, all your canned goods in one section, etc.
- Create Zones: Assign specific areas within the cabinet for each group. For example, in a kitchen cabinet, you might have a “baking zone,” a “canned goods zone,” and a “pasta and grains zone.”
- Consider Frequency of Use: Place items you use most often at eye-level and within easy reach. Less frequently used items can go on higher shelves or deeper in the cabinet.
- Store Heavier Items Lower: This is a safety measure to prevent items from falling and injuring someone. It also makes it easier to lift and access them.
- Group by Function: In a bathroom cabinet, group all your dental care items, all your skincare, and all your first-aid supplies.
Think about how you use the items. If you always grab your coffee filters when you get the coffee grounds, store them together. This intuitive grouping makes retrieval effortless.
Step 4: Smart Storage Solutions – Maximizing Every Inch
Now, let’s talk about making the most of the space you have, even in the most awkward corners. You don’t need to break the bank; simple solutions can make a huge difference.
- Utilize Vertical Space:
- Shelf Risers/Stackable Shelves: These are lifesavers for creating extra levels in tall cabinets. They are perfect for stacking plates, bowls, mugs, or canned goods without them becoming a precarious tower.
- Under-Shelf Baskets: These slide onto existing shelves, offering instant storage for smaller items like spice packets, linen napkins, or cleaning cloths.
- Contain Small Items:
- Drawer Dividers or Small Bins: For items like utensils, spice jars, or small toiletries, dividers keep them from rolling around and getting lost.
- Clear Plastic Bins or Baskets: Grouping smaller items in bins makes them easy to pull out and see what’s inside. Look for ones that fit snugly.
- Corner Solutions:
- Lazy Susans (Turntables): Perfect for corner cabinets or deep shelves. They allow you to spin items around to easily access what’s in the back, whether it’s spices, oils, or jars.
- Door Organizers:
- Over-the-Door Racks: Excellent for pantry doors or cabinet doors in the kitchen and bathroom. They can hold spices, cleaning supplies, foil/wrap boxes, or toiletries.
- Use the Full Depth: For deep cabinets, consider pull-out drawers or bins so you don’t lose items in the back.
When choosing organizers, measure your cabinet space first! Look for solutions that are sturdy, easy to clean, and fit your specific needs. Websites like The Container Store offer a vast array of ideas, though similar items can often be found at more budget-friendly retailers.
Step 5: The Art of Placement and Arrangement
Putting items back is an art form. It’s about visibility, accessibility, and making sure your system works long-term.
- The “Front-Facing” Rule: When placing jars, cans, or boxes, try to have their labels facing forward. This makes them easier to identify at a glance.
- Stack Wisely: Stack similar items on top of each other. For cans, stack only a few high to avoid a spill. For plates and bowls, use stacking shelves to double your capacity and avoid chipping edges.
- Tuck, Don’t Just Stuff: Instead of shoving items in, arrange them neatly. Use space dividers or small containers to keep rows of items tidy and prevent them from toppling.
- Leverage the “First In, First Out” (FIFO) Method: Especially for pantry items, place newer items at the back and older items at the front. This helps ensure you use older stock before it expires and reduces waste.
- Visual Appeal Matters: While functionality is key, a visually appealing cabinet is more likely to stay organized. Aim for neat rows, consistent containers, and clear labels if needed.
This step is about creating a system that is not only functional but also pleasing to look at and easy to maintain. A well-arranged cabinet invites order.
Step 6: Maintaining Your Unclogged Cabinet Bliss
The work isn’t over once your cabinets are organized; the real win is keeping them that way! Maintenance is key to long-term success.
- The “One In, One Out” Rule: When you buy a new item that fills a space (like a new bottle of cleaning spray), consider getting rid of an old one. This helps prevent accumulation.
- Weekly Tidy-Ups: Spend just 5-10 minutes each week giving your cabinets a quick once-over. Straighten items, put stray things back in their place, and do a quick scan for anything that’s expired or no longer needed.
- The “End of the Week” Check: Before you go grocery shopping, take a quick peek in your pantry cabinets. What do you really need? What’s running low? This also helps you identify items you’re not using.
- Seasonal Re-evaluation: Twice a year, do a slightly deeper check. This is a great time to identify items you haven’t touched in months and consider donating them.
- Teach Everyone in the Household: Ensure that everyone who uses the cabinets understands the system. A quick chat and demonstration can prevent the organization from being undone by well-meaning but uninitiated family members.
Consistency is your best friend here. Small, regular efforts are far more effective than a massive overhaul every few months. You’ve got this!
Common Cabinet Culprits and Their Solutions

Different types of cabinets present unique challenges. Let’s look at some common problem areas and how to tackle them using the principles we’ve discussed.
Kitchen Cabinets & Pantry
This is often the most intensely used cabinet space. Overcrowding here can lead to mealtime chaos.
Challenges:
- Expired food items
- Duplicate pantry staples
- Difficult-to-reach items in the back
- Awkwardly shaped containers
Solutions:
- Utilize FIFO: Place newer canned goods or boxes behind older ones.
- Stackable Containers: Transfer bulk items like flour, sugar, pasta, and cereal into clear, airtight, stackable containers. This maximizes space, keeps food fresh, and makes it easy to see quantities. Check out resources on food storage guidelines to ensure proper practices.
- Tiered Shelving: For canned goods or spices, tiered shelves allow you to see all items at once, preventing that forgotten jar at the back.
- Lazy Susans: Perfect for oils, vinegars, and condiments in hard-to-reach corner cabinets or deep shelves.
- Bin Systems: Group packets, snacks, or breakfast items in designated bins.
Under-Sink Cabinets
Often damp, dark, and filled with a confusing array of cleaning supplies and plumbing.
Challenges:
- Leaky bottles
- Hazardous chemicals stored haphazardly
- Limited vertical space due to pipes
- Items getting lost in the dark
Solutions:
- Containment is Crucial: Use sturdy bins or caddies to group cleaning supplies (e.g., one for kitchen cleaners, one for bathroom, one for laundry). This also contains any potential leaks.
- Adjustable Shelving: Look for under-sink organizers with adjustable shelves or pull-out drawers to navigate around pipes and maximize usable space.
- Clear Labels: Label all cleaning solutions, especially if they are in generic spray bottles.
- Safety First: Store all harsh chemicals out of reach of children and pets. Consider a cabinet lock if necessary.
- Door Storage: Use the inside of the cabinet doors for smaller items like sponges, brushes, or rolls of paper towels.
Bathroom Cabinets
These can quickly become a jumble of half-used toiletries, old makeup, and expired medications.
Challenges:
- Small items getting lost
- Expired medications and cosmetics
- Moisture can damage items
- Limited shelf depth
Solutions:
- Drawer Organizers & Small Bins: Ideal for items like cotton swabs, bobby pins, travel-sized toiletries, and makeup.
- Tiered Trays: For medications, keep them grouped and easy to see. Ensure they are stored away from heat and moisture.
- Medicine Safety: Dispose of expired medications properly. Check with your local pharmacy or municipality for guidance on medication disposal.
- Clear Jars: Use clear jars to store items like bath salts, cotton balls, or makeup brushes.
- Utilize Vertical Space: Stackable shelves are great for creating more levels for smaller bottles and tubes.
Tools and Accessories That Help
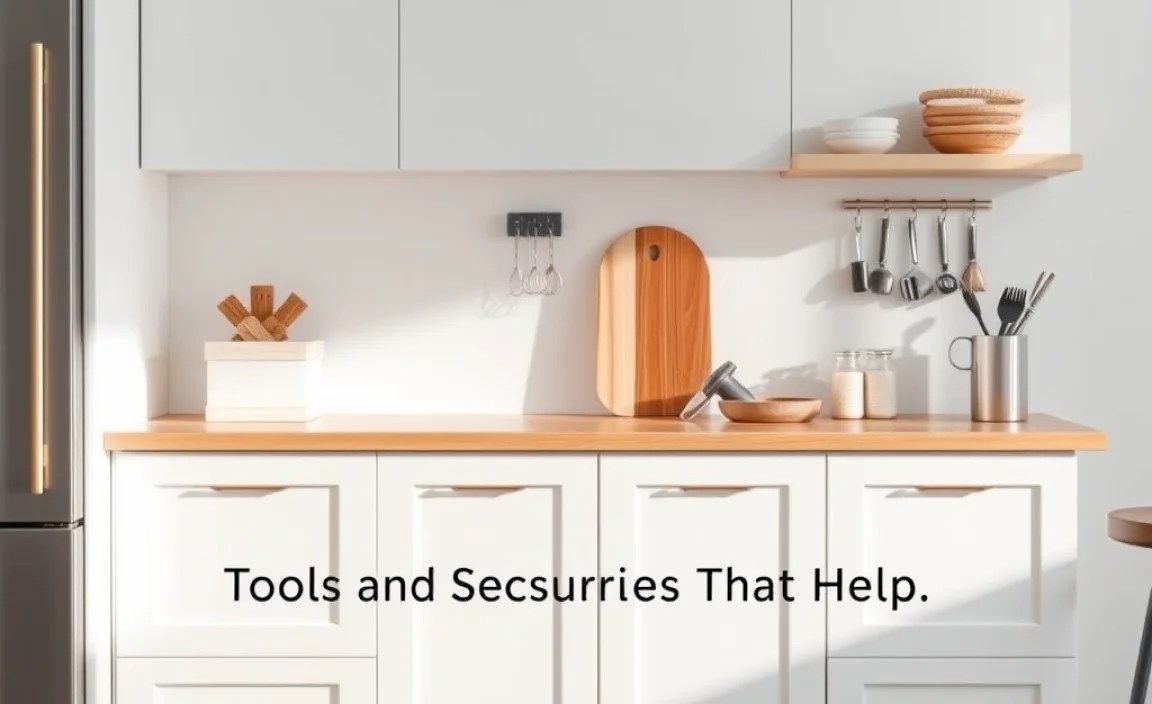
While not always necessary, a few smart accessories can significantly enhance your unclogging efforts and make maintaining order a breeze.
Essential Organizers:
These are fundamental for creating structure within your cabinets.
- Shelf Risers/Stackable Shelves: Instantly create extra layers.
- Drawer Dividers: Keep small items contained and easy to find.
- Bins and Baskets: Group similar items and make them pull-out friendly.
- Lazy Susans/Turntables: Essential for corner cabinets and deep shelves.
- Over-the-Door Organizers: Utilize unused door space.
Helpful Tools:
These make the process smoother and more efficient.
- Measuring Tape: Crucial for ensuring organizers fit your cabinets.
- Cleaning Supplies: All-purpose cleaner, microfiber cloths, a vacuum with a crevice tool for cleaning out dust and debris.
- Labels and Marker: For clear identification of what’s inside bins or on shelves.
- Step Stool: If you have high cabinets, a step stool ensures safe access.
- A Trash Bag and Donation Box: Have these ready during the decluttering phase.
When to Consider a Professional:
For most cabinet decluttering, DIY is perfectly sufficient. However, if you are:
- Facing very significant structural issues with your cabinets.
- Dealing with pest infestations or severe.
