
Upgrade caulking cost typically ranges from $100 to $500 for DIY projects, depending on linear footage and caulk type. Professional installation can add $200 to $800. This guide breaks down material expenses and labor factors, helping you budget effectively for a watertight home.
Is your home’s caulk looking a little worse for wear? Maybe it’s cracked, peeling, or just plain missing in spots. This isn’t just an eyesore; it’s an invitation for drafts, moisture, and even pests to sneak into your home. But thinking about fixing it can feel daunting, especially when you’re not sure about the costs involved. Don’t worry, upgrading your caulking is a manageable DIY project, and understanding the expense beforehand makes all the difference. We’ll walk you through exactly what goes into the cost, from the tubes of caulk itself to how much labor might be involved. Ready to seal up those gaps and boost your home’s comfort and efficiency?
Understanding the Basics of Caulking Costs


When you’re looking to upgrade your home’s caulking, the first thing that often comes to mind is the “upgrade caulking cost.” This phrase can bring up a lot of questions, especially if you’re new to home maintenance. What exactly influences this cost? It’s a combination of materials, the scope of the job, and whether you’re doing it yourself or hiring a professional. For DIYers, the primary expense is the caulk and any tools you might need. For those opting for professional help, you’ll be factoring in labor on top of materials. Understanding these components upfront will help you create a realistic budget.
Factors Influencing Your Caulking Budget
Several key factors play a role in how much you’ll spend on your caulking upgrade. Think of it like planning any other home improvement project; the size and complexity are major cost drivers.
- Linear Footage: This is the total length of gaps or seams you need to caulk. A small window frame will cost far less than sealing all the baseboards in your entire house. The more linear feet, the more caulk and time you’ll need.
- Type of Caulk: Not all caulk is created equal. Different types are designed for specific applications and offer varying levels of durability, flexibility, and resistance to elements like water and UV rays. This variety directly impacts the price per tube. We’ll dive into this more later.
- Surface Preparation: Before new caulk can be applied, old caulk often needs to be removed. This can involve scraping, cutting, or using a solvent. The more prep work required, the more time and potentially more supplies (like a caulk removal tool) you’ll need.
- Accessibility: Caulking high areas, tight corners, or spots that are difficult to reach can increase the time and effort needed, especially for professionals. This can translate to higher labor costs.
- DIY vs. Professional: As you might expect, doing the work yourself is almost always cheaper in terms of immediate cash outlay. However, it requires your time and effort. Hiring a professional saves you time and often ensures a cleaner, more durable finish, but comes at a higher price point.
Material Costs: The Caulk Itself
The most direct cost in your caulking upgrade is the caulk itself. The price of a single tube can vary significantly, from a few dollars to over $15. This difference comes down to the caulk’s formulation and its intended use. For a good estimate, you’ll want to understand the types available.
Types of Caulk and Their Price Points
Choosing the right caulk is crucial for a long-lasting seal. Here’s a look at common types and what you can expect to pay:
1. Acrylic Latex Caulk (Painter’s Caulk)
- Description: This is the most common and budget-friendly option. It’s water-based, easy to apply, cleans up with water, and can be painted over once dry. It’s great for interior gaps like around baseboards, window and door trim, and non-structural cracks.
- Price Range: $3 – $7 per tube.
- Pros: Affordable, easy to use, paintable, good for indoor use.
- Cons: Less flexible, can shrink over time, not ideal for high-moisture areas or exterior use where it’s exposed to extreme weather.
2. Silicone Caulk
- Description: Known for its excellent flexibility and waterproof properties. It’s ideal for bathrooms, kitchens, around sinks, tubs, showers, and windowsills where moisture is common. However, most silicones cannot be painted over.
- Price Range: $5 – $12 per tube.
- Pros: Highly waterproof, very flexible, durable in wet environments.
- Cons: Can be more difficult to apply and clean up (requires mineral spirits), usually not paintable, can be less durable in very high heat.
3. Siliconized Acrylic Latex Caulk
- Description: This offers a good balance. It starts with the ease of acrylic latex but adds silicone for improved flexibility and water resistance. It’s a versatile option for both indoor and outdoor use, and many can be painted.
- Price Range: $4 – $9 per tube.
- Pros: Good adhesion, better flexibility and water resistance than plain latex, often paintable, easier to clean up than pure silicone.
- Cons: Not as waterproof or flexible as 100% silicone.
4. Polyurethane Caulk
- Description: Considered a premium caulk, polyurethane offers superior durability, flexibility, and adhesion. It’s excellent for exterior applications, trim, joints, and areas that experience a lot of movement or weathering. It’s also paintable.
- Price Range: $8 – $15 per tube.
- Pros: Very durable, flexible, excellent adhesion, weather-resistant, paintable.
- Cons: Can be trickier to apply and clean up (often requires specialized cleaners), typically more expensive.
5. Speciality Caulks
- Description: There are also caulks formulated for specific jobs, like fire-rated caulks, acoustical caulks, or concrete/masonry caulks. These can be more expensive and are best used for their intended purpose.
- Price Range: $7 – $20+ per tube depending on application.
Estimating Caulk Quantity
A standard caulk tube contains about 10.3 fluid ounces. To estimate how many tubes you’ll need, you can use a general rule of thumb: one tube of caulk typically covers about 30 linear feet of a 1/4-inch bead. The wider or deeper the bead, the less coverage you’ll get per tube.
Quick Calculation Example: If you need to caulk around a standard door frame (using 1/4-inch bead), which might be roughly 14-16 linear feet, you’ll likely need about half a tube. For a very large project, like sealing all exterior windows on a modest home (say, 10 windows averaging 10 linear feet each), that’s 100 linear feet. Using our rule of thumb, you’d need approximately 3-4 tubes of caulk.
Always buy a little more than you think you’ll need. It’s better to have extra for touch-ups than to run out mid-project and have to make a special trip, potentially mismatching the color or finish.
Essential Caulking Tools
Beyond the caulk itself, you’ll need a few tools to do the job properly. Fortunately, these are often one-time purchases that can be used for many future projects.
- Caulk Gun: This is essential for dispensing caulk smoothly. Basic models are very inexpensive, while dripless or ergonomic models cost a bit more. A good dripless model is worth the investment to avoid messy drips. ($5 – $30+).
- Caulk Removal Tool or Utility Knife: Essential for scraping away old caulk. A dedicated caulk removal tool often has multiple edges for different tasks. ($5 – $15).
- Putty Knife or Scraper: Useful for stubborn old caulk or for smoothing new caulk. ($3 – $10).
- Cleaning Supplies: Rags, rubbing alcohol, or mineral spirits (depending on caulk type) are needed for cleaning up excess caulk and preparing surfaces. ($5 – $15).
- Joint Tool or Smoothing Tool: These dedicated tools help create a clean, smooth bead of caulk. Some DIYers use a damp finger or a wet rag, but dedicated tools offer better control for beginners. ($5 – $10).
- Painter’s Tape: For creating crisp, clean caulk lines, especially for beginners. ($3 – $5 per roll).
Labor Costs: Professional vs. DIY

This is where the upgrade caulking cost can dramatically shift. Deciding whether to DIY or hire a pro is a major budget consideration.
DIY: The Cost of Your Time and Effort
If you choose to tackle the project yourself, your primary costs are materials and tools. The “labor cost” is essentially the value of your time. For simple interior jobs around trim or a few windows, a DIYer might spend 2-5 hours. For a larger exterior project or extensive interior caulking, it could easily be a full weekend’s work.
| DIY Project Component | Estimated Cost Range | Notes |
|---|---|---|
| Caulk Tubes (e.g., 4-8 tubes) | $20 – $80 | Depending on type and quantity. |
| Caulk Gun | $5 – $30 | A basic or mid-range model. |
| Caulk Removal Tool / Utility Knife | $5 – $15 | Essential for prep. |
| Cleaning Supplies (rags, spirits) | $5 – $15 | For prep and cleanup. |
| Smoothing Tools / Painter’s Tape | $5 – $15 | For a cleaner finish. |
| Total DIY Estimate (for moderate project) | $40 – $155 | Excludes cost of time spent. |
Professional Installation: What to Expect
Hiring a professional for caulking can significantly increase the overall upgrade caulking cost, but it often comes with benefits like speed, expertise, and a warranty. Professionals have the experience to prepare surfaces correctly, choose the best caulk for the job, and apply it flawlessly, ensuring maximum longevity and a polished look.
Professional pricing can vary based on:
- Hourly Rate or Project Bid: Some contractors charge by the hour, while others will give you a flat fee based on the scope of work.
- Geographic Location: Labor rates are generally higher in areas with a higher cost of living.
- Complexity and Scope: As with DIY, the amount of linear footage, need for extensive prep work, and accessibility will affect the price.
- Type of Caulk Used: If you opt for premium caulks (like high-performance polyurethane), the material cost passed on by the professional will be higher.
For a typical residential caulking job (e.g., sealing exterior trim around windows and doors, or sealing interior gaps), you might expect professional labor and materials to cost anywhere from $200 to $800 or more. For very large homes or extensive projects, this cost could be higher.
| Professional Project Area | Estimated Cost Range (Materials + Labor) | Typical Scope |
|---|---|---|
| Exterior Window & Door Sealing (per window/door) | $50 – $150 | Removal of old caulk, cleaning, application of new caulk. |
| Interior Trim Caulk Upgrade (whole house) | $200 – $500 | Baseboards, window/door casing, often using paintable latex caulk. |
| Bathroom Sealing (tub, shower, sink) | $100 – $300 | Typically uses mold-resistant silicone caulk. |
| Extensive Exterior Caulking (e.g., siding, trim, foundation) | $400 – $1000+ | Larger homes, significant weather exposure, premium materials. |
Step-by-Step: DIY Caulking Upgrade

Ready to get hands-on? Follow these steps for a successful DIY caulk upgrade. Remember, proper preparation is key to a professional-looking and long-lasting finish.
Step 1: Gather Your Supplies
Before you start, make sure you have everything you need:
- Your chosen caulk (e.g., siliconized acrylic latex for versatility)
- Caulk gun
- Caulk removal tool or utility knife
- Putty knife or scraper
- Rags
- Rubbing alcohol or mineral spirits (as per caulk instructions)
- Painter’s tape (optional, for guides)
- Bucket of water (for cleaning tools and hands if using water-based caulk)
- Drop cloth or old newspaper to protect surfaces
Step 2: Prepare the Area
This is crucial for good adhesion and a neat finish.
- Remove Old Caulk: Use your caulk removal tool or utility knife to cut and scrape away all existing caulk from the seam. Get as much as possible.
- Clean the Surface: Wipe down the area with a damp rag to remove dust and debris. For silicone or polyurethane caulks, you might need to wipe with mineral spirits to ensure a clean, oil-free surface for optimal adhesion. Let it dry completely.
- Masking (Optional): For perfectly straight caulk lines, apply painter’s tape along both edges of the gap, creating an even border where you want the caulk to go. Press the tape down firmly.
Step 3: Apply the New Caulk
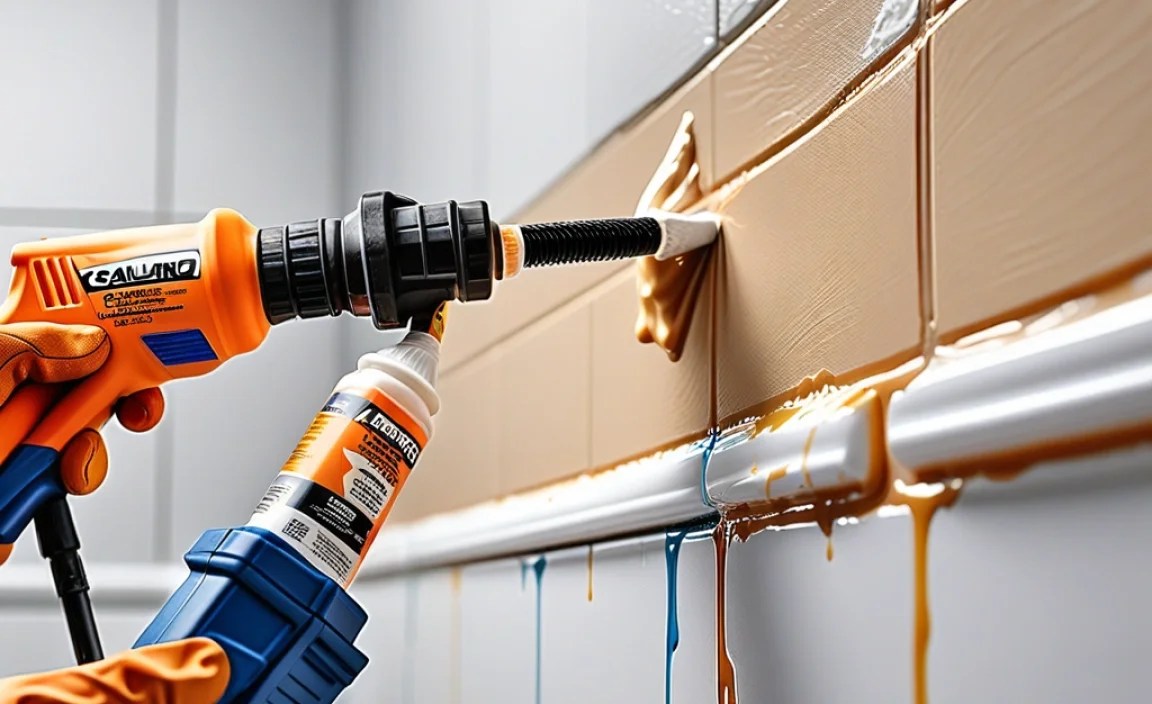
This is where the caulk gun comes in!
- Prepare the Caulk Tube: Cut the nozzle tip at a 45-degree angle using a utility knife. Start with a small opening; you can always cut more if needed. Puncture the inner seal of the tube using the rod on the caulk gun.
- Load the Caulk Gun: Pull back the plunger on the caulk gun, insert the tube, and push the plunger forward until it engages the tube’s follower.
- Start Caulking: Place the tip of the nozzle at the beginning of the gap and apply steady, even pressure to the trigger of the caulk gun. Move the gun at a consistent speed along the seam, allowing the caulk to fill the gap and create a smooth bead. Aim for a continuous bead. Release the trigger and pull back slightly on the plunger to stop the flow, preventing drips.
Step 4: Smooth the Bead
This makes the seam look professional.
- Tooling the Caulk: If using a caulk smoothing tool, lightly dampen it with water (for latex) or a recommended solvent. Run the tool along the bead of caulk at a consistent angle, pressing gently to push caulk into the gap and create a concave surface. This removes excess caulk and creates a neat finish.
- Alternative Smoothing: For DIYers, a wet finger (wear a glove if you prefer) or a damp cloth can also be used. Work quickly before the caulk starts to skin over.
- Remove Excess: Wipe away any excess caulk that squeezed out onto the tape or surrounding surface with a damp rag immediately.
Step 5: Remove Tape and Cure
The final touches for a clean job.
- Remove Painter’s Tape: If you used tape, carefully pull it off immediately after smoothing the caulk. Pull it away at an angle, away from the freshly applied caulk.
- Curing Time: Allow the caulk to cure according to the manufacturer’s instructions. This can range from a few hours to 24 hours or more. Avoid disturbing the area during this time. For paintable caulks, ensure they are fully cured before painting.
