
Mastering vanity layout for beginners is achievable! This guide breaks down choosing the right vanity size, style, and placement. We’ll cover sink types, countertop materials, and installation basics, ensuring you create a functional and beautiful bathroom space with confidence and ease.
Tired of a bathroom that feels cramped or just not quite right? You’re not alone! Figuring out the perfect vanity layout can feel like a puzzle, especially if you’re new to home improvement projects. A well-planned vanity is the heart of a functional bathroom, offering storage and style. Getting it wrong can lead to wasted space and daily frustration. But don’t worry, this guide is here to help! We’ll walk you through everything you need to know, step-by-step, to choose and place your vanity like a pro. Get ready to transform your bathroom!
Understanding Vanity Layout: What You Need to Know

A vanity is more than just a sink and a cabinet; it’s a crucial element in your bathroom’s design and functionality. When we talk about vanity layout, we’re essentially discussing how the vanity unit fits into your bathroom space, considering its size, shape, sink style, and surrounding elements like the toilet and shower. For beginners, the goal is to create a layout that is both aesthetically pleasing and highly practical for everyday use.
Choosing the right vanity layout involves balancing several factors: the available space, your storage needs, your budget, and your personal style. A common beginner’s mistake is overlooking the importance of clearances – the space needed around the vanity for comfortable movement and to ensure other bathroom fixtures can open and close properly. We’ll cover how to measure and plan for these essential clearances.
Key Components of a Vanity Layout
Before diving into the layout process, let’s get familiar with the main players involved:
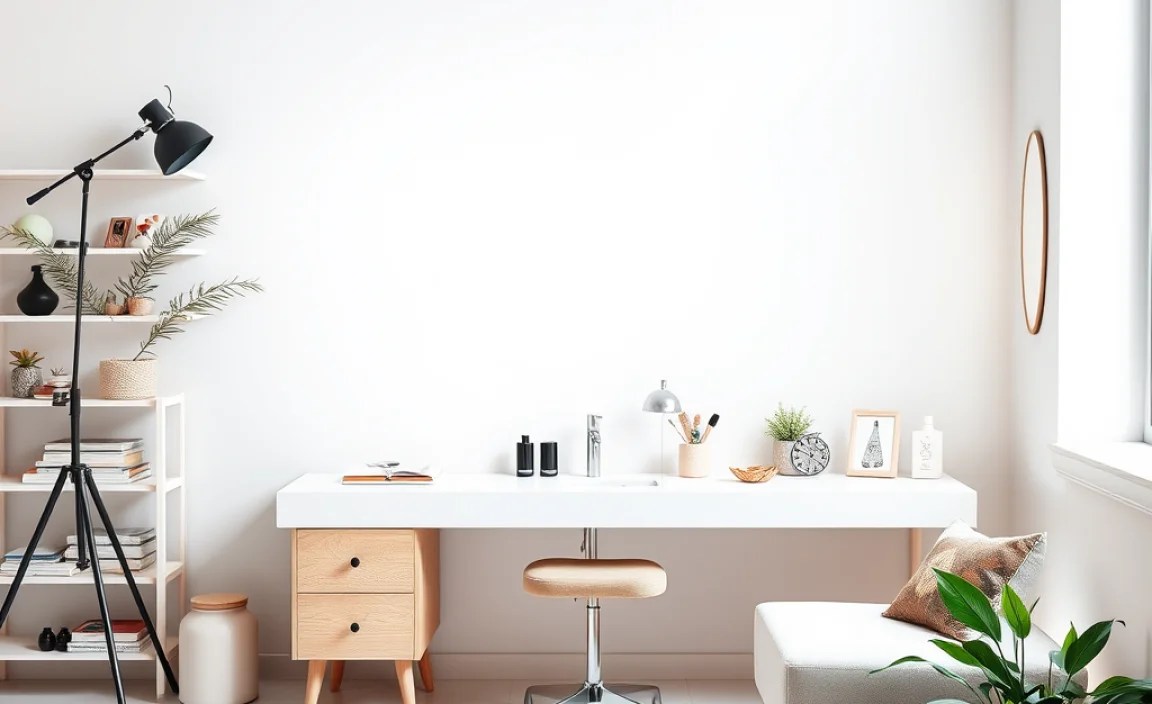
- The Vanity Cabinet: This is the base of your vanity, providing storage. It comes in various widths, depths, and styles (pedestal, freestanding, wall-mounted).
- The Sink: Where you wash your hands and face. Different types include undermount, drop-in (or self-rimming), vessel, and console.
- The Countertop: The surface on top of the cabinet. Materials range from laminate to quartz and granite, offering different looks and durability.
- Faucets & Fixtures: The controls for water and drainage.
- Mirror & Lighting: Essential for grooming and setting the mood.
- Storage Accessories: Sometimes overlooked, but vital for keeping the vanity area tidy.
Step-by-Step Guide to Vanity Layout for Beginners
Let’s get started on creating your perfect vanity layout. Follow these steps for a smooth process:
Step 1: Measure Your Bathroom Space Accurately
This is the absolute first step and can’t be stressed enough. Grab a reliable tape measure and a notepad.
What to Measure:
- Full Bathroom Width and Length: This gives you the overall canvas.
- Location of Doors and Windows: Note how they swing and their exact placement.
- Location of Existing Plumbing: Where are the hot and cold water lines, and the drainpipe? Knowing this is crucial for sink and faucet choices, and whether you can move plumbing (which can be a bigger project).
- Clearance Areas:
- Between the vanity and the toilet: Aim for at least 15 inches (38 cm) from the center of the toilet to any obstruction on either side for comfort and code compliance.
- Between the vanity and the opposite wall or shower: A minimum of 30 inches (76 cm) is recommended for comfortable movement.
- In front of the vanity: At least 30 inches (76 cm) of clear floor space is ideal for standing and using the sink.
Pro Tip: Use painter’s tape on the floor to mark out the dimensions of potential vanity sizes. This helps you visualize how much space a particular vanity will take up and if it feels too crowded.
Step 2: Determine Your Vanity Needs
Think about how you use your bathroom and what you need from your vanity.
- Storage Requirements: Do you need ample drawer space for toiletries and makeup, or are open shelves more your style?
- Sink Configuration: Single sink or double sink? This significantly impacts the width of vanity you’ll need.
- Style Aesthetic: Modern, traditional, rustic, minimalist? Your vanity should complement your overall bathroom design.
For single-sink vanities, widths can range from 18 inches (46 cm) to 36 inches (91 cm). Double-sink vanities typically start at 60 inches (152 cm) and go up from there. Consider the depth as well; standard depths are around 20-22 inches (51-56 cm), but shallower options exist for smaller bathrooms.
Step 3: Choose Your Vanity Type and Style
With your measurements and needs in hand, you can start exploring vanity options.
- Freestanding Vanities: These are the most common. They sit on the floor like furniture and offer a traditional look. They are generally easier to install as they don’t require wall mounting beyond securing them.
- Wall-Mounted (Floating) Vanities: These are attached directly to the wall, creating a “floating” effect. They offer a modern look and can make a small bathroom feel more spacious by leaving the floor visible. However, they require strong wall support and precise installation.
- Pedestal Sinks: These don’t have a cabinet, offering a minimalist look and saving floor space. Storage is sacrificed, but they can be charming for powder rooms.
- Consoles: Similar to pedestal sinks but often feature legs and a more substantial presence, sometimes with a shelf or drawer.
Step 4: Select Your Sink and Countertop
These choices significantly impact both the usability and look of your vanity.
Sink Types:
- Undermount Sinks: Installed beneath the countertop. This creates a seamless look, making it easy to wipe crumbs and water directly into the sink. They are generally more expensive to install.
- Drop-in (Self-Rimming) Sinks: The rim of the sink sits on top of the countertop. These are typically the most budget-friendly and easiest to install yourself.
- Vessel Sinks: These sit entirely on top of the countertop, resembling a bowl. They make a bold design statement but can be harder to clean around and might require a taller faucet.
Countertop Materials:
| Material | Pros | Cons | Beginner Friendliness |
|---|---|---|---|
| Laminate | Affordable, wide variety of colors/patterns, easy to clean | Prone to scratches, heat, and water damage; can look less premium | High – easy to install and maintain |
| Solid Surface (e.g., Corian) | Seamless look, repairable, non-porous, good range of colors | Can scratch, may require professional installation for cutouts | Medium – installation can be tricky for beginners |
| Granite | Durable, heat resistant, unique natural patterns, adds value | Porous (needs sealing), can stain, heavy, expensive | Low – requires professional templating and installation |
| Quartz | Very durable, non-porous, stain and scratch resistant, consistent patterns, low maintenance | Can be expensive, prone to damage from extreme heat, heavy | Medium – often requires professional installation due to weight and precision cuts, but less so than granite. |
| Marble | Luxurious look, classic beauty | Very porous, stains easily, scratches, requires frequent sealing, expensive | Very Low – high maintenance, delicate; best left to professionals. |
For beginners, laminate and quartz are often good choices. Laminate is the most budget-friendly and DIY-friendly, while quartz offers excellent durability and a premium look with less maintenance than natural stone.
Step 5: Plan for Plumbing and Electrical
This is where things can get a little more technical, but we’ll keep it simple.
- Plumbing: Most standard vanities are designed to fit over existing plumbing rough-ins. If you’re moving plumbing, it’s often best to consult a professional plumber. Ensure the vanity cabinet has appropriate cutouts for the drainpipe and water supply lines. Many pre-fabricated vanities come with these pre-drilled.
- Electrical: Do you need an outlet behind the vanity for a hairdryer or shaver? Plan for this during the framing stage if you’re doing a full renovation, or consider surface-mount solutions if not. Always hire a licensed electrician for any electrical work to ensure safety and compliance with building codes. You can learn more about electrical safety at the Consumer Product Safety Commission.
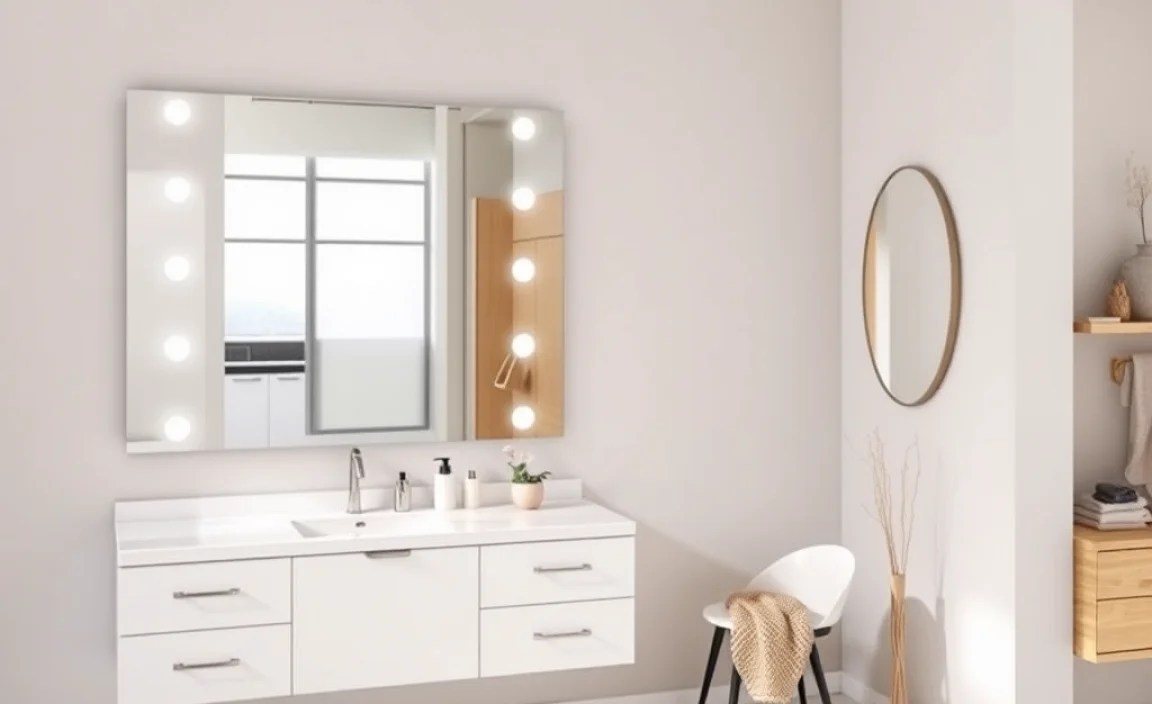
Step 6: Consider the Mirror and Lighting
These elements complete the vanity area.
- Mirror: A mirror should ideally be centered over the sink and be roughly 2/3 the width of the vanity. Consider framed or frameless mirrors, and whether you want additional features like built-in lighting or defoggers.
- Lighting: Good vanity lighting is crucial. Options include:
- Sconces: Mounted on either side of the mirror provide balanced, shadow-free light.
- Overhead Light: A single fixture above the mirror can work but may create shadows.
- Integrated Lighting: Many modern mirrors and medicine cabinets come with built-in LED lighting.
Positioning your lights at eye level is generally best for grooming tasks.
Step 7: Installation Basics (For Do-It-Yourselfers)
While complex installations might require a professional, many basic vanity installations are manageable for a beginner with the right tools and patience.
Essential Tools:
- Tape Measure
- Level
- Drill/Driver with assorted bits
- Screwdrivers (Phillips and flathead)
- Stud Finder
- Caulking Gun
- Adjustable Wrench
- Pliers
- Safety Glasses and Gloves
General Installation Steps (Varies by Vanity Type):
- Turn off water supply: Locate the main water shut-off valve or individual shut-off valves for the sink.
- Remove old vanity (if applicable): Disconnect plumbing, detach the old vanity, and clean the area.
- Locate wall studs: Use a stud finder to mark where you will secure the new vanity. This is critical for stability.
- Position the new vanity: Place it in the desired location and use a level to ensure it’s straight.
- Secure the vanity to the wall: Screw through the vanity’s support frame (or backing) into the wall studs.
- Connect plumbing: Attach the drain assembly and connect water supply lines to the faucet tailpieces.
- Caulk around the countertop: Apply a bead of silicone caulk around the edge where the countertop meets the wall to prevent water damage.
- Install sink and faucet: Follow the manufacturer’s instructions for your specific sink and faucet model.
- Turn water back on: Check carefully for any leaks at all connections.
Note: For wall-mounted vanities, ensure you use appropriate anchors and that the wall can support the weight. Always refer to the manufacturer’s installation guide for your specific vanity model.
Common Vanity Layout Challenges and Solutions

Even with careful planning, you might encounter a few bumps. Here are common issues and how to address them:
- Small Bathrooms: Opt for wall-mounted vanities, corner vanities, or narrow depth vanities. Utilize vertical space with shelving above the vanity. Consider a vanity with integrated sink and countertop to minimize seams.
- Awkward Plumbing Locations: Sometimes, plumbing can’t be moved easily. Look for vanities with flexible plumbing access or consider shallower cabinets that can accommodate the pipe in the back. Recessed medicine cabinets can add storage without taking up floor space.
- Lack of Natural Light: Position your vanity under a window if possible. If not, ensure ample and well-placed artificial lighting. A larger or strategically placed mirror can also help bounce light around the room.
- Uneven Floors: Most freestanding vanities have adjustable legs or shims can be used during installation to ensure the vanity sits level and stable.
Vanity Size and Placement Cheat Sheet
Here’s a quick reference for common bathroom sizes and recommended vanity considerations:
| Bathroom Size (Approximate) | Recommended Vanity Width | Sink Options | Considerations |
|---|---|---|---|
| Powder Room (e.g., 3’x5′) | 18″ – 24″ | Small single sink, pedestal sink, vessel sink | Focus on style over storage; ample legroom is key. |
| Small Bathroom (e.g., 5’x7′) | 24″ – 36″ | Single sink (undermount or drop-in) | Balance sink size with comfortable clearances. Maximize storage within width. |
| Medium Bathroom (e.g., 6’x8′) | 36″ – 48″ | Single sink, or small double sink | More flexibility for sink size and storage. |
| Large Bathroom (e.g., 8’x10′ or more) | 60″ – 72″+ | Double sink is common; larger single sink options | Plenty of space for dual sinks, ample counter and storage space. |
Maintaining Your Vanity
Once your vanity is installed, regular cleaning and minor maintenance will keep it looking great and functioning well.
- Countertop Care: Wipe down daily with a soft cloth and mild soap. For natural stone, follow specific sealing recommendations. Avoid harsh chemicals or abrasive cleaners.
- Cabinet Cleaning: Dust cabinet exteriors and drawer fronts regularly. For spills or smudges, use a damp cloth and mild cleaner suitable for the cabinet finish.
- Plumbing Checks: Periodically check under the sink for any signs of leaks or corrosion. Tighten connections if necessary.
- Drain Maintenance: Keep drains clear of hair and debris. Use a drain snake or a plunger if clogs occur.
For more in-depth cleaning and maintenance tips, check out resources from reputable home improvement sites like This Old House.
Frequently Asked Questions (FAQs)
Q1: What is the most important factor when choosing a vanity layout?
A1: The most important factor is accurately measuring your bathroom space and ensuring adequate clearances around the vanity for comfortable movement and access to other fixtures. This prevents daily frustration and potential code violations.
Q2: Can I install a vanity myself if I’m a beginner?
A2: Yes, many freestanding vanities with standard plumbing can be installed by beginners with basic tools and by carefully following the manufacturer’s instructions. Always prioritize safety and consider hiring a professional for any plumbing or electrical work outside your comfort zone.
Q3: How much space do I need between the vanity and the toilet?
A3: Building codes typically require at least 15 inches (38 cm) from the centerline of the toilet to any side obstruction or wall, and at least 30 inches (76 cm) of clear space in front of the toilet. Ensure your vanity placement respects these clearances for functionality and safety.
Q4: What is the easiest sink type for a beginner to install?
A4: Drop-in (self-rimming) sinks are generally the easiest for beginners because the sink rim rests on top of the countertop, and the installation often involves less precise fitting and sealing compared to undermount or complex vessel sinks.
