
Quick Summary: Explore proven wall-mounted towel rack designs that blend style and function for any bathroom. Learn how to choose, install, and organize your towels effectively, transforming your space with simple, reliable solutions for a tidier, more inviting home.
Tired of towels cluttering your bathroom floor or draped precariously over the shower door? A well-chosen wall-mounted towel rack can be a game-changer. It’s a simple upgrade that brings order and a touch of style to your space. Many people feel overwhelmed thinking about installation or choosing the “right” rack. But don’t worry! With a few tips and proven design ideas, you’ll be organizing like a pro.
We’ll walk you through everything, from picking the perfect rack for your needs to making sure it stays put. Get ready to say goodbye to towel chaos and hello to a beautifully organized bathroom.
Proven Wall-Mounted Towel Rack Designs

When it comes to wall-mounted towel racks, there’s a world of options beyond just a single bar. The best design for you depends on your bathroom’s size, your storage needs, and your personal style. Let’s explore some tried-and-true ideas that work wonderfully in most homes.
1. Single Towel Bars: Sleek and Space-Saving
The classic single towel bar is a popular choice for a reason. It’s minimalist, easy to install, and perfect for holding one bath towel. They come in various lengths and finishes, from brushed nickel to matte black, allowing you to match your existing decor.
- Best for: Smaller bathrooms, guest bathrooms, or for those who prefer a clean, uncluttered look.
- Pros: Space-efficient, simple design, easy to clean.
- Cons: Limited towel capacity.
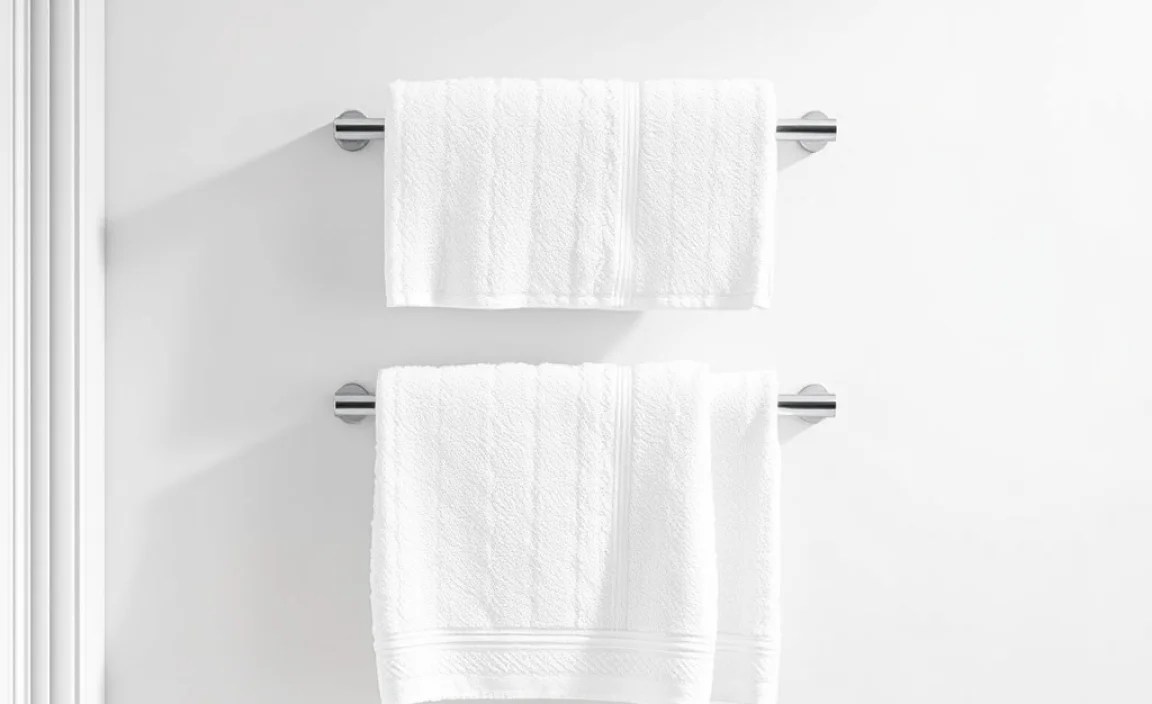
2. Double Towel Bars: Double the Storage
For bathrooms needing more towel-holding power, a double towel bar is ideal. These racks feature two parallel bars, doubling your hanging space. This is perfect for families or for separating wet and dry towels. Some double bars also have a shelf above for lotions or decorative items.
- Best for: Family bathrooms, or anyone who likes to keep multiple towels readily accessible.
- Pros: Increased storage capacity, allows for better towel drying and separation.
- Cons: Takes up a bit more wall space than a single bar.
3. Towel Racks with Shelves: Functional Decor
Combining storage and display, towel racks with integrated shelves are incredibly versatile. The bars below can hold towels, while the shelf above is perfect for folded hand towels, decorative items, or toiletries. This option adds a layer of functional elegance.
- Best for: Bathrooms where extra surface space is needed for small items, or for a more curated look.
- Pros: Offers dual functionality (hanging and shelving), adds visual interest.
- Cons: Can look cluttered if not organized well; requires a bit more wall space.
4. Towel Hooks: Casual and Accessible
Towel hooks are a more casual alternative to bars and are fantastic for quick and easy access. You can install a single hook for each family member or a row of hooks for hand towels and bathrobes. They are especially useful in smaller spaces or for children’s towels.
- Best for: Kids’ bathrooms, powder rooms, or for robes and smaller towels.
- Pros: Very easy for anyone to use, can be spaced out to fit your needs, great for odd-shaped towels or robes.
- Cons: Towels can dry less efficiently compared to bars; can look messy if not hung neatly.
5. Towel Ladders and Stands (Wall-Mounted Variations)
While traditionally standing items, some modern designs offer wall-mounted versions of towel ladders or tiered racks. These often feature multiple bars at different heights, mimicking a ladder’s look. They are excellent for showcasing beautifully folded towels or for maximizing vertical space.
- Best for: Bathrooms with a modern or spa-like aesthetic, or where vertical storage is key.
- Pros: High capacity, stylish design, good air circulation for towels.
- Cons: Can be more visually prominent; installation might require more precision for stability.
6. Towel Rings: For Hand Towels
Towel rings are specifically designed for hand towels. They provide a neat, circular spot for them to hang, preventing them from falling to the floor. They are usually installed near the sink, making them convenient for drying hands.
- Best for: Placement near sinks, for guest bathrooms, or for easy access to hand towels.
- Pros: Compact, keeps hand towels tidy and accessible, often a stylish accent piece.
- Cons: Not suitable for bath towels.
Choosing the Right Material and Finish

The material and finish of your towel rack aren’t just about looks; they also impact durability and maintenance. Here’s a quick guide:
| Material | Pros | Cons | Best For |
|---|---|---|---|
| Stainless Steel | Resistant to rust and corrosion, durable, easy to clean. | Can be more expensive. | High-humidity bathrooms, modern or transitional styles. |
| Aluminum | Lightweight, rust-resistant, affordable. | Can be less sturdy than stainless steel. | Budget-friendly projects, casual styles. |
| Brass (often plated) | Classic look, durable when properly finished. | Can tarnish or corrode if plating is damaged; can be pricey. | Traditional or vintage-inspired bathrooms. |
| Chrome | Shiny, reflective, durable, easy to clean. | Can show water spots and fingerprints easily. | Most bathroom styles, especially contemporary. |
| Matte Black / Powder-Coated Metals | Modern aesthetic, hides water spots better than chrome. | Can chip if hit hard; quality varies by finish. | Modern, industrial, or minimalist bathrooms. |
Consider Your Finish
Match the finish to your existing bathroom fixtures for a cohesive look. Common finishes include:
- Polished Chrome: Shiny and classic.
- Brushed Nickel: Softer, matte silver look.
- Matte Black: Bold and contemporary.
- Oil-Rubbed Bronze: Dark, warm, and antique-inspired.
- Polished Brass: A warm, golden tone.
Installation Made Easy: A Step-by-Step Guide

Installing a wall-mounted towel rack is a DIY project most beginners can tackle with confidence! Safety and proper technique are key to a secure mount that will last.
Step 1: Gather Your Tools and Materials
Before you start, make sure you have everything you need. This will save you time and frustration.
- Your chosen wall-mounted towel rack and all its included mounting hardware.
- Stud finder: Essential for locating wall studs.
- Level: To ensure your rack is perfectly straight.
- Pencil: For marking.
- Drill with drill bits: Appropriate sizes for pilot holes and screws.
- Screwdriver: (Phillips or flathead, depending on your screws).
- Measuring tape: For precise placement.
- Wall anchors (if not mounting into studs): Drywall anchors, toggle bolts, or molly bolts. Read more about choosing the right anchors on This Old House for heavy-duty options.
- Safety glasses: Always wear these when drilling.
- Optional: Spackle or putty if you need to fill old holes; painter’s tape.
Step 2: Choose the Perfect Location
Think about placement carefully to maximize usability and visual appeal.
- Height: For bath towels, aim for about 5 feet (60 inches) from the floor to the top of the bar. For hand towels or racks near a sink, 3-4 feet from the floor is typical.
- Clearance: Ensure there’s enough space around the rack for towels to hang freely without touching walls, doors, or other fixtures. About 12-15 inches of clearance on either side of a bar is usually good.
- Accessibility: Place it within easy reach from the shower or sink.
- Wall Type: Identify if your wall is drywall, tile, or plaster. This will determine if you can screw directly into studs or need anchors.
Step 3: Locate Wall Studs
Mounting your towel rack into wall studs provides the most secure hold. This is especially important for a rack that will hold heavy, wet towels.
- Scan the area: Use your stud finder to scan horizontally across the desired mounting area.
- Mark the edges: Lightly mark the edges of the studs with your pencil.
- Find the center: Measure the distance between the edges and mark the center of the stud. Repeat for all mounting points.
Pro Tip: If you can’t hit studs for all mounting points, you’ll need appropriate wall anchors for the drywall sections. Ensure the anchors you choose are rated for the weight you expect. For more on wall anchoring, the Family Handyman offers great visual guides.
Step 4: Position and Mark Mounting Holes
This is where your measuring tape and level come in handy.
- Hold the rack: Have a helper hold the towel rack in the desired position, or if it has a separate mounting bracket, hold that in place.
- Use the level: Place your level on top of the rack or bracket to ensure it’s perfectly straight.
- Mark the holes: Once level and in position, use your pencil to mark the center of each screw hole through the bracket or rack.
- Double-check: Remove the rack and re-measure to ensure your marks are accurate and aligned with studs if possible.
Step 5: Drill Pilot Holes or Install Anchors
The size of your pilot hole depends on the screws you’re using and whether you’re screwing into a stud or using an anchor. For studs, drill a pilot hole slightly smaller than the screw diameter. For drywall anchors, follow the anchor manufacturer’s instructions for hole size.
- For studs: Drill pilot holes at your marked locations.
- For drywall anchors: Drill holes as specified by the anchor packaging. Insert the anchors into the holes until they are flush with the wall. You might need to tap them gently with a hammer or use the drill for some types.
Step 6: Mount the Towel Rack
Now it’s time to attach your rack!
- Align the rack: Position the rack or its mounting bracket over the pilot holes or anchors.
- Insert screws: Drive the mounting screws through the rack’s holes into the wall (or anchors) using your screwdriver or drill.
- Tighten securely: Tighten the screws until the rack is snug against the wall. Be careful not to overtighten, which could strip the screws or damage the wall/anchor.
- Check for stability: Give the rack a gentle pull to ensure it’s firmly attached.
Step 7: Final Check and Clean-Up
Wipe away any pencil marks or dust from drilling. Hang your towels and admire your work!
DIY and Creative Wall-Mounted Towel Rack Ideas

Feeling adventurous? You can also create unique towel racks with a bit of creativity and everyday items. These can add a very personal touch to your bathroom.
1. Repurposed Items
- Old Ladder Rungs: Mount individual ladder rungs horizontally on the wall for a rustic or farmhouse look.
- Plumbing Pipes: Create an industrial-chic look by using galvanized or copper pipes and fittings. Many hardware stores can cut custom lengths for you.
- Wooden Dowels: Simple wooden dowels mounted with brackets can create a minimalist, Scandinavian-inspired rack. Paint or stain them to match your decor.
- Oars or Drawer Pulls: Mount an old oar horizontally or use decorative drawer pulls as individual hooks for a quirky statement piece.
2. Floating Shelves with Hooks
Install a floating shelf and then attach stylish hooks underneath. This gives you a place to fold spare towels or display decor, while the hooks handle your daily towels.
3. Peg Rails
A simple wooden rail with pegs can be incredibly versatile. You can hang towels, brushes, or even small baskets for extra storage.
Optimizing Towel Storage and Organization
Once your rack is installed, here are some tips to keep your towels organized and looking great:
- Fold or Hang Neatly: Encourage everyone in the household to fold or hang towels neatly to prevent tangling and ensure better airflow.
- Separate Wet and Dry: If possible, use different bars or hooks for towels that are in use and those that are dry or clean.
- Consider Towel Size: Large bath sheets might require longer bars or multiple hooks.
- Regular Cleaning: Wash your towel rack periodically to remove soap scum and mineral deposits, keeping it looking its best.
- Don’t Overload: Avoid piling too many towels onto one bar, as this hinders drying and can strain the mounting.
Troubleshooting Common Installation Issues
Even with the best intentions, sometimes things don’t go perfectly. Here are common issues and how to fix them:
| Problem | Solution |
|---|---|
| Rack feels loose. | The screws might not be fully tightened, not engaging with studs, or anchors are failing. Re-tighten screws. If it still feels loose, remove the rack, check if it’s hitting studs. If not, add stronger anchors or toggle bolts. |
| Drilled into a pipe or wire. | STOP IMMEDIATELY! Turn off the power or water supply if possible. Carefully assess the wall from the outside. Consult a professional plumber or electrician for safe removal and repair. For future projects, consider using a multi-scanner that can detect wires and pipes within walls. |
| Tile surface makes drilling difficult. |
