
Upgrade your bathroom components to create a more functional and beautiful space! This guide covers essential fixtures like faucets, toilets, and lighting, plus stunning aesthetic touches such as tile and hardware, explaining each step simply for beginners.
Your bathroom. It’s more than just a room; it’s a daily retreat, a place for quick fixes, and often the first and last stop of your day. But is it working as hard as it should be for you? Sometimes, even the most functional bathrooms can feel a bit… tired. Maybe the faucet drips, the lighting is harsh, or the overall style just doesn’t spark joy. You might be thinking a full renovation is the only answer, but often, upgrading key bathroom components can make a world of difference. It’s easier and more budget-friendly than you think!
Don’t let the thought of a bathroom refresh feel overwhelming. We’re going to break down the essential bathroom components you can update and explore some stunning ways to make your space shine. From practical plumbing fixes to stylish decorative touches, we’ll guide you step-by-step, making sure you feel confident and ready to tackle these upgrades. Get ready to transform your bathroom from drab to fab!
Why Upgrade Your Bathroom Components?

Upgrading bathroom components isn’t just about making things look pretty – though that’s a fantastic bonus! It’s about improving daily life. A leaky faucet wastes water and money, while a poorly designed vanity can lead to clutter and frustration. Modernizing your fixtures can mean better water efficiency, easier cleaning, and a more comfortable experience every time you use the room.
Think about it: a new showerhead can turn a mundane shower into a spa-like experience. Updated lighting can dramatically change the mood and functionality of the space. Even small changes, like swapping out an old towel bar for a more stylish option, can elevate the entire feel of your bathroom. These upgrades also add value to your home, making them a smart investment.
Essential Bathroom Components: The Foundation of Function
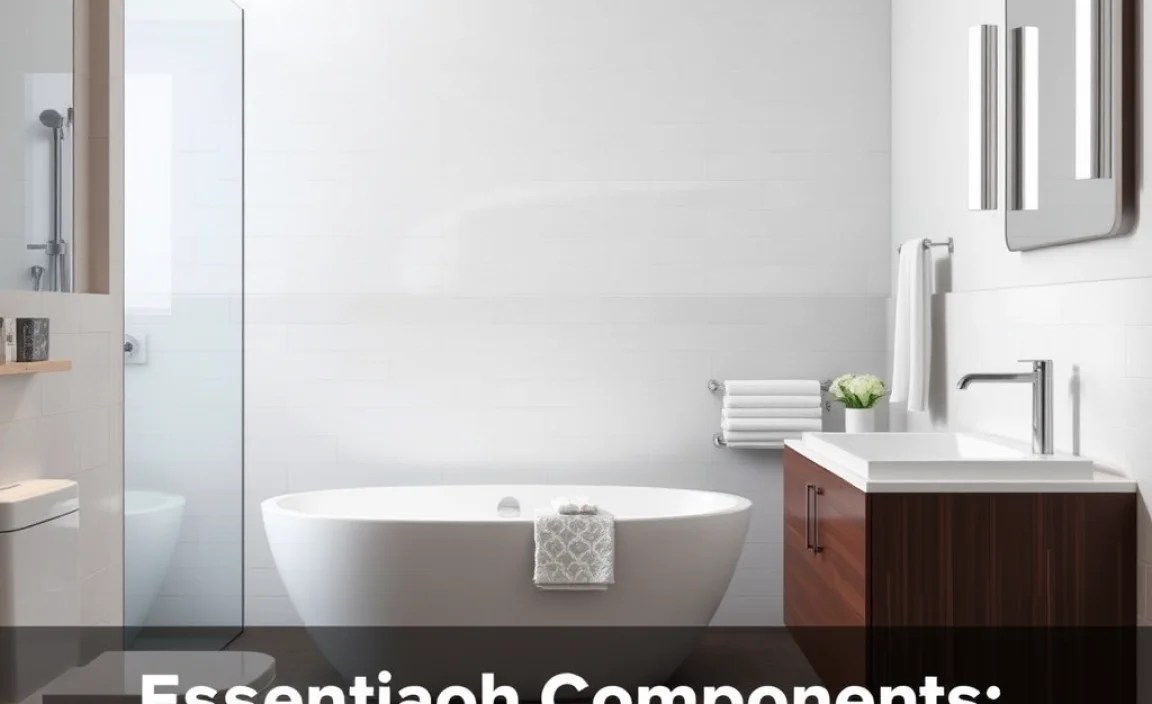
When we talk about bathroom components, we’re referring to the core fixtures that make your bathroom work. These are the items you interact with daily. Focusing on these essential elements is where you’ll see the biggest improvements in both form and function. Let’s dive into the key players.
1. Faucets: The Water Wizards
Your faucet is one of the most-used items in the bathroom. Upgrading your sink faucet can dramatically improve both aesthetics and performance. Old, worn-out faucets can lead to drips, poor water pressure, and a dated look. Modern faucets come in a vast array of styles, finishes, and features.
Types of Sink Faucets:
- Widespread Faucets: These have three separate pieces – hot and cold handles and the spout – offering a classic, elegant look.
- Centerset Faucets: All three parts are joined together on a single base plate. They are easy to install and come in many designs.
- Single-Hole Faucets: A sleek, modern option where the handle and spout are combined into one unit. Requires a single hole in the sink or countertop.
- Wall-Mounted Faucets: Mounted directly on the wall above the sink. Very modern and can save counter space, but installation is more complex.
Choosing a Finish:
The finish isn’t just about looks; it affects durability and maintenance. Consider these popular options:
- Chrome: Durable, affordable, and easy to clean. It’s a classic choice that fits almost any style.
- Brushed Nickel: Offers a warm, matte look that hides water spots and fingerprints well.
- Matte Black: A bold, modern choice that adds a dramatic contrast. Requires regular cleaning to keep it looking its best.
- Bronze/Oil-Rubbed Bronze: Provides a warm, rustic feel. Finishes can vary, giving a unique look.
Installation Tip:
When replacing a faucet, always turn off the water supply to the sink first! You’ll find shut-off valves under the sink. If you’re unsure, it’s always best to consult a plumber.
2. Toilets: More Than Just a Seat
Your toilet is a crucial bathroom component. Beyond basic function, modern toilets offer significant improvements in water efficiency, comfort, and hygiene. Older toilets can use as much as 6 gallons per flush (GPF), while new standards recommend 1.6 GPF or less.
Key Features to Look For:
- Water Efficiency: Look for the EPA’s WaterSense label, indicating a 20% reduction in water use compared to federal standards.
- Dual-Flush: These allow you to choose between a full flush for solid waste and a reduced flush for liquid waste, saving even more water.
- Comfort Height (or ADA Height): These toilets are taller, making them easier to sit on and get up from, especially for taller individuals or seniors.
- Skirted Design: The sides of the toilet are smooth and enclosed, making it much easier to clean as there are no awkward crevices to reach.
Toilet Styles:
- One-Piece Toilets: The tank and bowl are integrated into a single unit. They are generally easier to clean and have a sleeker profile.
- Two-Piece Toilets: The tank and bowl are separate and bolted together. These are more common and often more affordable.
DIY Installation Note:
Installing a new toilet can be a manageable DIY project, but it requires precision. Ensure you have a good wax ring and that the floor is level. Always follow the manufacturer’s instructions carefully.
3. Showerheads: Elevate Your Shower Experience
The showerhead is a surprisingly impactful bathroom component. Upgrading from an old, basic fixture can transform your daily shower from a chore into a relaxing ritual. Water efficiency is also a major factor here, with many low-flow options now offering powerful and satisfying sprays.
Showerhead Types:
- Fixed Showerheads: The most common type, mounted directly to the shower arm.
- Handheld Showerheads: Attached to a flexible hose, allowing you to direct the water spray easily. Great for rinsing, cleaning the shower, and for homes with pets or children.
- Rainfall Showerheads: Larger in diameter, mounted overhead, and designed to mimic the sensation of rain.
- Adjustable/Multi-Function Showerheads: Allow you to change spray patterns, from a gentle mist to a powerful massage.
Considerations:
- Water Pressure: Ensure your home’s water pressure can handle the type of showerhead you choose. Some high-pressure models require good flow.
- Flow Rate: Look for the WaterSense label to ensure efficiency, typically 2.0 GPM or less.
- Finish: Match your showerhead finish to your other bathroom fixtures for a cohesive look.
Quick Upgrade:
Replacing a showerhead is one of the easiest DIY upgrades. Simply unscrew the old one, clean the threads on the shower arm, apply some plumber’s tape, and screw on the new one. Ensure it’s snug but don’t overtighten!
4. Lighting: Set the Mood and Enhance Function
Good lighting is crucial for any bathroom. It impacts everything from applying makeup and shaving to creating a relaxing atmosphere. Often overlooked, lighting is a key bathroom component that can be significantly improved.
Types of Bathroom Lighting:
- Ambient Lighting: General illumination for the entire room. This is typically provided by a ceiling fixture, like a flush mount or recessed lights.
- Task Lighting: Focused lighting for specific activities, such as vanity lighting around the mirror for applying makeup or shaving. Sconces on either side of the mirror are often better than a single light above.
- Accent Lighting: Used to highlight specific features, like artwork or a beautiful tile accent. This can include small spotlights or integrated lighting within niches.
Bulb Considerations:
Choose bulbs that offer good color rendering (high CRI) so colors appear natural. For task lighting, a “cool white” or “daylight” bulb (3000K-5000K) is often preferred. For a more relaxing ambiance, a “warm white” bulb (2700K-3000K) is ideal.
Safety First:
When working with electrical fixtures, always turn off the power at the breaker box. If you’re not comfortable with electrical work, hire a qualified electrician.
Stunning Bathroom Upgrades: Adding Style and Personality

Once the essential bathroom components are functioning beautifully, it’s time to inject some personal style. These upgrades focus on aesthetics and can significantly impact the overall feel and luxury of your bathroom.
1. Vanity and Countertops: The Visual Hub
The vanity is often the focal point of a bathroom. Upgrading it can provide better storage, a refined look, and a more durable surface.
Vanity Styles:
- Freestanding Vanities: Traditional units that sit on the floor. They offer a classic look and come in widths from small single-sink to large double-sink options.
- Wall-Mounted (Floating) Vanities: These are mounted directly to the wall, creating a modern, airy feel and making the floor easier to clean underneath. Excellent for smaller bathrooms.
- Pedestal Sinks: Primarily for powder rooms, these have a sink that sits on a simple pedestal, offering minimal storage but a lot of style.
Countertop Materials:
The countertop is a significant surface that impacts durability and appearance:
| Material | Pros | Cons | Average Cost (per sq ft) |
|---|---|---|---|
| Granite | Durable, heat-resistant, large variety of colors/patterns, increases home value. | Requires sealing, can be porous if not sealed properly, heavy. | $100 – $200 |
| Quartz | Non-porous (stain-resistant), very durable, low maintenance, consistent patterns. | Can be more expensive than granite, susceptible to extreme heat. | $120 – $250 |
| Marble | Luxurious, classic look, available in beautiful veining. | Soft, porous, stains easily, scratches easily, requires diligent sealing. | $100 – $250 |
| Solid Surface | Seamless look, non-porous, easy to repair, integrated sinks available. | Can scratch and scorch, less natural look than stone. | $70 – $150 |
External Link: For detailed information on countertop materials and their properties, the HomeTips Countertop Buying Guide is an excellent resource.
2. Tile: Flooring that Shines and Walls that Wow
Tile is a versatile bathroom component that impacts both your floor and your walls. It’s durable, water-resistant, and comes in an endless array of styles, colors, and patterns.
Flooring Options:
- Ceramic & Porcelain Tiles: Both are excellent choices for bathroom floors. Porcelain is denser and less porous than ceramic, making it ideal for high-moisture areas. They are durable, easy to clean, and come in many designs, including convincing wood and stone looks.
- Natural Stone Tiles (e.g., Travertine, Slate): Offer a unique, high-end look. They can be more porous and require regular sealing to prevent staining and water damage.
- Mosaic Tiles: Small tiles often on a mesh backing, great for shower floors or accent walls due to their ability to conform to curves and provide slip resistance.
Wall Tile Ideas:
- Subway Tile: A timeless classic, offering a clean, crisp look. Easy to install and versatile in pattern arrangements.
- Large Format Tiles: Fewer grout lines mean easier cleaning and a more expansive feel.
- Accent Tiles: Introduce patterned, textured, or colored tiles in a shower niche, behind the vanity, or as a backsplash for a pop of personality.
Grout Considerations:
The grout color can significantly impact the final look. Darker grout can hide stains better than white, while contrasting grout can make the tile pattern pop. Consider epoxy grout for shower areas, as it is highly resistant to stains and moisture and requires no sealing.
3. Hardware and Fixtures: The Finishing Touches
Don’t underestimate the power of small details. Cabinet handles, door knobs, towel bars, and toilet paper holders are all crucial bathroom components that tie your design together.
Hardware Styles:
- Knobs: Come in a wide variety of shapes and materials, from simple spheres to intricate designs.
- Pulls/Bar Handles: Often offer a more modern or sleek look and can be easier to grip.
- Towel Bars/Rings/Hooks: Choose based on your available space and how many towels you need to hang.
- Toilet Paper Holders: Freestanding or wall-mounted options are available.
Finishes:
As with faucets, finishes are key. Try to keep finishes consistent throughout the bathroom (e.g., all brushed nickel, or all matte black) for a cohesive design. Common finishes include:
- Chrome
- Brushed Nickel
- Polished Nickel
- Matte Black
- Oil-Rubbed Bronze
- Brass (Polished and Unlacquered)
DIY Installation:
Replacing cabinet hardware is one of the easiest DIY tasks. Simply unscrew the old hardware and screw in the new. For towel bars and paper holders, you’ll need a drill and a level.
4. Mirrors: Function and Style
A mirror is a functional necessity, but it’s also a key bathroom component for style. It can make a small bathroom feel larger and brighter.
Mirror Types:
- Framed Mirrors: Come in all styles, from ornate to simple wood or metal frames, adding decorative detail.
- Unframed Mirrors: Offer a clean, modern look. Beveled edges can add a touch of elegance.
- Medicine Cabinets: These provide hidden storage behind a mirrored door, often a valuable addition to bathrooms with limited space.
- Vanity Mirrors: Often larger and hung above the vanity, they can be a strong design element.
Placement Tips:
Ensure your mirror is hung at an appropriate height so everyone who uses it can see themselves comfortably. For vanity mirrors, center them above the vanity width. For medicine cabinets, their placement is usually dictated by the vanity.
External Link: For tips on choosing and hanging mirrors, check out This Old House’s guide on hanging mirrors.
Step-by-Step: A Simple Faucet Upgrade Example
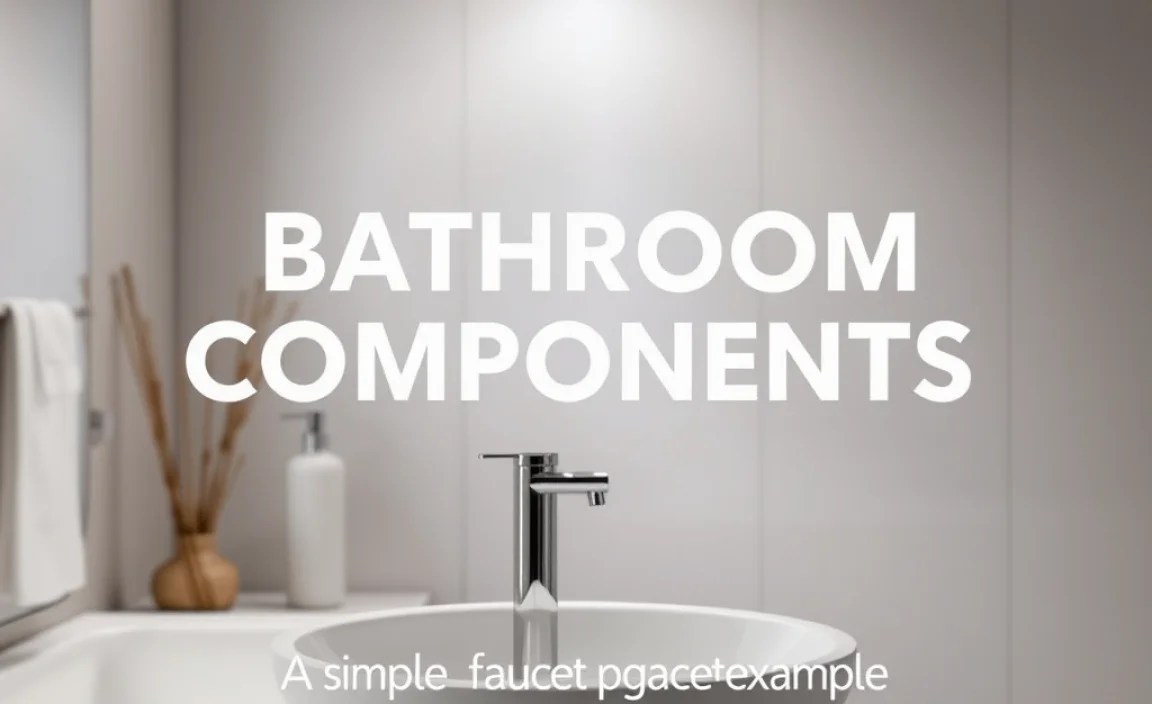
Let’s walk through upgrading a common bathroom component: the sink faucet. This is a fantastic beginner DIY project.
Tools You’ll Need:
- Adjustable wrench
- Basin wrench (highly recommended for tight spaces under the sink)
- Pliers
- Screwdriver (Phillips and flathead, depending on your faucet)
- Plumber’s tape (Teflon tape)
- Bucket
- Old towels or rags
- New faucet and any included hardware
Steps:
- Turn Off Water Supply: Locate the hot and cold water shut-off valves under the sink. Turn them clockwise until they are snug. Turn on the old faucet to drain any remaining water and confirm the supply is indeed off.
- Disconnect Water Supply Lines: Place a bucket under the valves and use your adjustable wrench to disconnect the water supply lines from the shut-off valves. Then, disconnect these lines from the faucet tailpieces (the pipes extending down from the faucet).
- Remove Old Faucet: This is where the basin wrench is invaluable. It’s designed to reach up behind the sink basin to unscrew the nuts holding the faucet in place. Unscrew these nuts. Once loose, lift the old faucet out from above.
- Clean the Sink Surface: Wipe down the area where the old faucet was. Remove any old putty or mineral buildup.
- Install New Faucet: Follow the instructions that came with your new faucet. Usually, this involves.
