
Caulking plays a vital role in home maintenance, sealing gaps to prevent water damage, drafts, and pest intrusion. Understanding its functions, benefits, and drawbacks is key to deciding when and where to use it for reliable, efficient sealing of your home.
Ever notice those little cracks and gaps around your windows, doors, or even in your bathroom? They might seem small, but they can lead to big problems like drafts that make your home chilly and your energy bills climb. Water can sneak in, causing damage over time, and tiny critters can find their way inside. That’s where caulking comes in like a trusty superhero for your home! It’s a flexible material that fills these openings, keeping your home comfortable, dry, and secure.
Don’t worry if you’re new to this; we’re going to break down exactly what caulking does, why it’s so helpful, and what to watch out for, step by step. This guide will help you understand the essential role of caulking, its amazing benefits, and a few things to consider, so you can tackle those sealing jobs with confidence. Let’s get your home sealed up tight!
What Exactly Is Caulking and What’s Its Main Job?

At its core, caulking is a versatile sealant. Think of it as a flexible rubbery paste that you squeeze out of a tube to fill gaps and cracks in your home. Its primary function is to create a watertight and airtight seal. This isn’t just about making things look tidy; it’s crucial for protecting your home’s structure and keeping your living space comfortable.
When you see gaps between a window frame and the wall, or where your bathtub meets the tile, caulking is the material used to seal them up. It acts as a barrier, preventing unwanted elements from entering or escaping. This simple material is a workhorse in home maintenance, contributing significantly to a home’s energy efficiency and longevity.
The Essential Functions of Caulking
Caulking performs several critical jobs around your home. Understanding these functions will help you appreciate why it’s such an important maintenance task.
- Sealing Against Water Infiltration: This is perhaps the most critical function. Caulking prevents water from seeping into walls through gaps around windows, doors, pipes, and siding. This protection is vital to prevent rot, mold, and structural damage. For instance, properly caulked window frames are a first line of defense against rain damage.
- Preventing Air Leaks (Draft Proofing): Gaps around windows and doors are major culprits for air leaks. Caulking seals these openings, reducing drafts. This means your heating and cooling systems don’t have to work as hard, leading to significant energy savings. It helps maintain a consistent indoor temperature, making your home more comfortable year-round.
- Blocking Pests and Insects: Small cracks and gaps can serve as entry points for ants, spiders, rodents, and other unwanted guests. A good caulk seal blocks these tiny pathways, keeping pests out and helping to maintain a more sanitary living environment.
- Improving Aesthetics: While its functional benefits are paramount, caulking also provides a clean, finished look. It fills unsightly gaps and creates smooth transitions between different materials, enhancing the overall appearance of a room or exterior.
- Reducing Noise Transmission: By sealing gaps, caulk can also help to dampen sound transmission between rooms or from the outside, contributing to a quieter home environment.
- Supporting Structural Movement: Many caulking compounds are designed to be flexible. This flexibility allows them to accommodate minor movements and expansions/contractions that building materials undergo due to temperature changes, preventing the gaps from reopening or cracking further.
The Big Picture: Pros and Cons of Using Caulking

Like any home maintenance tool or material, caulking has its distinct advantages and disadvantages. Knowing these will help you make informed decisions about where and how to use it effectively.
The Advantages (Pros) of Caulking
- Cost-Effective: Caulking is generally an inexpensive material. A single tube is affordable, making it a very budget-friendly solution for sealing numerous gaps.
- Easy to Apply: With a basic caulking gun and a little practice, most DIYers can apply caulk successfully. It’s one of the more accessible DIY home improvement tasks.
- Versatility: There’s a caulk for almost any job. You can find types that are paintable, waterproof, mildew-resistant, flexible, and suitable for interior or exterior use, or specific materials like kitchens and bathrooms.
- Energy Efficiency Boost: Sealing gaps with caulk directly combats drafts, which significantly reduces unwanted heat loss in winter and heat gain in summer. This makes your home more comfortable and lowers your energy bills, as confirmed by resources like the U.S. Department of Energy.
- Protects Against Water Damage: Preventing water intrusion is key to avoiding costly repairs from leaks, rot, and mold. Caulking is a proactive measure against these issues.
- Improves Home Comfort: A well-caulked home feels better. It eliminates drafts, helps maintain a steady temperature, and can even reduce noise, making your living space more pleasant.
- Aesthetically Pleasing Finish: Caulking smooths out transitions and covers gaps, giving a neat and professional appearance to finished surfaces.
The Disadvantages (Cons) of Caulking
- Durability Varies: Not all caulks are created equal. Some types can become brittle and crack over time, especially when exposed to extreme weather, UV rays, or significant movement. Inferior quality or wrong type of caulk won’t last long.
- Can Be Messy: Applying caulk can be a messy job if you’re not careful. Excess caulk can drip, and mistakes can leave unsightly, uneven beads that are difficult to clean up once dry.
- Proper Preparation is Key: For caulk to adhere properly and last, the surface must be clean, dry, and often free of old caulk or paint. Skipping these steps leads to poor performance.
- Requires Maintenance: Caulking isn’t a “set it and forget it” solution for all applications. It may need touch-ups or full replacement every few years, depending on the type, location, and environmental conditions.
- Choosing the Right Type Can Be Confusing: With so many different types of caulk (silicone, latex, acrylic latex, polyurethane), selecting the correct one for a specific job can be overwhelming for beginners.
- Not Suitable for Large Gaps: Caulking is designed for small to medium-sized gaps. Very large or structural cracks may require more robust repair materials.
- Potential for Mold/Mildew in Damp Areas: While many modern caulks are mildew-resistant, older or lower-quality formulations in perpetually damp areas (like shower corners) can still be prone to mold and mildew growth if not properly maintained or if ventilation is poor.
Types of Caulk: Choosing the Right One for Your Needs

The world of caulk can seem a bit daunting with all the different types. But don’t worry, understanding a few key differences will make choosing the right caulk much easier. Generally, caulks are made from acrylic latex, silicone, or a hybrid like polyurethane.
Common Caulk Types and Their Uses
Here’s a look at the most common types you’ll encounter, helping you pick the best fit for your DIY project.
1. Acrylic Latex Caulk (often called “Painter’s Caulk”)
This is probably the most common and versatile type for general home use. It’s water-based, making cleanup a breeze with just soap and water.
- Pros: Easy to use, cleans up with water, generally paintable, good for indoor projects, relatively inexpensive, and widely available.
- Cons: Less flexible than silicone, not as waterproof or durable in areas exposed to constant moisture or extreme temperature swings.
- Best For: Sealing gaps around baseboards, trim, window frames (interior), door frames (interior), and other non-wet interior areas.
2. Silicone Caulk
Silicone caulk is known for its exceptional flexibility, waterproof capabilities, and resistance to extreme temperatures and UV rays.
- Pros: Highly flexible, waterproof, durable, resistant to mold, mildew, and UV damage. Excellent for high-moisture areas and exterior applications.
- Cons: Difficult to clean up (requires mineral spirits or specialized removers), not paintable, can be a bit trickier to apply smoothly, and sometimes requires specialized tools to remove.
- Best For: Bathrooms (around tubs, showers, sinks), kitchens (around countertops and sinks), exterior window frames, and any area needing a truly waterproof and flexible seal.
3. Siliconeized Acrylic Latex Caulk
This type is a hybrid, aiming to combine the best of both worlds. It’s an acrylic latex caulk with added silicone for improved flexibility and adhesion.
- Pros: Easier to work with and clean up than pure silicone, generally paintable, more flexible and durable than standard acrylic latex. Offers good water resistance.
- Cons: Not as completely waterproof or flexible as 100% silicone.
- Best For: A good all-around choice for many interior and exterior applications, including around windows and doors, trim, and in bathrooms and kitchens where a paintable, water-resistant seal is desired.
4. Polyurethane Caulk (often called “Construction Adhesive Caulk”)
Polyurethane caulk is a heavy-duty option known for its extreme durability, flexibility, and strong adhesion to a wide range of materials. It’s often used in more demanding applications.
- Pros: Very durable, flexible, excellent adhesion to many surfaces (wood, metal, concrete, masonry), waterproof, UV resistant, and paintable. It can bridge larger gaps than some other types.
- Cons: Can have a strong odor during application, may require mineral spirits for cleanup, and can be more expensive.
- Best For: Exterior applications like siding joints, concrete cracks, around masonry, and structural sealing where long-term durability and flexibility are essential.
When in doubt, always check the product packaging. It will clearly state the caulk’s intended use, cleanup instructions, and whether it’s paintable. For most common DIY tasks around the house, a good quality siliconeized acrylic latex caulk will serve you well.
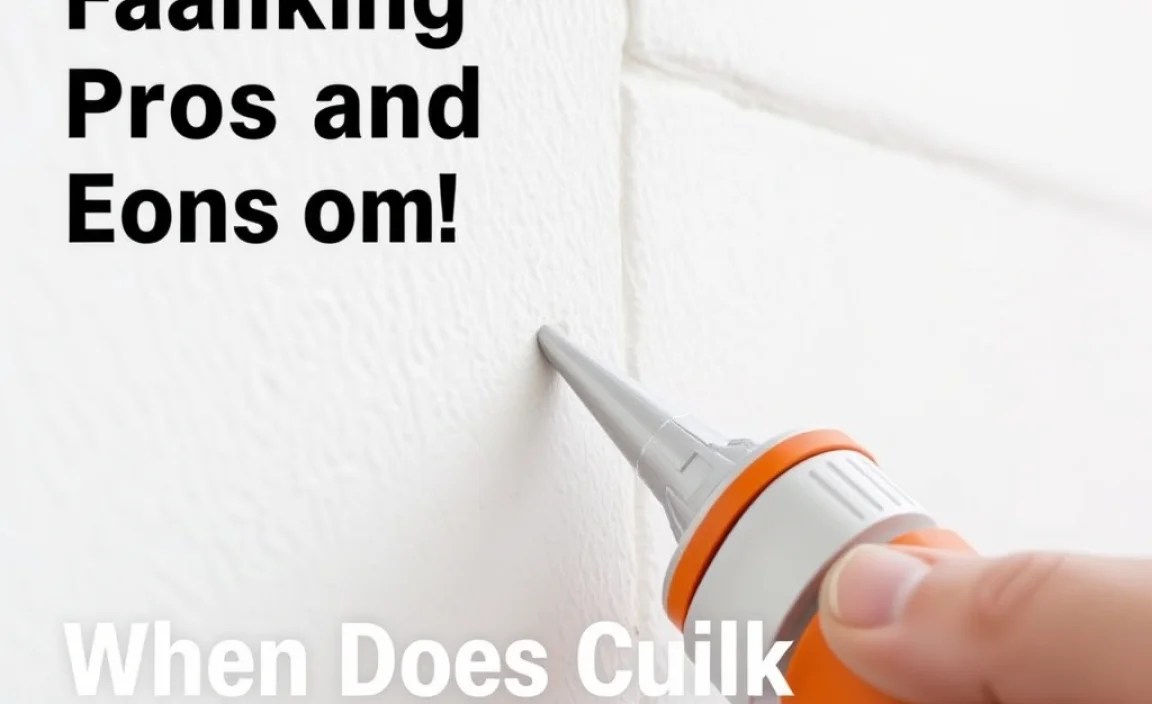
Step-by-Step: How to Apply Caulk Like a Pro

Applying caulk neatly and effectively is a skill that improves with practice. Follow these steps, and you’ll be creating smooth, professional-looking seals in no time.
Tools and Materials You’ll Need
Before you start, gather these items:
- Caulking gun (a basic, dripless model is great for beginners)
- Caulk of your choice
- Utility knife or caulk removal tool
- Putty knife or old credit card
- Painter’s tape (optional, but highly recommended for beginners)
- Damp cloths or rags
- Rubbing alcohol or mineral spirits (for silicone cleanup)
- Gloves
- Safety glasses
- Drop cloth or newspaper (to protect surfaces)
The Application Process: A Beginner’s Guide
Let’s get caulking!
- Prepare the Area: This is the most crucial step for a lasting seal.
- Clean the Gap: Remove any old caulk, paint, dirt, dust, grease, or debris from the gap. Use a utility knife or a caulk removal tool. A clean surface ensures good adhesion.
- Dry the Area: Make sure the surface is completely dry. Water interferes with caulk adhesion.
- Masking (Optional but Recommended for Beginners): Apply painter’s tape just above and below the gap, creating a straight edge. This helps you apply a neat bead and makes cleanup much easier. Leave a gap between the tape strips that’s slightly wider than the bead you want to apply.
- Prepare the Caulk Tube:
- Cut the Nozzle: Using a utility knife, cut the tip of the caulk tube nozzle at a 45-degree angle. Start with a small opening. You can always cut it larger if needed. A smaller opening gives you more control.
- Puncture the Inner Seal: Most caulk guns have a long rod that you can use to puncture the inner seal of the caulk tube after cutting the nozzle.
- Load the Caulking Gun: Pull back the plunger on the caulking gun, insert the caulk tube (nozzle first), and push the plunger firmly back into the tube.
- Test the Flow: Squeeze the trigger gently to get the caulk flowing. This helps you get a feel for the pressure needed and ensures the caulk is coming out smoothly. Release the trigger, and sometimes there’s a small lever or button on the gun to stop the flow completely (preventing drips).
- Apply the Caulk Bead:
- Hold the caulk gun at that 45-degree angle.
- Position the nozzle tip in the gap.
- Squeeze the trigger steadily and move the gun along the gap at a consistent speed. Aim for a continuous bead of caulk that fills the gap without too much excess.
- Try to apply just enough caulk so that it slightly fills the gap but doesn’t pile up excessively on the surface. Think of it as filling the trench.
- Smooth the Bead: This is where you get that professional finish.
- With Painter’s Tape: If you used tape, use a caulk tool, a wet finger (wear a nitrile glove!), or a damp cloth to gently smooth the bead. The tape catches any excess.
- Without Painter’s Tape: Lightly dampen a gloved finger or a caulk smoothing tool. Run it along the length of the bead, applying gentle, consistent pressure to press the caulk into the gap and create a smooth, concave surface. Wipe off excess caulk from your finger/tool onto a rag frequently.
- Clean Up Excess Caulk IMMEDIATELY:
- For Latex/Acrylic Caulk: Use a damp cloth to wipe away any smudges or excess caulk from surrounding surfaces and the painter’s tape.
- For Silicone Caulk: Use a rag dampened with mineral spirits or rubbing alcohol to clean up any excess.
Act fast! Once caulk starts to skin over, it becomes much harder to clean.
- Remove Painter’s Tape (If Used): Carefully pull off the painter’s tape while the caulk is still wet, pulling it away from the bead at an angle. This leaves a super sharp, clean line.
- Allow to Cure: Let the caulk dry and cure according to the manufacturer’s instructions. This can take anywhere from a few hours to 24 hours or more. Avoid disturbing it during this time. Most caulks are paintable after curing, but check the label.
When Does Caulk Need Replacing?
Caulking is not a permanent fix. Over time, it degrades, and you’ll need to replace it. Here’s how to tell when it’s time:
- Cracking or Shrinking: If you see cracks, split lines, or the caulk has pulled away from one of the surfaces, it’s no longer sealing effectively.
- Torn or Missing Sections: If parts of the caulk bead are missing or have been torn away, it needs repair or replacement.
- Mold or Mildew Growth: While some caulks are mildew-resistant, persistent mold or mildew can indicate that the caulk is no longer providing a good seal or is becoming saturated.
- Water Stains or Leaks: If you notice water getting past the caulk (leading to stains, drips, or rot), it’s a clear sign replacement is needed.
- Brittleness: If the caulk feels hard and brittle to the touch, it has likely lost its flexibility and is prone to cracking soon.
- Loose or Peeling: If the caulk is no longer adhering firmly to the surface and feels loose, it needs to be removed and reapplied.
Regular inspection of your caulked areas, especially those exposed to weather or moisture, will help you catch these issues early and prevent further damage.
Caulking vs. Grouting: What’s the Difference?
People often confuse caulking and grouting, especially in bathrooms and kitchens. While both fill gaps, they serve very different purposes and have different properties.
| Feature | Caulking |
|---|
