
Have you ever wondered how to fill those tiny gaps around your bathtub? It’s not magic, but it’s called caulking. Caulking helps keep water out and things tight. This guide explained caulking for beginners. So, if you’re ready to learn a new skill, this is for you. Get ready to become a caulking pro!
Key Takeaways
- Caulking is essential for sealing gaps and cracks.
- It helps keep water and air out.
- Choose the right caulk for the job.
- Explained of caulking for beginners is simple and fun!
- Practice makes you a better caulker.
What Is Caulking and Why Is It Important?

Caulking is like putting toothpaste in a tube. But instead of brushing teeth, it fills gaps! Caulk is a special material that keeps water and air from sneaking in. It’s used around bathtubs, windows, and doors. Keeping these areas sealed prevents damage. Imagine rain trying to get in through a window. With caulking, rain stays outside where it belongs! This section explained caulking for beginners so they can understand its importance.
- Caulking prevents water leaks.
- It keeps air from coming in or out.
- It stops pests from entering your home.
- Caulking saves energy and money.
- It improves home appearance.
How do you choose the right caulk? It’s simple. Some caulks are good for bathrooms, while others are better for windows. Check the label to know where to use it. Using the wrong caulk is like using a fork to eat soup! Once you have the right caulk, you’re ready to start sealing. Take your time and practice. You’ll get better with each try.
Fun Fact or Stats : The word “caulk” comes from the old French word “cauquer,” meaning to press.
Tools Needed for Caulking

Before you begin, gather all the tools you need. Having the right tools makes the job easier. You will need a caulking gun, a tube of caulk, a utility knife, a damp rag, and painter’s tape. The caulking gun helps squeeze the caulk out smoothly. The knife cuts off the tip of the tube. The rag cleans up any mess. And tape keeps the line straight. With these tools, you’re ready to tackle any caulking job.
- Caulking gun for smooth caulk application.
- Utility knife to cut caulk tube.
- Damp rag for quick cleanup.
- Painter’s tape for neat lines.
- Safety goggles to protect eyes.
Using these tools correctly is important. Start by putting the caulk tube into the gun. Cut the tip at a 45-degree angle. The smaller the opening, the more control you have. Practice squeezing the trigger slowly. This helps you control the flow of caulk. Use painter’s tape to mark the area you want to caulk. Once everything is ready, you can start applying caulk like a pro.
Fun Fact or Stats : There are over 10 different types of caulk available!
Choosing the Right Caulk
What if you use the wrong caulk? It could crack, peel, or not stick. That would be frustrating! So, how do you pick the right one? First, think about where you’ll use it. Bathrooms need waterproof caulk. Windows need flexible caulk for weather changes. Reading labels helps you choose wisely. Also, remember that practice makes you better at this. Like learning to ride a bike, caulking gets easier.
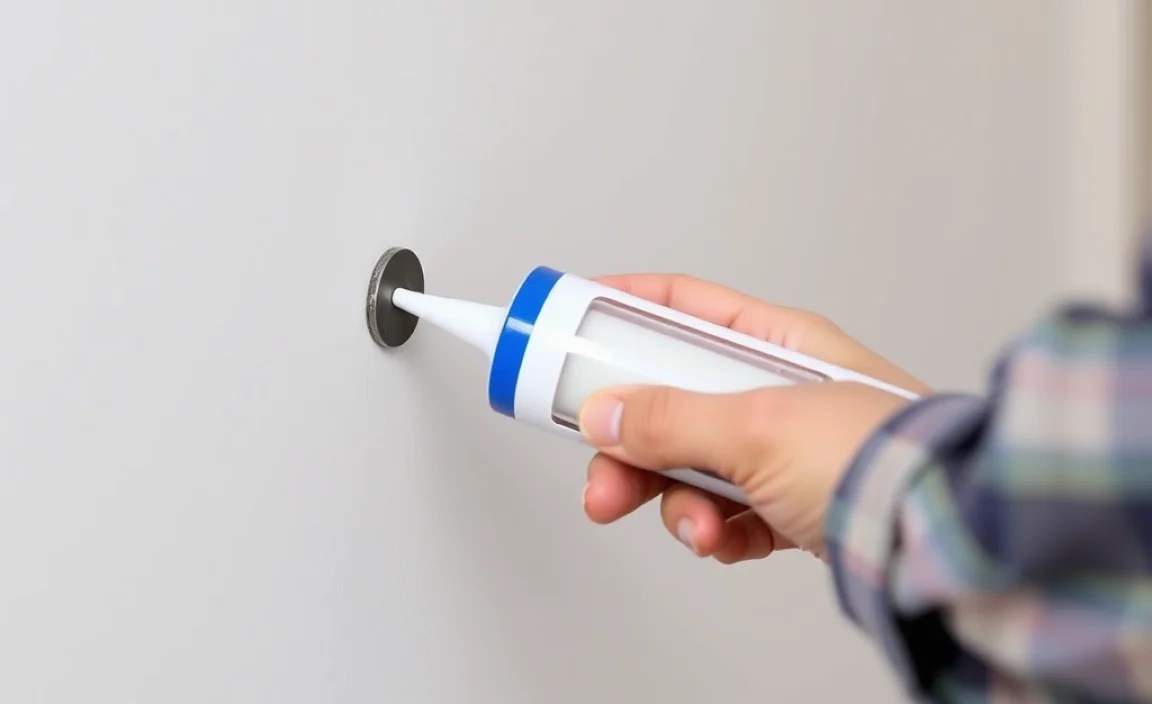
How to Use a Caulking Gun
Have you ever used a caulking gun before? If not, don’t worry! It’s like using a squirt gun. First, cut the caulk tube tip at a 45-degree angle. Load the tube into the gun. Pull the trigger slowly to control the flow. Move the gun steadily along the gap. Keep the same pressure for a smooth line. It’s that easy! Practice on scrap material if you like.
Common Caulking Mistakes
Ever seen a messy caulk job? It’s usually because of common mistakes. Rushing can cause uneven lines. Not cleaning the area first leaves dirt under the caulk. Using too much caulk makes a sticky mess. Avoid these mistakes by taking your time. Clean the surface before applying caulk. Start with a small amount and build up if needed. Practicing helps you avoid these pitfalls.
Preparation Before Caulking
Good preparation leads to a great caulking job. Before you start, clean the area. Remove old caulk with a scraper or knife. Make sure the surface is dry. Wet surfaces make it hard for caulk to stick. Use painter’s tape to mark where you want the caulk. This makes it easier to get a straight line. Once everything is clean and marked, you’re ready to start!
- Clean the area thoroughly.
- Remove old caulk before applying new.
- Ensure surfaces are dry.
- Use tape for straight lines.
- Gather all tools before starting.
Why is preparation so important? Think of it like building a sandcastle. If you use dry sand, the castle won’t last. Wet sand makes it stand strong. Proper preparation ensures the caulk sticks well and lasts longer. Once you’re ready, the actual caulking will be a breeze. Remember, the better the prep, the better the result.
Fun Fact or Stats : Caulk can last up to 10 years if applied correctly!
Cleaning the Surface
Why clean the surface first? Dust and dirt can stop the caulk from sticking. Use a damp rag to clean the area. Let it dry before you start. If there’s old caulk, remove it with a scraper. Make sure the surface is smooth. This step is like laying the groundwork for a solid wall. Once clean, your caulk will stick better and last longer.
Using Painter’s Tape
Painter’s tape is your best friend for straight lines. Place it on both sides of the gap. This keeps your caulk line neat. Once you finish caulking, remove the tape while the caulk is still wet. This prevents pulling the caulk away. Using tape is like having training wheels on a bike. It helps you stay on track and create perfect lines.
Drying and Curing Time
Do you know that caulk needs time to dry? It’s not ready right away. Give it at least 24 hours to cure. During this time, avoid touching or getting it wet. Patience is key here. Just like waiting for paint to dry, curing makes sure the caulk stays put. Once it’s dry, your work is done and the area is protected.
Applying the Caulk

Now comes the fun part—applying the caulk! Start at one end of the gap. Hold the caulking gun at a 45-degree angle. Squeeze the trigger gently and move steadily along the line. Don’t rush, take your time. Use a damp finger or tool to smooth the caulk. This makes it look neat and professional. Once done, admire your work!
- Start from one end of the gap.
- Hold the gun at a 45-degree angle.
- Squeeze the trigger gently.
- Move steadily along the line.
- Smooth the caulk with a damp finger.
Why smooth the caulk? It helps seal the gap completely. If the caulk is bumpy, water can sneak in. Smoothing also makes the job look neat. You want your caulking to look like it was done by a pro, right? Practice makes perfect, so don’t worry if it’s not perfect at first. Each time you caulk, you’ll get better and faster.
Fun Fact or Stats : Smoothing the caulk increases its lifespan by up to 50%!
Loading the Caulking Gun
How do you load a caulking gun? It’s simple! First, pull the rod back. Insert the caulk tube with the tip facing out. Push the rod forward until it touches the tube. Now, you’re ready to start caulking. Remember to cut the tip at a 45-degree angle. This gives you control over the flow. Practicing this step makes the whole process easier.
Smoothing the Caulk Line
Why smooth the caulk line? A smooth line looks neat and seals better. Use a damp finger or tool for this. Run it along the line gently. This pushes the caulk into the gap. It also removes any extra caulk. A smooth caulk line not only looks good but also works best. Like a well-cut puzzle piece, it fits perfectly.
Cleaning Up After Caulking
Once you’re done, it’s time to clean up. Use a damp rag to wipe away any extra caulk. This keeps your work area neat. If you see any mistakes, fix them now while the caulk is wet. Proper cleanup makes your next caulking job easier. It’s like cleaning your room after playing. A tidy space is ready for new adventures.
Types of Caulk
Did you know there are different kinds of caulk? Each type is made for a specific job. Acrylic caulk is great for painting. Silicone caulk works best in wet areas. Polyurethane caulk is strong and flexible. Choosing the right caulk is like picking the right tool. It makes the job easier and lasts longer. Let’s take a look at the different types.
- Acrylic caulk is paintable.
- Silicone caulk is waterproof.
- Polyurethane caulk is strong.
- Fireproof caulk is for high temperatures.
- Adhesive caulk bonds surfaces together.
Why use different caulks for different jobs? Each has unique properties. Imagine using a rubber band to fix everything. It wouldn’t work! The same goes for caulk. Use the right one for the best results. This helps your caulking job last longer and look professional. Remember to check the label before buying.
Fun Fact or Stats : Silicone caulk can withstand temperatures up to 400°F!
Acrylic Caulk
What is acrylic caulk for? It’s perfect for areas you want to paint. It sticks well to surfaces like wood and drywall. Once dry, you can paint over it. This makes it ideal for baseboards and crown molding. Acrylic caulk is easy to work with and cleans up with water. If you plan to paint, this is the caulk to choose.
Silicone Caulk
Where should you use silicone caulk? It’s great for wet areas like bathrooms and kitchens. Silicone is waterproof and flexible. It stays strong even in humid conditions. This makes it perfect for bathtubs, sinks, and showers. Once applied, it lasts a long time. Use silicone caulk where you need a waterproof seal.
Polyurethane Caulk
Why choose polyurethane caulk? It’s known for being strong and flexible. It’s perfect for outdoor use. This caulk can handle temperature changes and is excellent for sealing windows and doors. It’s like having a strong shield against the weather. Polyurethane caulk is tough and long-lasting. Use it where you need extra durability.
Maintaining Your Caulking
How do you keep caulking in top shape? Regular checks are key. Look for cracks or peeling. If you see any, it’s time to reapply caulk. This keeps your home protected. Proper maintenance extends caulk life. It’s like checking your bike tires for air. Regular checks keep everything running smoothly. Let’s see how to maintain your caulking.
- Check caulking for cracks regularly.
- Reapply caulk if you see peeling.
- Keep caulk clean and dry.
- Repair damages as soon as possible.
- Use the right caulk for repairs.
Why is maintenance important? It keeps the seal strong and effective. Neglecting it can lead to leaks and damage. Regular checks save you time and money. It ensures your home stays safe from water and pests. Be proactive and keep your caulking in top shape. A little effort goes a long way in home maintenance.
Fun Fact or Stats : Regular caulking checks can save up to 20% on energy bills!
Checking for Damage
Why check for damage? It prevents small issues from becoming big problems. Look for cracks or peeling in the caulk. Check around windows, doors, and wet areas. If you find damage, fix it right away. This stops leaks and keeps your home safe. Regular checks make sure your caulking does its job well.
Reapplying Caulk When Needed
How do you know when to reapply caulk? If you see cracks or peeling, it’s time. Remove the old caulk first, then clean the area. Apply new caulk just like before. It keeps the seal strong and effective. Reapplying caulk is like changing a bike tire. It keeps everything working like new.
Keeping Caulk Clean
What happens if caulk gets dirty? Dirt and mold can weaken it. Clean caulk with a damp cloth regularly. If you see mold, use a cleaner made for caulk. Keeping it clean ensures it stays strong. Like washing your hands, clean caulk stays healthy and effective. Regular cleaning extends the life of your caulking.
| Type of Caulk | Best Use | Waterproof | Paintable |
|---|---|---|---|
| Acrylic | Indoor, Paintable areas | No | Yes |
| Silicone | Wet areas, Bathrooms | Yes | No |
| Polyurethane | Outdoor, Windows | Yes | No |
| Fireproof | High temperatures | No | No |
Conclusion
Now you’ve learned all about caulking! From tools to types, you know it all. Explained of caulking for beginners made it simple. Remember to choose the right caulk for each job. Practice makes you a better caulker. Check your caulking regularly to keep it in top shape. With these tips, you’ll master caulking in no time!
FAQs
Question: What is caulking used for?
Answer: Caulking is used to seal gaps and cracks. It prevents water, air, and pests from coming in. It makes your home more energy-efficient. Caulking also improves the appearance of your home. Keeping it well-maintained is crucial for protection.
Question: Why is explained of caulking for beginners important?
Answer: Understanding caulking helps beginners start with confidence. It teaches the right techniques and tools. Beginners learn to choose the right caulk for each job. This knowledge prevents mistakes and saves money in the long run. With practice, beginners become skilled at sealing gaps.
Question: How do I know which caulk to choose?
Answer: Choose caulk based on where you will use it. Acrylic caulk is good for paintable surfaces. Silicone is best for wet areas like bathrooms. Polyurethane is strong and ideal for outdoors. Reading the label helps you make the right choice. Using the right caulk ensures a lasting seal.
Question: Can I paint over caulk?
Answer: You can paint over acrylic caulk. It is specifically made to be paintable. However, silicone caulk is not paintable. Always check the label before painting. Painting over the right caulk gives a smooth, finished look. It enhances the appearance of your work.
Question: How often should I check my caulking?
Answer: Check your caulking every few months. Look for cracks, peeling, or mold. Regular checks keep your home protected. If you find damage, fix it right away.
