
A wet room can be a brilliant addition to your home, offering a spacious, modern showering experience. Understanding the pros and cons helps you decide if this innovative bathroom design is right for you, ensuring a waterproof, stylish, and functional space.
Thinking about a bathroom upgrade? You might have heard about wet rooms. They sound sleek and modern, but what exactly are they, and are they a good fit for your home? Don’t worry if it sounds a bit complicated; I’m here to break it down. Wet rooms are essentially bathrooms, or parts of bathrooms, designed to be completely waterproof.
This means the whole area, including the shower, is open and doesn’t have screens or cubicles keeping the water contained. It’s a design that can make a small space feel bigger and a standard bathroom feel like a spa. We’ll walk through everything you need to know, from the amazing benefits to potential downsides, so you can make a smart decision for your home. Let’s dive in!
What is a Wet Room?

In simple terms, a wet room is a bathroom where the showering area isn’t enclosed by a traditional cubicle or shower screen. The entire room, or a designated section of it, is designed to get wet. This means meticulous waterproofing is key. The floor is often level with the rest of the bathroom, with a slight slope leading to a discreet drain. Instead of a bath, you typically have a walk-in shower. This open-plan design creates a seamless, modern look and can make bathrooms feel much more spacious, especially in smaller homes.
The concept thrives on careful planning and execution. Every surface, from the floor to the walls, needs to be completely waterproofed before tiling. This usually involves specialized membranes that create a watertight seal behind the tiles. Think of it as creating a safe, waterproof box that houses your bathroom. This attention to detail is what separates a successful wet room from a potential water damage problem.
The Genius Benefits: Wet Room Pros

Wet rooms offer a wealth of advantages that make them incredibly popular for modern homes. They’re not just about looks; they bring practical improvements too!
1. Space-Saving Efficiency
One of the biggest wins for wet rooms is their ability to make any bathroom, especially a small one, feel significantly larger. By removing bulky shower trays, cubicles, and screens, you create an open, flowing space. This visual trick can transform a cramped bathroom into something that feels airy and inviting.
- No need for hinged doors that swing into the room.
- Level, seamless flooring enhances the sense of openness.
- Ideal for en-suites, loft conversions, or smaller houses.
2. Modern Aesthetics and Luxury Feel
Wet rooms exude a contemporary, minimalist vibe that many homeowners adore. The clean lines, the absence of clutter, and the sleek finishes contribute to a spa-like atmosphere. It’s a design choice that instantly elevates the perception of luxury and sophistication in your home. Imagine stepping into a space that feels like a high-end hotel bathroom every day!
3. Enhanced Accessibility
This is a massive benefit for many. With a level entry and no steps or curbs to navigate, wet rooms are incredibly accessible. This makes them an excellent choice for:
- Elderly individuals who may have mobility issues.
- People with disabilities.
- Households with young children, where stepping into a shower can be tricky.
The ease of movement makes showering safer and more comfortable for a wider range of users. This forward-thinking design can also add value to your property by catering to future needs.
4. Easier Cleaning and Maintenance
Think about the soap scum and grime that build up in shower trays and along the edges of shower doors. In a wet room, these common cleaning nightmares are virtually eliminated. With fewer nooks and crannies, cleaning becomes a breeze. A quick wipe-down of the tiled surfaces and a clear drain are usually all that’s needed. This drastically reduces your cleaning time and effort.
- No shower screens to scrub.
- Level floor means less trapped dirt.
- Simple, accessible design for quick upkeep.
5. Superior Water Management (When Done Right!)
Though it might seem counterintuitive, a properly constructed wet room is one of the most secure ways to manage water in a bathroom. The entire room is designed with a robust waterproofing system. This means that if a leak were to occur, it’s contained within a sealed system, preventing damage to surrounding walls and floors. Modern drainage systems are highly efficient and discreet.
6. Versatile Design Options
The open nature of a wet room allows for a lot of creative freedom. You can use beautiful large-format tiles, natural stone, or even decorative finishes. The showerhead can be a sleek rainfall shower or a practical handheld option. You can also choose to incorporate built-in seating or niche shelving for added comfort and storage. The possibilities are vast, allowing you to tailor the space to your personal style.
A well-designed wet room can integrate seamlessly with the rest of your bathroom décor, creating a unified and sophisticated look. You can opt for contrasting tiles to define the showering zone or use the same material throughout for ultimate visual continuity.
Potential Downsides: Wet Room Cons
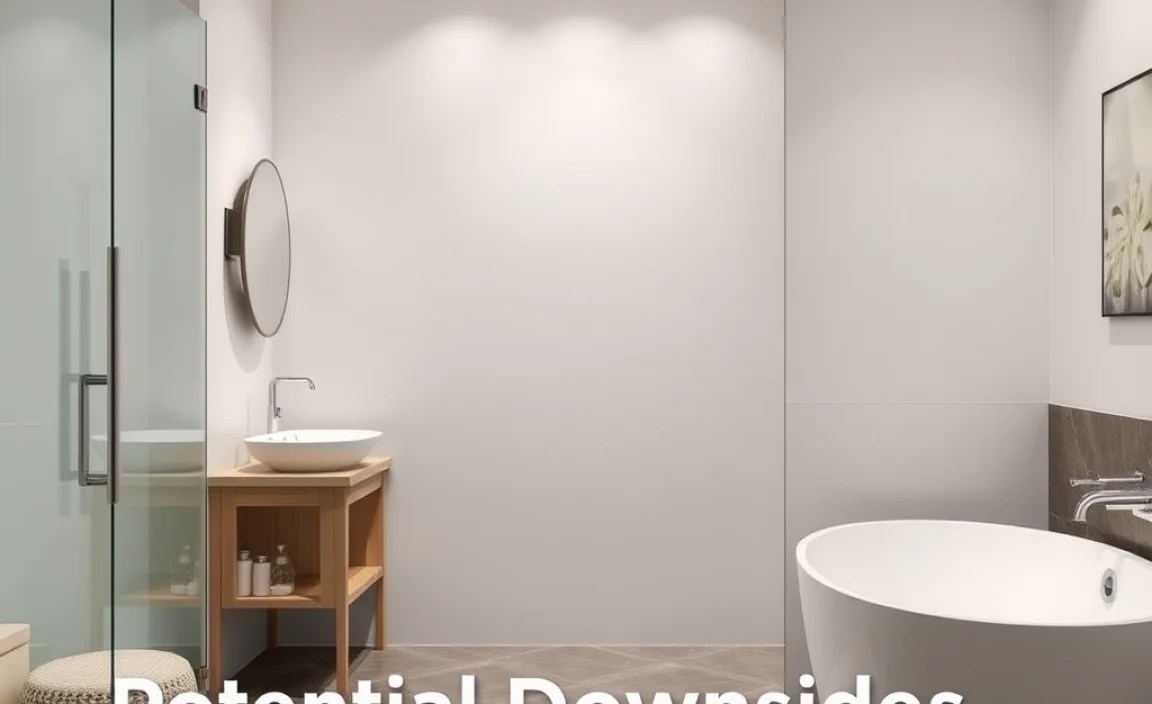
While the benefits are compelling, it’s crucial to consider the challenges. Being informed about potential drawbacks helps you plan effectively and avoid common pitfalls.
1. The Absolute Necessity of Professional Waterproofing
This is the most critical point. A wet room’s success hinges entirely on its waterproofing system. If not installed by experienced professionals using the correct materials and techniques, you risk serious water damage to your property. This isn’t a DIY job for beginners. The cost of remedial work if waterproofing fails can be astronomical, far exceeding the initial installation cost.
According to government building regulations in the UK, for example, new bathrooms often require specific standards for waterproofing and ventilation to prevent moisture-related issues. You can find guidance on these standards from bodies like the Planning Portal, which outlines building regulations for homeowners.
2. Installation Costs Can Be Higher
Due to the specialized skills and materials required for proper waterproofing, installing a wet room can be more expensive than a standard bathroom with a shower cubicle. You’re essentially paying for robust protection against water damage, which is an investment in the longevity of your home.
The cost breakdown often includes:
- Professional waterproofing membrane installation.
- Specialized drainage systems (e.g., linear drains).
- Potentially reinforced flooring to support the sloped area.
- Skilled labor for tiling and sealing.
3. Potential for Water to Splash Further
Since there are no physical barriers, water can splash further than in a traditional shower. While this is often managed with careful showerhead placement and appropriate floor grading, it’s something to consider, especially in very small bathrooms. You might want to ensure toiletries, towels, and electrical items are kept well away from the immediate showering zone. Some people opt for a single glass panel or a strategically placed screen, but this slightly compromises the full open-plan aesthetic.
4. Maintaining Warmth
A bathroom without enclosed walls can feel cooler. The open space means warm, humid air from the shower can escape more easily, making the rest of the room feel chilly. Good ventilation is crucial for a wet room to prevent condensation and mould, but this can also contribute to a cooler environment. Investing in a powerful extractor fan and potentially underfloor heating can counteract this, but it adds to the overall cost.
5. Ventilation is Paramount
As mentioned, good ventilation is non-negotiable. Without it, moisture will build up, leading to:
- Condensation on walls and ceilings.
- Mould and mildew growth.
- Damage to paintwork and plaster.
- An unpleasant, damp smell.
A high-quality extractor fan is essential, ideally one on a timer or humidity sensor. Some systems even have ducted fans vented externally for maximum efficiency.
6. Potential for Smells
If the drainage system isn’t correctly installed or maintained, there’s a small risk of unpleasant smells emanating from the drain, especially as water levels in the trap can sometimes dry out if the room isn’t used regularly. Regular use and proper maintenance of the drain should prevent this. Trapped water in the U-bend of the drain is designed to create a seal against sewer gases, so ensuring this is always present is key.
Wet Room vs. Standard Bathroom: A Comparison

To help you visualize the differences, let’s compare some key aspects:
| Feature | Wet Room | Standard Bathroom (with Shower/Bath) |
|---|---|---|
| Waterproofing | Entire room or designated zone; critical, specialized system. | Shower enclosure/bath surround; less complex. |
| Space Perception | Feels larger, more open. | Can feel more compartmentalized. |
| Accessibility | Excellent; level entry. | Can be challenging for limited mobility (e.g., shower tray lip). |
| Cleaning | Easier; fewer nooks, no screens. | More effort; cleaning screens, trays, grout. |
| Installation Cost | Generally higher due to specialized waterproofing. | Typically lower to moderate. |
| Aesthetics | Modern, minimalist, spa-like. | Varies widely; can be traditional or modern. |
| Ventilation Needs | Crucial; high-powered extractor essential. | Important, but less critical than in a wet room. |
| Water Splash | Can splash further if not managed. | Contained within enclosure. |
Key Components of a Wet Room

Creating a successful wet room involves several important elements working together:
-
Waterproofing Membrane:
This is the hero product. It’s a flexible, waterproof sheet applied to all surfaces that might get wet. Common types include liquid-applied membranes or roll-out sheets. They create a seamless barrier that prevents water from penetrating the substrate (e.g., plasterboard, concrete). For more on building materials and membranes, resources like Fine Homebuilding offer detailed guides.
-
Sloped Floor:
The floor in the showering area (and often the entire room) must be sloped towards the drain. This ensures water runs away efficiently and doesn’t pool on the floor. The slope is typically around 1:40 (25mm fall for every 1000mm).
-
Drainage System:
This is where the water goes! Options range from simple circular drains to sleek linear channels that run along the wall. Linear drains can offer a more minimalist look and are often easier to tile around.
-
Water-Resistant Boarding:
Instead of standard plasterboard, special cement-based or fibreglass-faced boards are used for walls and floors. These are resistant to moisture and provide a stable surface for the waterproofing membrane and tiles.
-
Tiling and Grouting:
While tiles themselves are generally waterproof, the grout between them can absorb moisture. Using epoxy grout or high-quality, flexible cementitious grout sealed properly helps maintain the waterproof integrity.
Essential Tools and Materials for Consideration
If you are planning a wet room renovation, ensuring you have the right tools and materials at hand is vital. While professional installation is recommended, understanding the components involved can empowering. Here’s a list of what you might encounter:
Materials:
- Waterproofing membrane (liquid-applied or sheet)
- Waterproof tile backer boards
- Primer compatible with the membrane
- Sealant for joints and edges
- Tiles (porcelain, ceramic, natural stone – ensure they are suitable for wet areas)
- Water-resistant adhesive
- Epoxy or high-performance grout
- Drainage system (including trap and waste pipe fittings)
- Ventilation fan and ducting
- Underfloor heating (optional but recommended for comfort)
Tools (for the professional installer):
- Trowels (notched and smooth)
- Mixing buckets and paddle mixer
- Heavy-duty rollers and brushes for membrane application
- Utility knives or tile cutters
- Measuring tape and spirit level
- Screwdrivers and drills
- Caulking gun
- Safety equipment (gloves, eye protection, mask)
Step-by-Step: The (Professional) Wet Room Installation Process
Understanding the steps involved can help you manage your project and communicate effectively with your chosen professionals. Remember, these are general steps and specific methods may vary.
-
Planning and Design:
This is the crucial first phase. Determine the layout, shower area, drainage location, and waterproofing zones. Calculations for floor slope are made.
-
Prepare the Substrate:
Existing walls and floors are prepared. Any damaged areas are repaired. Usually, new moisture-resistant backer boards are installed on walls and floors, providing a solid, stable base.
-
Install the Drainage:
The shower drain is fitted into the subfloor, ensuring it’s correctly positioned and connected to the waste pipe.
-
Create the Floor Slope:
If the existing floor isn’t sloped, a screed (a cementitious leveling compound) is laid to create the necessary fall towards the drain. This often happens before or during backer board installation.
-
Apply Waterproofing Membrane:
This is the most critical stage. The specialized membrane is meticulously applied to the entire floor and up the walls in the wet zone (typically at least 1.5 meters high, or to the ceiling). All seams, corners, and penetrations (like around pipes) are carefully sealed to create a completely watertight shell.
-
Tile the Room:
Once the waterproofing membrane is cured, the chosen tiles are fixed using a suitable adhesive. The focus is on neat tiling and ensuring the grout lines are consistent.
-
Grout and Seal:
After the adhesive has dried, the tiles are grouted. High-performance grout is recommended. Finally, all edges (around the drain, wall/floor junctions if not tiled, and any fixtures) are sealed with flexible bathroom silicone sealant.
-
Install Fixtures:
Shower heads, taps, glass screens (if used), toilets, and basins are installed.
-
Test and Verify:
The system is tested to ensure proper drainage and no leaks. Ventilation is checked.
Frequently Asked Questions (FAQs)
Q1: Can I install a wet room myself, or do I need a professional?
For a wet room, professional installation is highly recommended, especially for the waterproofing. Incorrect waterproofing can lead to severe and costly damage. While some aspects like tiling can be DIY-friendly, the core wet room system requires expertise and specific knowledge to ensure it’s completely watertight and compliant with building standards.
Q2: How much does a wet room typically cost compared to a standard shower?
The initial cost of a wet room is generally higher than a standard shower installation. This is due to the specialized waterproofing materials, drainage systems, and skilled labor required. However, the long-term benefits in terms of durability, ease of cleaning, and potential property value increase can make it a worthwhile investment.
Q3: Will my bathroom get cold in a wet room?
It can feel cooler due to the open design. However, this can be mitigated with good insulation, underfloor heating, a powerful extractor fan, and strategic placement of the shower head. A well-designed wet room with heating solutions can be just as comfortable, if not more so, than a traditional bathroom.
Q4: What kind of floor is best for a wet room?
The floor must be sloped towards the drain and covered by a robust waterproofing membrane. Tiles, such as porcelain or ceramic, are common choices due to their durability and water resistance. Natural stone can also be used, but it may require sealing. The key is the integrity of the underlying waterproofing system, not just the surface finish.
Q5: How do I prevent water from splashing out of the shower area?
Strategic placement of the shower head is important. Using wider shower heads that create a rainfall effect can help keep water more localized. If splashing is still a concern, a single, fixed glass panel can contain some of the water without the need for a full enclosure. Proper floor sloping also ensures any stray water quickly drains away.
